
1. Description
The start page is also known as the main page.
The start page differs depending on whether the user is logged in.
Dark and light website design mode are available.
Use the 
1.1. The user is not logged in
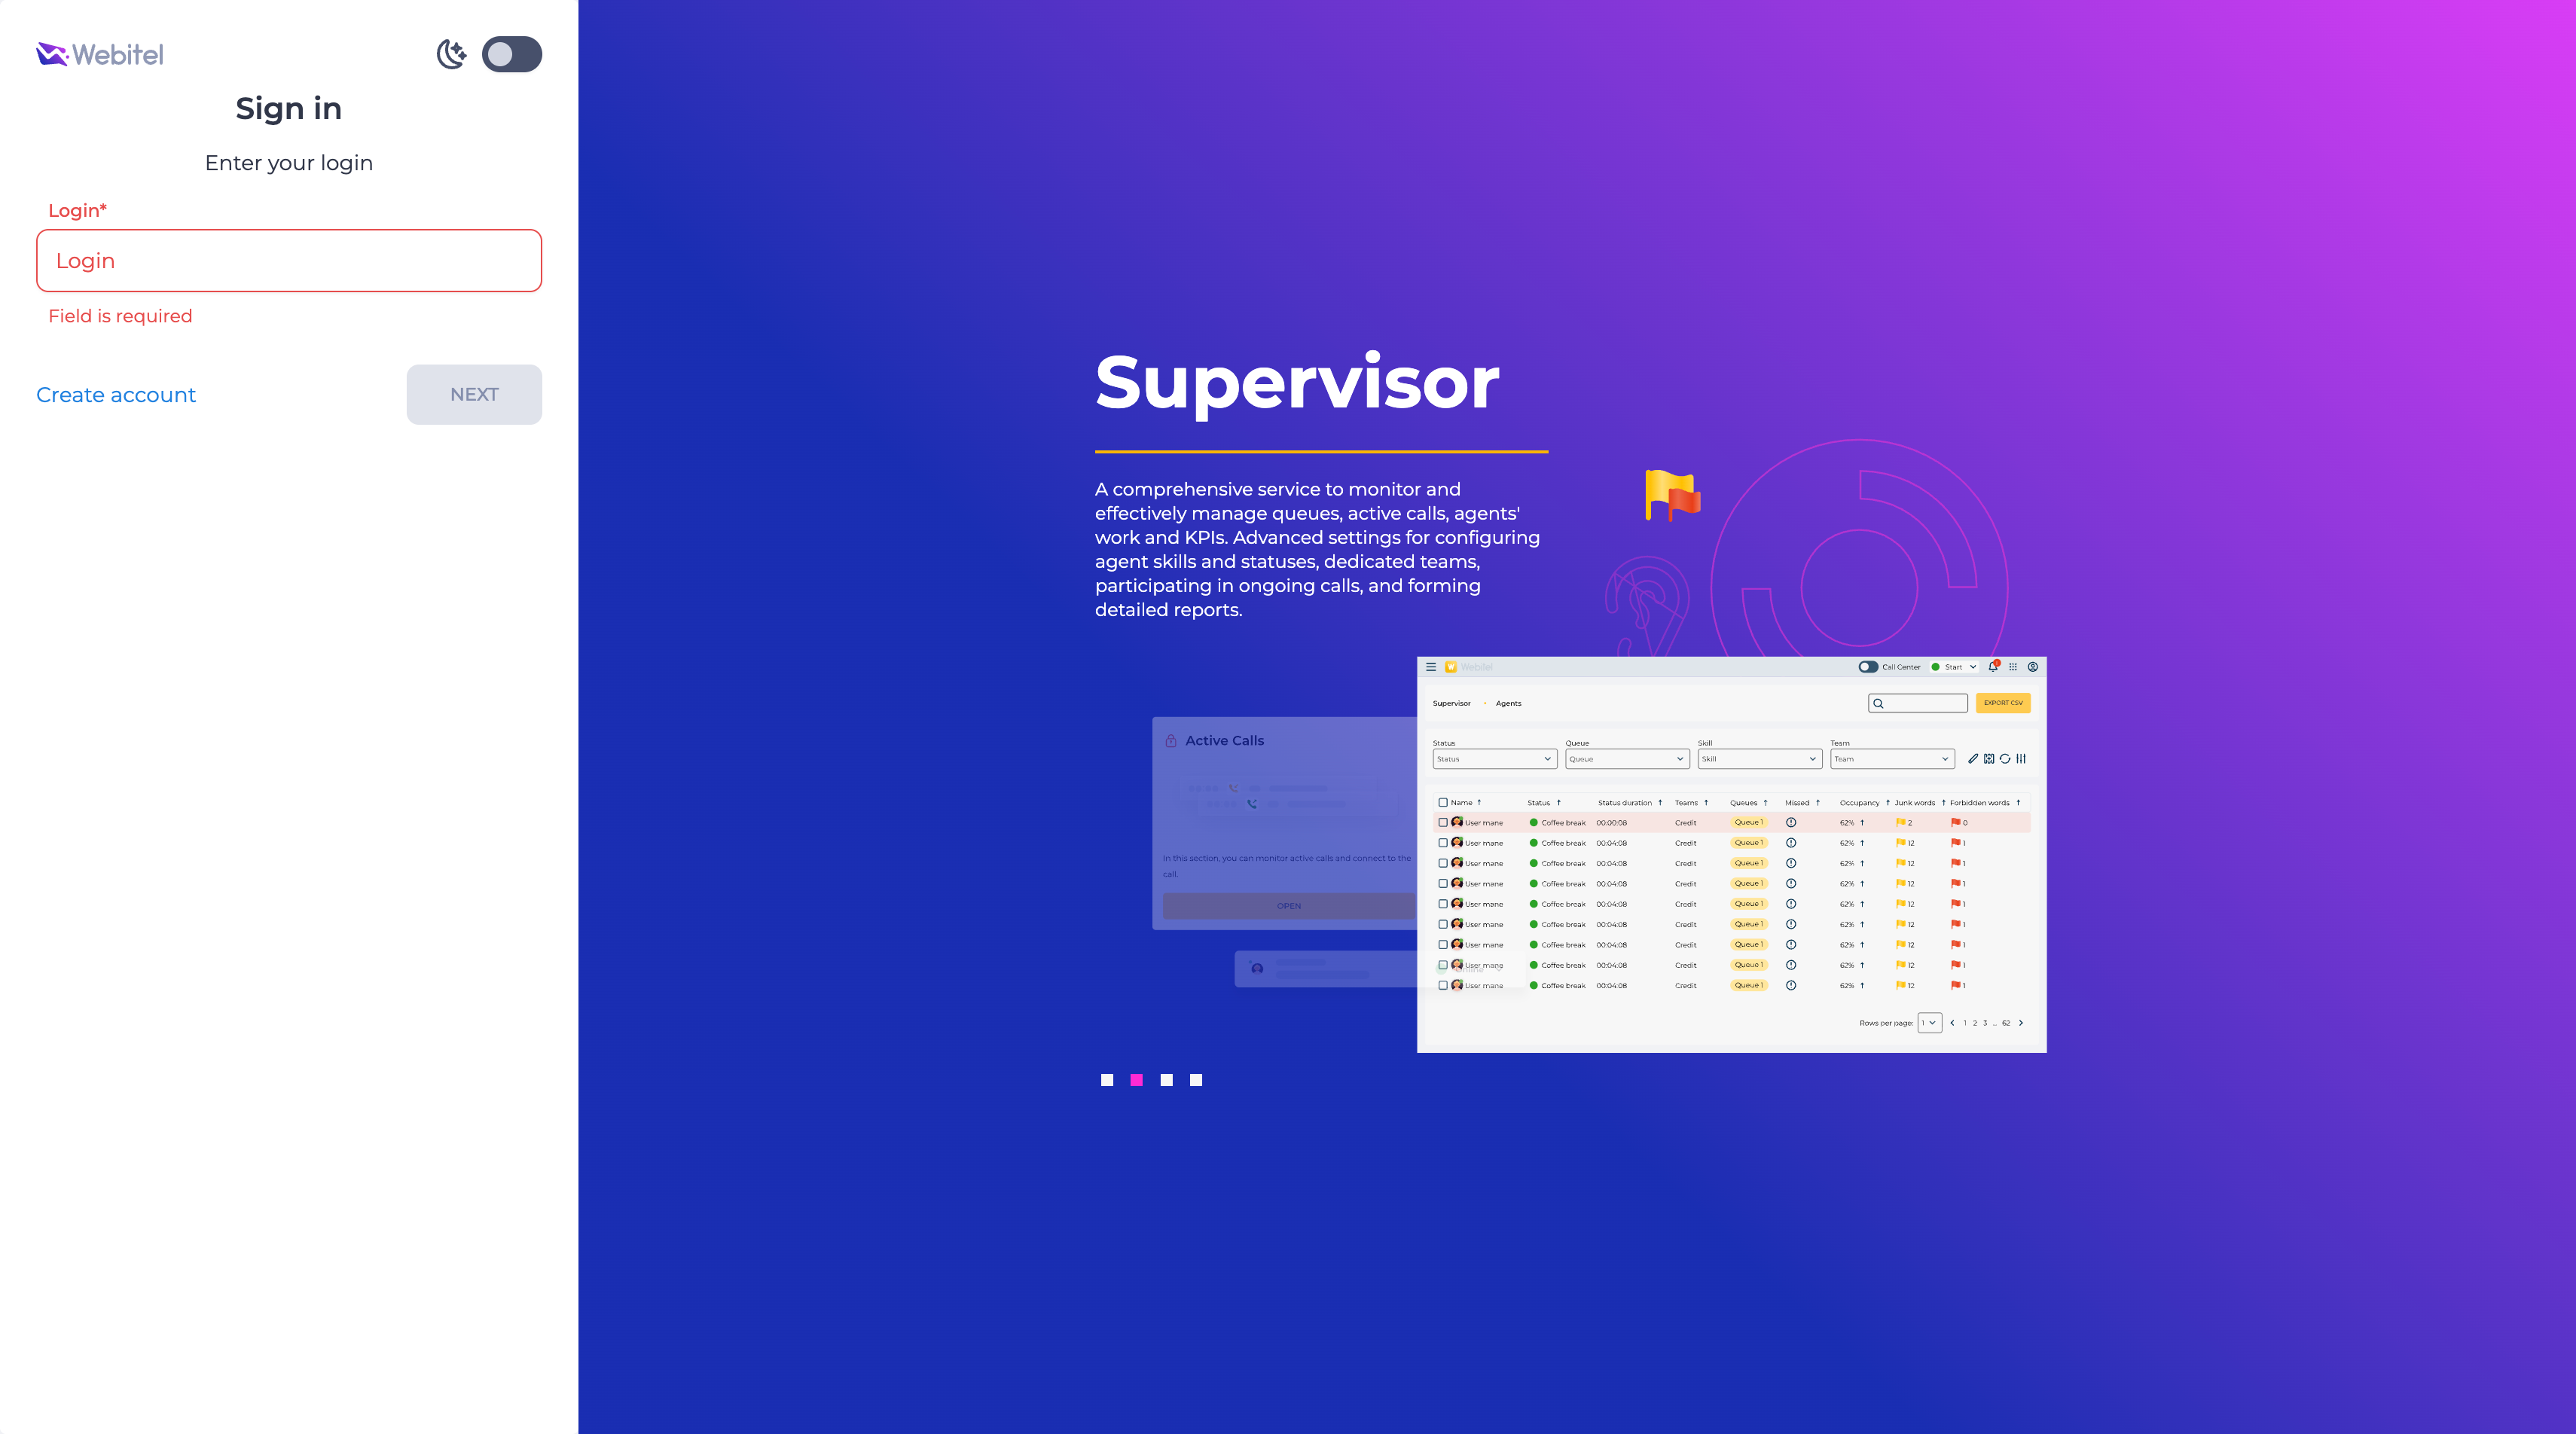
For an unauthorized user, the main page (Fig. 1) consists of a login window and a slideshow with product information.
To enter the system, you need to log in. Only registered users can log in.
1.1.1. Logging in to the system
Consists of fields that change after the login is entered.
Initially displayed (Fig. 1):
-
the Login field — required, entered in the format: user login+@domain;
-
the Create account link — redirects to the registration page;
-
the Next button — becomes active after the login is entered; determines the domain and available login methods.
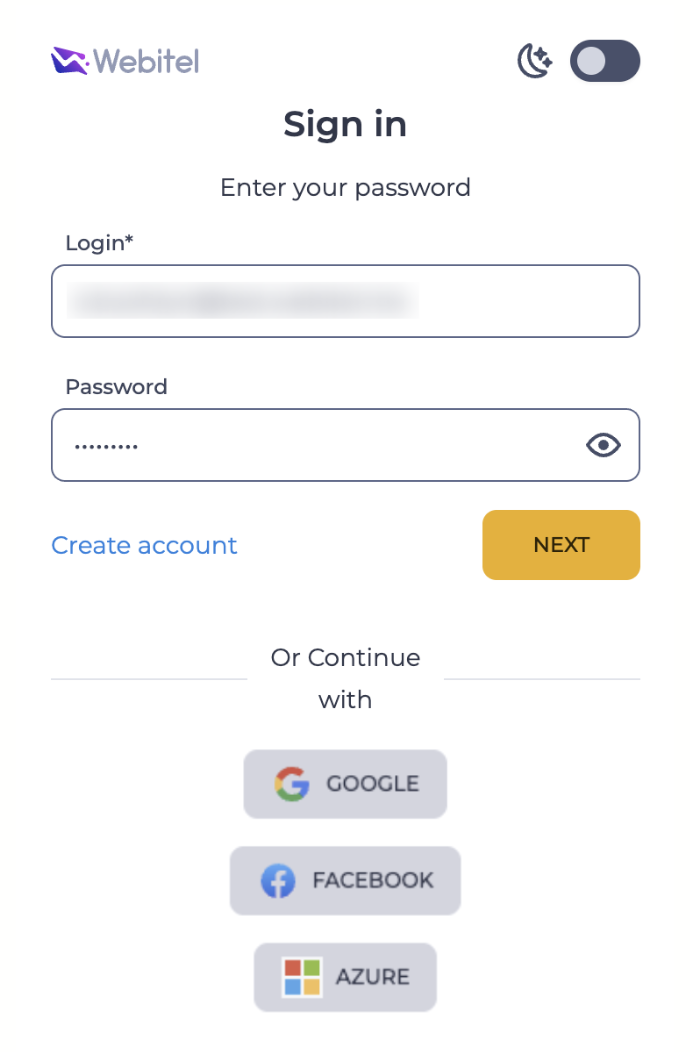
After clicking the Next button, the page additionally displays (Fig. 2):
-
the Password field — the user's password is entered; the show/hide icon allows viewing the entered value;
-
the Or continue with block — displayed if at least one SSO profile is enabled in the system and the corresponding setting is configured in the login_options parameter. Contains a button for each enabled profile with an icon and name.
1.1.1.1. Mandatory password change
In some cases, after entering the login and password, the user cannot immediately log in to the system because the password must be changed.
The user is required to change the password in the following cases:
-
if the login is performed using a temporary password;
-
if the password has expired.
Until the password is changed, the user cannot continue working in the system.
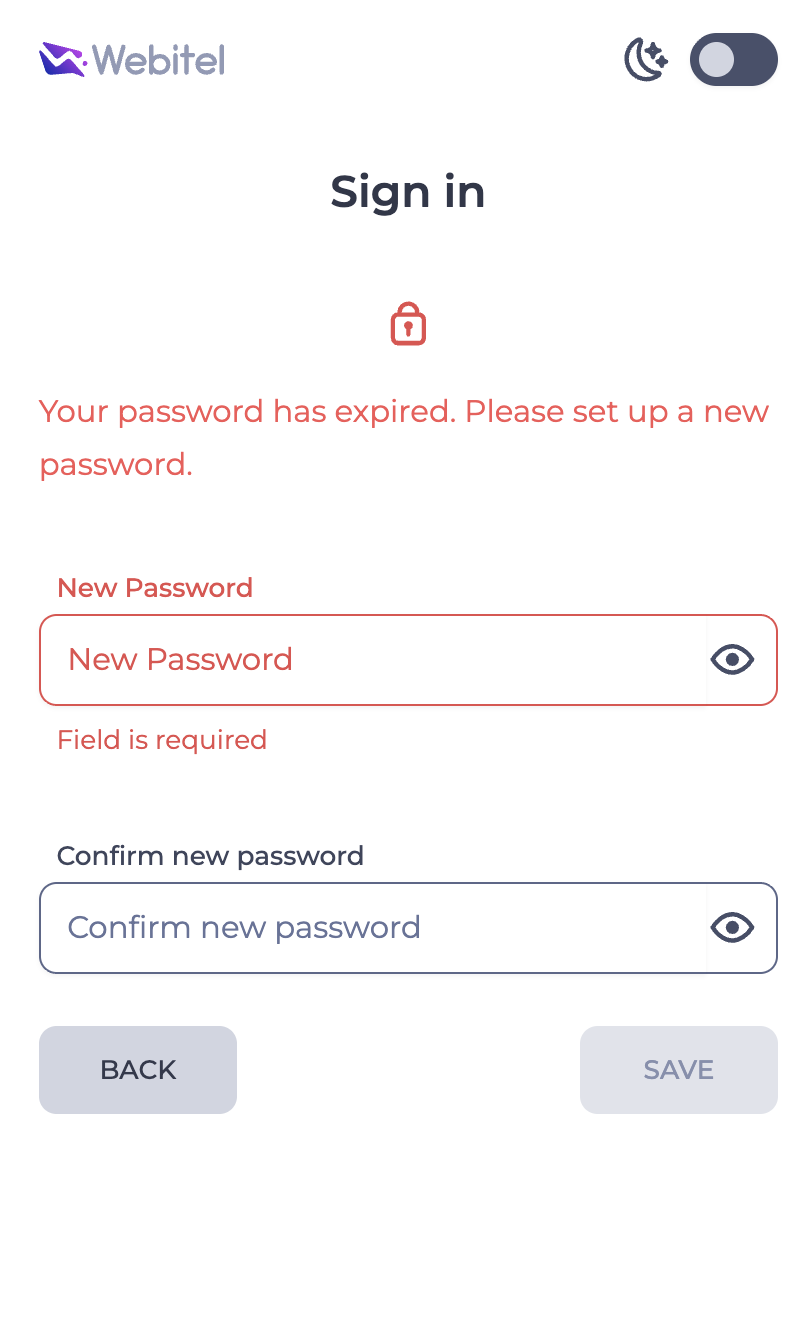
In this case, the password change page (Fig. 3–4) is displayed, which contains:
-
a message indicating that the password must be changed;
-
New password field — entering a new password;
-
Confirm new password field — confirming the password;
-
Save button — saves the new password (becomes active after valid data is entered), and the user is logged into the system;
-
Back button — returns to the previous authorization page.
|
.jpg?cb=960222b353f9188bcce6bc46cc06e583)
|
|---|
When changing a password, its value is validated according to the parameters configured in the Configuration section.
If the password_regular_expression parameter is set, the password must match the specified regular expression (this parameter has priority over other settings).
If the password_regular_expression parameter is not set, the following restrictions apply:
-
password_min_length — defines the minimum allowed password length;
-
password_categories — defines the required character categories (uppercase letters, lowercase letters, digits, special characters);
-
password_contains_login — defines whether the password can contain the username.
If the password does not meet the specified requirements:
-
if password_regular_expression and password_validation_text parameters are set in the configuration, then when entering a value in the Password field that does not fall under the specified regular expression (see password_regular_expression), the text specified in the password_validation_text parameter value will be displayed.
-
if the password_validation_text parameter is not set, a default error message will be displayed.
1.1.1.2. License Expiry Notifications
After authorization, the system checks the expiry date of the user's licenses and displays the relevant push notifications if necessary.
If the license expires in 30 days or fewer, after clicking the Next button a push notification is displayed: "Your license <license_name> will expire in <days_left> days".
The notification is displayed on every login. If there are multiple such licenses, a separate notification is displayed for each one.
If the license has expired, after clicking the Next button login is not possible. A push notification is displayed: "Your license <license_name> has expired".
1.1.2 Registering a new user
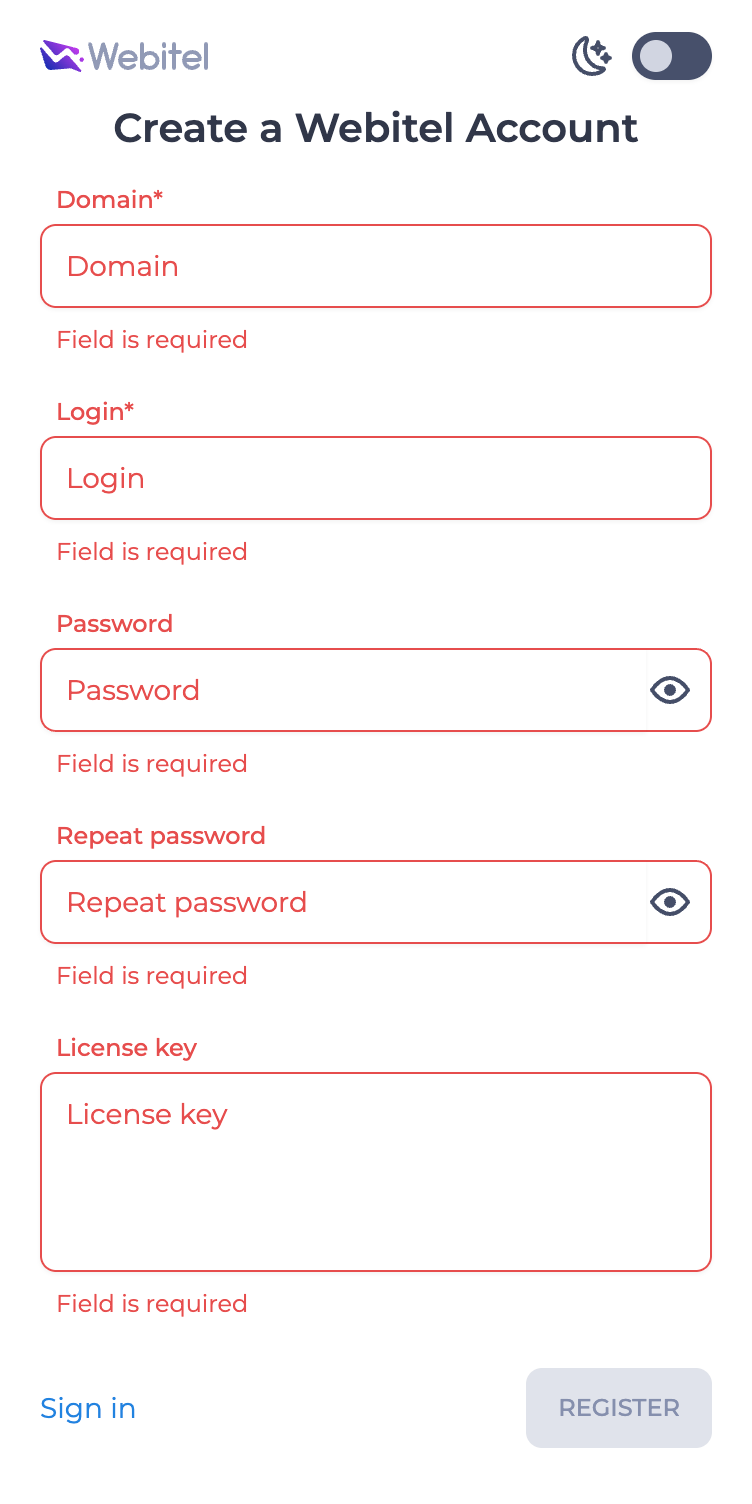
To register a new domain, click the Create account link (Fig. 1). This opens the account creation page (Fig. 5).
It consists of the following elements:
-
the Domain field — the name of the new domain is entered;
-
the Login field — the field can be edited;
-
the Password field — the user's password is entered; the show/hide icon allows viewing the entered value;
-
the Repeat password field — the password is entered again for confirmation;
-
the Key field — the license key provided by Webitel is entered;
-
the Sign in link — returns to the login page;
-
the Create button — becomes active after all fields are filled in; completes the account registration.
1.2. The user is logged in
For an authorized user, the main page displays a menu of applications that are available to the user (Fig. 6)
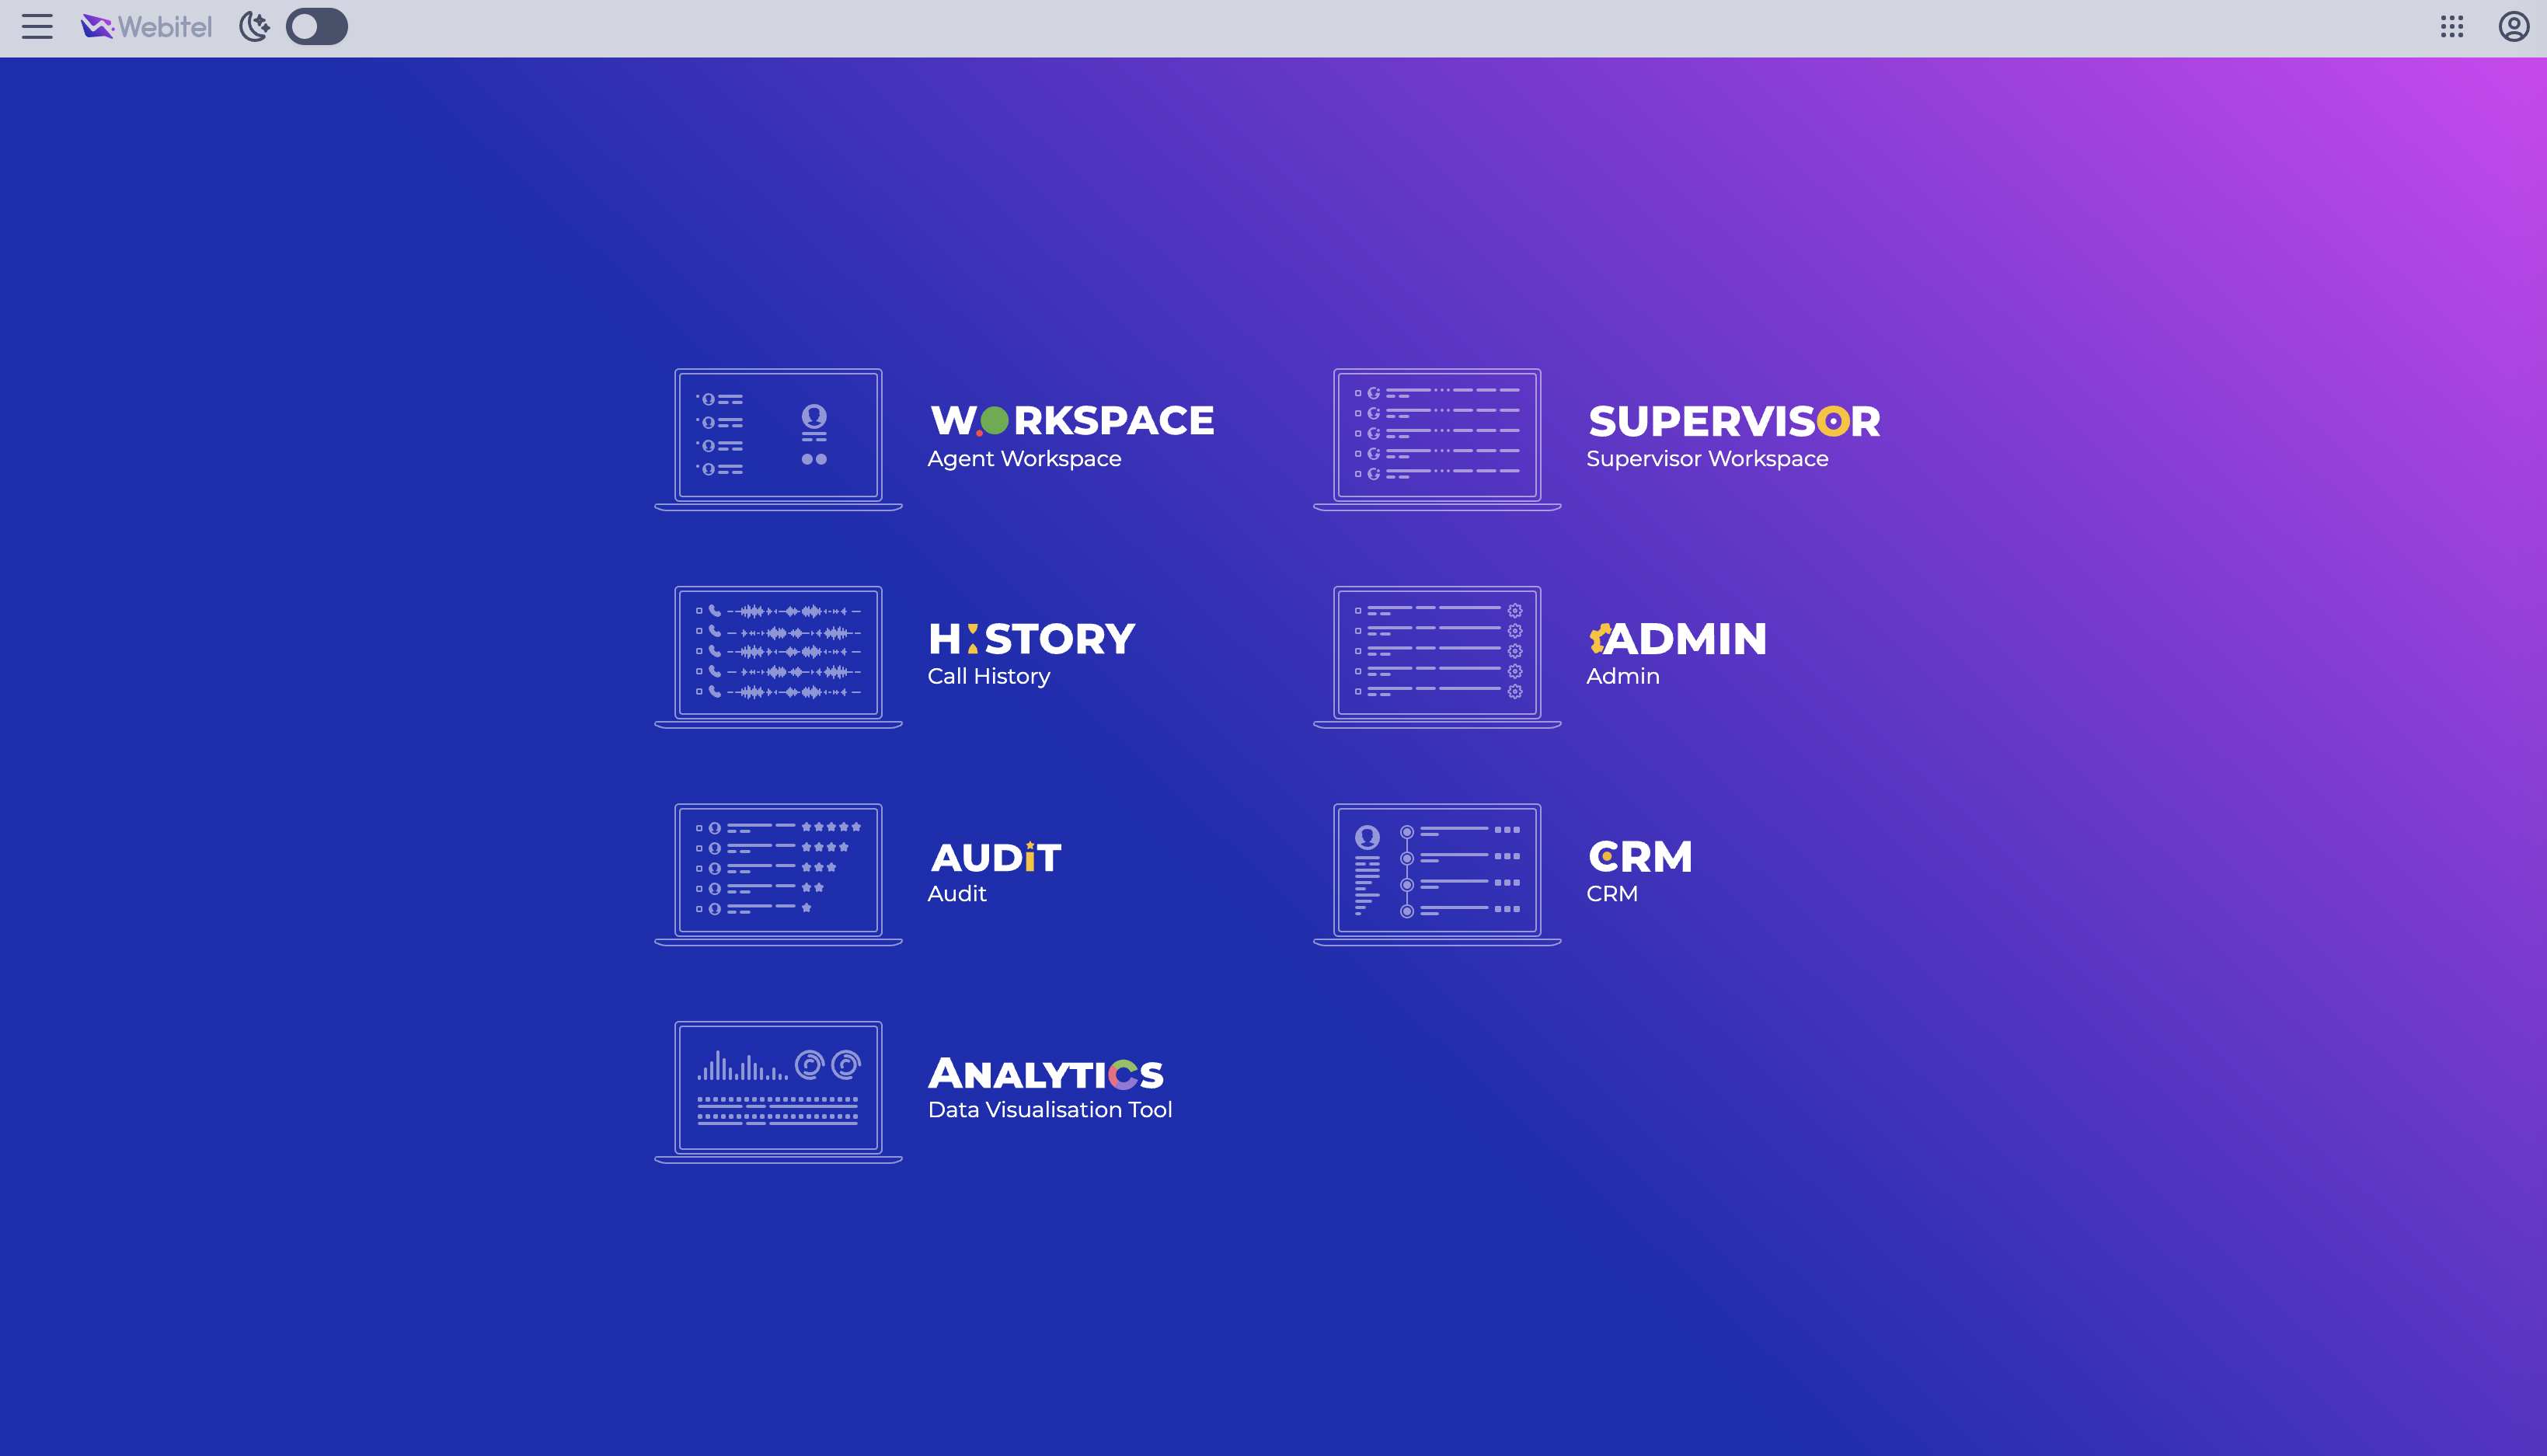
Available applications: