
1. Description
It is designed to configure system settings at the domain level.
The Configuration page is accessible to Users who have permissions for the actions Select and Manage system configurations. These permissions are assigned to the User's Role on the Role permissions page.
For the permissions Edit, Create, and Delete, the User must have both the Select and Manage system configurations permissions.
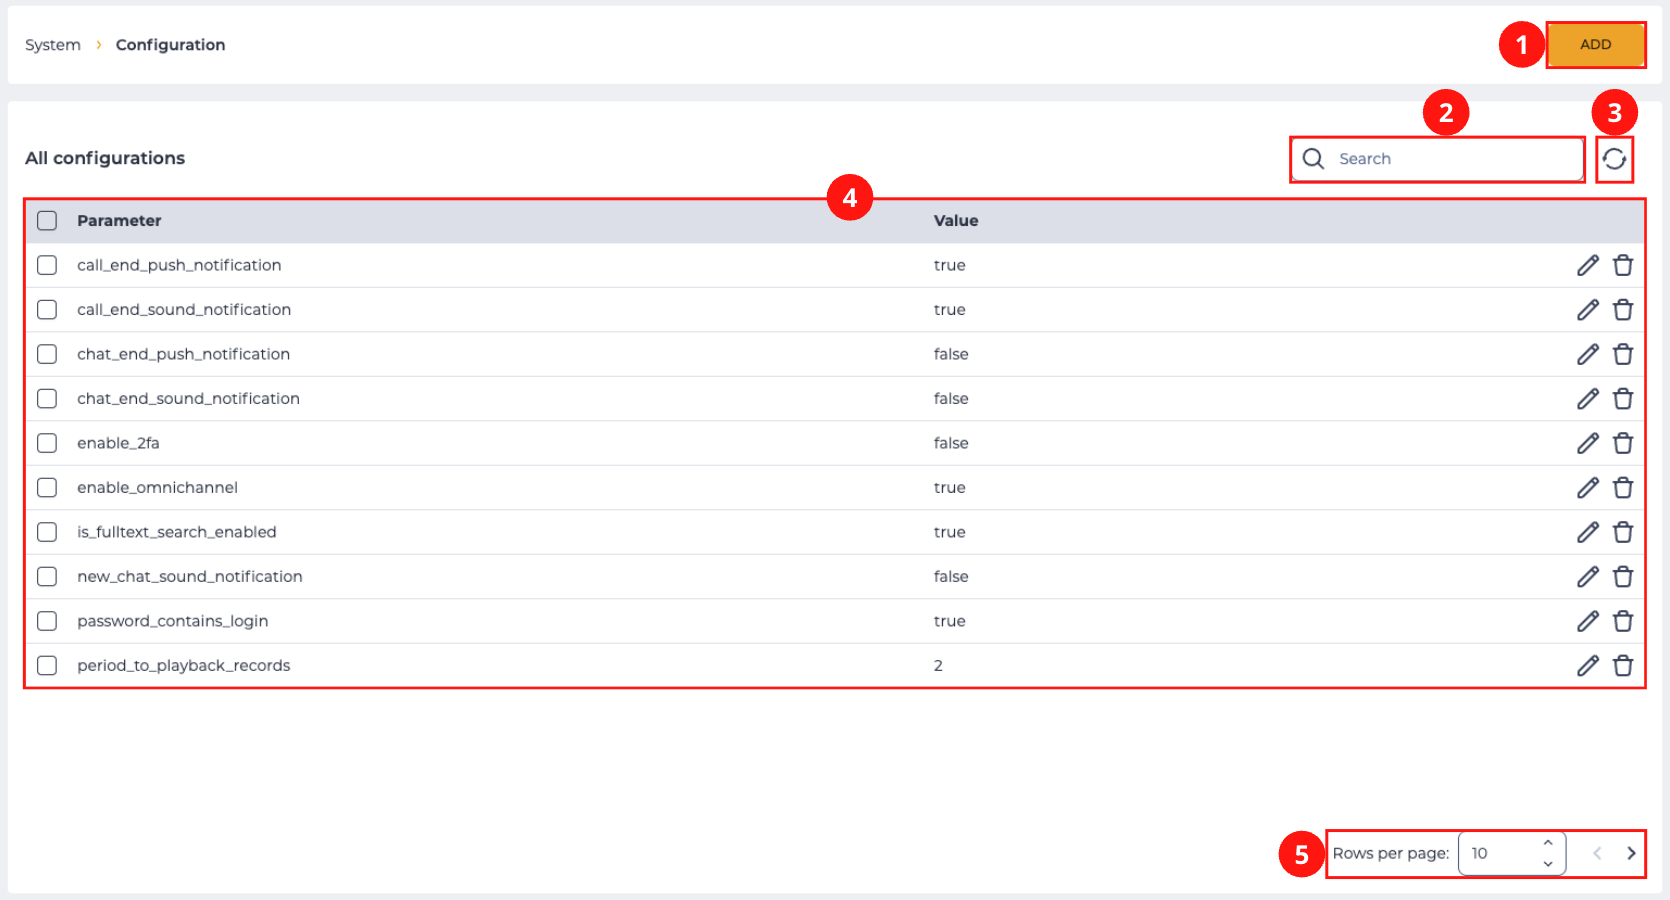
It consists of the following elements:
-
Creation tool (Fig. 1.(1));
-
Search field (Fig. 1.(2));
-
Refresh button (Fig. 1.(3));
-
Registry (Fig. 1.(4));
-
Pagination (Fig. 1.(5)).
1.1. Creation tool
Use the Add button to create a new configuration (Fig.1(1)). The New parameter modal window (Fig. 2) opens after clicking the button.
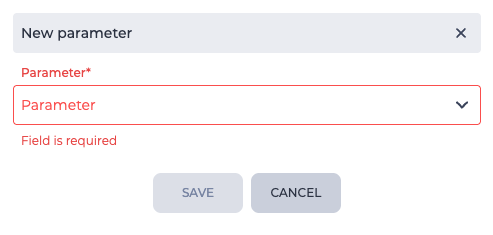
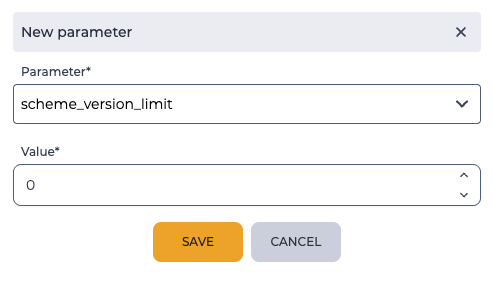
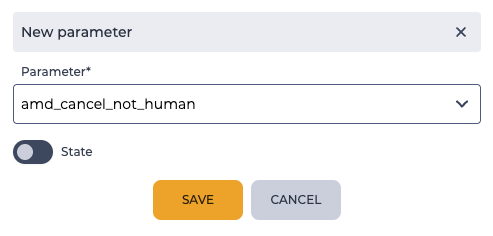
The New parameter modal window consists of the Parameter field. Clicking on it opens a list of available options. After selecting a parameter, additional items appear:
-
the Value field (Fig. 3) — the value of the selected parameter;
-
the State switch (Fig. 4) — responsible for the
true/falsevalue of the selected parameter;
-
The Format field (Fig. 5) — additional elements may be available depending on the format selected.
The following options are available:
-
enable_omnichannel;
-
member_chunk_size;
-
enable_2FA;
-
scheme_version_limit;
-
amd_cancel_not_human;
-
search_number_length;
-
chat_ai_connection;
-
password_regular_expression;
-
password_validation_text;
-
export_settings;
-
autolink_call_to_contact;
-
labels_to_limit_contacts;
-
call_end_sound_notification;
-
call_end_push_notification;
-
chat_end_sound_notification;
-
chat_end_push_notification;
-
task_end_sound_notification;
-
task_end_push_notification;
-
push_notification_timeout;
-
new_message_sound_notification;
-
new_chat_sound_notification;
-
period_to_playback_records;
-
screenshot_interval;
-
password_expiry_days;
-
password_min_length;
-
password_categories;
-
password_contains_login;
-
default_workspace_tab;
-
block_all_member_numbers_from_list;
-
password_warning_days;
-
login_options.
1.1.1. enable_omnichannel
When set to true, allows you to receive calls and chat at the same time.
1.1.2. member_chunk_size
It is used when bulk importing Subscribers to optimize the database. When loading in this way, the value of this parameter indicates the number of Subscribers that will be imported in one go.
1.1.3. enable_2FA
The Status switch determines whether two-factor authentication is enabled or disabled.
1.1.4. scheme_version_limit
The maximum number of saved previous versions of the Flow Scheme. It is set in the Value field.
1.1.5. amd_cancel_not_human
If AMD defined the result as Cancel, such values are not included in the percentage abandoned for the dialler if the State switch is on. If the State switch is off, such values are included in the percentage abandoned.
1.1.6. search_number_length
If the parameter is set, the system searches for a contact during any call by comparing the number from the end based on the number of digits set in this parameter. If the parameter is not set, a complete match does the search. This is used to improve contact identification by inbound or outbound phone numbers.
Example:
Call from the number +380991234567.
Contact X with the number 380991234567 is created in the system.
If search_number_length = 10, then the search will be performed on ten numbers from the end.
That is, the check will be performed on the value 0991234567. And when you call from the number +380991234567, contact X will be identified.
1.1.7. chat_ai_connection
In the value sets the connection string to the machine learning model server. The component Chat AI used in the Flow Schema will connect to this address if the setting is set. If the address is set directly in the Flow Schema (Chat AIcomponent), the connection will be made using it.
1.1.8. password_regular_expression
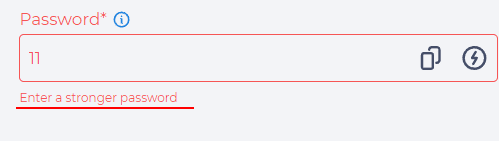
The value of this parameter specifies a regular expression for the User password.
If this parameter is set together with password_validation_text, then when a value that does not match the specified regular expression is entered in the Password field, a hint with the text specified in the password_validation_text parameter will be displayed below the field.
1.1.9. password_validation_text
The value of this parameter specifies the text that will be displayed if the value entered in the Password field does not fall under the specified regular expression (div.password_regular_expression) (Fig. 6).
1.1.10. export_settings
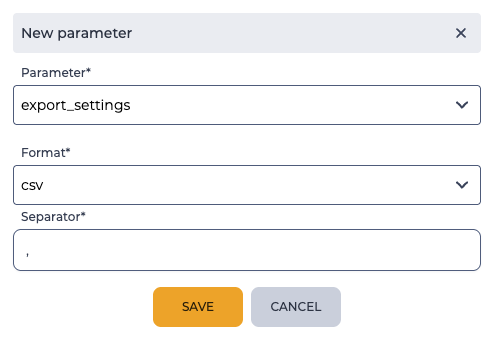
It is used to set the format in which files will be exported.
The available formats are:
-
xls;
-
csv.
When selecting the csv format, you need to specify the delimiter in the Separator field.
1.1.11. autolink_call_to_contact
Used to link a call to a contact when the Agent does not have a CUSTOMER_SERVICE licence.
Depending on the value of the variable wbt_hide_number, contact information may not be displayed in Workspace. The display of the contact in Workspacealso depends on the availability of the CUSTOMER_SERVICE licence.
If the Status switch is active, an automatic search for a contact by phone number is applied to all calls that fall into the routing.
If one contact is found, then its identifier is saved and transmitted with the call. Automatic binding to the found contact is performed.
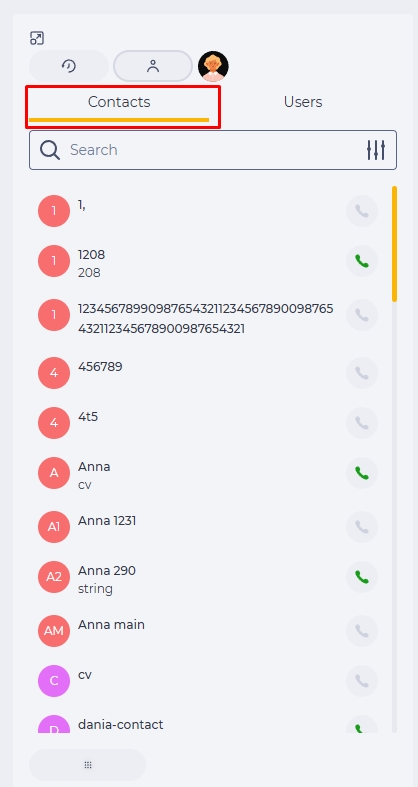
1.1.12. labels_to_limit_contacts
Used to limit the available contacts in Workspace according to contact labels (Fig. 7).
In the Values field, one or more labels are selected, which are used to filter the contact list.
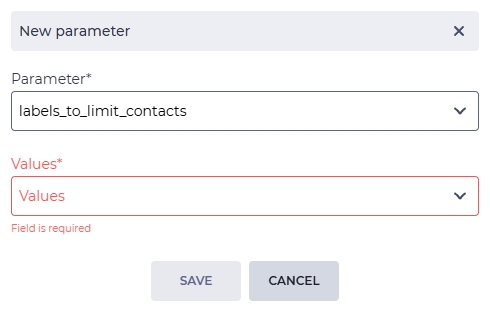
If the parameter is not set — when the "Limit contacts in Workspace" permission is active, no contacts are displayed in Workspace (Fig. 8).
If the parameter is set — the user sees only those contacts in Workspace that contain at least one of the selected labels.
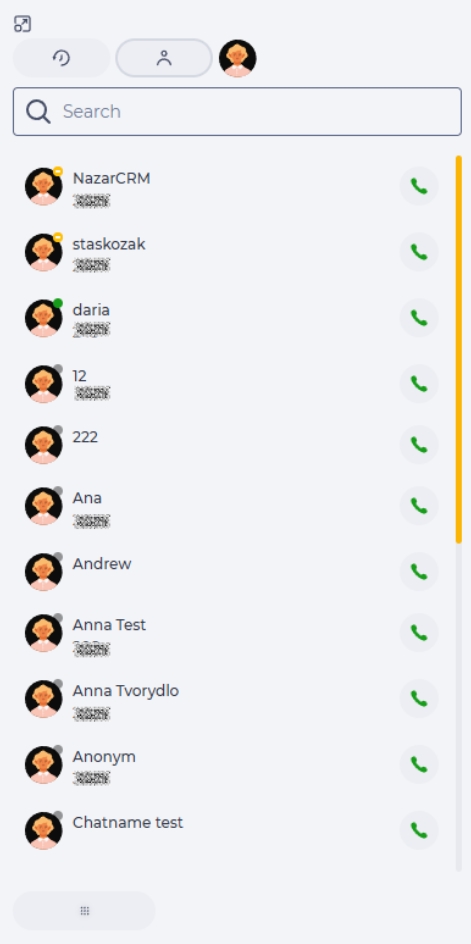
If the "Limit contacts in Workspace" permission is not assigned — filtering is not applied, and all contacts are displayed (Fig. 9).
1.1.13. call_end_sound_notification
Controls sound notification playback in Workspace after a call ends.
If the State toggle is enabled – 
User-level notification settings have higher priority than corresponding system settings configured in Admin → System → Configuration.
1.1.14. call_end_push_notification
Controls the display of a visual notification on the Workspace screen after a call ends.
If the toggle is enabled –
1.1.15. chat_end_sound_notification
Enables sound notifications in Workspace after a chat ends.
When the parameter is active –
1.1.16. chat_end_push_notification
Controls visual notifications in Workspace after a chat ends.
The notification appears on the screen if the toggle is enabled
1.1.17. task_end_sound_notification
Controls sound notifications in Workspace after a task is completed.
If the parameter is active
1.1.18. task_end_push_notification
Enables visual notifications in Workspace after a task is completed.
The notification appears automatically in the interface if the parameter is enabled
1.1.19. push_notification_timeout
Specifies the duration (in seconds) that a visual notification remains visible in Workspace.
Value type: number. Default value — 30 (Fig. 10).
1.1.20. new_message_sound_notification
Enables sound notifications in Workspace for new chat messages.
When the parameter is active –
1.1.21. new_chat_sound_notification
Controls sound notifications in Workspace for new incoming chats.
If the parameter is active –
1.1.22. period_to_playback_records
This parameter is used to limit the period during which users can view call history and play call recordings in the “History” section.
The “Value” field defines the number of days for which call recordings will be available for viewing and playback. If the parameter is set, the system automatically hides all recordings older than the specified period.
Example:
If the value of period_to_playback_records = 30, the user will be able to view and play call recordings only for the last 30 days.
The parameter works in combination with role permissions:
-
“Playback record file” — has the highest priority. If this permission is assigned to a role, the user can view and play all call recordings regardless of the “Time-limited playback record file” permission and the
period_to_playback_recordssetting. -
“Time-limited playback record file” — the restriction defined in the
period_to_playback_recordsparameter applies. The user can view and play only those recordings that fall within the specified period.
If none of the above permissions are assigned, the user can see all call records, but the playback player will be unavailable.
1.1.23. screenshot_interval
The Value field specifies a numeric interval in minutes that defines how often the system automatically creates screenshots of operators’ screens for whom the Control agent screen permission is enabled.
The default value is 30 minutes.
This parameter defines the frequency of automatic screenshot creation during the working shift.
For example, if 10 is specified in the Value field, the system will capture a screenshot every 10 minutes and save it to the server.
1.1.24. password_expiry_days
In the Value field, the number of days after which the user must change the password is specified.
Value type: number.
If the parameter is set, after the specified period the system requires a password change and automatically ends all active user sessions.
1.1.25. password_min_length
In the Value field, the minimum allowed password length for the user is specified.
Value type: number.
Default value: 8.
If the password does not meet the minimum length, it will not be accepted by the system, and an error message will be displayed — during authorization and in the General section (Users).
1.1.26. password_categories
In the Value field, the categories of characters that must be present in the user’s password are specified.
Value type: multiselect.
The following values are available:
-
[A-Z] — uppercase letters;
-
[a-z] — lowercase letters;
-
[0-9] — digits;
-
special — special characters (!@#$%^&*()_+-=[]{};:|,.<>/?).
If the parameter is set, the password must contain at least one character from each selected category.
If the password does not contain characters from a required category, an error message indicating the missing category will be displayed — during authorization and in the General section (Users).
1.1.27. password_contains_login
The State switch determines whether the username can be used in the password.
Value type: boolean.
Default value: false.
-
If the switch is disabled, the password cannot contain the username.
-
If enabled — using the username in the password is allowed.
If the password contains the username and this is restricted by the settings, an error message will be displayed — during authorization and in the General section (Users).
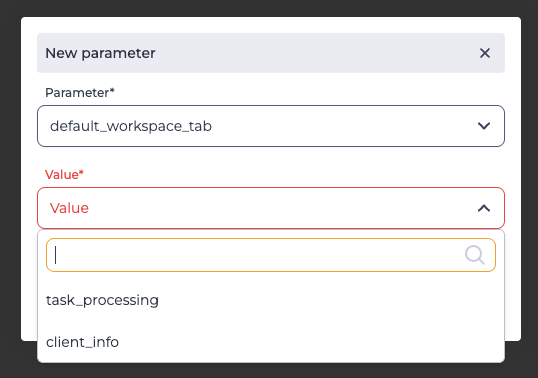
1.1.28. default_workspace_tab
Defines which tab opens by default during an active communication in Workspace.
In the Value field, select one of the following values (Fig. 12):
-
“client_info” — the client information tab opens by default;
-
“task_processing” — the task processing tab opens by default.
If the parameter is not configured, the "task_processing" tab opens.
This setting does not apply to closed chats — for them, the "client_info" tab is displayed regardless of the parameter value.
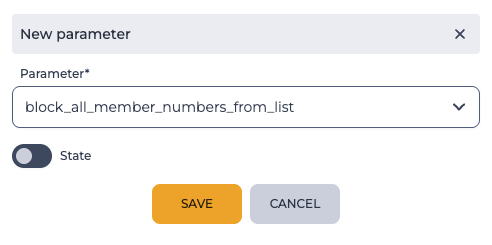
1.1.29. block_all_member_numbers_from_list
The State toggle (Fig. 13) defines the system behavior during a call campaign if one or more of a subscriber's numbers are present in the block list.
-
if the toggle is enabled
-
if the toggle is disabled

1.1.30. password_warning_days
In the Value field, specify the number of days before the password expires, during which the system should warn the user.
Value type: number.
If the parameter is set, the system displays a push notification about the password expiration. The notification is shown right after logging in. If the user does not log out for a long period of time, the notification will not appear, and the password may expire without warning.
The notification text differs depending on how much time is left before the password expires:
-
more than 24 hours — "Your password will expire in ${password_warning_days} days";
-
less than 24 hours — "Your password will expire in less than 24 hours".
The notification is displayed only after the user logs in, regardless of the application or start page the user is on.
The notification remains visible for 20 seconds, unless the user navigates to another page.
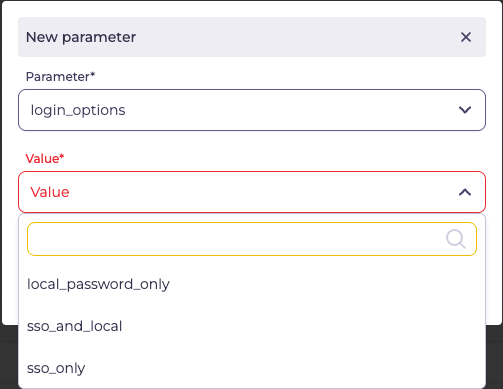
1.1.31. login_options
The Value field is used to select the login method for users within the domain (Fig. 14):
-
sso_only — allows login only via SSO;
-
local_password_only — allows login only with a local username and password. Default value;
-
sso_and_local — allows login both via SSO and with a local username and password.
If the parameter is not set, login is only possible with a local username and password.
Depending on the selected value, the corresponding login options are displayed on the login page.
1.2. Search field
The search is performed on the Parameter column.
It consists of an input field and a close button ( 
1.3. Refresh button
Updating the register table is performed by clicking on the refresh button - 
1.4. Registry
The registry is a list of entries of existing objects in this section, each of which consists of a set of fields:
-
Checkbox;
-
Parameter;
-
Value;
-
Editing tool;
-
Removal tool.
1.4.1. Checkbox
Used to select one or more entries. An additional removal tool appears next to the search field after selecting one or more entries. Information about the number of entries chosen for deletion appears when you hover over this tool. When you click on it, a modal confirmation window appears.
It contains the Yes, No, and close ( 
-
Clicking the Yes button deletes the entries.
-
Clicking the No button closes the modal window, and the entries are not deleted.
All records on the page will be selected if you select the checkbox in the header.
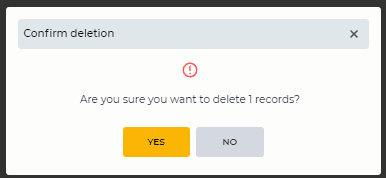
Fig. 15. Confirm deletion modal window
1.4.2. Parameter
The parameter names are displayed here.
1.4.3. Value
The parameter value is displayed here.
1.4.4. Editing tool
When you click the 
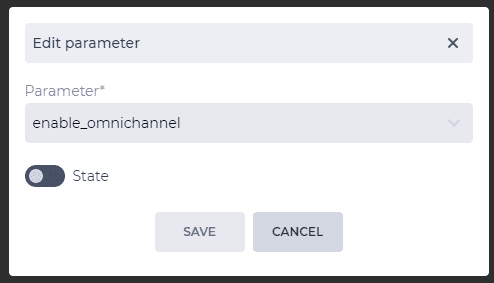
Depending on the parameter, the modal window may have several variations.
1.4.5. Removal tool
Used to remove an object with confirmation through a modal window. When hovering over the delete button ( 
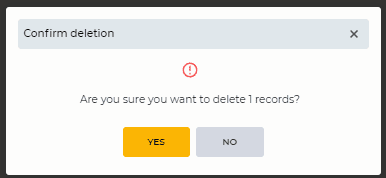
Fig. 17. Confirm deletion modal window
1.5. Pagination
It consists of the Rows per page field, which indicates the number of entries (it is possible to set from 1 to 1000) per page, and forward and backward buttons for switching pages.
2. Opportunities
2.1. Create a Configuration
|
Goal |
Create a Configuration |
|---|---|
|
Preconditions |
|
|
Steps
|
|
|
Result |
The modal window closes. Configuration is created. |
2.2. Delete a Configuration
|
Goal |
Delete a Configuration |
|---|---|
|
Preconditions |
|
|
Steps
|
|
|
Result |
The modal window closes. The Configuration is removed. |

2.3. Delete several Configurations
|
Goal |
Delete several Configurations |
|---|---|
|
Preconditions |
|
|
Steps
|
|
|
Result |
The modal window closes. Configurations are removed. |
2.4. Edit a Configuration
|
Goal |
Edit a Configuration |
|---|---|
|
Preconditions |
|
|
Steps
|
|
|
Result |
The modal window closes. Data saved. |