
1. Description
Here you enter information about the Agent or Supervisor.
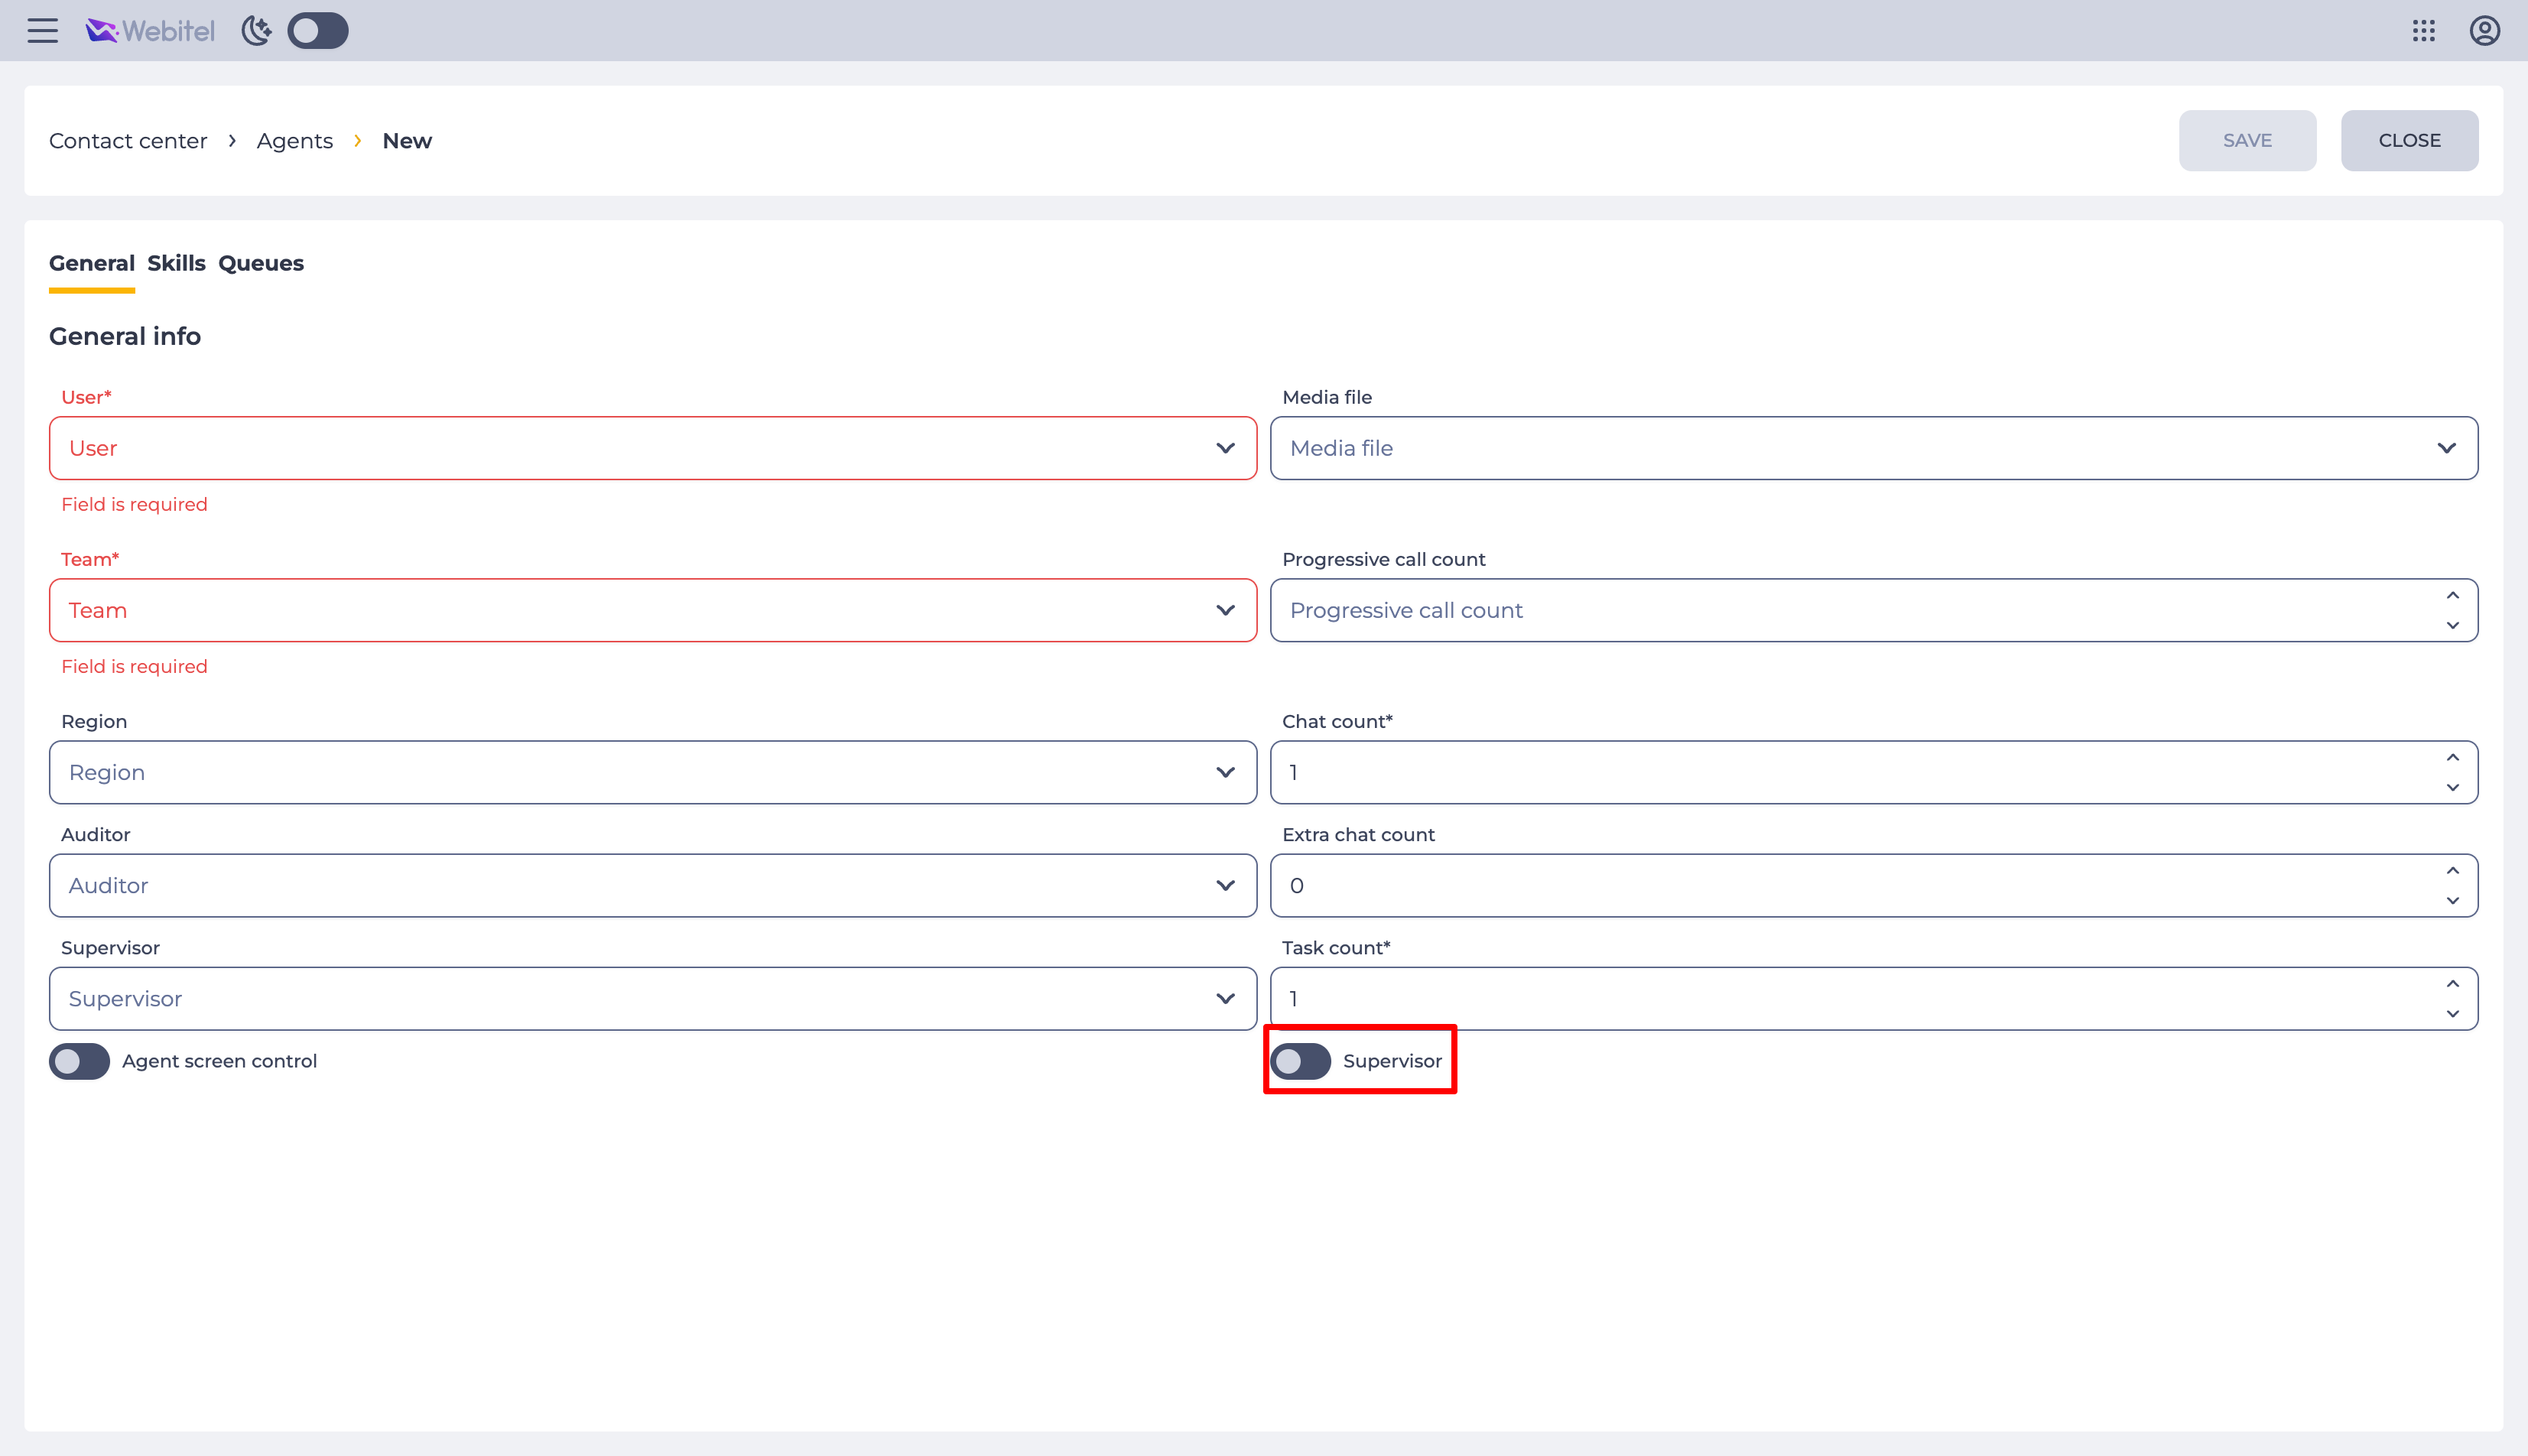
Consists of fields (Fig. 1):
-
User;
-
Team;
-
Region;
-
Auditor;
-
Supervisor field;
-
Agent screen control switch;
-
Media file;
-
Progressive call count;
-
Chat count;
-
Extra chat count;
-
Task count;
-
Supervisor switch.
1.1. User
When you click on the User field, a drop-down list opens from which a choice is made. You can use the User field to search if the required list is not shown.
The drop-down list only displays Users who are not yet Agents or Supervisors. How to create a new User is included here.
1.2. Team
It is designed to select the Team for the Agent. The Agent can work within the same Team.
When you click on the Team field, a drop-down list opens from which a choice is made. You can use the Team field to search if the required list is not shown.
How to create a new Team is included here.
1.3. Region
It is designed to select the Region from which the Agent will work. The Regions determine the Agent's time zone.
When you click on the Region field, a drop-down list opens from which a choice is made. You can use the Region field to search if the required list is not shown.
How to create a new Region is included here.
1.4. Auditor
It is designed to select an Auditor for the Agent.
When you click on the Auditor field, a drop-down list of Users opens from which a choice is made. You can use the Auditor field to search if the required list is not shown.
One or more Auditors can be assigned to one Agent.
1.5. Supervisor field
Available only for the Agent (see point 1.2). It is used to select a Supervisor for this Agent.
When you click on the Supervisor field, a drop-down list opens from which a choice is made. You can use the Supervisor field to search if the required list is not shown.
One or more Supervisors can be assigned to one Agent.
1.6. Agent screen control switch
This switch defines whether the screen control and screenshot creation settings apply to this agent.
When the switch is enabled, the following capabilities become active:
-
Automatic screenshot creation. The system captures screenshots of the agent’s screen at the interval specified in the “screenshot_interval” variable.
Note! If the variable value is not set, automatic screenshots are not created, even if the switch is enabled.
-
Screen recording during calls. If the “wbt_record_screen” variable is configured in the Flow or Queue, the system records the agent's screen during the call.
Note! If the variable is not set, screen recording is not performed.
-
Access to the Workspace only if DeskTrack is installed. If the switch is enabled, the agent can enter the Workspace only when the DeskTrack application is installed, running, and authorized.
-
If the switch is enabled at the team level, it is automatically applied to all agents in that team and becomes inactive for editing in the agent’s profile. A helper message appears: “Cannot be disabled while the setting for the team is enabled”.
-
If the toggle is disabled at the team level, the administrator can manage this setting for a specific agent (the toggle remains active).
Important! A Supervisor can view the agent’s screen regardless of the switch state, provided the DeskTrack application is running and authorized on the agent’s computer.
1.7. Media file
The field for selecting a sound file for a personal greeting.
The personal greeting is enabled using the Allow greeting agent switch on the Parameters tab of the Queue.
1.8. Progressive call count
Determines how many simultaneous outgoing calls can be made to this Agent when using Progressive (this parameter is also used in cases where the Predictive dialer switches to Progressive) Dialer.
1.9. Chat count
Here enter the number of simultaneous Chats the Agent can handle.
Note!
If the Agent works with chats and calls, then the call can be distributed to the Agent when there is no open Chat; respectively, the Chat can be distributed to the Agent when there is no active call.
Note!
After refreshing the page in the Workspace interface, only 40 active chats are displayed. If new chats arrive during operation, they are added to the list of active chats and continue to be displayed, even if the total number of active chats exceeds 40.
On the next page reload, the system again loads only 40 chats.
This limitation applies exclusively to the display of chats in the interface and does not affect the actual number of active chats that an agent can handle.
1.10. Extra chat count
Specifies the additional number of concurrent chats an Agent can handle in excess of the limit set in the Chat count field.
A chat is considered extra if it passes through the Join Queue schema component with the Extra chat count toggle enabled, and the Agent receiving the chat has the Extra chat count field value set (greater than 0). All other chats are considered regular.
The overall maximum limit of simultaneously active chats for an Agent equals:
Chat count + Extra chat count.
Important!
The value of the Chat count field is shared between regular and extra chats: as long as it isn't exhausted, any new chat (regular or extra) occupies a free slot within it.
-
Extra chats beyond this limit occupy slots only within the value of the Extra chat count field.
-
Regular chats cannot occupy slots beyond the limit of the Chat count field.
An extra chat has a higher priority in distribution. If, at the time of its arrival, there is a free slot within the Chat count limit, the extra chat will occupy that slot rather than the Extra chat count slot. Because of this, an extra chat can "displace" the possibility of distributing the next regular chat to the Agent, even if the Extra chat count limit has not yet been used.
Example
Agent settings:
-
Chat count = 1;
-
Extra chat count = 1.
Possible scenarios:
Scenario 1:
-
A regular chat arrives → occupies the Chat count slot.
-
An extra chat arrives → occupies the Extra chat count slot.
-
The next extra chat does not arrive, since both slots are already occupied.
Scenario 2:
-
An extra chat arrives → occupies the free Chat count slot.
-
A regular chat arrives → cannot be delivered to the Agent, since the Chat count slot is already occupied by the extra chat.
-
After the extra chat ends, the Chat count slot is freed, and the regular chat can be delivered to the Agent.
Scenario 3:
-
An extra chat arrives → occupies the Chat count slot.
-
A second extra chat arrives → occupies the Extra chat count slot.
-
A regular chat does not arrive, since the Chat count slot is already occupied.
-
Even if the extra chat occupying the Extra chat count slot ends, the regular chat still won't be delivered — the Chat count slot remains occupied by the first extra chat. The regular chat can only arrive once that specific slot is freed.
1.11. Task count
Here enter the number of simultaneous Tasks the Agent can handle.
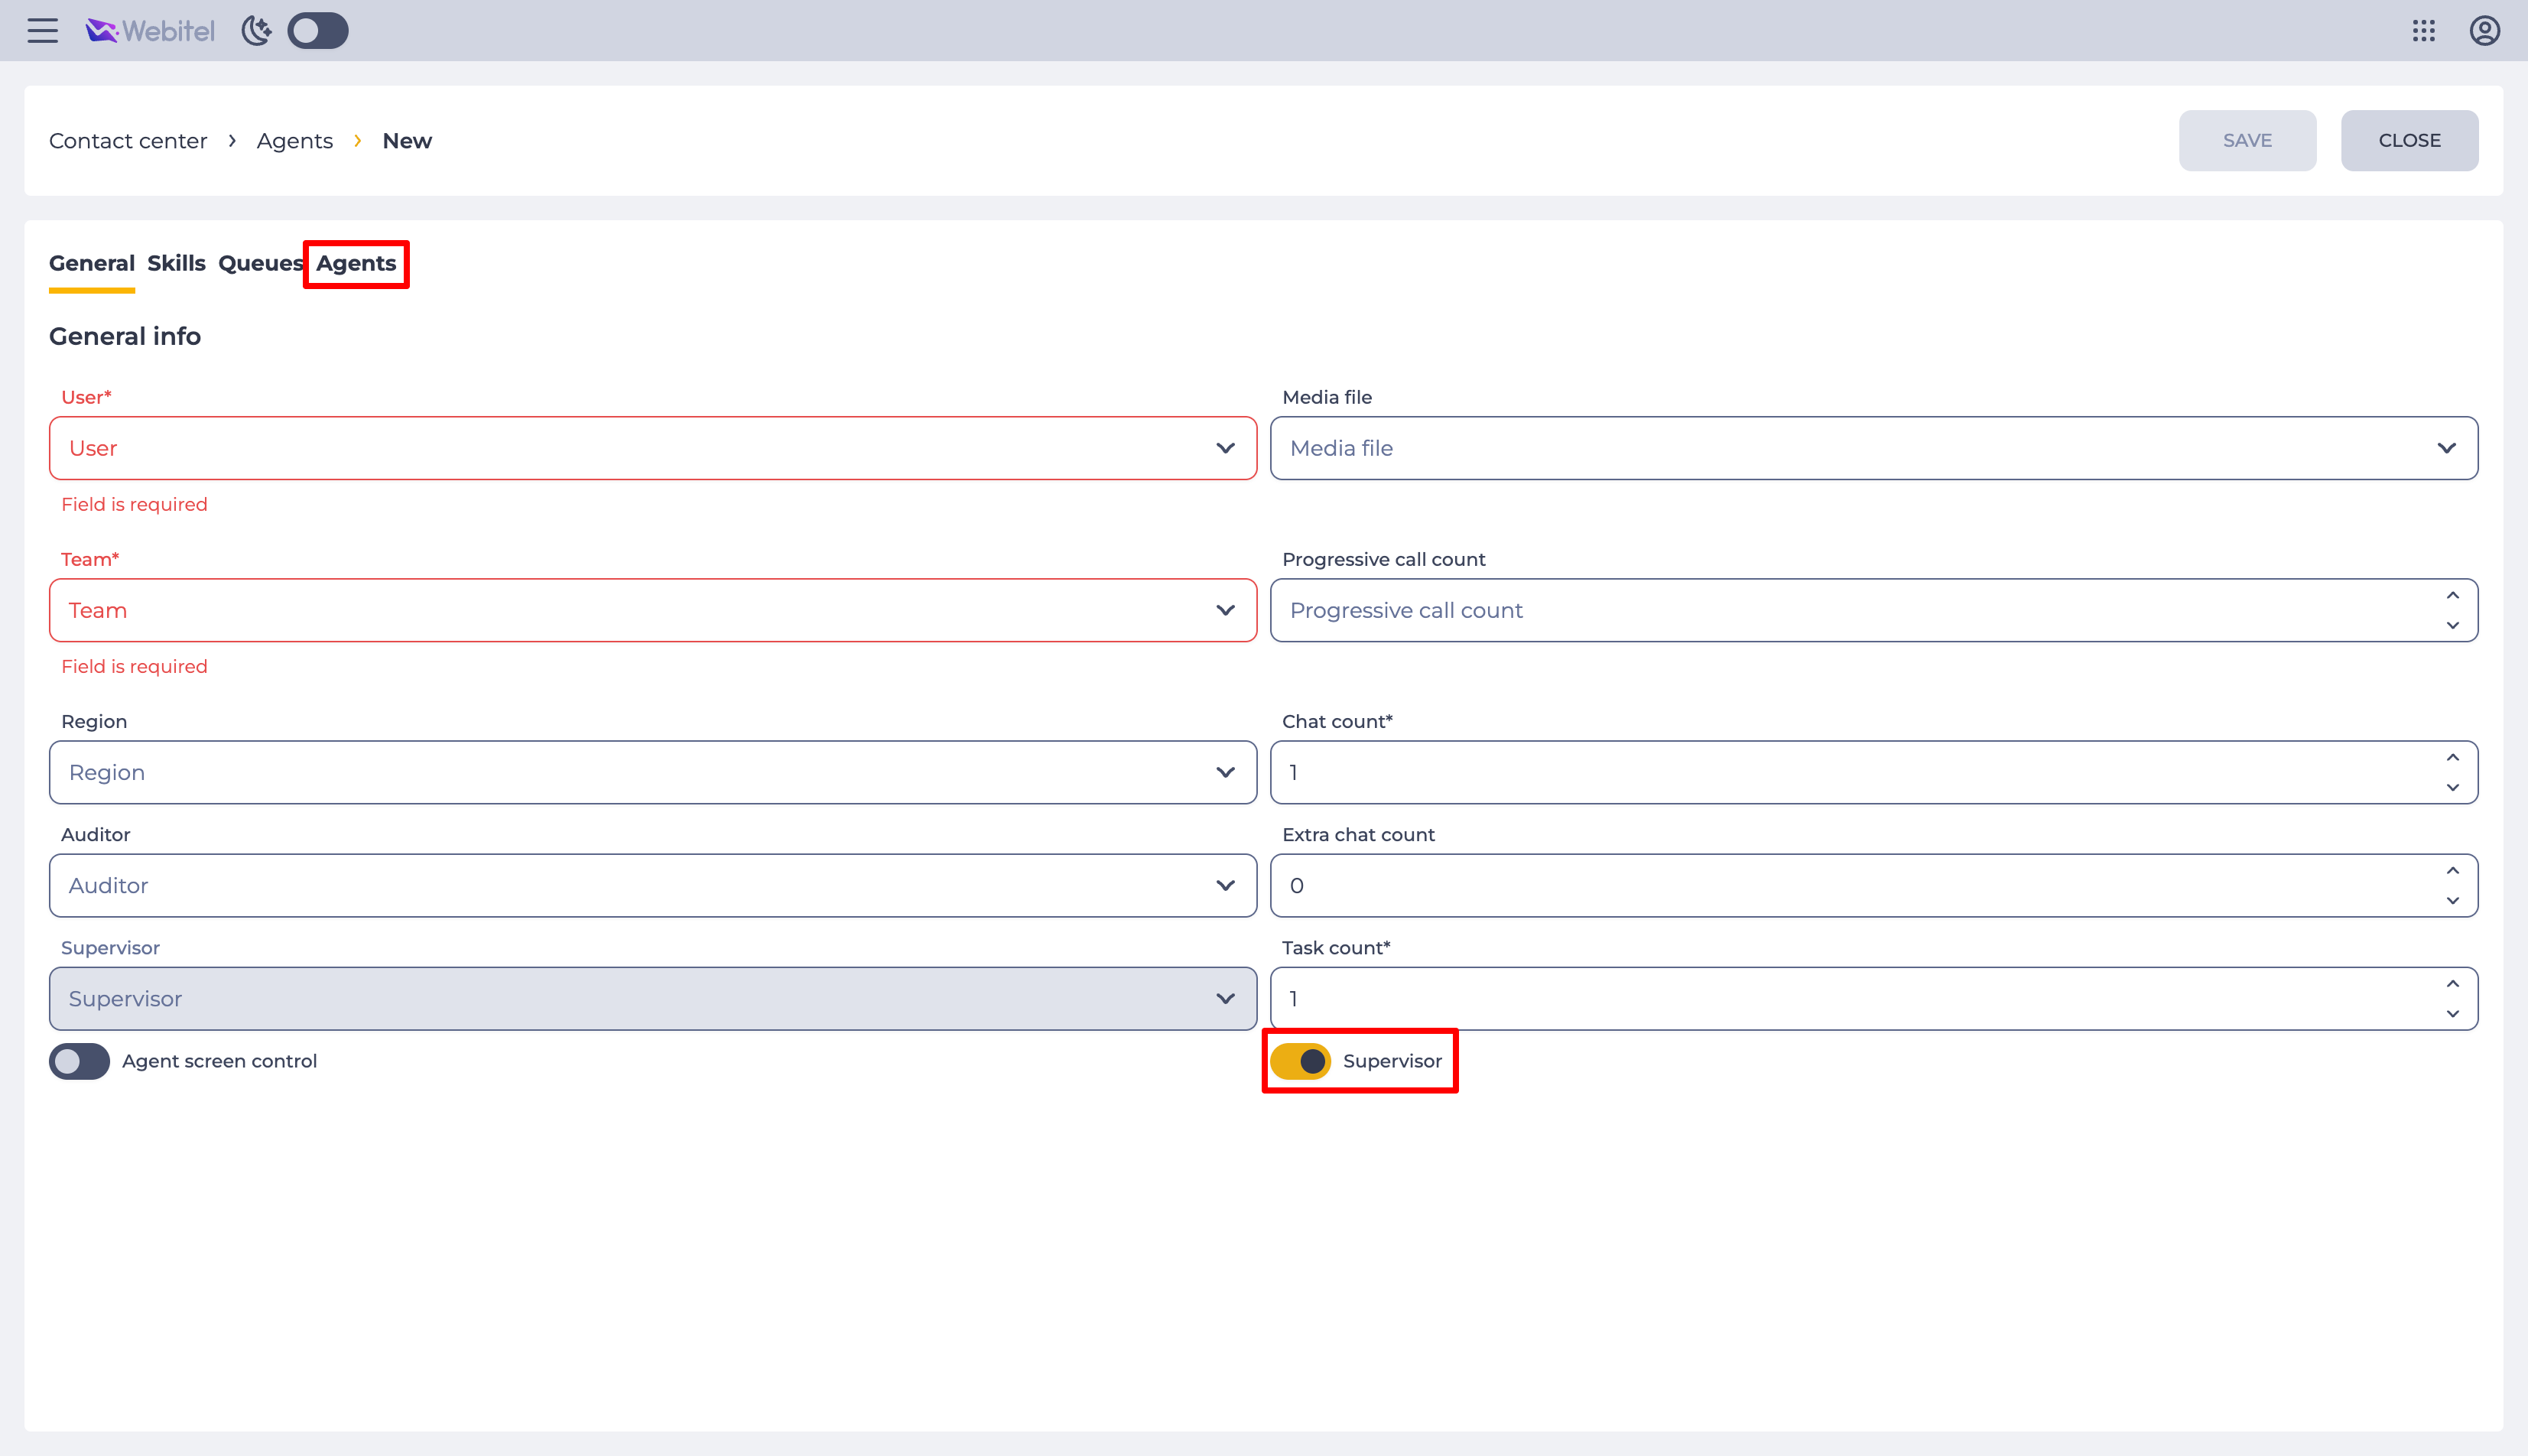
1.12. Supervisor switch
It is designed to set the rights of the Supervisor:
-

-

2. Opportunities
2.1. Change the Progressive call count / Chat count
|
Goal |
Change the Progressive call count / Chat count |
|---|---|
|
Preconditions |
|
|
Steps
|
|
|
Result |
Data saved. |

2.2. Change the Team/ Supervisor / Auditor / Location / Media file
|
Goal |
Change the Team/ Supervisor / Auditor / Location / Media file |
|---|---|
|
Preconditions |
|
|
Steps
|
|
|
Result |
Data saved. |
2.3. Assign the User as a Supervisor
|
Goal |
Assign the User as a Supervisor |
|---|---|
|
Preconditions |
|
|
Steps
|
|
|
Result |
Data saved |