
-
Go to the page https://developers.facebook.com/ and log in.
-
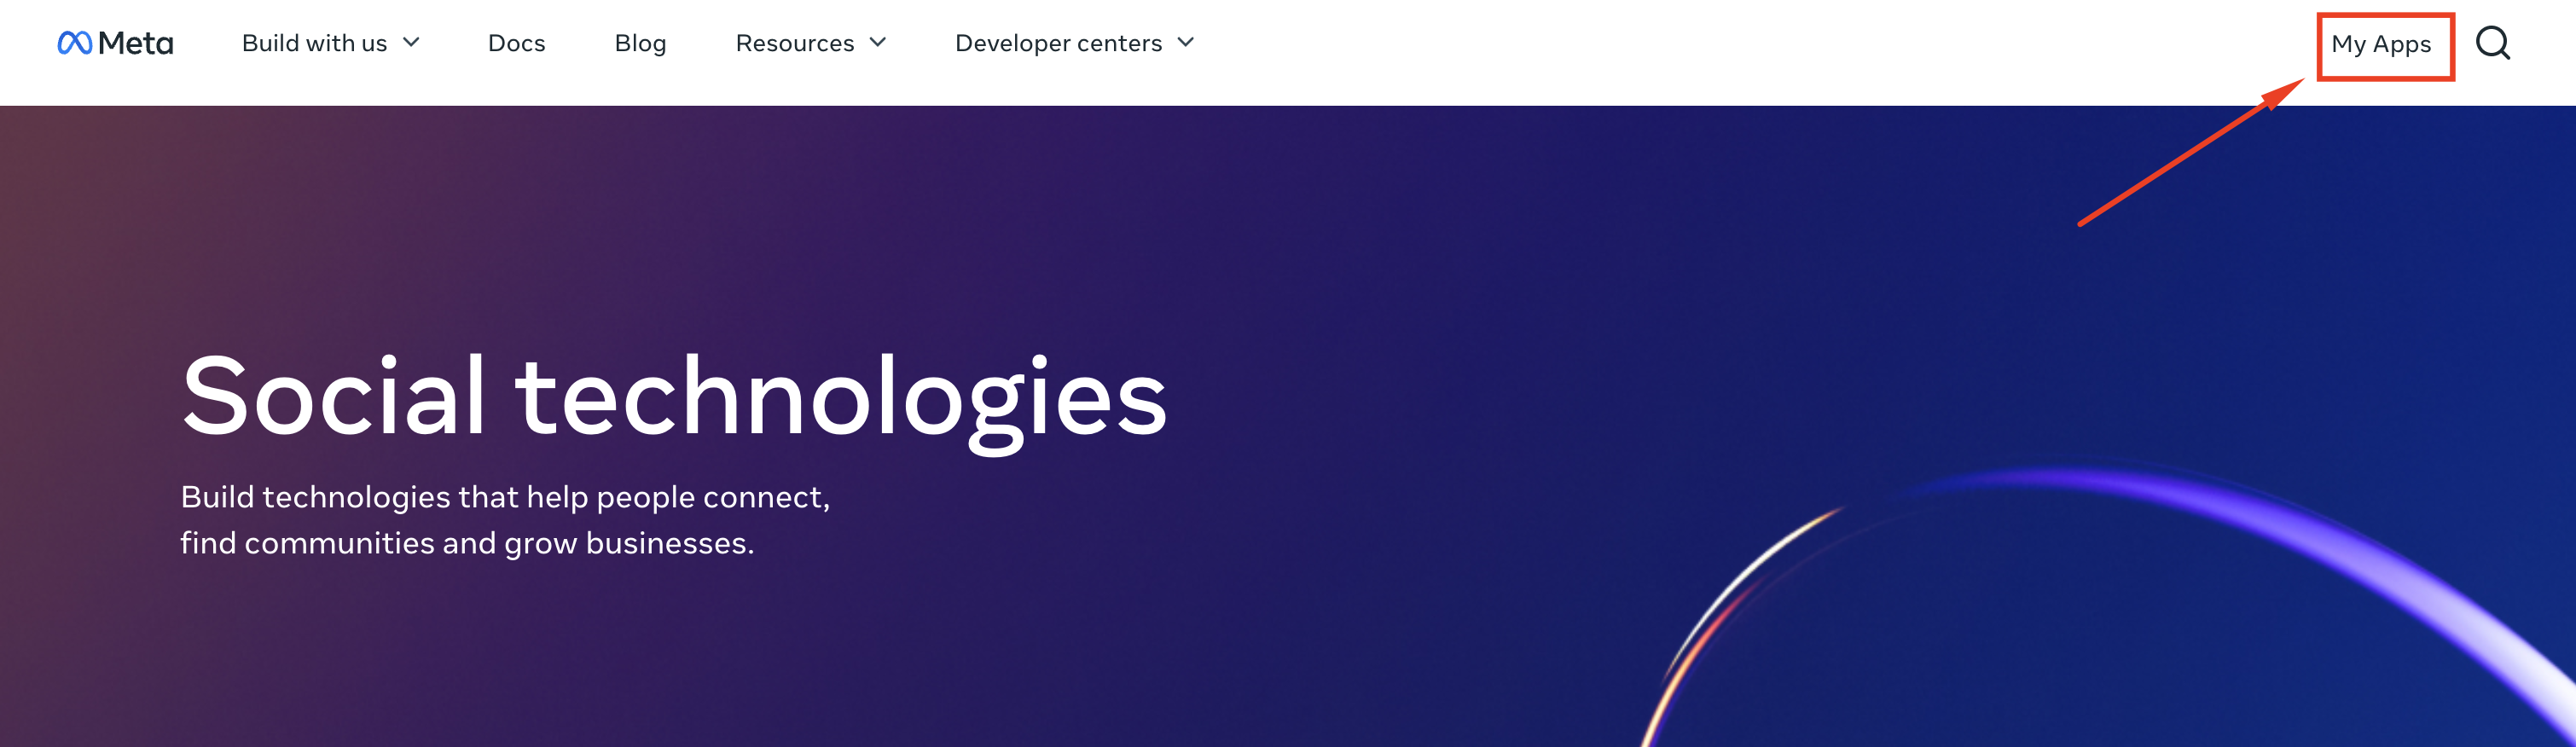
Click “My Apps” (Fig. 1).
-
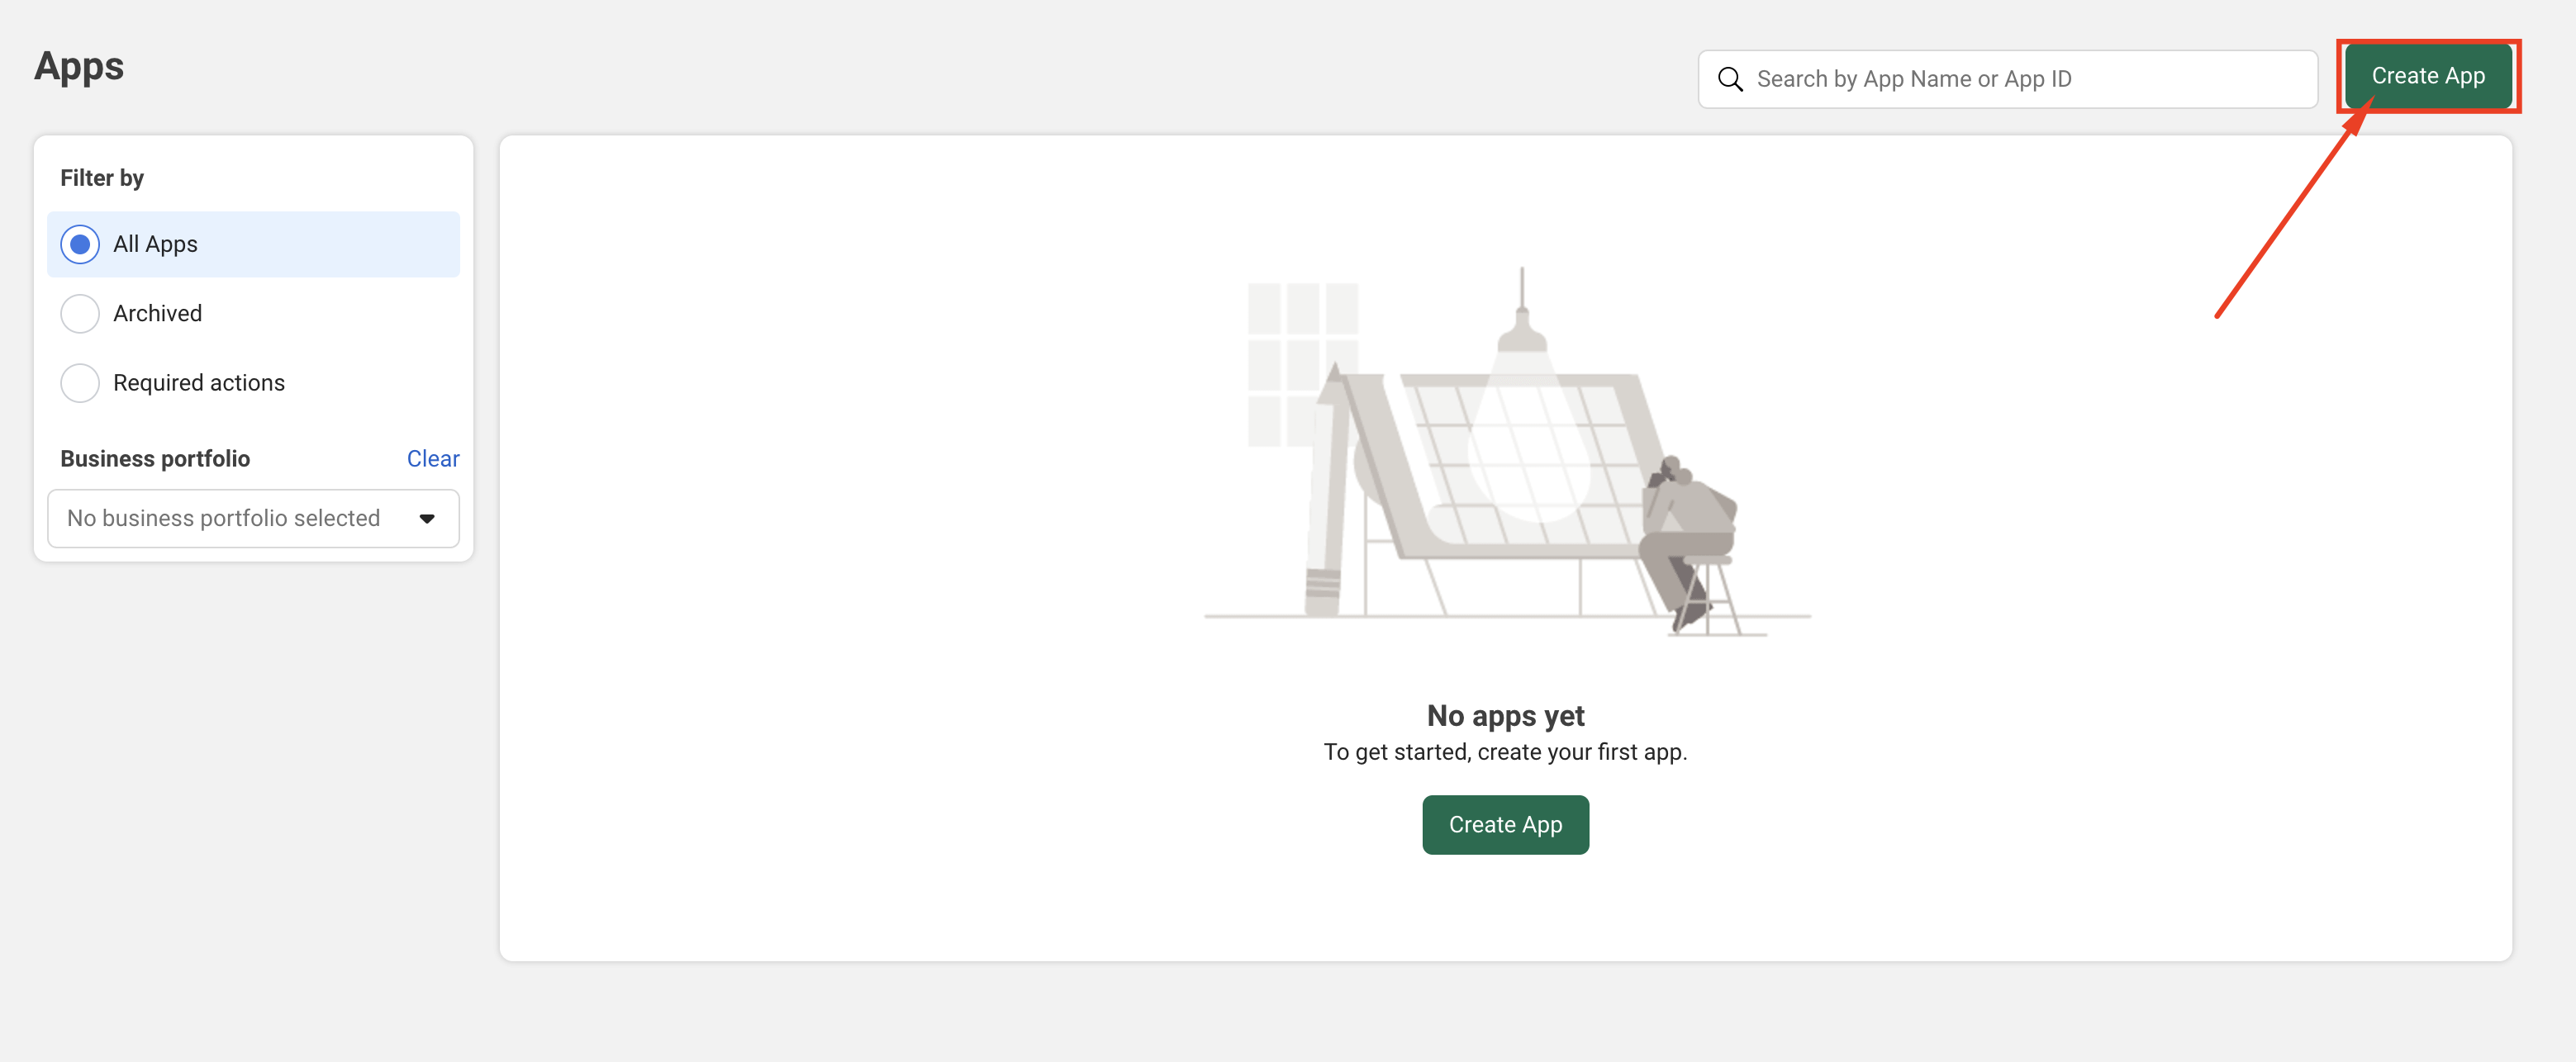
The “Apps” page opens. Click the “Create App” button (Fig. 2).
-
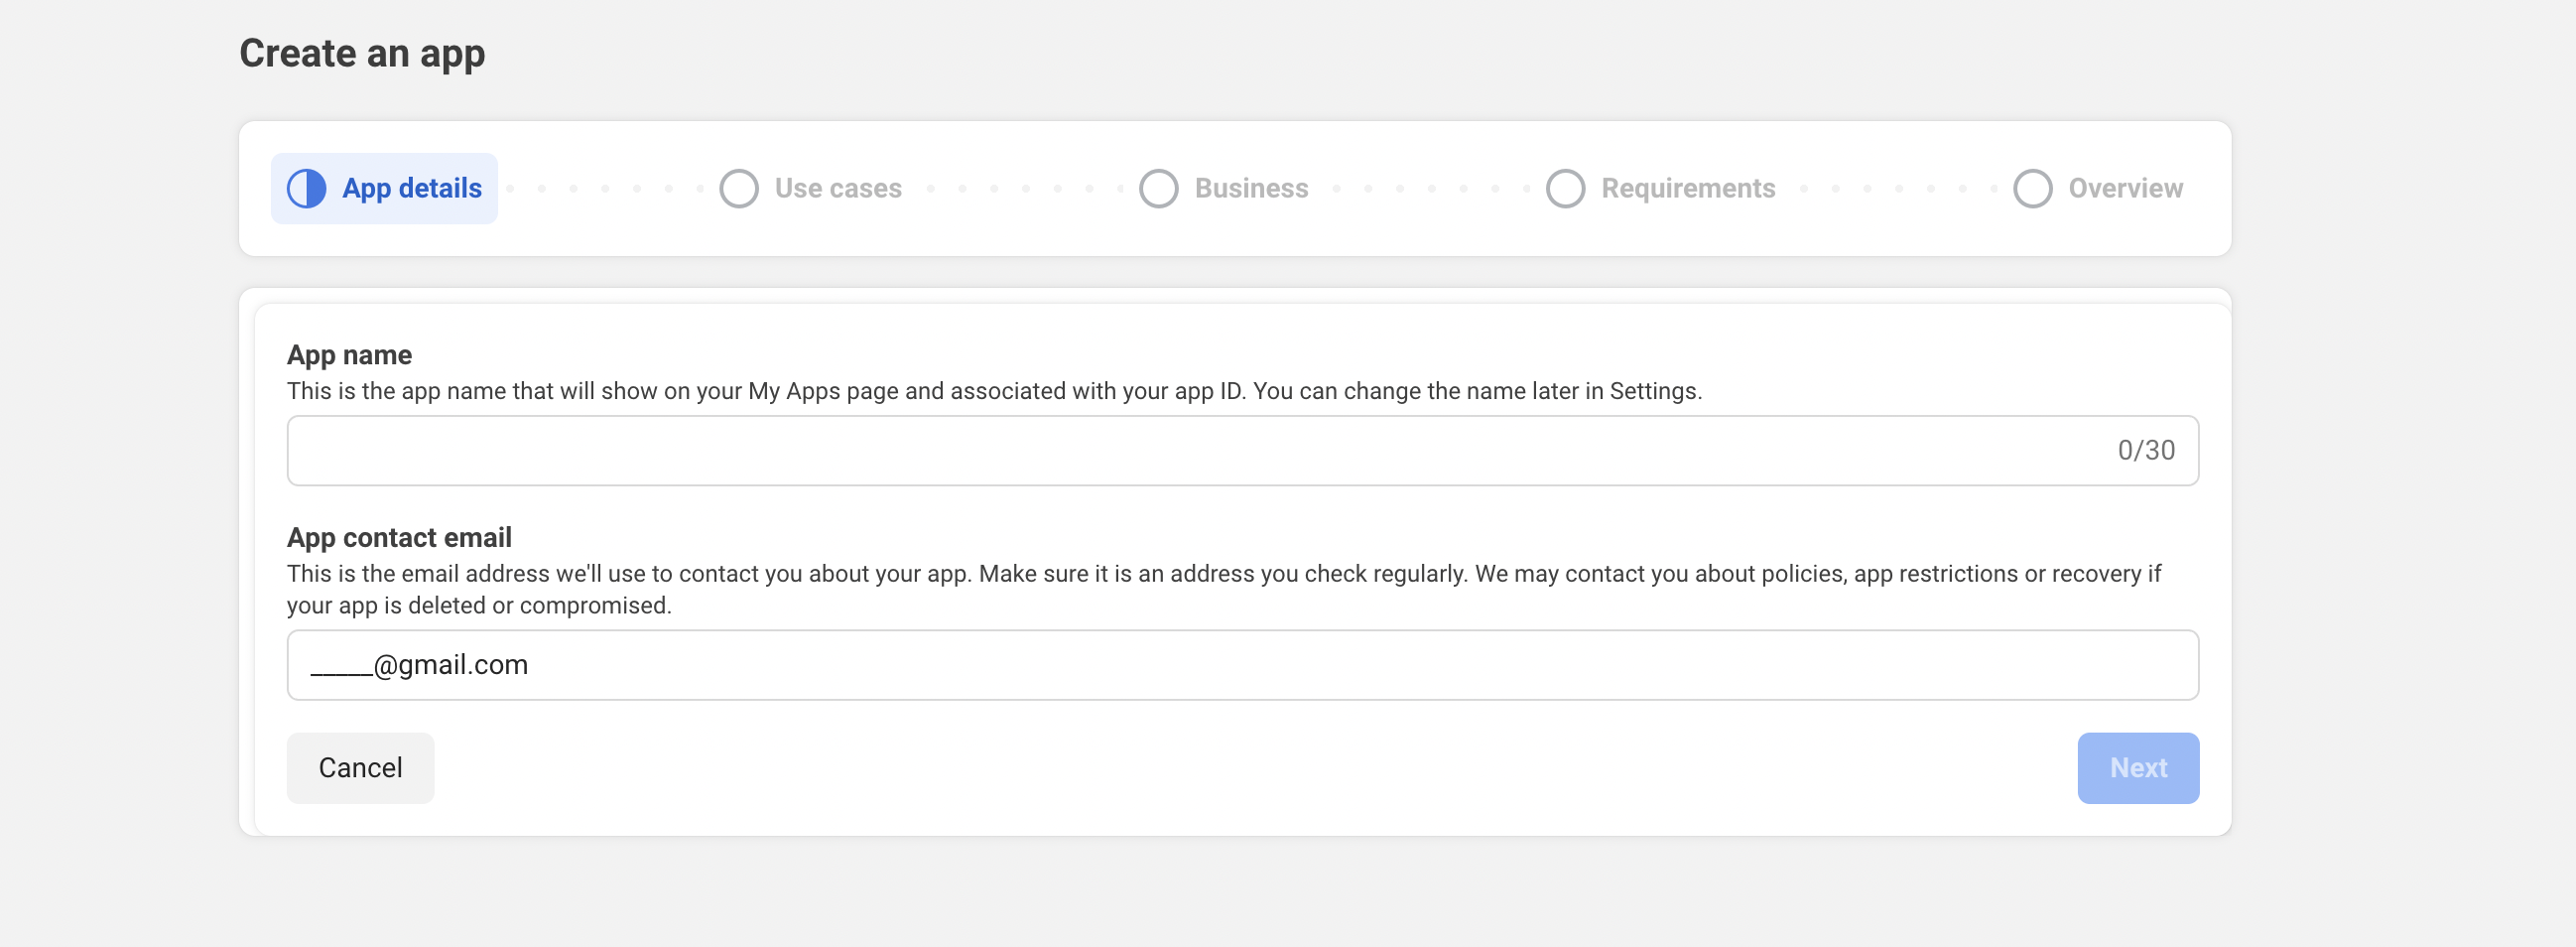
The “Create an App” page opens. Enter the name of the future application in the “App Name” field and click the “Next” button (Fig. 3).
-
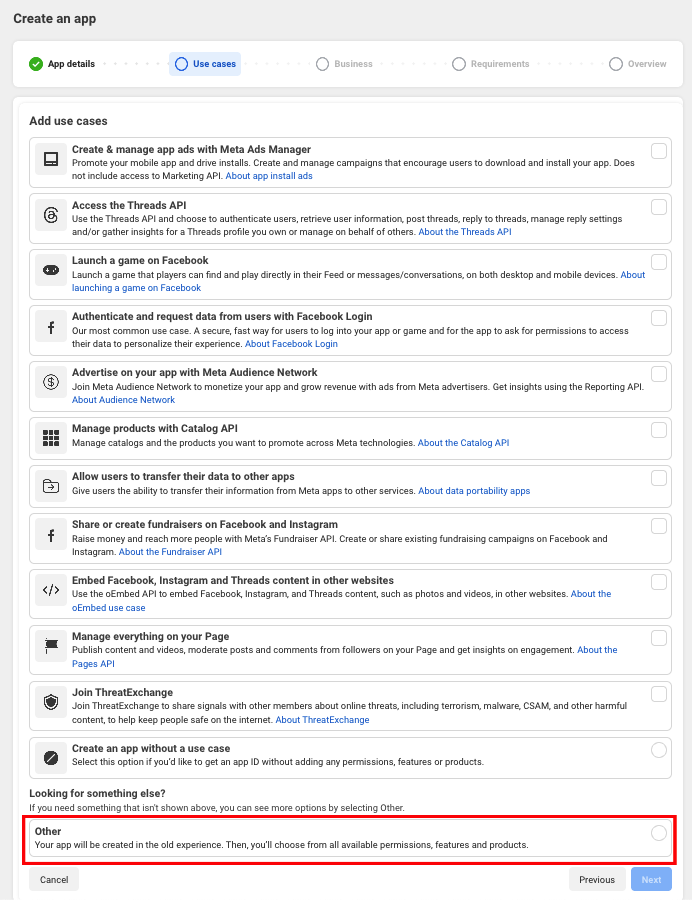
The “Use cases” tab opens. Select “Other” and click “Next” (Fig. 4).
-
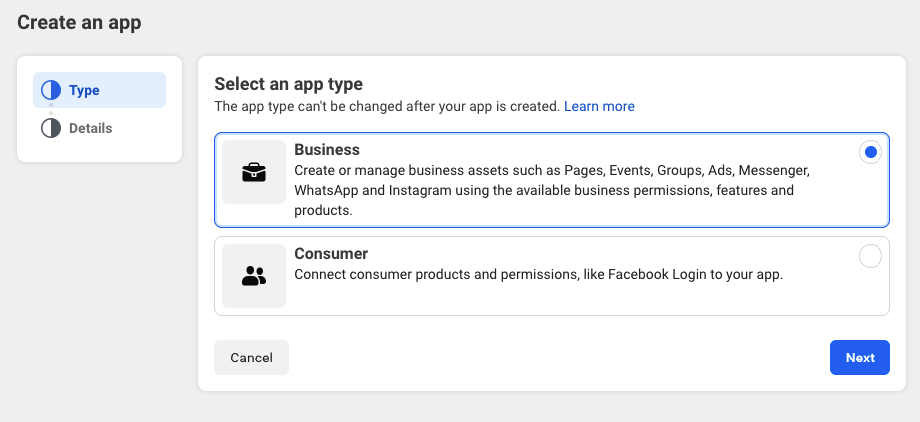
The “Type” tab opens. Select “Business” and click “Next” (Fig. 5).
-
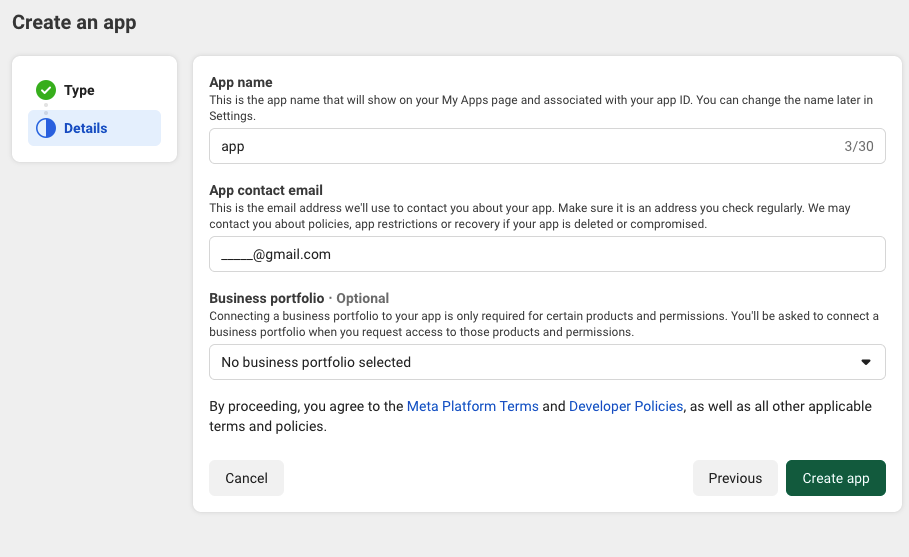
The “Details” tab opens. Check the name and contact email address. Click the “Create App” button (Fig. 6).
-
Enter your password again and click “Submit.”
-
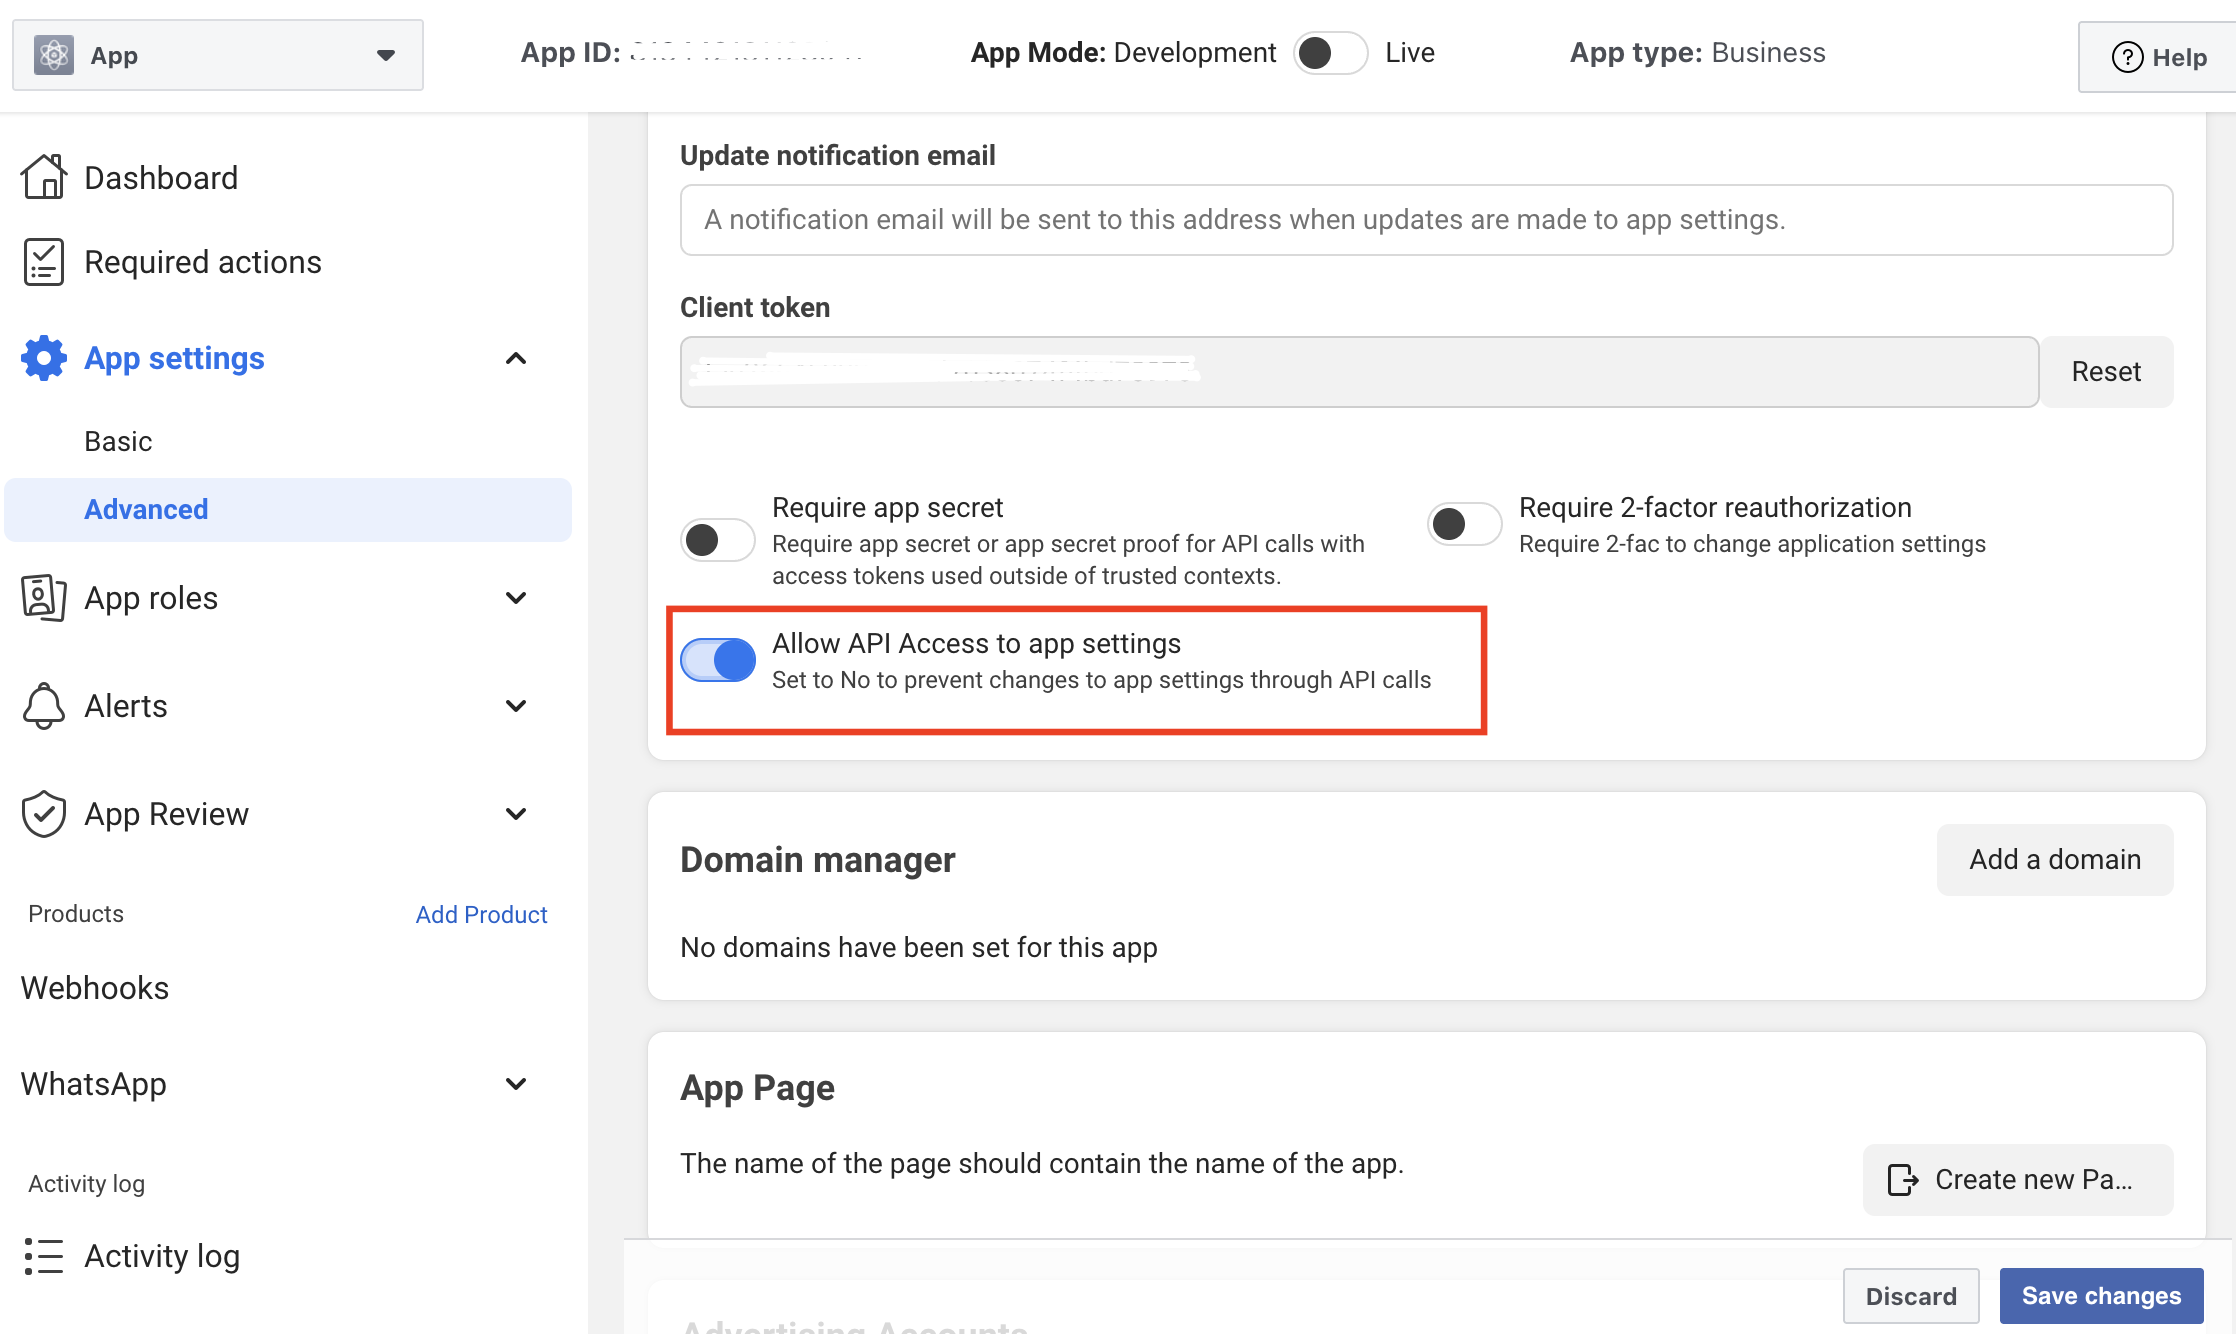
The app is created. Go to “App Settings” → “Advanced.” Toggle the “Allow API Access to App Settings” switch to the active position (Fig. 7). Click “Save Changes.”
-
Open the “Chat Gateways” page in the Admin (Webitel) application and create a new Facebook chat gateway.
-
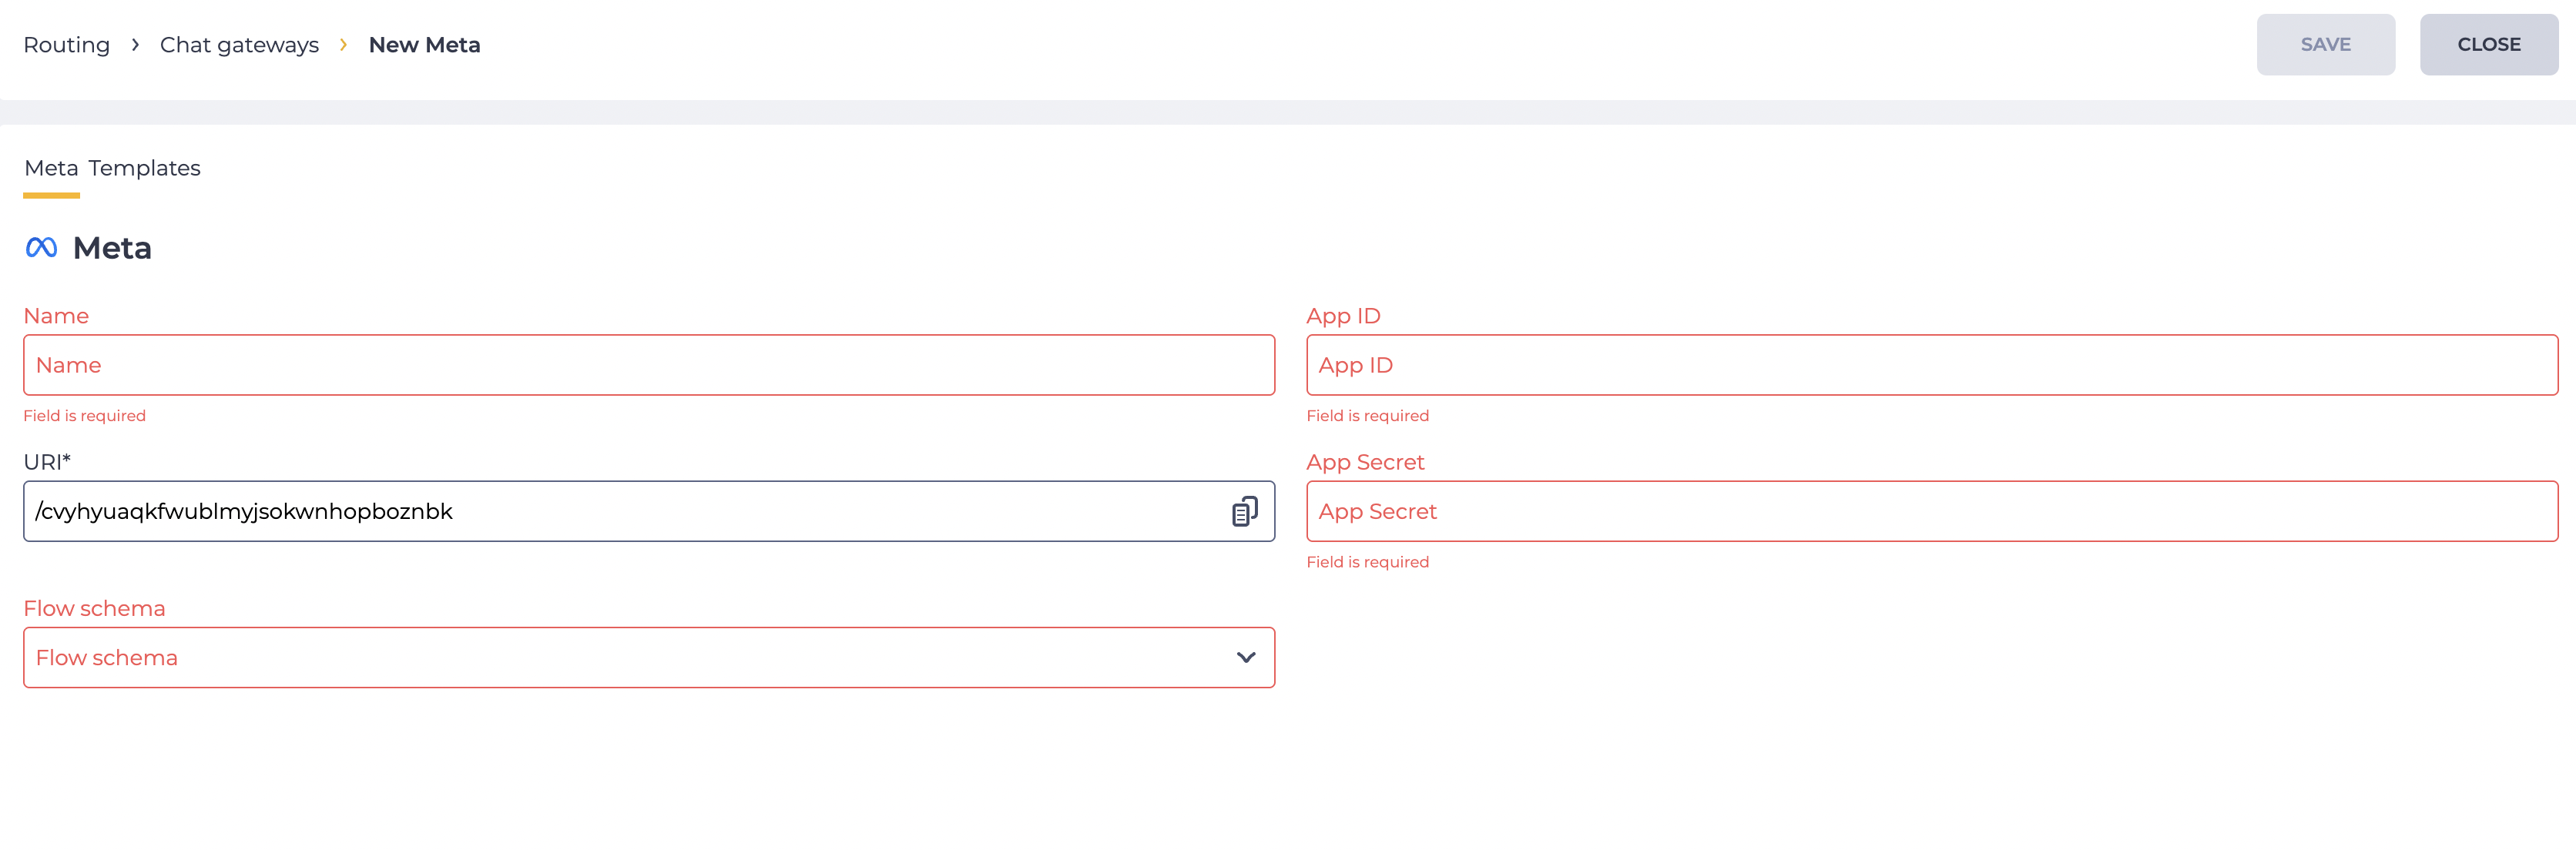
The “Meta” page opens, where you need to fill in the fields (Fig. 8).
-
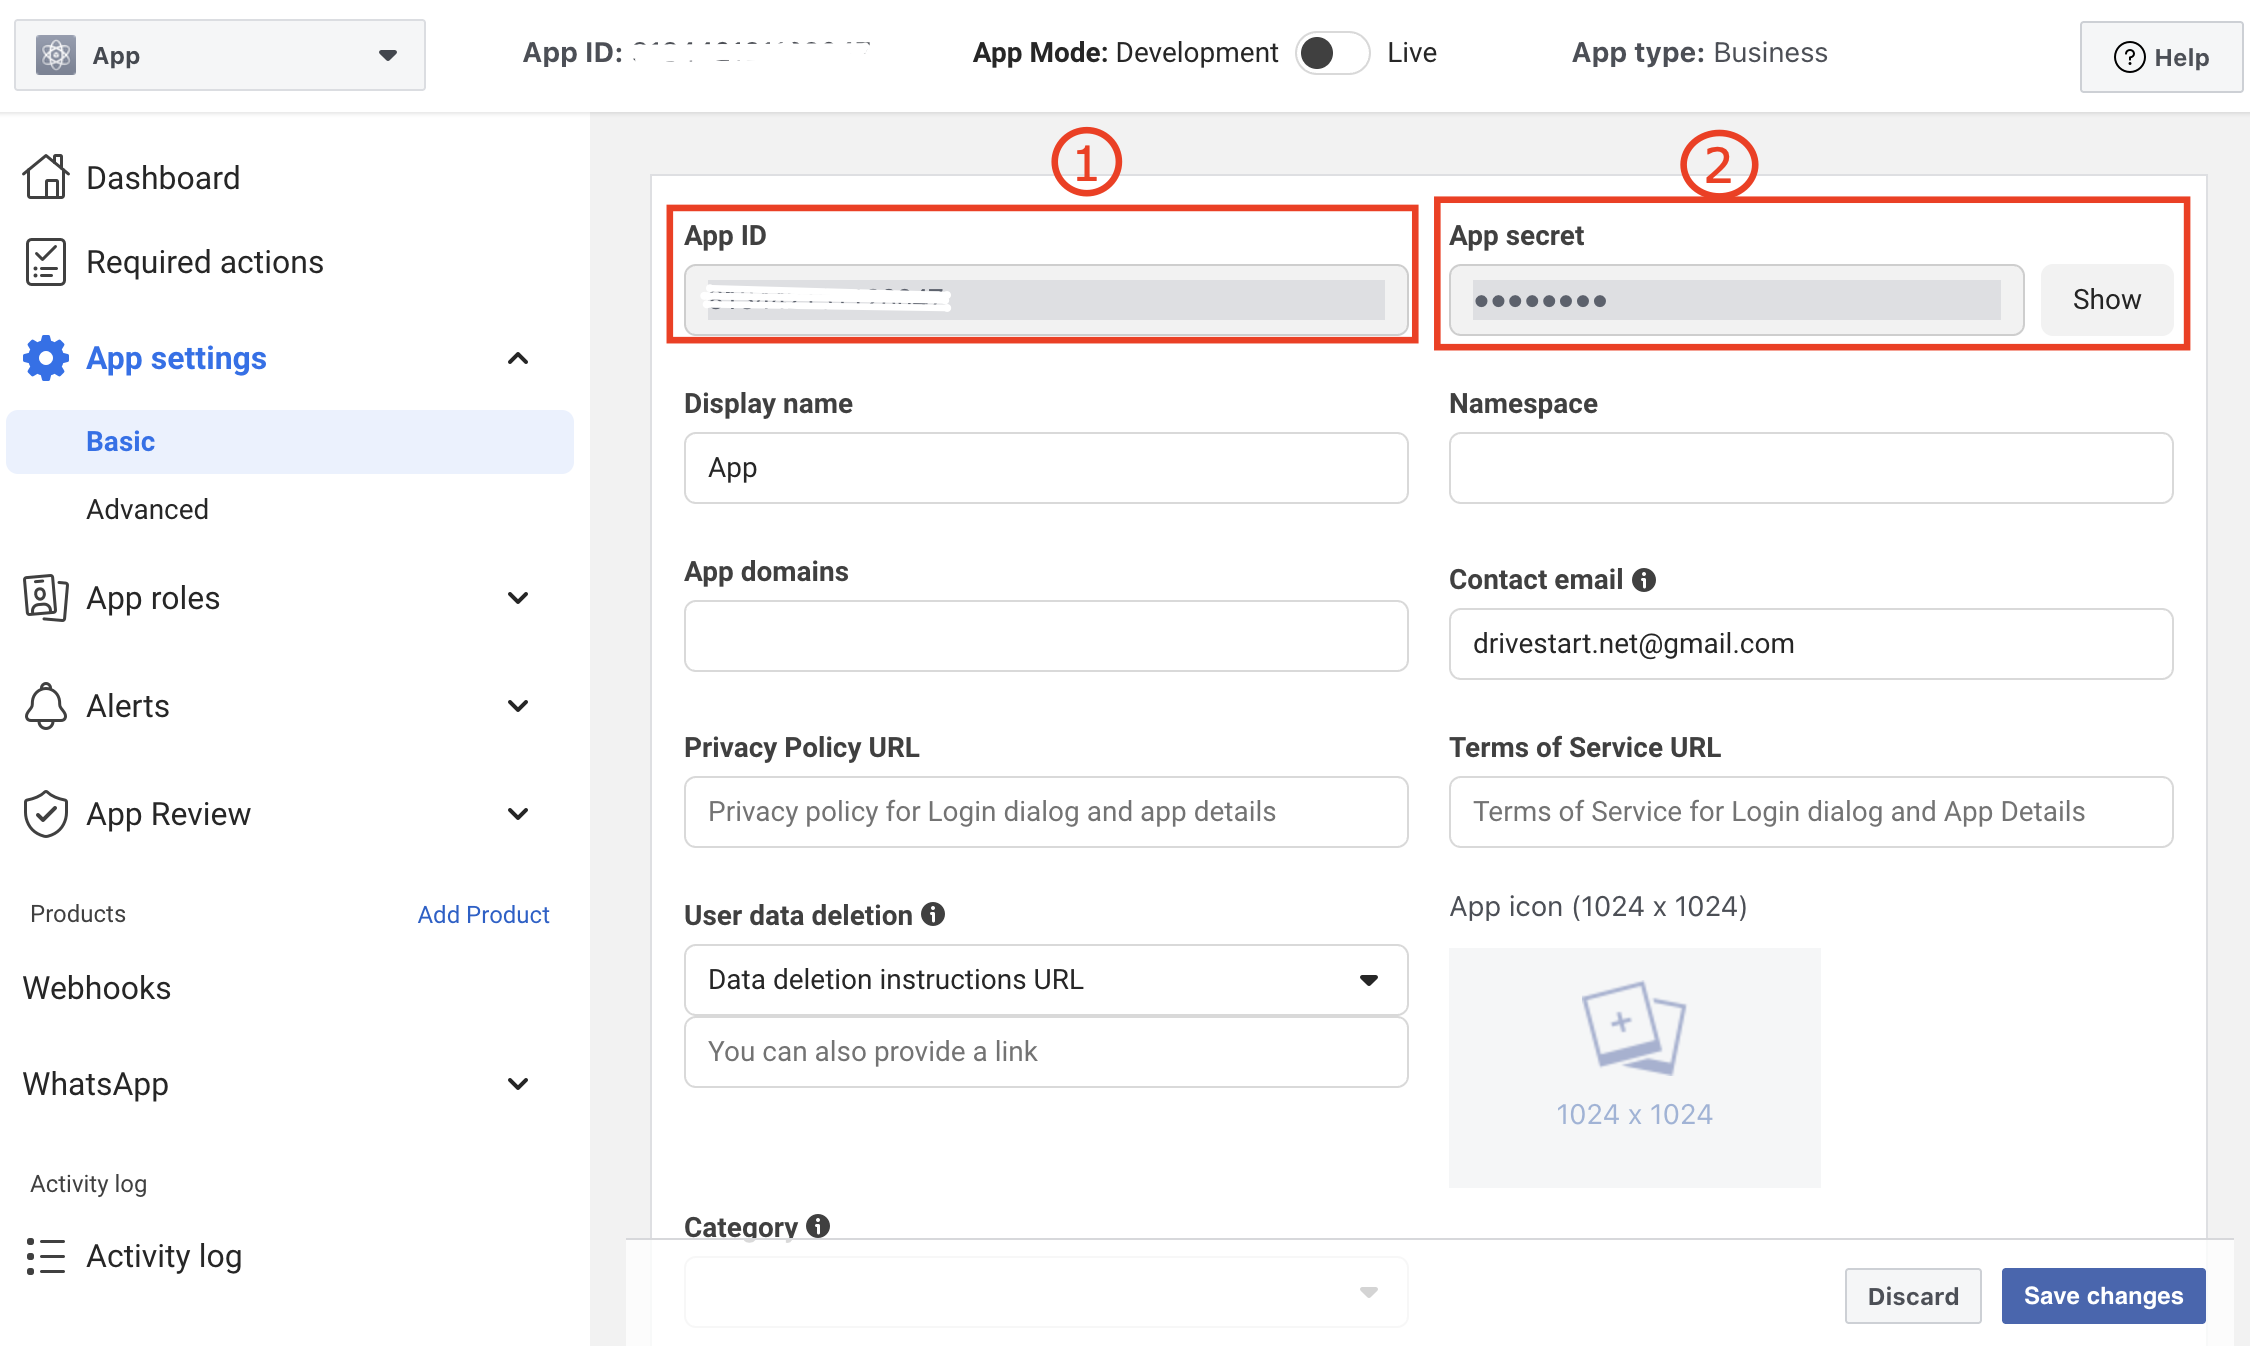
To obtain the values for the “App ID” and “App Secret” fields, return to the Facebook Developer page. Go to Settings → Basic. From this page, take the values of:
-
App ID (Fig. 9.(1));
-
App Secret (Fig. 9.(2)).
-
Enter the data on the Meta page and click “Save.”
-
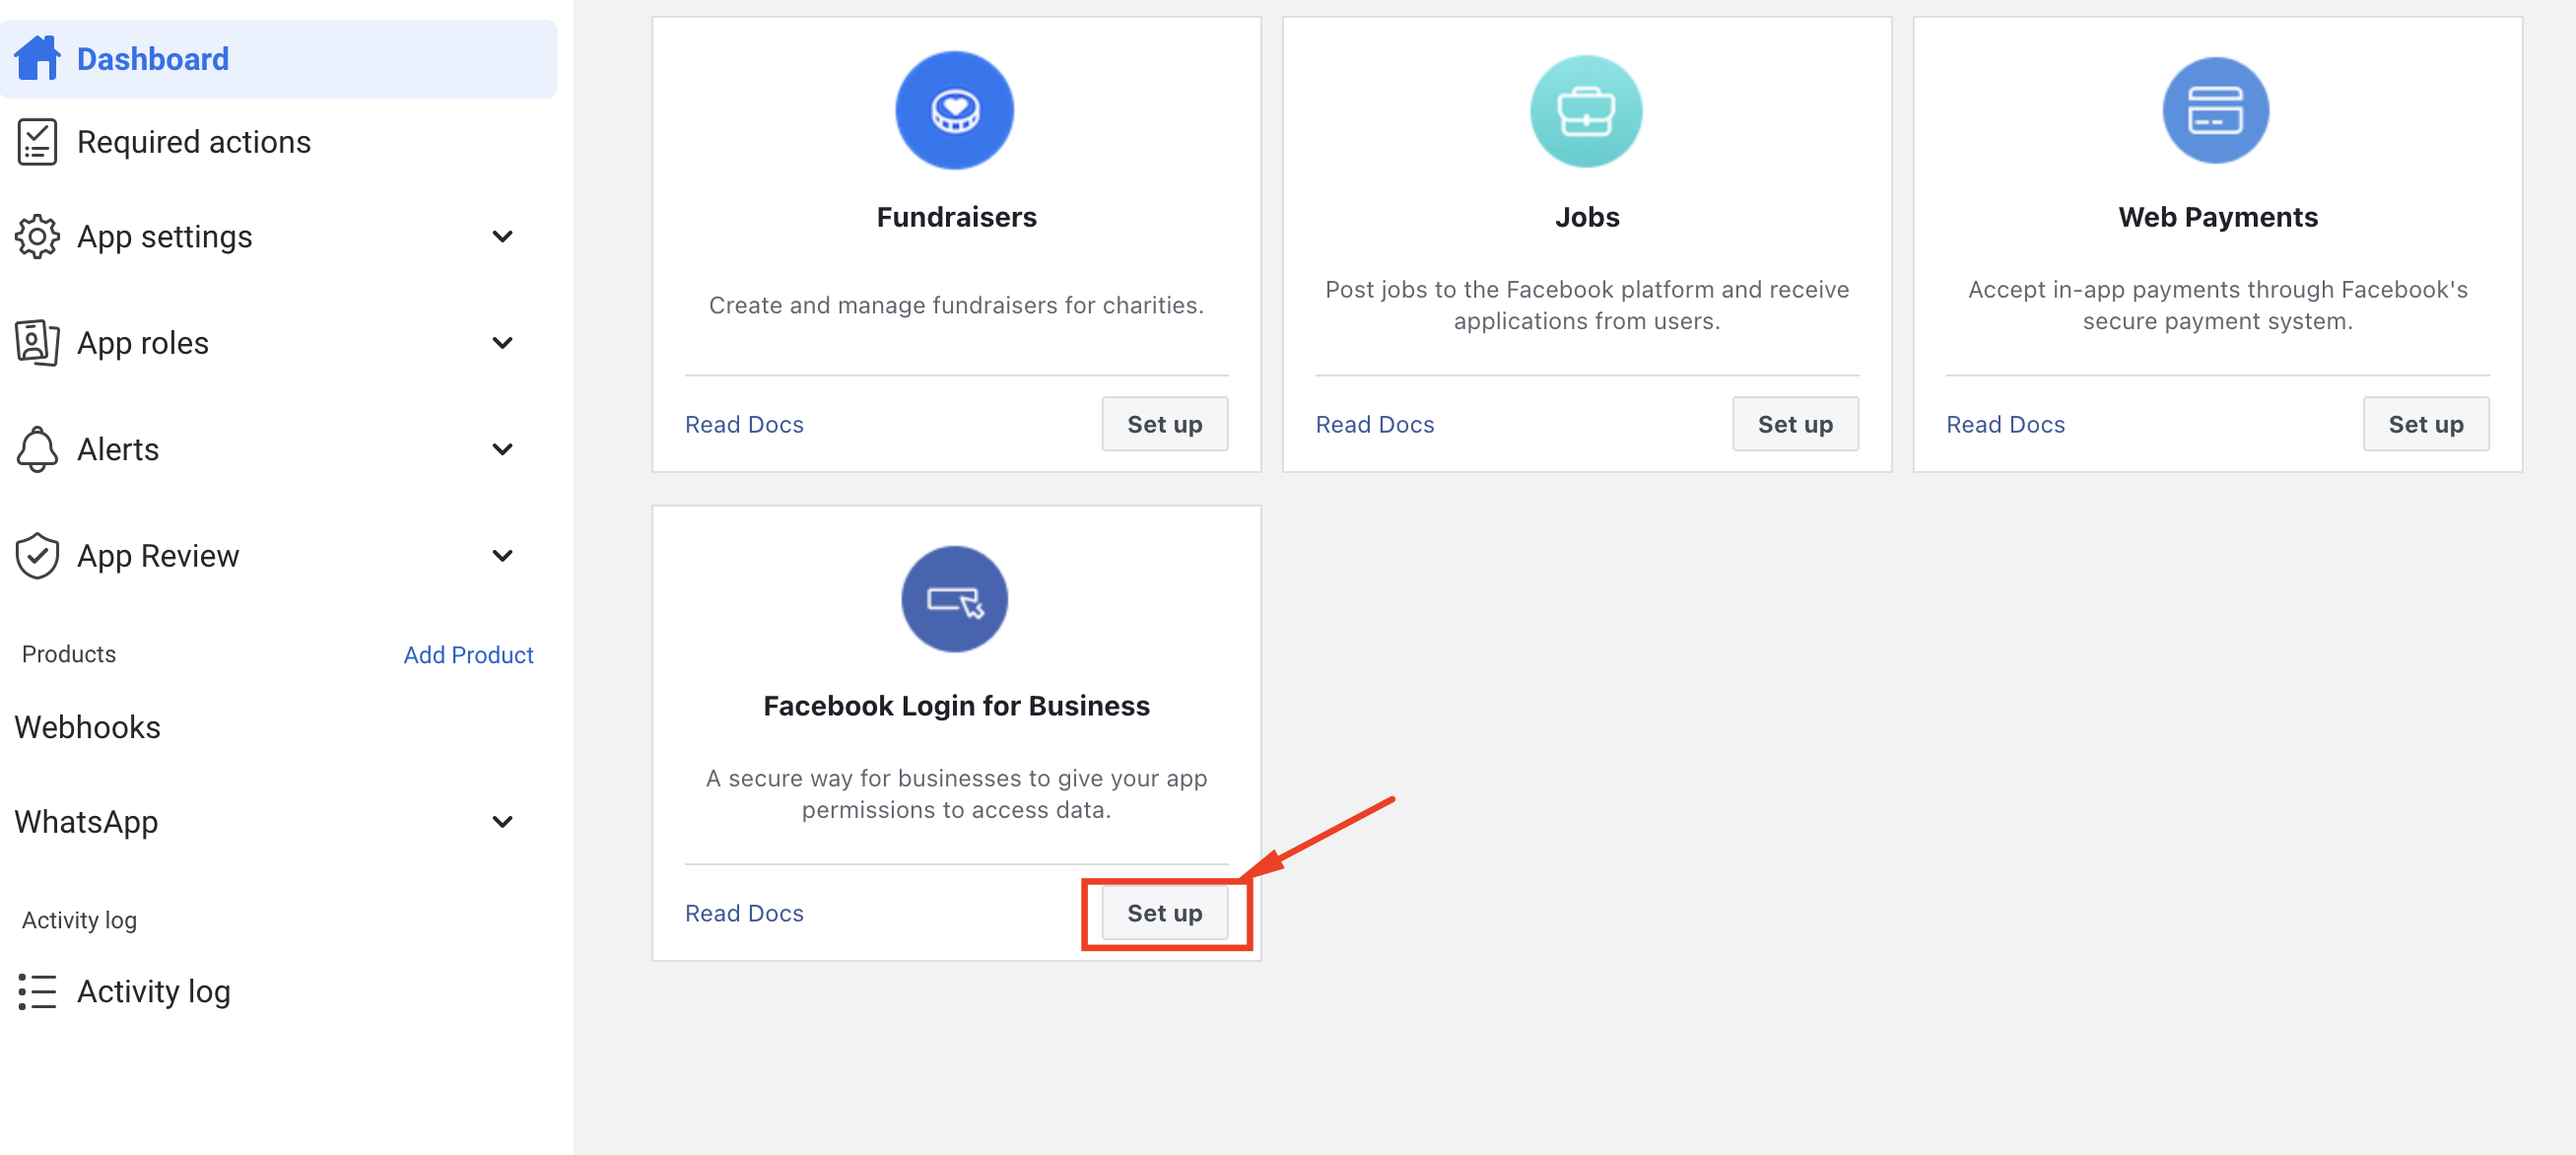
Copy the value from the “URI” field (Fig. 8). Go to Facebook Developer → Dashboard. Select “Facebook Login for Businesses” by clicking the “Set Up” button (Fig. 10).
-
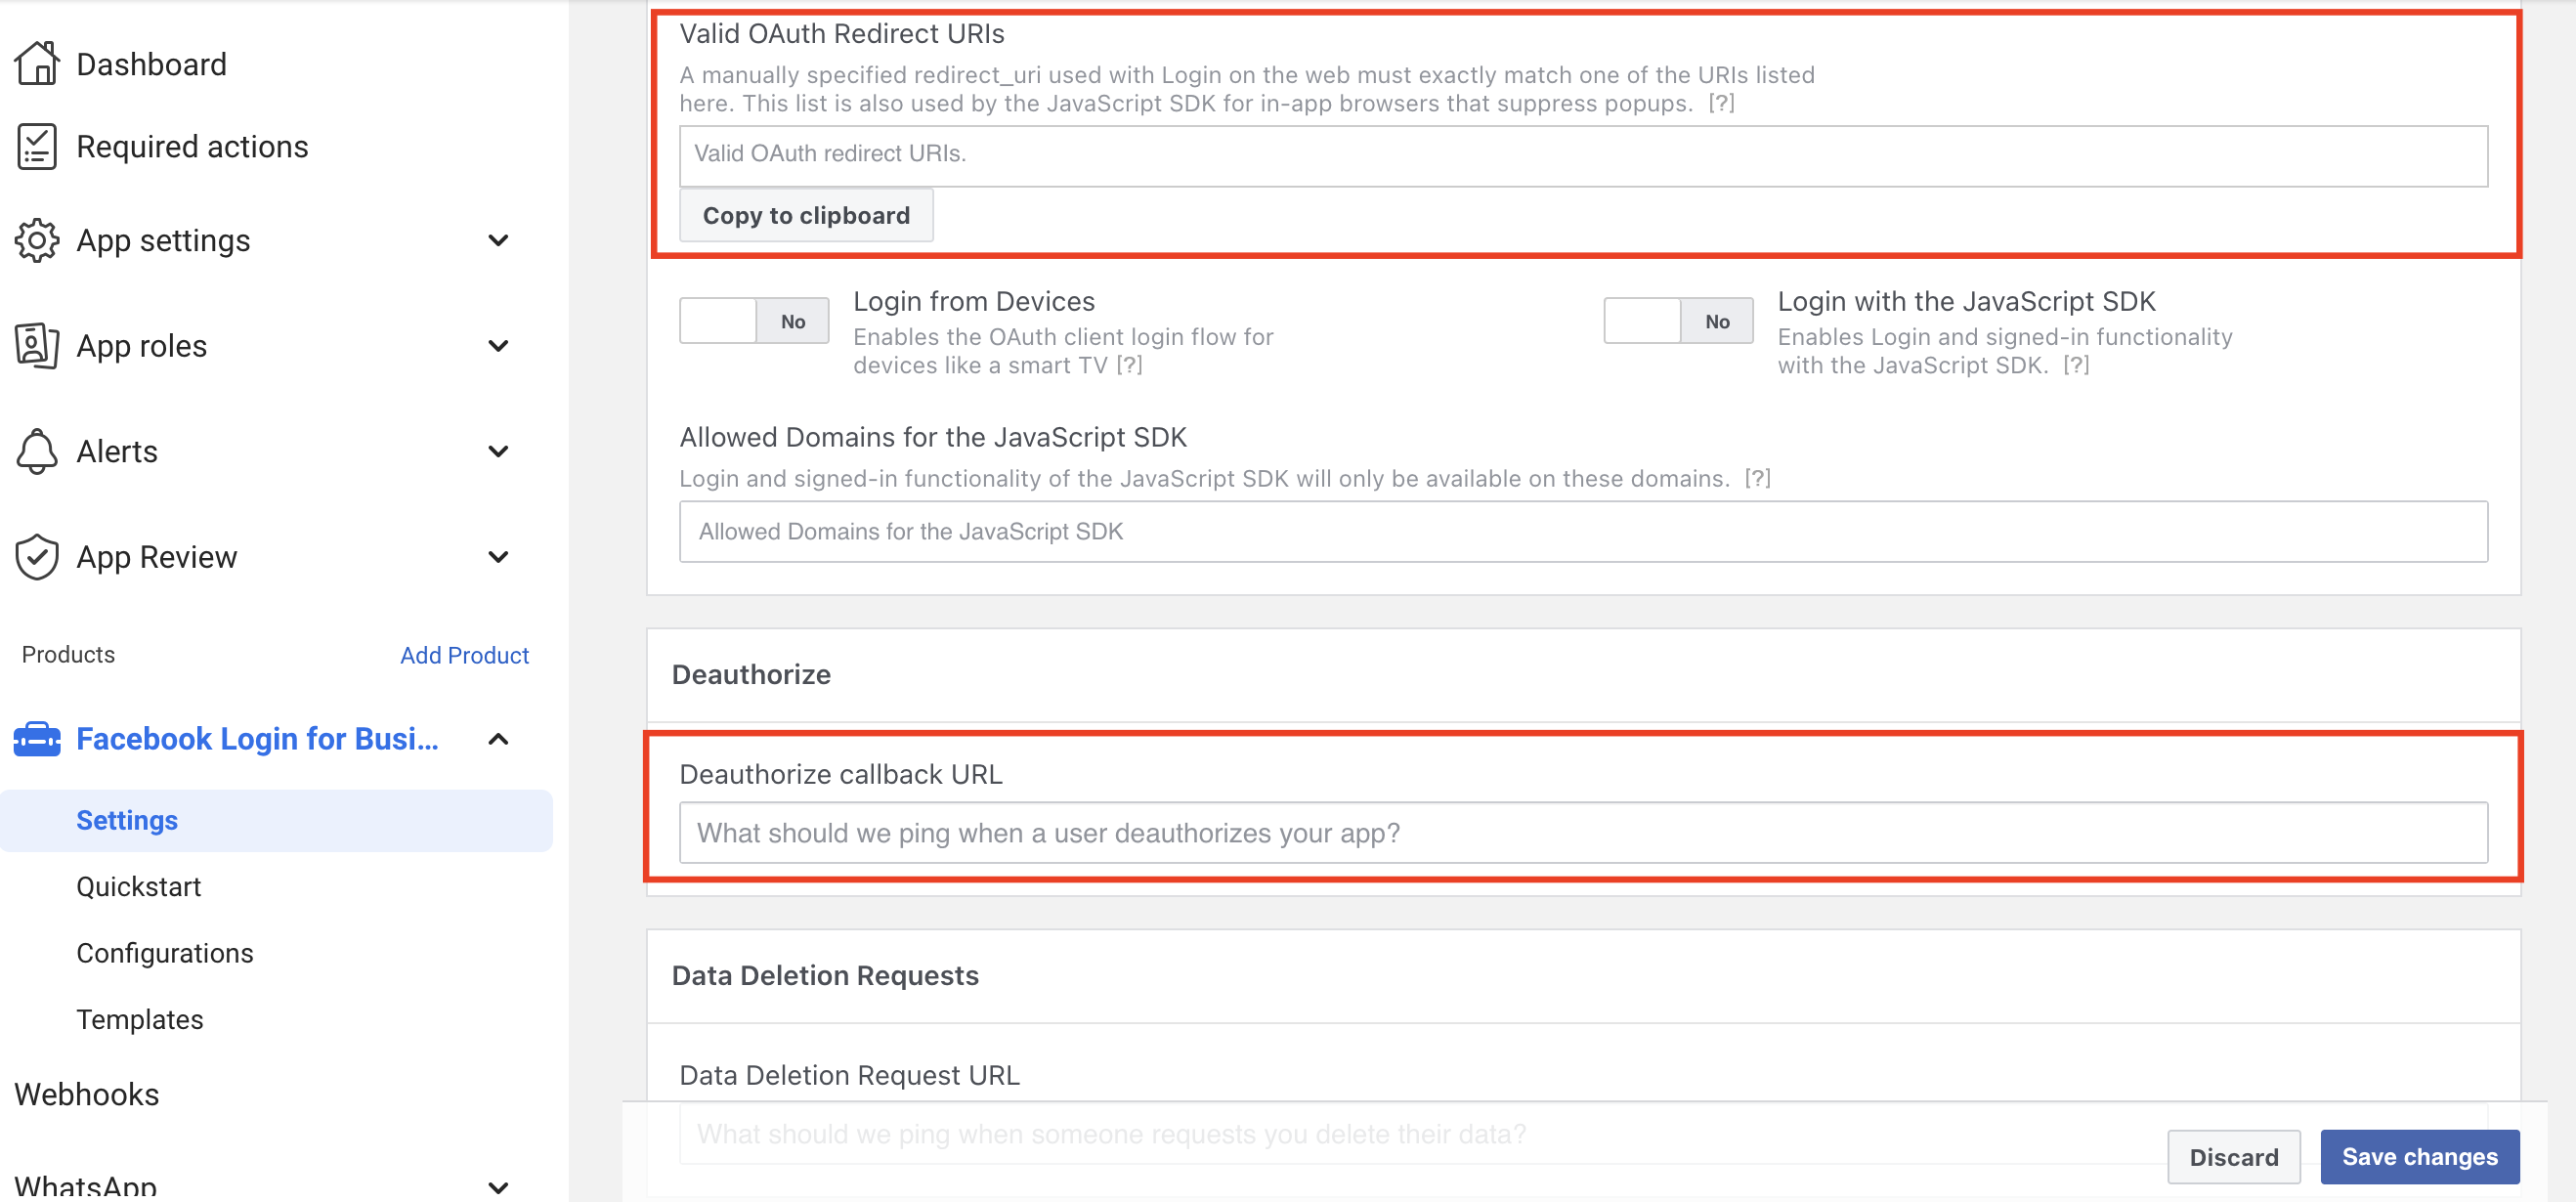
On the Settings page, paste the copied value into the “Valid OAuth Redirect URIs” and “Deauthorize Callback URL” fields (Fig. 11). Click “Save Changes.”
Open the “Facebook Pages” page and add the required pages. Enable message retrieval for the pages.
-
If your app will only be used by people with a role in it, only standard access is required for the permissions and features your app needs.
-
If your app will be used by people who do not have a role in it, the permissions and features your app needs will require advanced access.
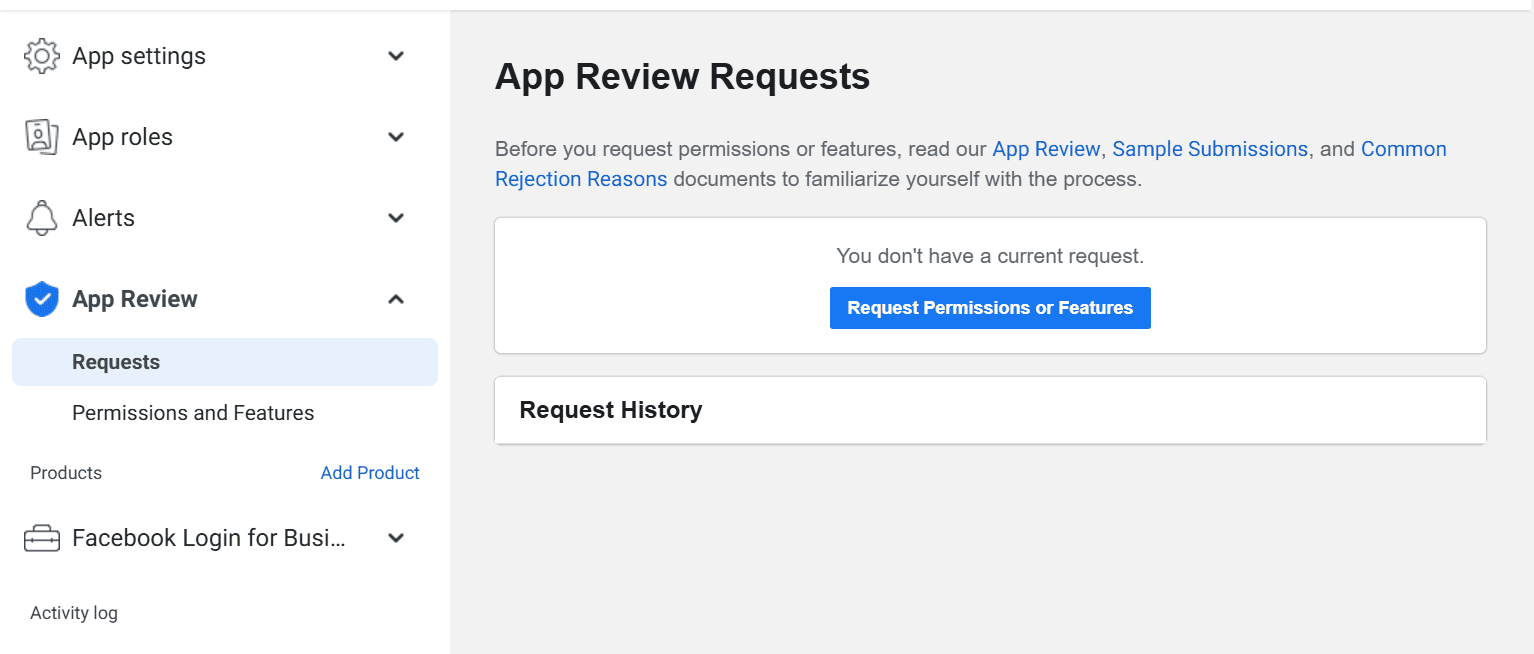
To request advanced access, click “Requests” (Fig. 12).
-
The “App Review Requests” page opens (Fig. 12). Click the “Request permissions or features” button.
-
The “Permissions and Features” page opens. Then click the “Request” button in the row of the required permission (Fig. 13).
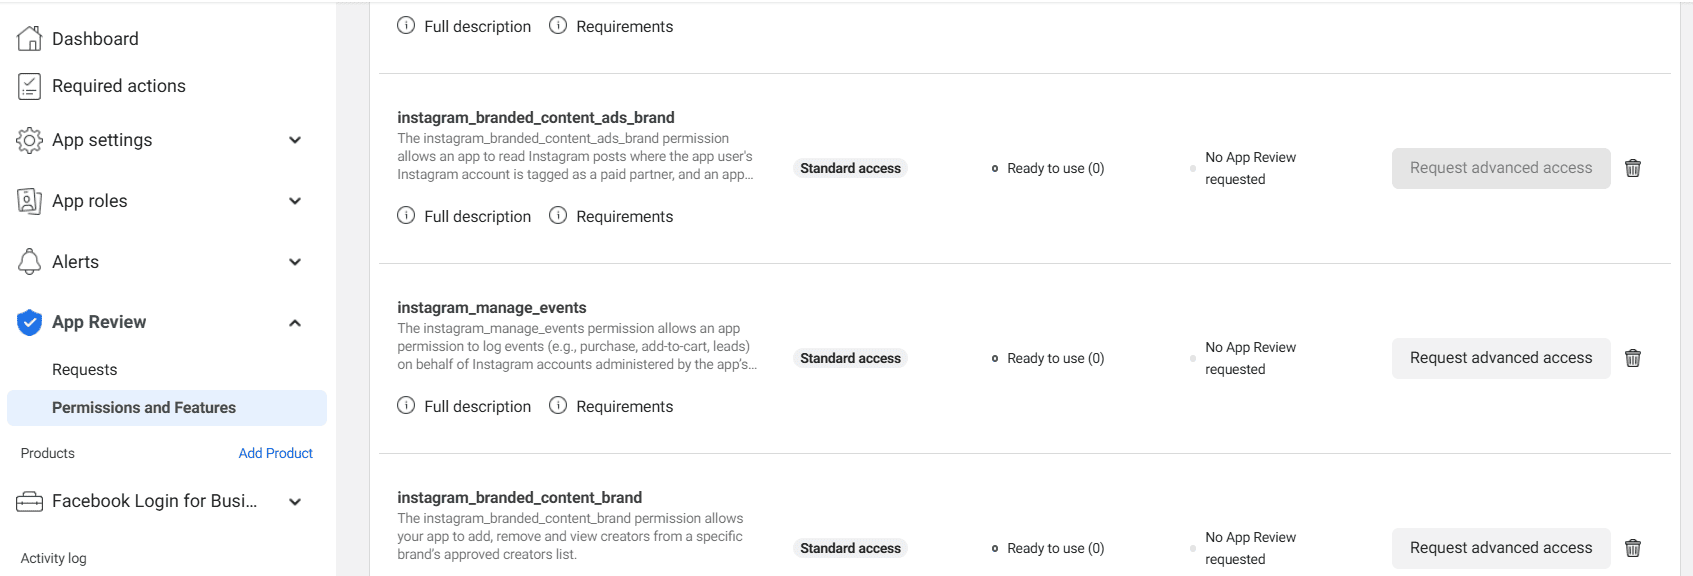
The table below describes the set of permissions Webitel uses to integrate with the Facebook Messenger page:
|
Permission or Feature |
Endpoints |
Description |
Note |
|---|---|---|---|
|
This permission allows your app to access the list of Pages a person manages. Usage: display the user’s list of managed Pages and verify ownership. It can also be used for requesting analytics data to improve your app or for marketing/advertising purposes with aggregated and identified or anonymized data (as long as such data cannot be re-identified). |
For cloud installation, standard access is sufficient for app admins to retrieve their list of Pages. |
||
|
This permission allows your app to manage conversations on a Page in Messenger and access them. Usage: create user-initiated interactive experiences, send support messages, confirm bookings, or handle orders. It can also be used for analytics, marketing, and advertising with aggregated and identified or anonymized data (as long as such data cannot be re-identified). |
|
||
|
This permission allows your app to subscribe to and receive webhooks about Page activity, as well as update Page settings. Usage: assist Page admins in managing the Page. It can also be used for analytics, marketing, and advertising with aggregated and identified or anonymized data. |
|
||
|
This feature allows your app to read user fields for users interacting with your business assets (e.g., ID, ids_for_business, name, and profile picture). Usage: read one or more user fields in a business app. It can also be used for analytics, marketing, and advertising with aggregated and identified or anonymized data. |
|
-
Go to the Requests page. Click “Edit.”
Specify the purpose of requesting advanced access — select “Yes.” Click “Proceed to App Review.”
-
Fill in the settings for submitting the request. Click “Save.”
-
Provide information to confirm the application.
-
A modal window opens where you must provide a detailed step-by-step instruction. Following this guide, the reviewer will be able to test your integration and verify how you use the requested permissions or features. The instructions must include all login credentials required to access the integration and perform testing.
Click “Save.”
-
Fill in the details for each requested permission.
The request may be rejected due to inaccurate/incomplete descriptions. A screen recording showing step-by-step how your app will use the requested permission/feature increases the chances of approval on the first try.
The video must demonstrate:
-
logging in as an operator in Webitel,
-
going to Workspace,
-
toggling “Call Center” on,
-
sending a message to the Facebook Page,
-
opening Workspace and showing the conversation.
Optionally, display Facebook and Workspace side by side (split screen).
-
After completing all the required fields, the “Submit for Review” button becomes active — click it.