
1. Purpose
It is used to give the client the opportunity to evaluate the quality of the provided consultation. The client receives an email with buttons to rate the quality of the response.
2. Configuration
2.1. Creating the flow
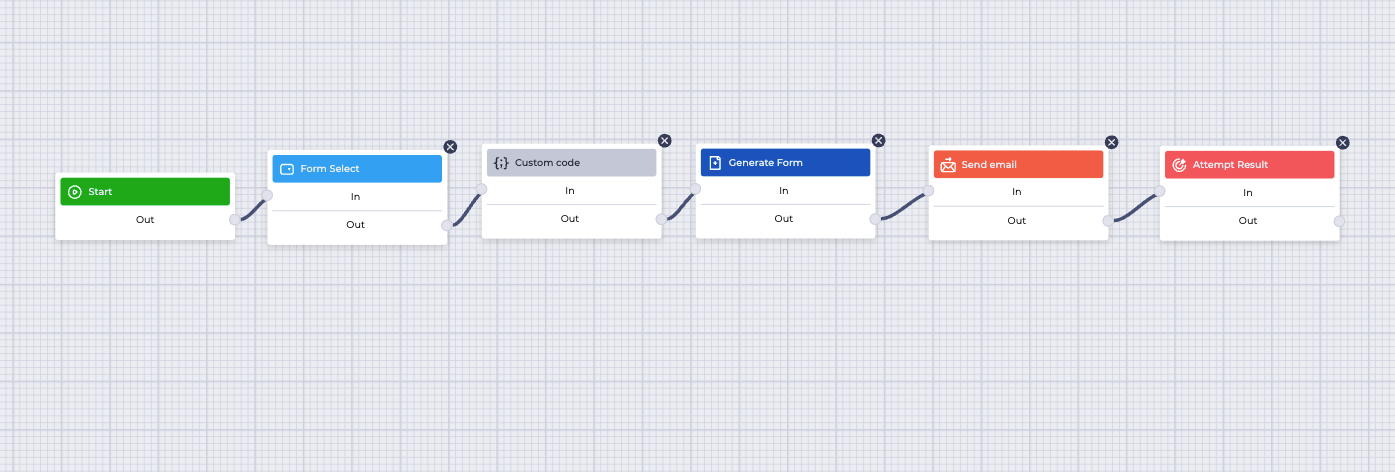
On the workspace, add the components in the following sequence:
Start → Form Select → Custom code → Generate Form → Send email → Attempt Result.
2.2. Configuring the “Form Select” component
-
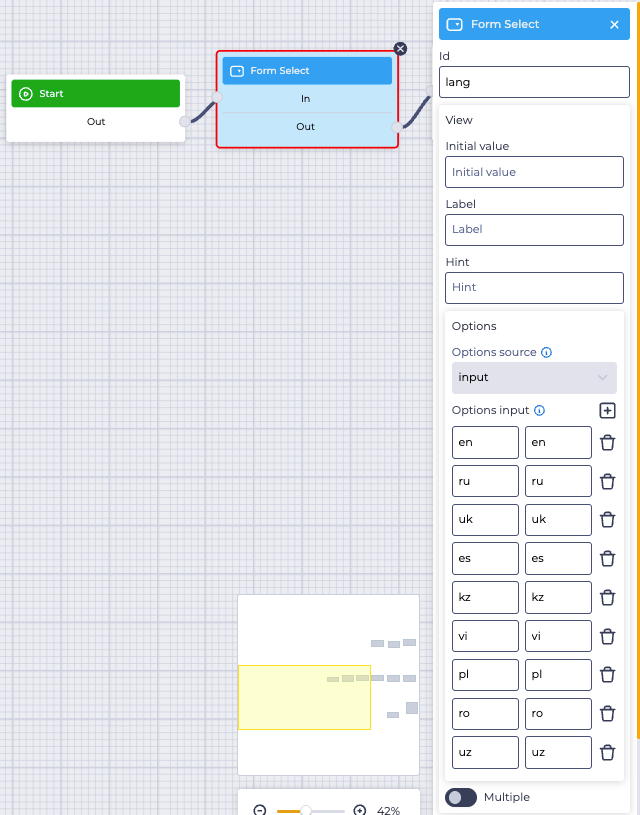
On the toolbar, select the Form Select component and drag it into the flow.
-
In the Id field, enter
lang. -
In the Options source field, select
input. -
Add all available languages to the list (for example: en, ru, uk, es, kz, vi, pl, ro, uz).
2.3. Add the “Custom code” component
-
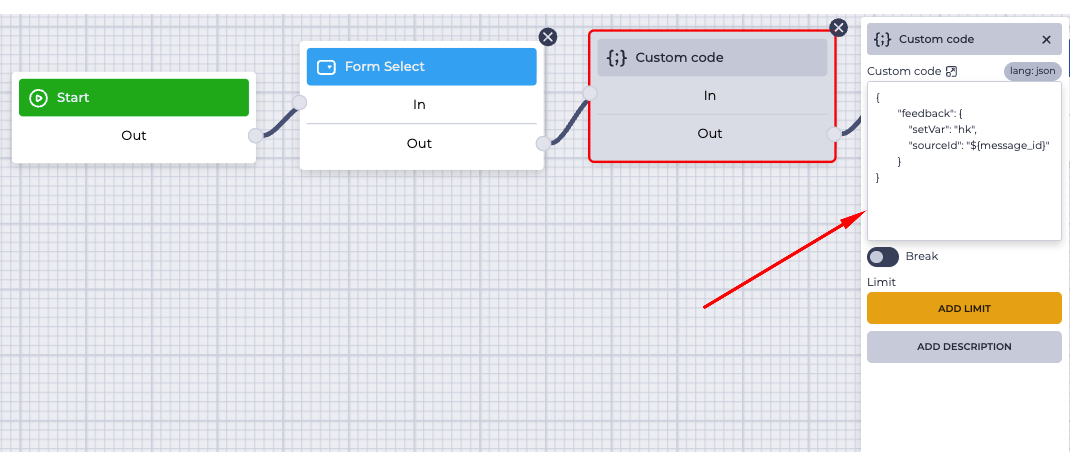
Add the Custom code block to the flow.
-
In the Custom code field, insert the JSON code:
{
    "feedback": {
        "setVar": "hk",
        "sourceId": "${message_id}"
    }
}
2.4. Add the “Generate Form” component
-
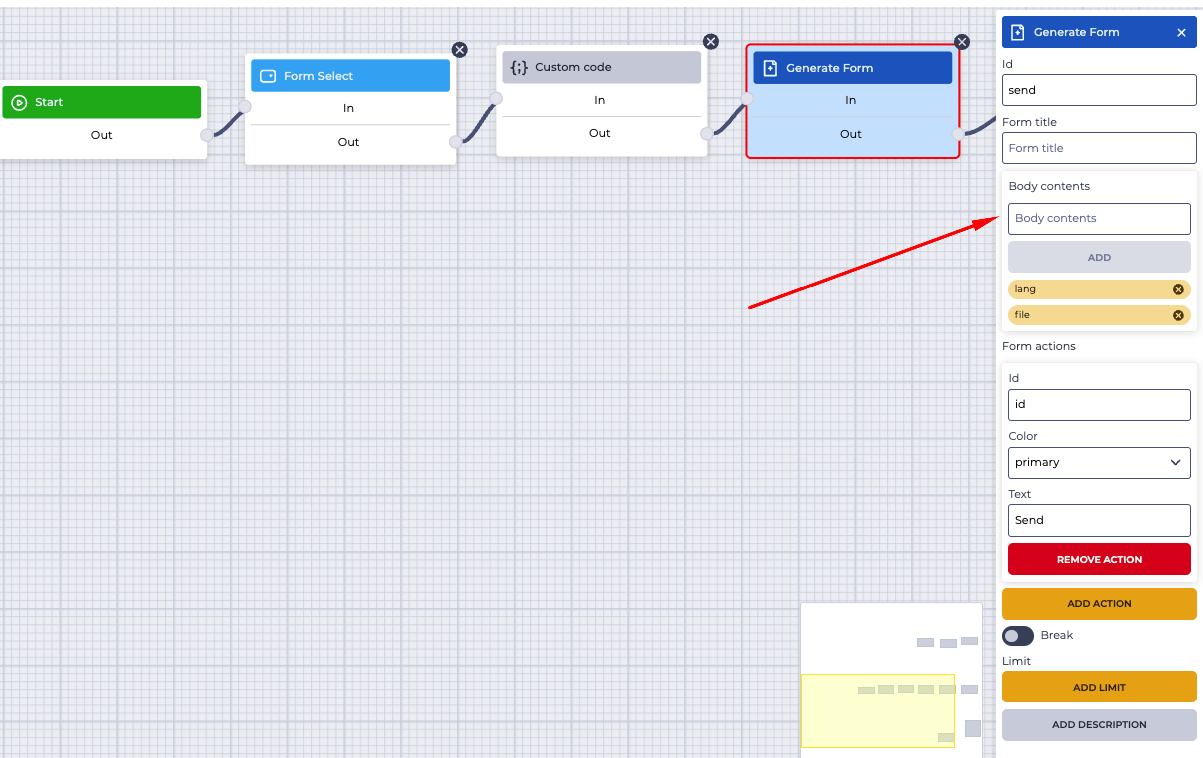
Drag the Generate Form block into the flow.
-
In the Id field, enter
send. -
In the Body contents section, add the variable:
lang. -
In the Form actions section:
-
In the Id field, enter a value (for example,
id). -
In the Text field, enter the button label (for example,
Send). -
Choose the button color, for example,
primary.
-
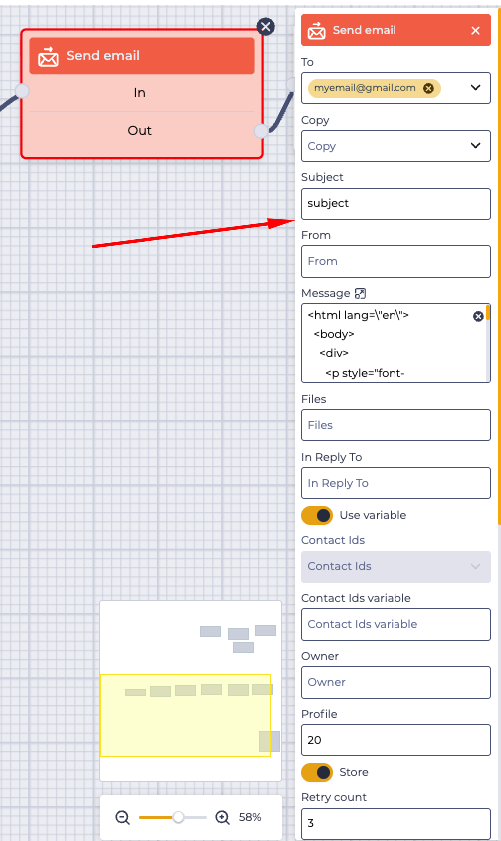
2.5. Add the “Send email” component
-
Drag the Send email block into the flow.
-
Fill in the main fields:
-
To — recipient’s address;
-
Subject — email subject;
-
From — sender’s address;
-
Message — email body in HTML format:
<html lang="en">
  <body>
    <div>
      <p style="font-size:16px;font-weight:300;line-height:24px;color:#000;">
        Good afternoon!
        <br>
        Dear customer, thank you for your request! ${message_id}
        <br>
        Please answer the question. Your opinion is very important to us!
      </p>
      <p style="margin-top:32px;font-size:16px;font-weight:700;line-height:24px;color:#000;">
        Was your question resolved?
      </p>
      <div>
        <a style="margin-right: 32px;" href="https://test.webitel.me/workspace/feedback-page?hk=${hk}&lang=${lang}&rating=1" target="_blank">
          <img style="width:120px" src="IMAGE_LINK_YES"/>
        </a>
        <a href="https://test.webitel.me/workspace/feedback-page?hk=${hk}&lang=${lang}&rating=0" target="_blank">
          <img style="width:120px" src="IMAGE_LINK_NO"/>
        </a>
      </div>
    </div>
  </body>
</html>
Note: the image links must be replaced with the required ones.
-
Enable the Use variable toggle if you want to use a variable for contacts.
-
Enter the email profile ID in the Profile field (for example,
20), which will be used for sending the email. -
Enable the Store toggle to allow outgoing messages to be sent.
-
In the Retry count field, specify the number of attempts to resend the message after a failure (for example,
3). -
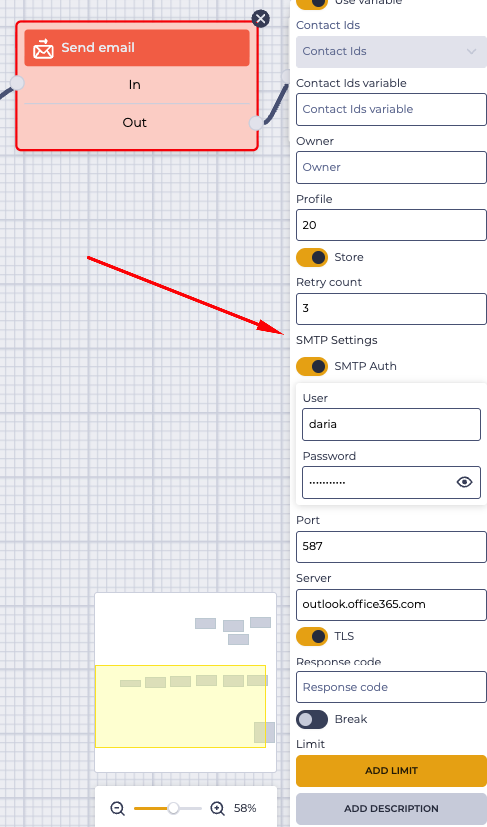
Enable the SMTP Auth toggle. After that, the User and Password fields (your Webitel account data) will be filled automatically.
-
Fill in the parameters:
-
Port (for example,
587) — value taken from the configured email profile; -
Server (for example,
outlook.office365.com) — value taken from the configured email profile.
-
-
Enable the TLS toggle for a secure connection.
2.6. Add the “Attempt Result” component
-
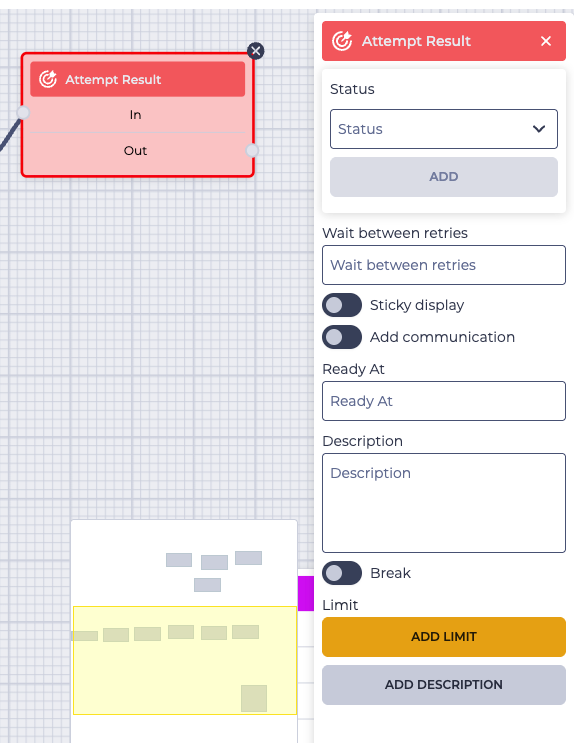
Add the Attempt Result block to the flow. This component is used to check the result of the email sending.
3. Display in Workspace
-
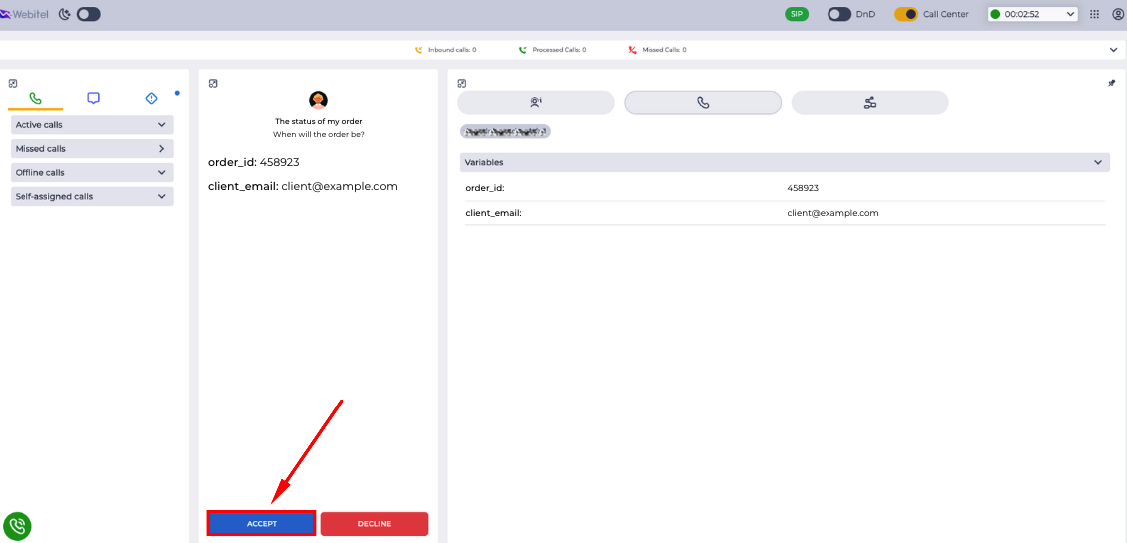
The agent receives a message from the client in Workspace. They click the Accept button (Fig. 8) to take it into work.
-
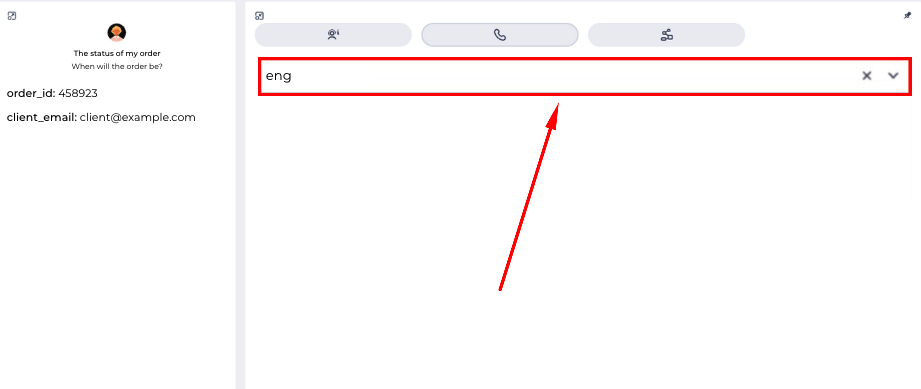
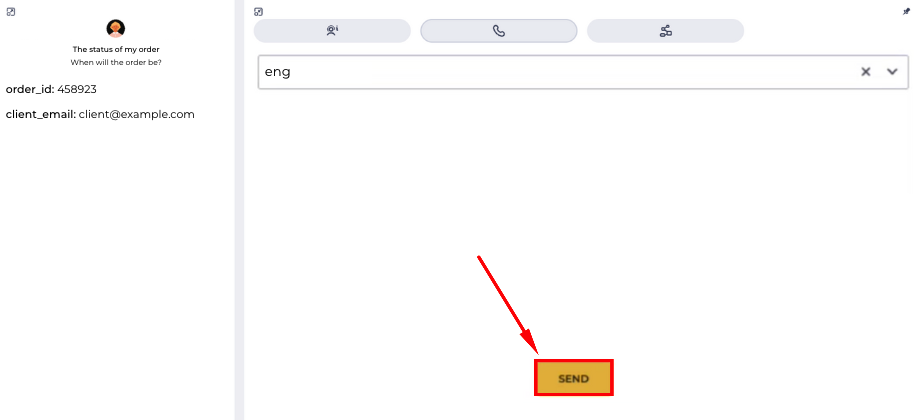
After accepting the message, the post-processing form opens. The agent selects the language (Fig. 9) in which the client will receive the feedback email with evaluation buttons, and then clicks the Send button (Fig. 10).
-
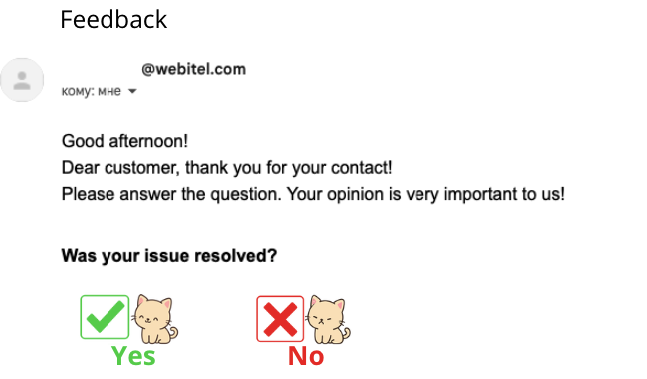
The system sends an email to the client. The email contains the configured text and two buttons with images (Fig. 11).
-
The client clicks one of the buttons to respond. The choice is automatically recorded in the system:
-
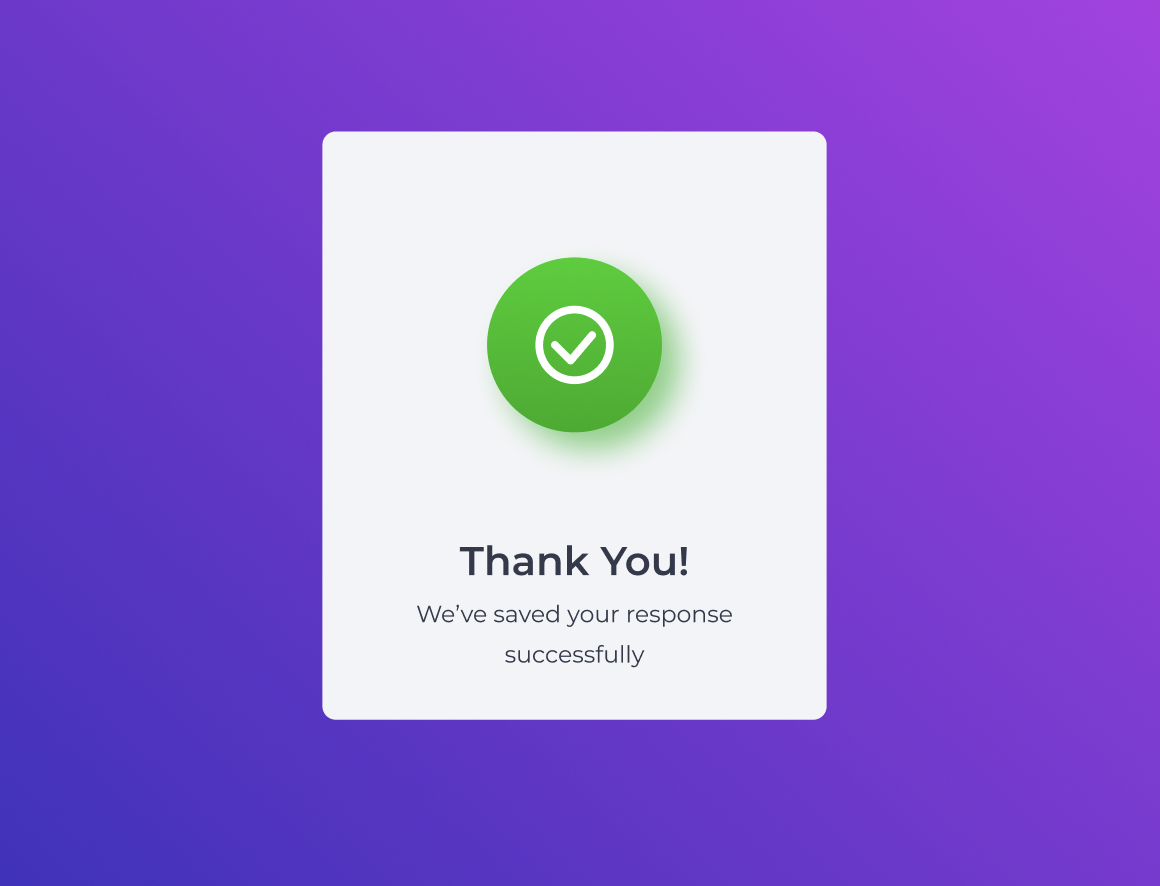
If no evaluation has been submitted yet, the system saves the response and shows the client a page confirming successful submission (Fig. 12).
-
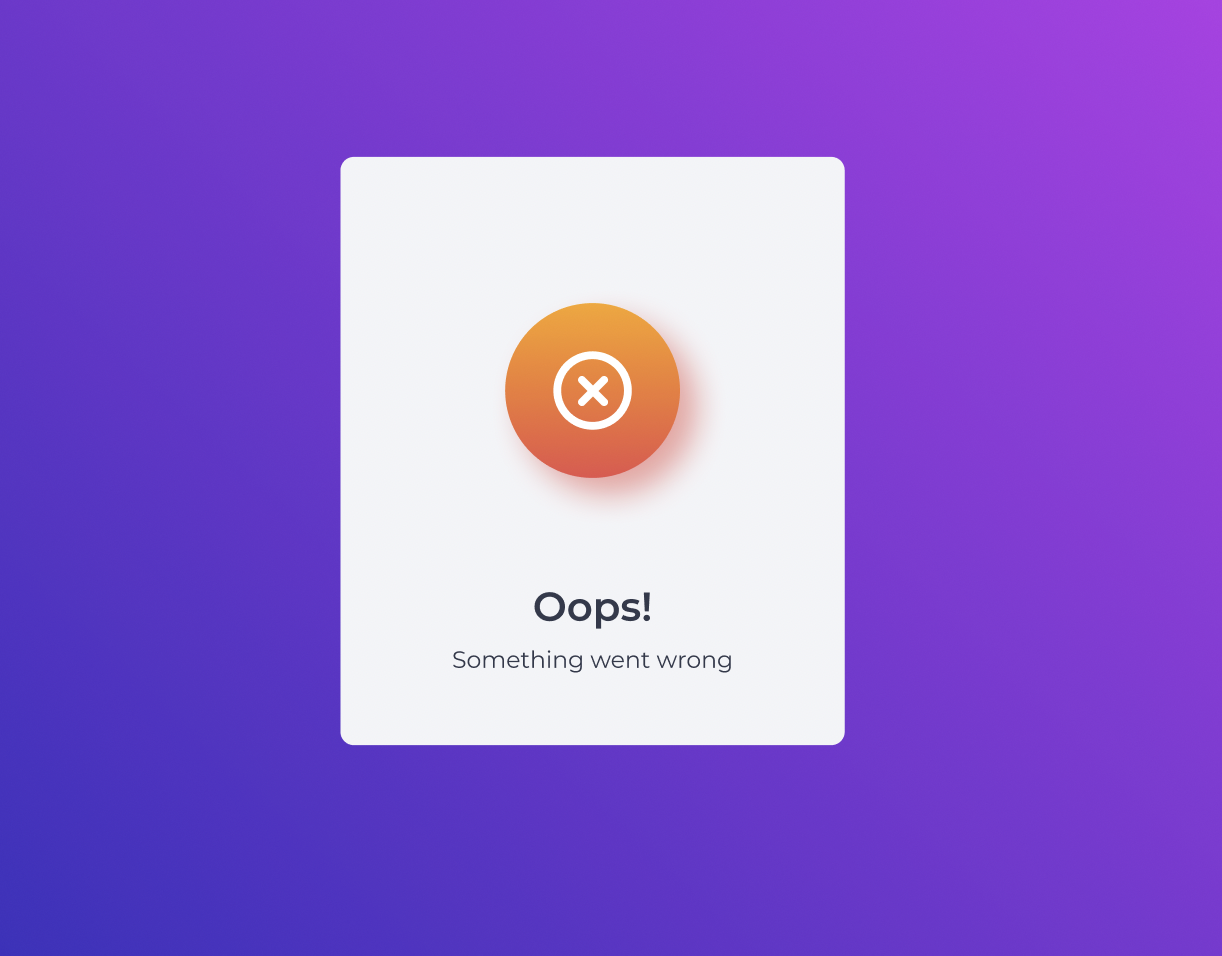
If an evaluation has already been submitted, the system does not accept a repeat response and shows the client an error page (Fig. 13).
Note:
-
The client can submit their evaluation only once.
-
Repeated clicks on the buttons do not change the result.
-
The client’s evaluation does not affect the operator’s evaluation — it is stored separately in the database (in Grafana, convenient for analytics).