
1. Description
It is used to send an email message.
This component is present in flow types like:
-
Voice;
-
Chat;
-
Forms;
-
Service.
The block (Fig.1(1)) is used in space to build the Flow. The settings panel for this component opens (Fig.1(2)) when you click on the block.
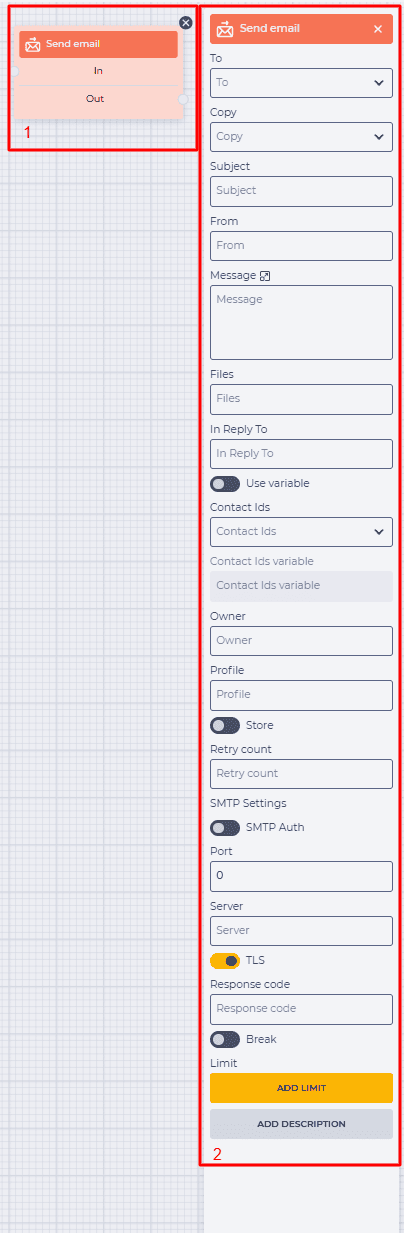
Fig.1. Send email component
1.1. Send email block
The block consists of the following elements:
-
The name of the component;
-
In branch — receiving (connecting with the previous block) branch;
-
Out branch — outgoing (connecting with the following block) branch. When hovering over the Out field, a switch appears. The switch allows this component to be connected to a component that already has a connection.
The presence of an 
Changing the switch position removes the outgoing branch of this component.
The 
1.2. Send email settings panel
It consists of the following elements:
-
To;
-
Copy;
-
Subject;
-
From;
-
Message;
-
Files;
-
In Reply To;
-
Use variable;
-
Contact Ids;
-
Contact Ids variable;
-
Owner;
-
Profile;
-
Store;
-
Retry count;
-
SMTP Settings;
-
Port;
-
Server;
-
TLS;
-
Response code;
-
Break;
-
Limit;
-
Add description.
1.2.1. To
Here you can enter the recipient of the email. You can either enter the recipient's email address or use a variable (e.g., ${variable id}). After entering the address or variable, select the appropriate option from the list or press the ‘Enter’ key on your keyboard.
1.2.2. Copy
Here you can enter additional recipients.
1.2.3. Subject
The subject of the message is entered here.
1.2.4. From
Here, you enter the email sender.
1.2.5. Message
The body of the message is entered in this field.
1.2.6. Files
The identifiers of the files from the database that are to be sent should be entered in this field.
1.2.7. In Reply To
It is used to be able to maintain a conversation, that is, to quote previous messages in response to them.
The response will be sent as a separate new message if the field is blank.
To maintain the conversation, you need to specify a variable in the In Reply To field that contains the ID of the message you are replying to — ${message_id}.
This variable contains the identifier of the message to be answered.
1.2.8. Use variable
To associate the email with a Contact, its identifier must be specified.
The Use variable switch determines how the Contact identifiers are set:


1.2.9. Contact Ids
The field is active when the Use variable switch is in the off position.
The Contact ID is entered here.
1.2.10. Contact Ids variable
The field is active when the Use variable switch is in the on position.
The Contact ID is passed in a variable.
1.2.11. Owner
The ID of the Webitel User sending the email.
1.2.12. Profile
The Email profile identifier that is used to send the email message.
1.2.13. Store
A switch that controls whether an outbound message can be sent.
1.2.14. Retry count
The number of retries to send a message after an unsuccessful sending.
1.2.15. SMTP Settings
It is designed for authorization.
In the on position, two additional fields are opened for entering data for authorization:
-
User;
-
Password.
1.2.16. Port
Mail server settings.
Here you can enter the port in this field.
1.2.17. Server
Mail server settings.
Here you can enter the server in this field.
1.2.18. TLS
TLS (Transport Layer Security) is a protocol for encrypting email to protect privacy. TLS prevents unauthorized access to emails during transmission over the Internet.


1.2.19. Response code
Enter the name of the variable that will be used to store responses from SMTP in case of receiving errors in this field.
1.2.20. Break
Responsible for the completion of the flow execution.
-

-

1.2.21. Limit
It is intended to determine the maximum number of passes through this component.
The failover branch appears in the edited component when the limit is set 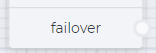
The failover branch will be used if more passes are passed through the component than entered in the Max field.
Clicking on the Add Limit button adds a Max field and a Delete limit button.
The number of possible passes is indicated in the Max field.
Clicking on the Delete limit button removes the limit and returns the Add limit button.
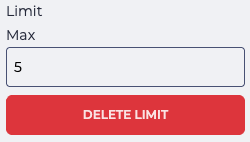
Fig. 2. Setting a limit
1.2.22. Add description
When you click the Add description button, a Description field and a Delete description button will be added.
The Description field is used to add comments to the component.
Clicking the Delete description button removes the description field and brings back the Add description button.
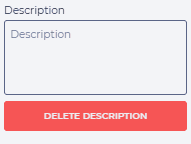
Fig. 3. Add description