1. Description
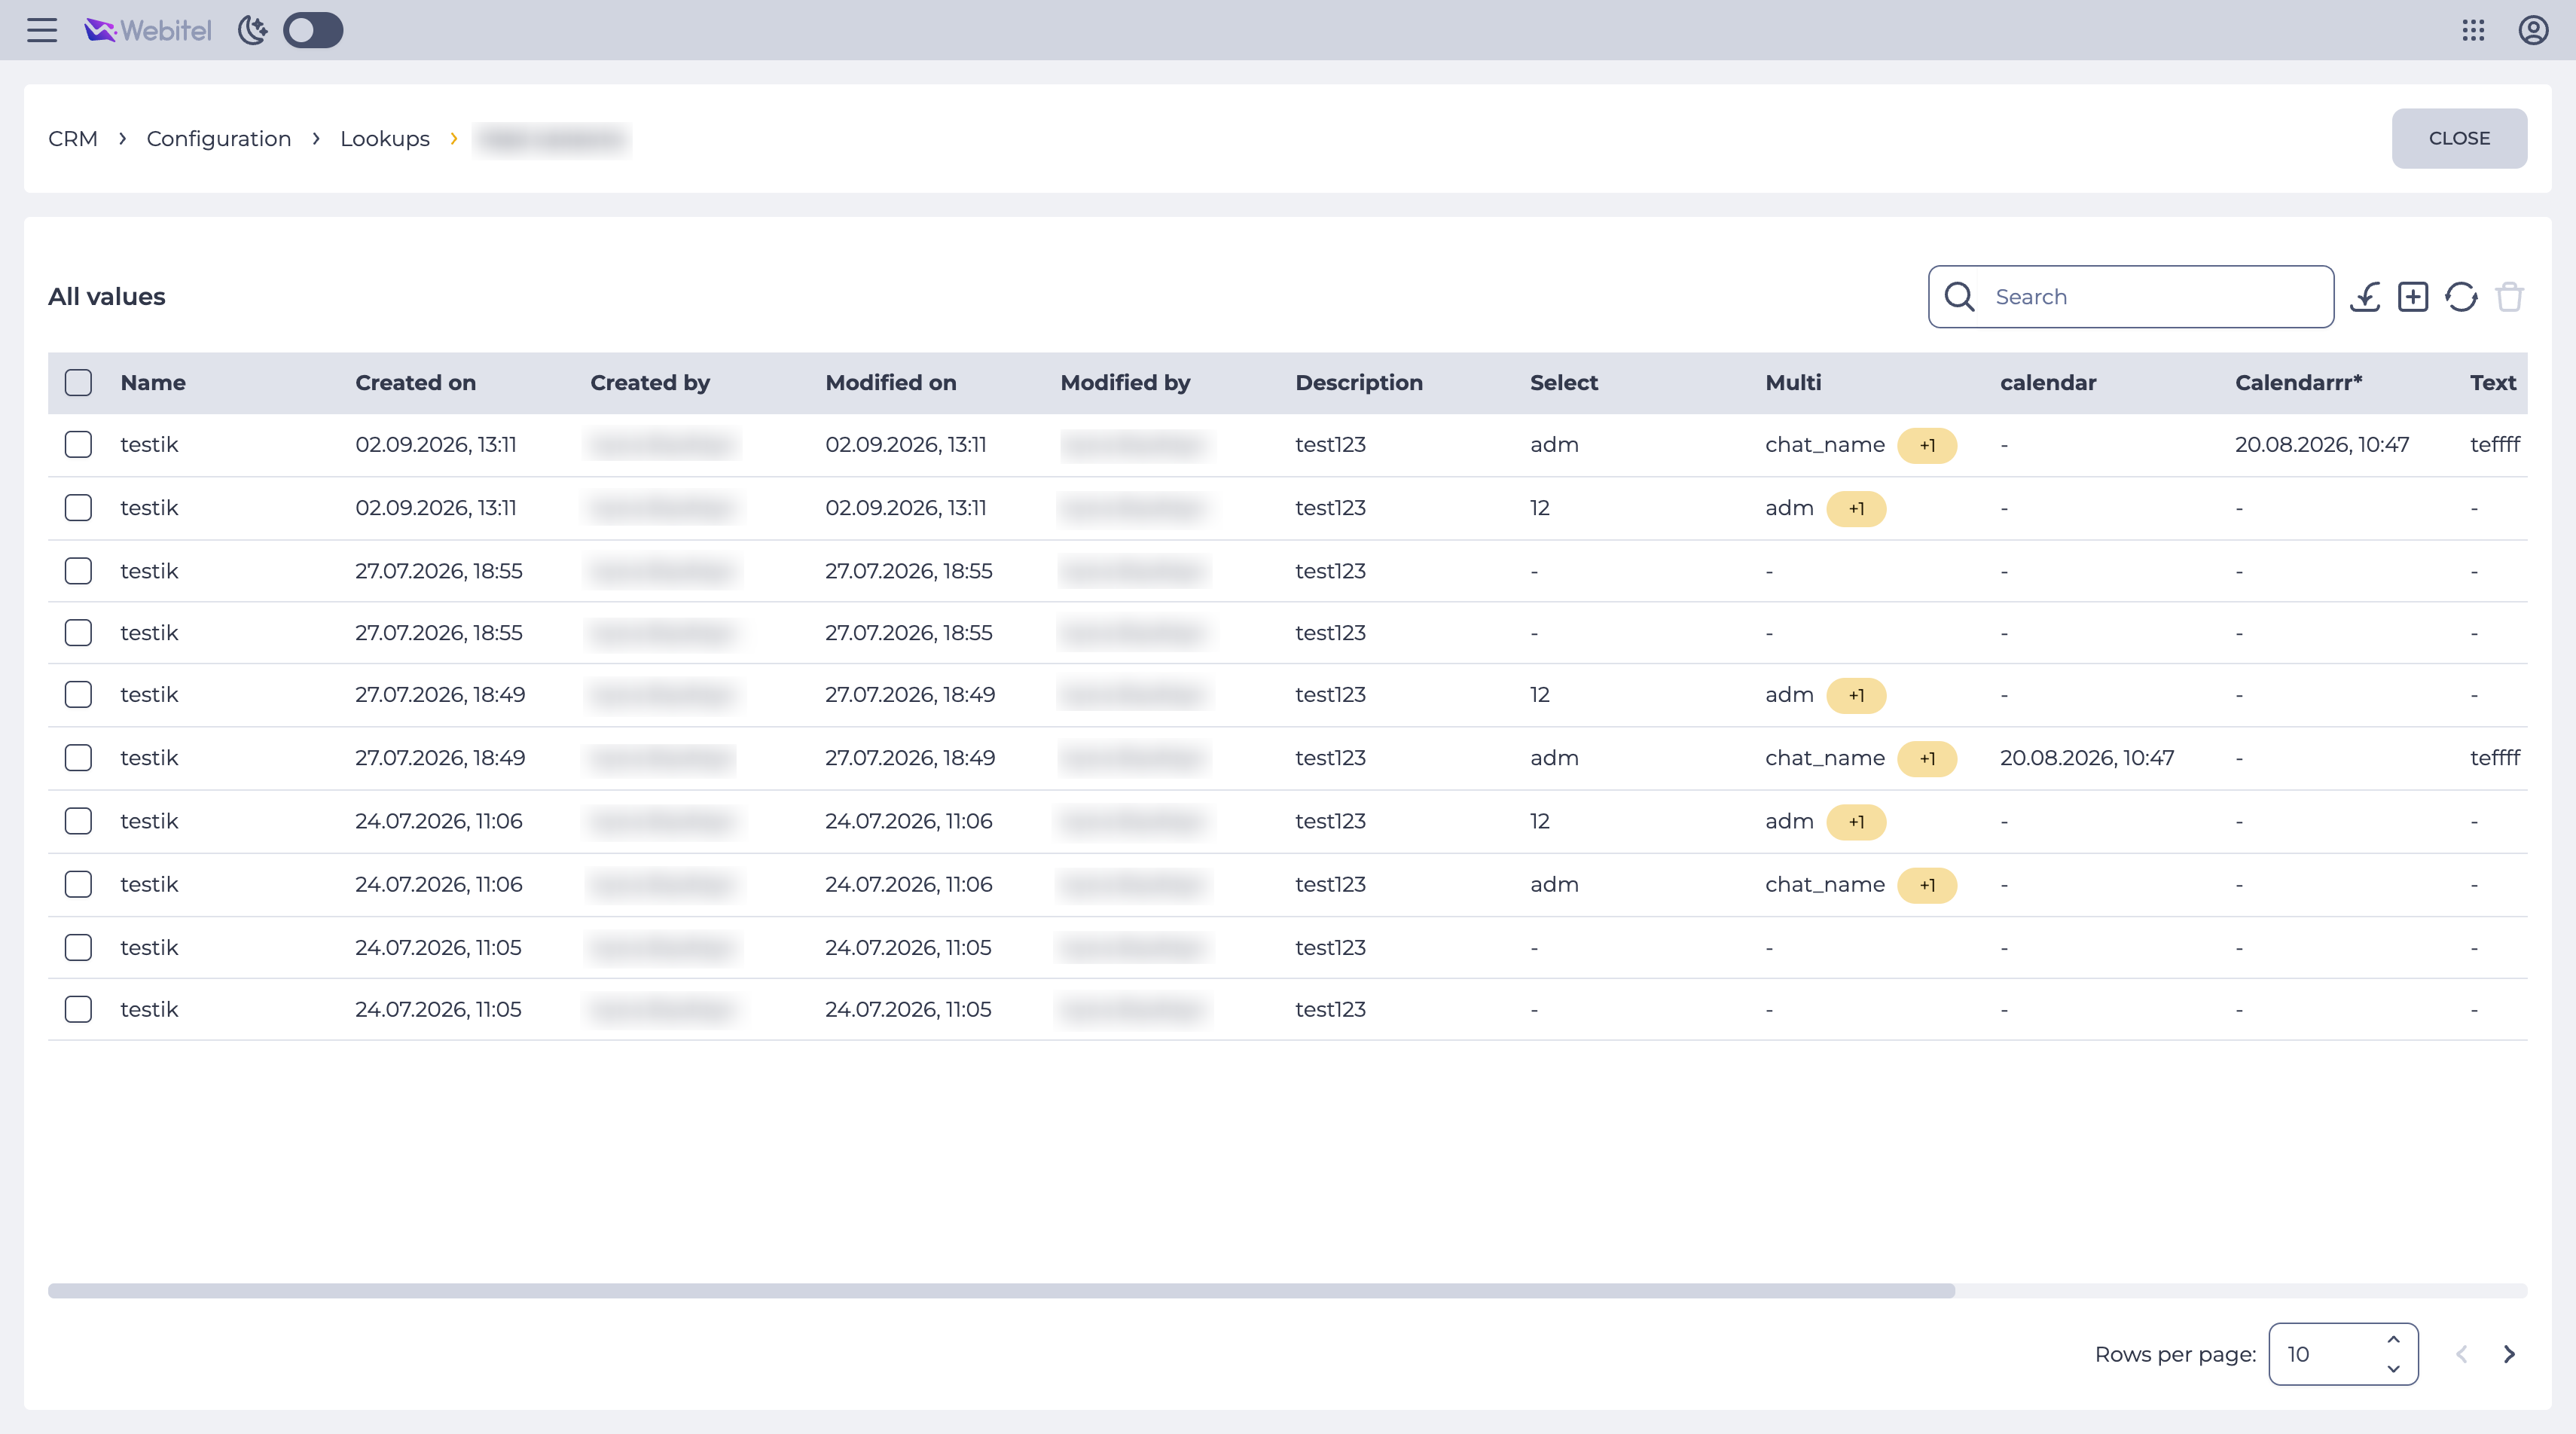
The page displays a list of values (records) of the selected custom lookup (Fig. 1).
Consists of the following elements:
-
Records registry (Fig. 1.(1));
-
Search field (Fig. 1.(2));
-
Import tool (Fig. 1.(3));
-
Add tool (Fig. 1.(4));
-
Records registry refresh tool (Fig. 1.(5));
-
Delete tool (Fig. 1.(6));
-
Pagination (Fig. 1.(7)).
1.1. Records registry
The registry is a list of values of this lookup. Each record consists of a set of fields:
-
Checkbox;
-
System columns;
-
Custom columns (according to the settings in the "Columns" tab);
-
Edit tool;
-
Delete tool.
1.1.1. Checkbox
Used to select one or more records. After selecting one or more records, an additional delete tool appears next to the search field. If you check the checkbox in the header, all records on the page will be selected.
1.1.2. System columns
Displayed for each lookup by default:
-
Name;
-
Created — the date and time the record was created;
-
Created by — the user who created the record;
-
Modified — the date and time of the last change to the record;
-
Modified by — the user who last modified the record;
-
Description.
1.1.3. Custom columns
Displayed according to the list and order set in the "Columns" tab. The display format of the value depends on the column type:
-
Text, Number — the entered value is displayed;
-
Select — the selected value is displayed;
-
Multiselect — one selected value and the number of remaining ones are displayed (for example, "Northern +1");
-
Calendar — the date is displayed in the dd.mm.yyyy, hh:mm format;
-
Boolean — the switch state is displayed (on


If a value is not set, "-" is displayed in the corresponding column.
1.1.4. Edit tool
Opens the record detail page (see section 2), where changes can be made.
1.1.5. Delete tool
Used to remove an object with confirmation through a modal window. When hovering over the delete button ( 
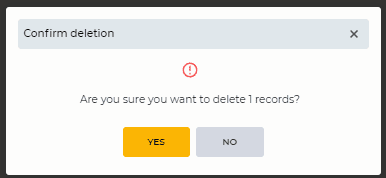
Fig. 2. "Confirm Deletion" modal window
1.2. Search field
Search is performed by the "Name" column.
It consists of an input field and a close button ( 
1.3. Import tool
Used to upload lookup values from a CSV file.
To import, click the "Import" icon (Fig. 1.(3)). The file system window opens for file selection.
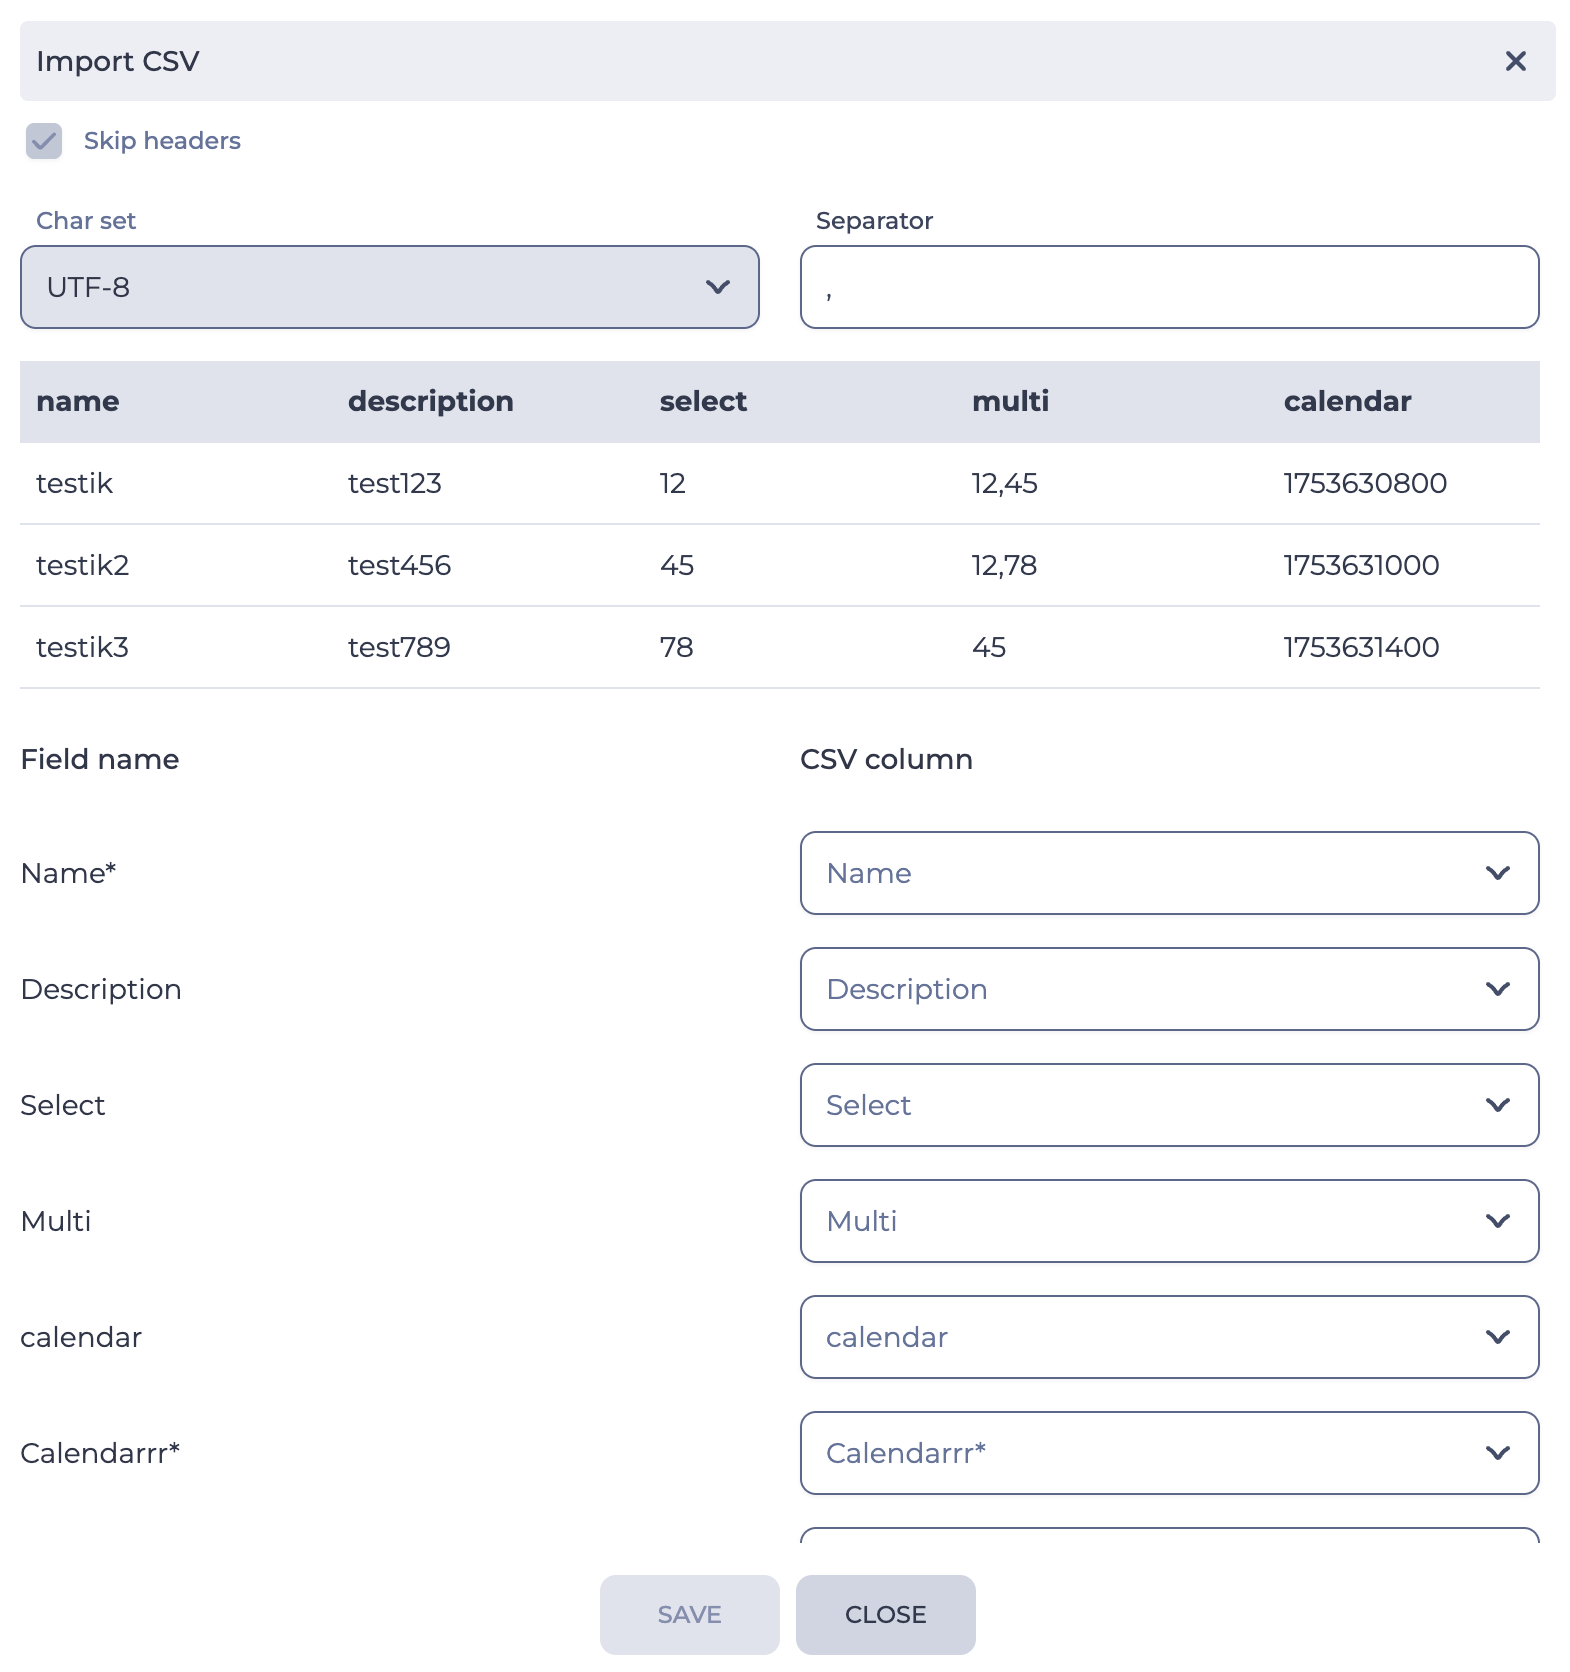
After selecting a file in CSV format, the "Import CSV" modal window opens (Fig. 3), which contains:
-
the "Skip headers" checkbox — allows skipping the file's headers;
-
the "Encoding" field — the file's encoding. "UTF-8" is used by default;
-
the "Delimiter" field — the delimiter used in the file. "," is used by default;
-
a preview block — displays the column names and data from the file being imported;
-
a field matching block "Field Name" / "CSV Column" — for each lookup field, the corresponding file column is selected. The "Name" field is required for matching. The "

The modal window contains buttons:
-
"Save" — imports the values from the file according to the set matches. The user returns to the records registry;
-
"Close" — closes the window without importing. The user returns to the records registry.
Please note! For columns of the type:
-
Select — the value is set by the name of the record in the linked lookup. The corresponding record is searched case-insensitively;
-
Multiselect — the value is set as an array of record names (for example: "
Lviv;Kyiv;Odesa"); -
Calendar — the value is set in the form of a Unix Timestamp;
-
Boolean — the value determines the switch state: true (on) or false (off).
Example of a file for import:
|
name |
description |
Contract Number (Text) |
Category (Select) |
Service Regions (Multiselect) |
Partnership Start Date (Calendar) |
Annual Purchase Volume (Number) |
Active Partner (Boolean) |
|---|---|---|---|---|---|---|---|
|
Techsupply LLC |
Equipment supplier |
AG-2024-015 |
Equipment |
"Northern;Eastern" |
1710498000 |
1250000 |
true |
|
Ivanenko FLP |
Materials supplier |
AG-2023-089 |
Materials |
"Western" |
1698876000 |
340000 |
true |
|
Service+ LLC |
Services supplier |
AG-2025-003 |
Services |
"Southern;Western;Eastern" |
1737331200 |
87500 |
false |
1.4. Add tool
To create a new record, use the "Add" button (Fig. 1.(4)), after clicking which the record detail page opens (see section 2).
1.5. Records registry refresh tool
The records registry table is refreshed by clicking the refresh button (Fig. 1.(5)).
1.6. Delete tool
The delete button (Fig. 1.(6)) becomes active after selecting records using the checkbox. Clicking the button opens a confirmation modal window.
1.7. Pagination
It consists of the Rows per page field, which indicates the number of entries (it is possible to set from 1 to 1000) per page, and forward and backward buttons for switching pages.
2. Record Detail Page
2.1. Description
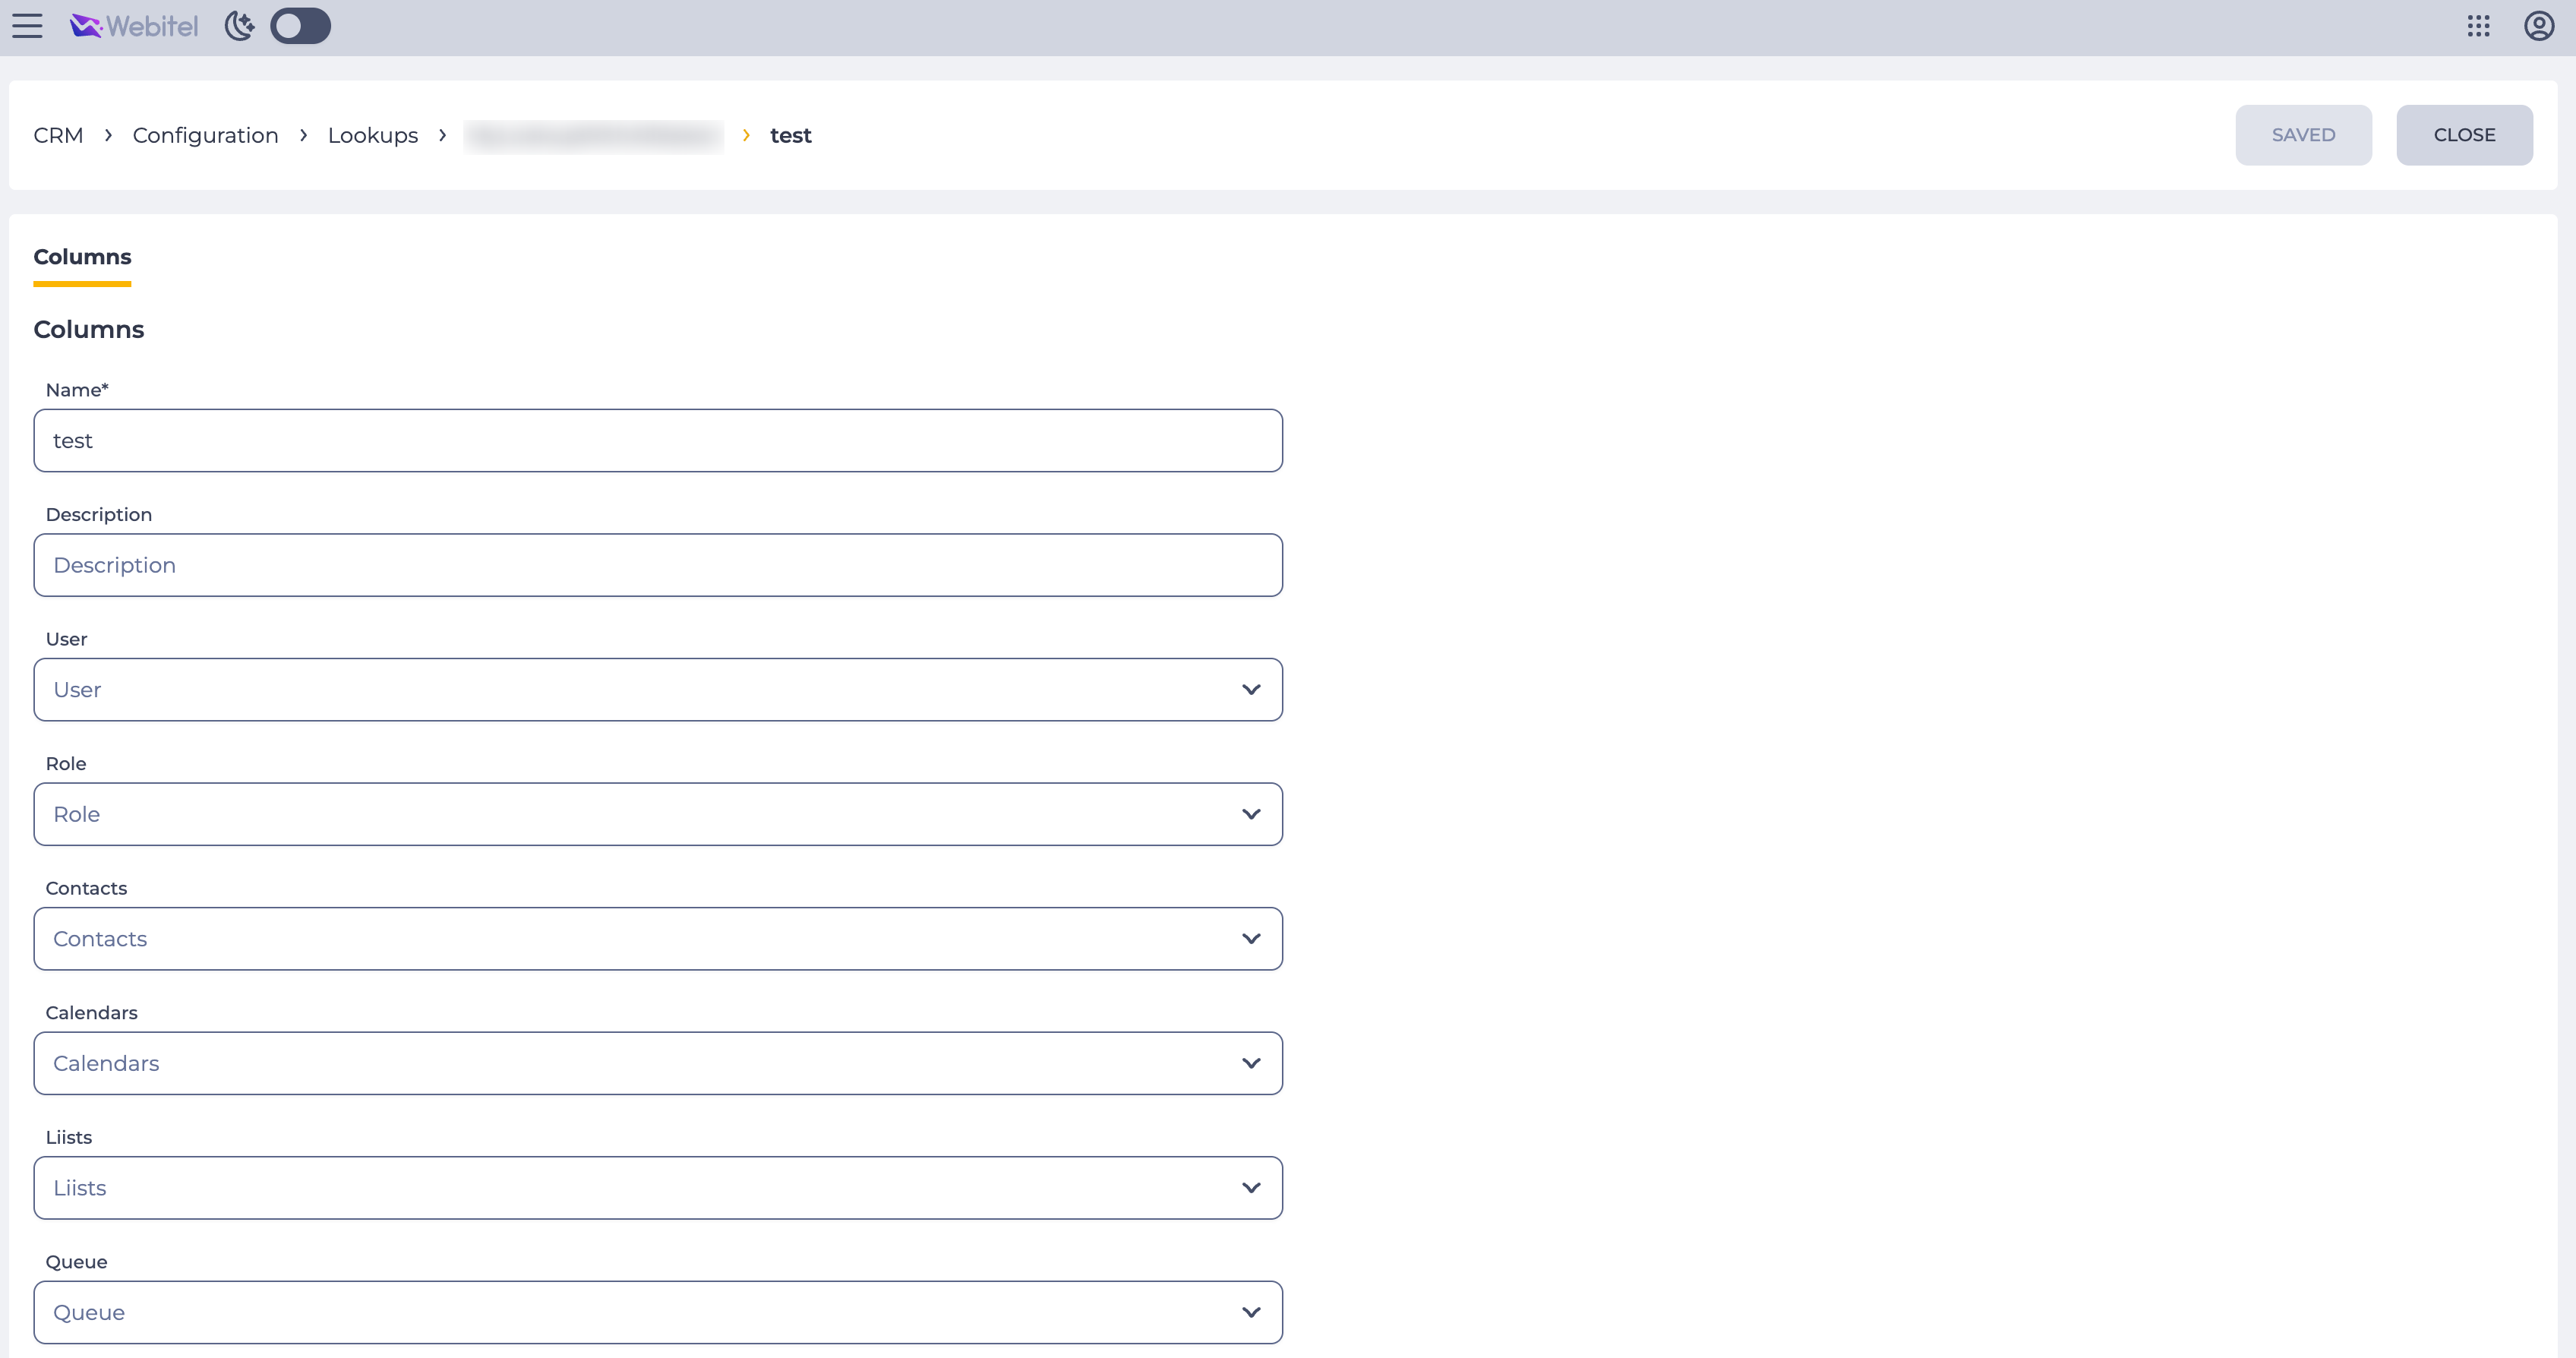
Opens after clicking the "Add" button or the record edit tool in the registry (Fig. 4). Contains the "Columns" tab, which displays the fields to be filled in according to the structure set in the lookup configuration.
Consists of the following elements:
-
the "Name" field — required;
-
the "Description" field;
-
Custom fields — the type and requirement of each is determined in the lookup configuration (Columns tab):
-
a field of type Text — a text value is entered;
-
a field of type Number — a numeric value is entered (with increase/decrease arrows);
-
a field of type Select — a dropdown list appears for selecting a single value;
-
a field of type Multiselect — a dropdown list appears for selecting multiple values;
-
a field of type Calendar — a date and time is selected in the dd/mm/yyyy hh:mm format;
-
a field of type Boolean — a switch with the values on/off.
-
-
the "Save" button — becomes active after changes are made and saves the data;
-
the "Close" button — ends work with the page without saving changes and returns to the records registry.