
1. Description
Triggers are automation tools in Webitel that allow launching a specified flow (process) in response to a certain event or at a specific time.
Depending on the type, a trigger can:
-
be time-based (At Time), for example, every day at 09:00 or every minute — for periodic reminders, technical actions, etc.;
-
respond to an event (On Event), for example, the creation or editing of a case, adding a comment, or deleting a file.
For the trigger to function correctly, it must be linked to a flow that performs the required action (e.g., sends a notification or updates a status). A trigger cannot be created without an assigned flow.
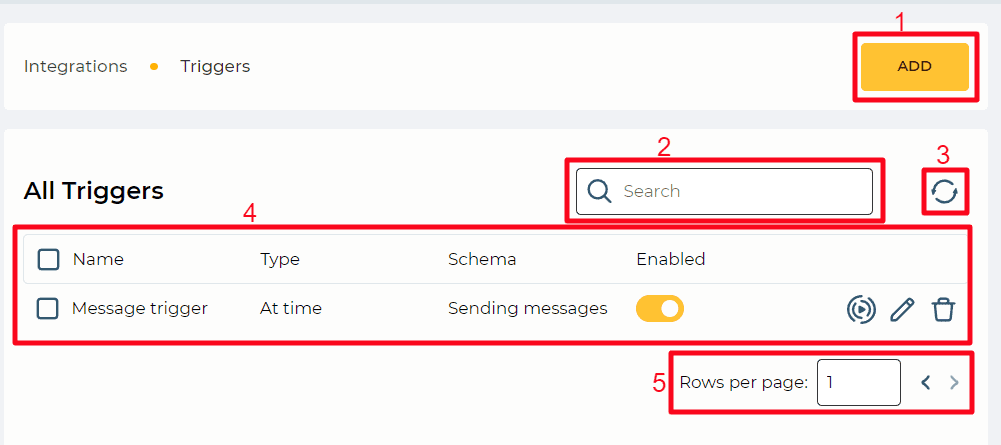
It consists of the following elements:
-
Creation tool (Fig. 1.(1));
-
Search field (Fig. 1.(2));
-
Refresh button (Fig. 1.(3));
-
Registry (Fig. 1.(4));
-
Pagination (Fig. 1.(5)).
1.1. Creation tool
Use the Add button (Fig.1(1)) to create a new object. Access to a General tab opens after clicking. You can open tabs for existing Trigger through the entries editing tool (see paragraph 1.4.7).
Tabs:
1.2. Search field
The search is performed on the Name column.
It consists of an input field and a close button ( 
1.3. Refresh button
Updating the register table is performed by clicking on the refresh button - 
1.4. Registry
The registry is a list of entries of existing objects in this section, each of which consists of a set of fields:
-
Checkbox;
-
Name;
-
Type;
-
Schema;
-
Enabled;
-
Manual start button;
-
Editing tool;
-
Removal tool.
If there is no entry on the page, then an additional Add button is displayed in the register, the functionality of which duplicates the Add button in paragraph 1.1.
1.4.1. Checkbox
Used to select one or more entries. An additional removal tool appears next to the search field after selecting one or more entries. Information about the number of entries chosen for deletion appears when you hover over this tool. When you click on it, a modal confirmation window appears.
It contains the Yes, No, and close ( 
-
Clicking the Yes button deletes the entries.
-
Clicking the No button closes the modal window, and the entries are not deleted.
All records on the page will be selected if you select the checkbox in the header.
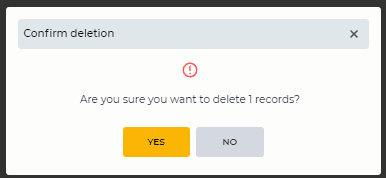
Fig. 2. Confirm deletion modal window
1.4.2. Name
The name of the Trigger are displayed here. Clicking on the name opens the Trigger's General tab (if you have edit rights).
1.4.3. Type
The Trigger type is displayed here.
Available types:
-
At Time — the Trigger fires at the set time. The time is set on the General tab in the Expression field.
-
On Event – is activated after a specific event occurs in the system. The event is selected on the General tab, in the Event field.
1.4.4. Schema
Displays the name of the Flow schema that is being used.
Clicking on the name of the Flow scheme opens the General tab of this Flow scheme if the Flow scheme type is Code, or the graphical editor, if the Flow scheme type is Diagram.
1.4.5. Enabled
A switch that is responsible for enabling and disabling the Trigger profile by the position:


1.4.6. Manual start button
Clicking the button to do the Trigger regardless of the Enabled switch position and auto Trigger settings.
Manual triggering does not cancel automatic triggering if the Enabled switch is on.
1.4.7. Editing tool
The General tab opens after clicking on this button - 
1.4.8. Removal tool
Used to remove an object with confirmation through a modal window. When hovering over the delete button ( 
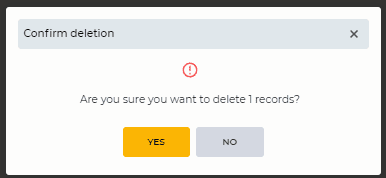
Fig. 3. Confirm deletion modal window
1.5. Pagination
It consists of the Rows per page field, which indicates the number of entries (it is possible to set from 1 to 1000) per page, and forward and backward buttons for switching pages.
2. Opportunities
2.1. Create a new Trigger
|
Goal |
Create a new Trigger |
|---|---|
|
Preconditions |
|
|
Steps |
|
|
Result |
Data saved. The Trigger is created. |
2.2. Delete a Trigger
|
Goal |
Delete a Trigger |
|---|---|
|
Preconditions |
|
|
Steps
|
|
|
Result |
The modal window closes. The Trigger is removed. |

2.3. Delete several Triggers
|
Goal |
Delete several Triggers |
|---|---|
|
Preconditions |
|
|
Steps
|
|
|
Result |
The modal window closes. Triggers are removed. |
2.4. Edit a Trigger
|
Goal |
Edit a Trigger |
|---|---|
|
Preconditions |
|
|
Steps
|
|
|
Result |
Data saved. |
2.5. Enable/disable Trigger
|
Goal |
Enable a Trigger |
|---|---|
|
Preconditions |
|
|
Steps
|
|
|
Result |
The Trigger is enabled |
2.6. Run a Trigger manually
|
Goal |
Run a Trigger manually |
|---|---|
|
Preconditions |
|
|
Steps
|
|
|
Result |
The trigger started manually. |
