
1. Description
This section is designed to connect authentication providers for user single sign-on (SSO) login. Multiple connection profiles can be configured.
Access to the section and the ability to work with profiles is governed by access permissions for the SSO object and Applications.
Consists of the following elements:
-
Records registry (Fig. 1.(1));
-
Create tool (Fig. 1.(2));
-
Search field (Fig. 1.(3));
-
Records registry refresh tool (Fig. 1.(4));
-
Delete tool (Fig. 1.(5));
-
Pagination (Fig. 1.(6)).
.png?cb=d7f512116918f3a77776423e45b723eb)
1.1. Records registry
The registry is a list of SSO profiles connected in the system, each consisting of the following fields:
-
Checkbox;
-
Name column;
-
Provider column;
-
State column;
-
Edit tool;
-
Delete tool.
1.1.1. Checkbox
Used to select one or more entries. An additional removal tool appears next to the search field after selecting one or more entries. Information about the number of entries chosen for deletion appears when you hover over this tool. When you click on it, a modal confirmation window appears.
It contains the Yes, No, and close ( 
-
Clicking the Yes button deletes the entries.
-
Clicking the No button closes the modal window, and the entries are not deleted.
All records on the page will be selected if you select the checkbox in the header.
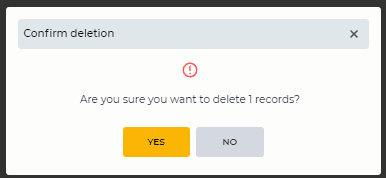
Fig. 2. Confirm deletion modal window
1.1.2. Name column
Displays the connection profile's name.
1.1.3. Provider column
Displays the authentication provider's icon. The icon is set automatically by the system and cannot be edited by the user.
1.1.4. State column
Contains a toggle switch responsible for enabling and disabling the SSO profile, according to the switch position:
-

-

By default, the profile is disabled.
If the profile is enabled, the user is presented with an SSO authentication option on the login page — provided that the corresponding value of the login_options system setting is also configured (Admin → System → Configuration).
1.1.5. Edit tool
The General tab opens after clicking on this button - 
1.1.6. Delete tool
Used to remove an object with confirmation through a modal window. When hovering over the delete button ( 
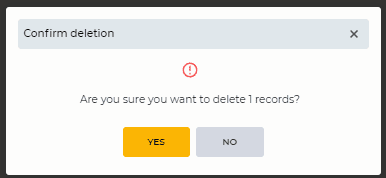
Fig. 3. Confirm deletion modal window
1.2. Create tool
To create a new connection profile, use the Add button, which opens access to the General detail page.
1.3. Search field
Search is performed by the Name column.
It consists of an input field and a close button ( 
1.4. Records registry refresh tool
Updating the register table is performed by clicking on the refresh button - 
1.5. Delete tool
Used to remove an object with confirmation through a modal window. When hovering over the delete button (
Fig. 4. Confirm deletion modal window
1.6. Pagination
It consists of the Rows per page field, which indicates the number of entries (it is possible to set from 1 to 1000) per page, and forward and backward buttons for switching pages.
2. Opportunities
2.1. Creating an SSO profile
|
Goal |
Create a new SSO connection profile |
|---|---|
|
Preconditions |
|
|
Steps:
|
|
|
Result |
Data is saved. |
2.2. Deleting an SSO profile
|
Goal |
Delete an SSO profile |
|---|---|
|
Preconditions |
|
|
Steps:
|
|
|
Result |
The modal window closes. The profile is deleted. |
2.3. Deleting multiple SSO profiles
|
Goal |
Delete several SSO profiles |
|---|---|
|
Preconditions |
|
|
Steps:
|
|
|
Result |
The modal window closes. The selected profiles are deleted. |
2.4. Editing SSO profile parameters
|
Goal |
Edit SSO profile parameters |
|---|---|
|
Preconditions |
|
|
Steps:
|
|
|
Result |
Data is saved. |
2.5. Enabling an SSO profile
|
Goal |
Enable an SSO profile |
|---|---|
|
Preconditions |
|
|
Steps:
|
|
|
Result |
Profile is enabled. |