
1. Description
The Client info tab becomes available on inbound or outbound calls and chats. The name of the Queue, if the communication is from the Queue, and blocks with information about the client are displayed (Fig.1):
-
Client;
-
Member description;
-
Call variables.
Each block has a button to expand and collapse it:


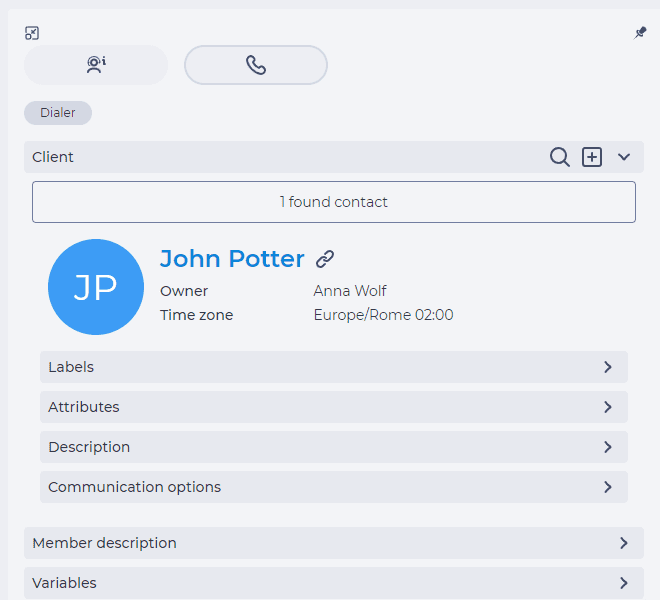
When calling, identification is based on the Contact's phone number. The contact's phone number is displayed on the Phones tab on the Contact's page.
When chatting, identification is based on the Contact's communication channel identifier. The contact's communication channel identifier is displayed on the Messaging tab on the contact's page.
1.1. Client
If there is no Contact for the current number, the corresponding information is displayed. After accepting a call or chat, the search and add options become available.
The Add button opens the form for adding a new Contact with this number (Fig. 2).
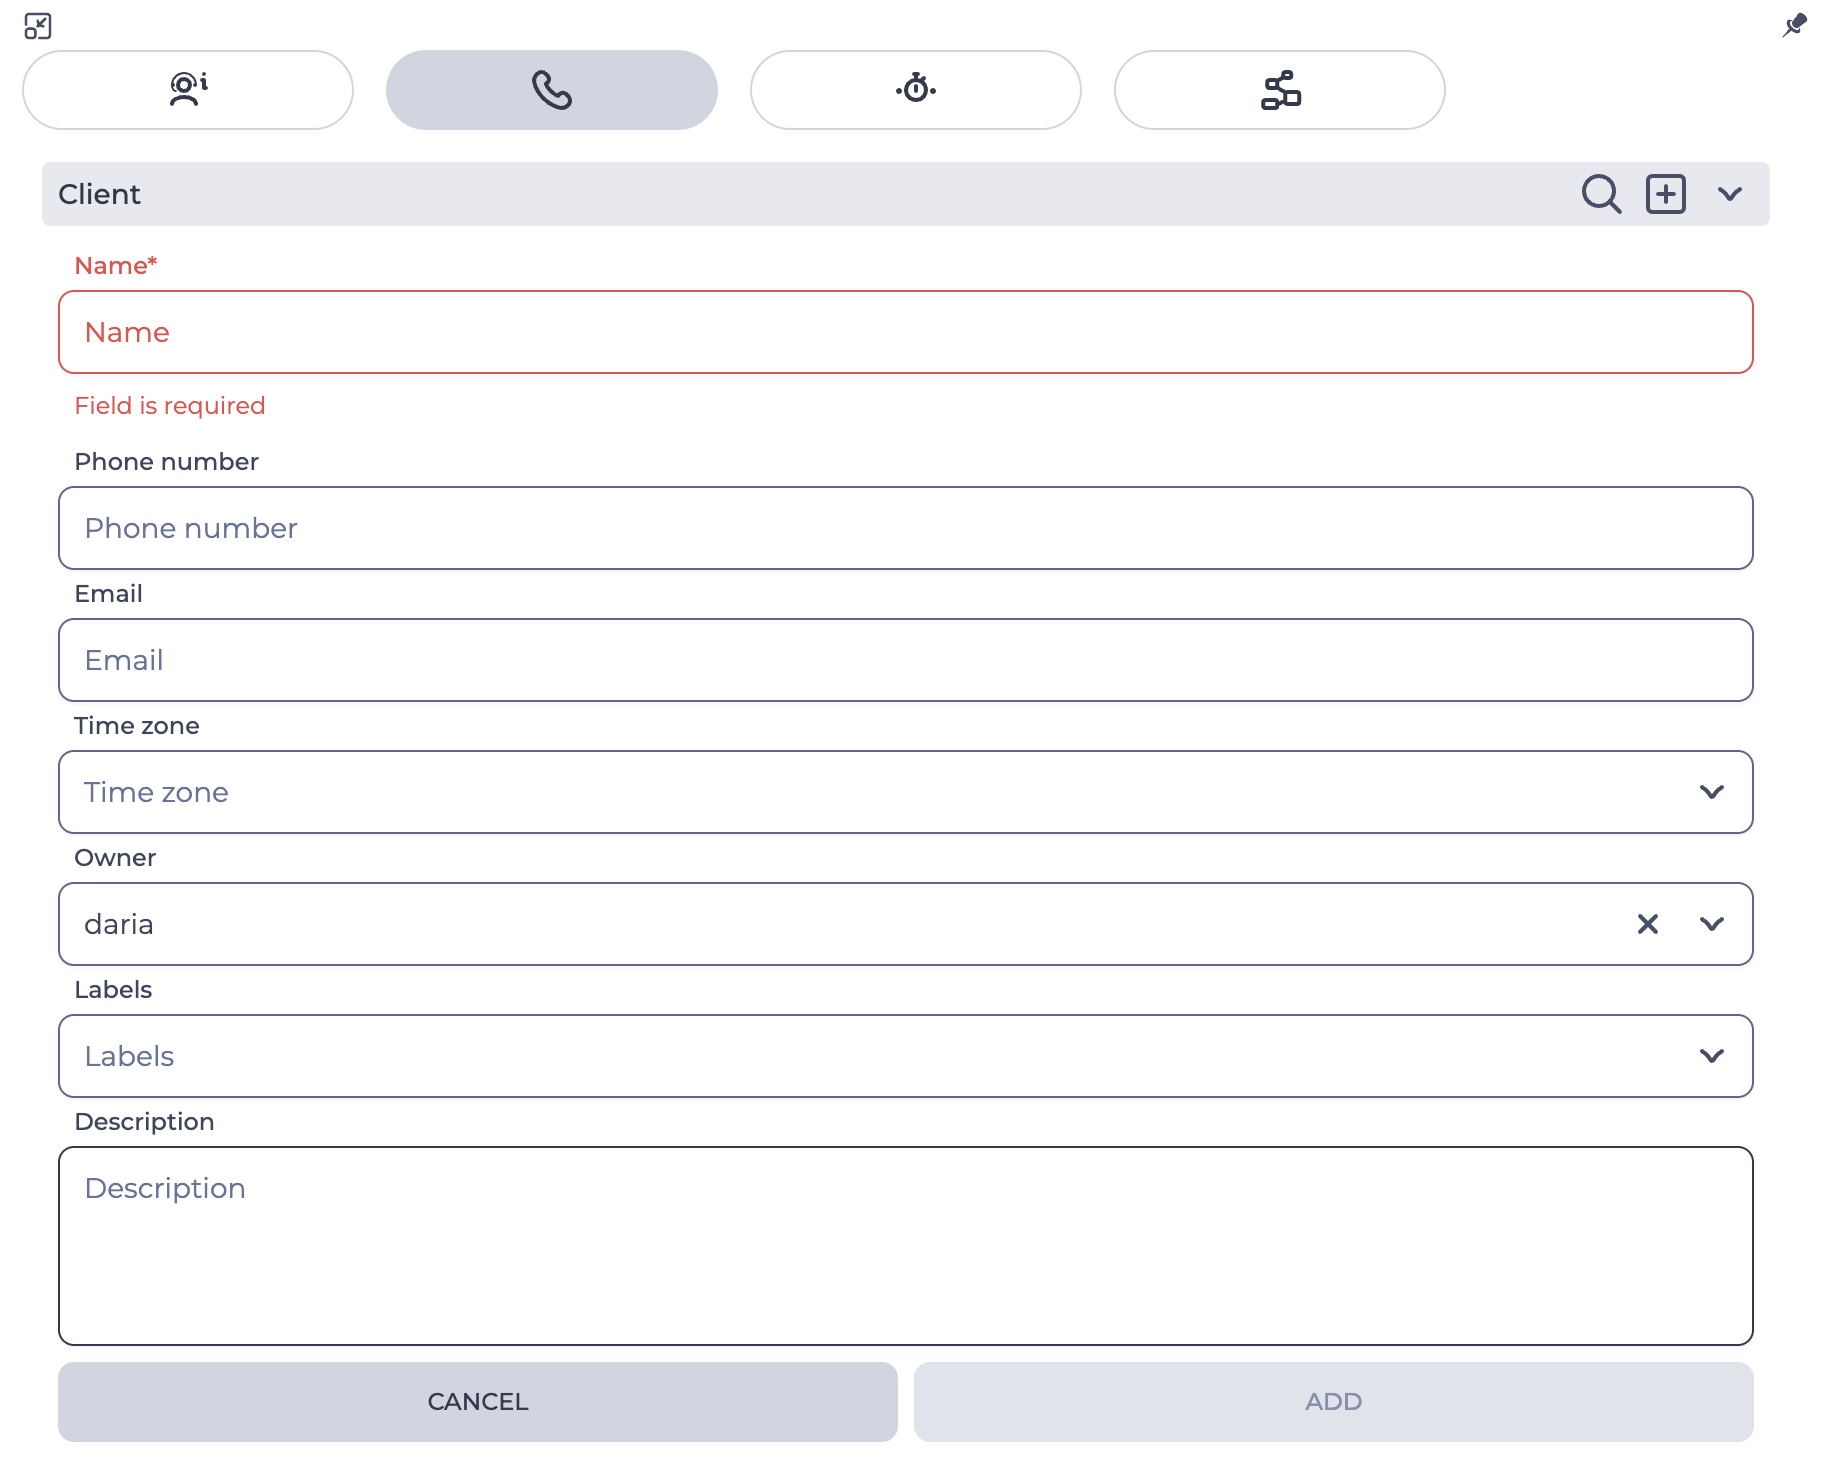
Consists of the following elements:
-
Name — the name of the Contact (required field);
-
Phone number — the Contact's phone number;
-
Email — the Contact's email address;
-
Time zone — the Contact's time zone;
-
Owner — the User to be assigned to the Contact;
-
Labels — you can select, or enter new, label(s) to group Contacts by;
-
Description — description of the Contact;
-
Cancel button — closes the form, the Contact is not added;
-
Add button — adds the Contact.
Clicking the 
If you click the 
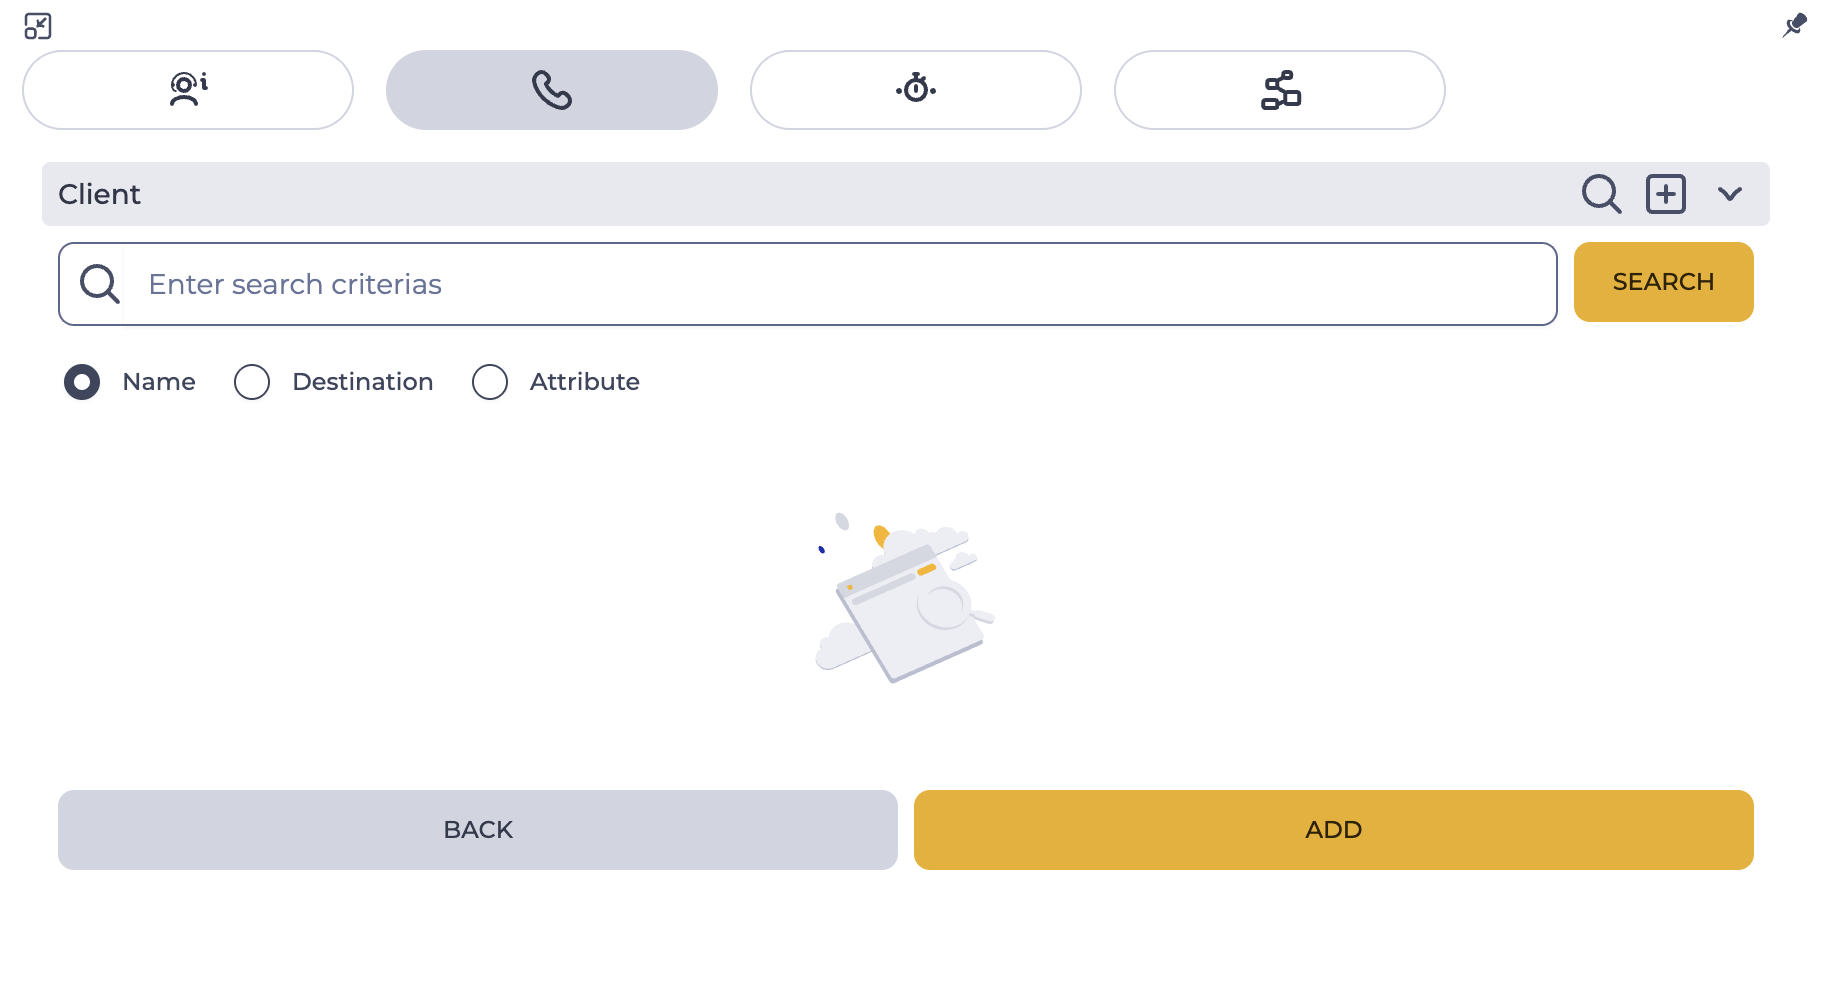
After entering data in the search field, you need to click the Search button. You can search by name, destination (phone number or email address) and attributes.
If several contacts are found as a result of the search, they are displayed one by one with the possibility of viewing the next ones, for which you need to use the 
If a Contact was found, but the Agent creates a new Contact during the active chat, the number is automatically unlinked from this Contact and linked to the new one.
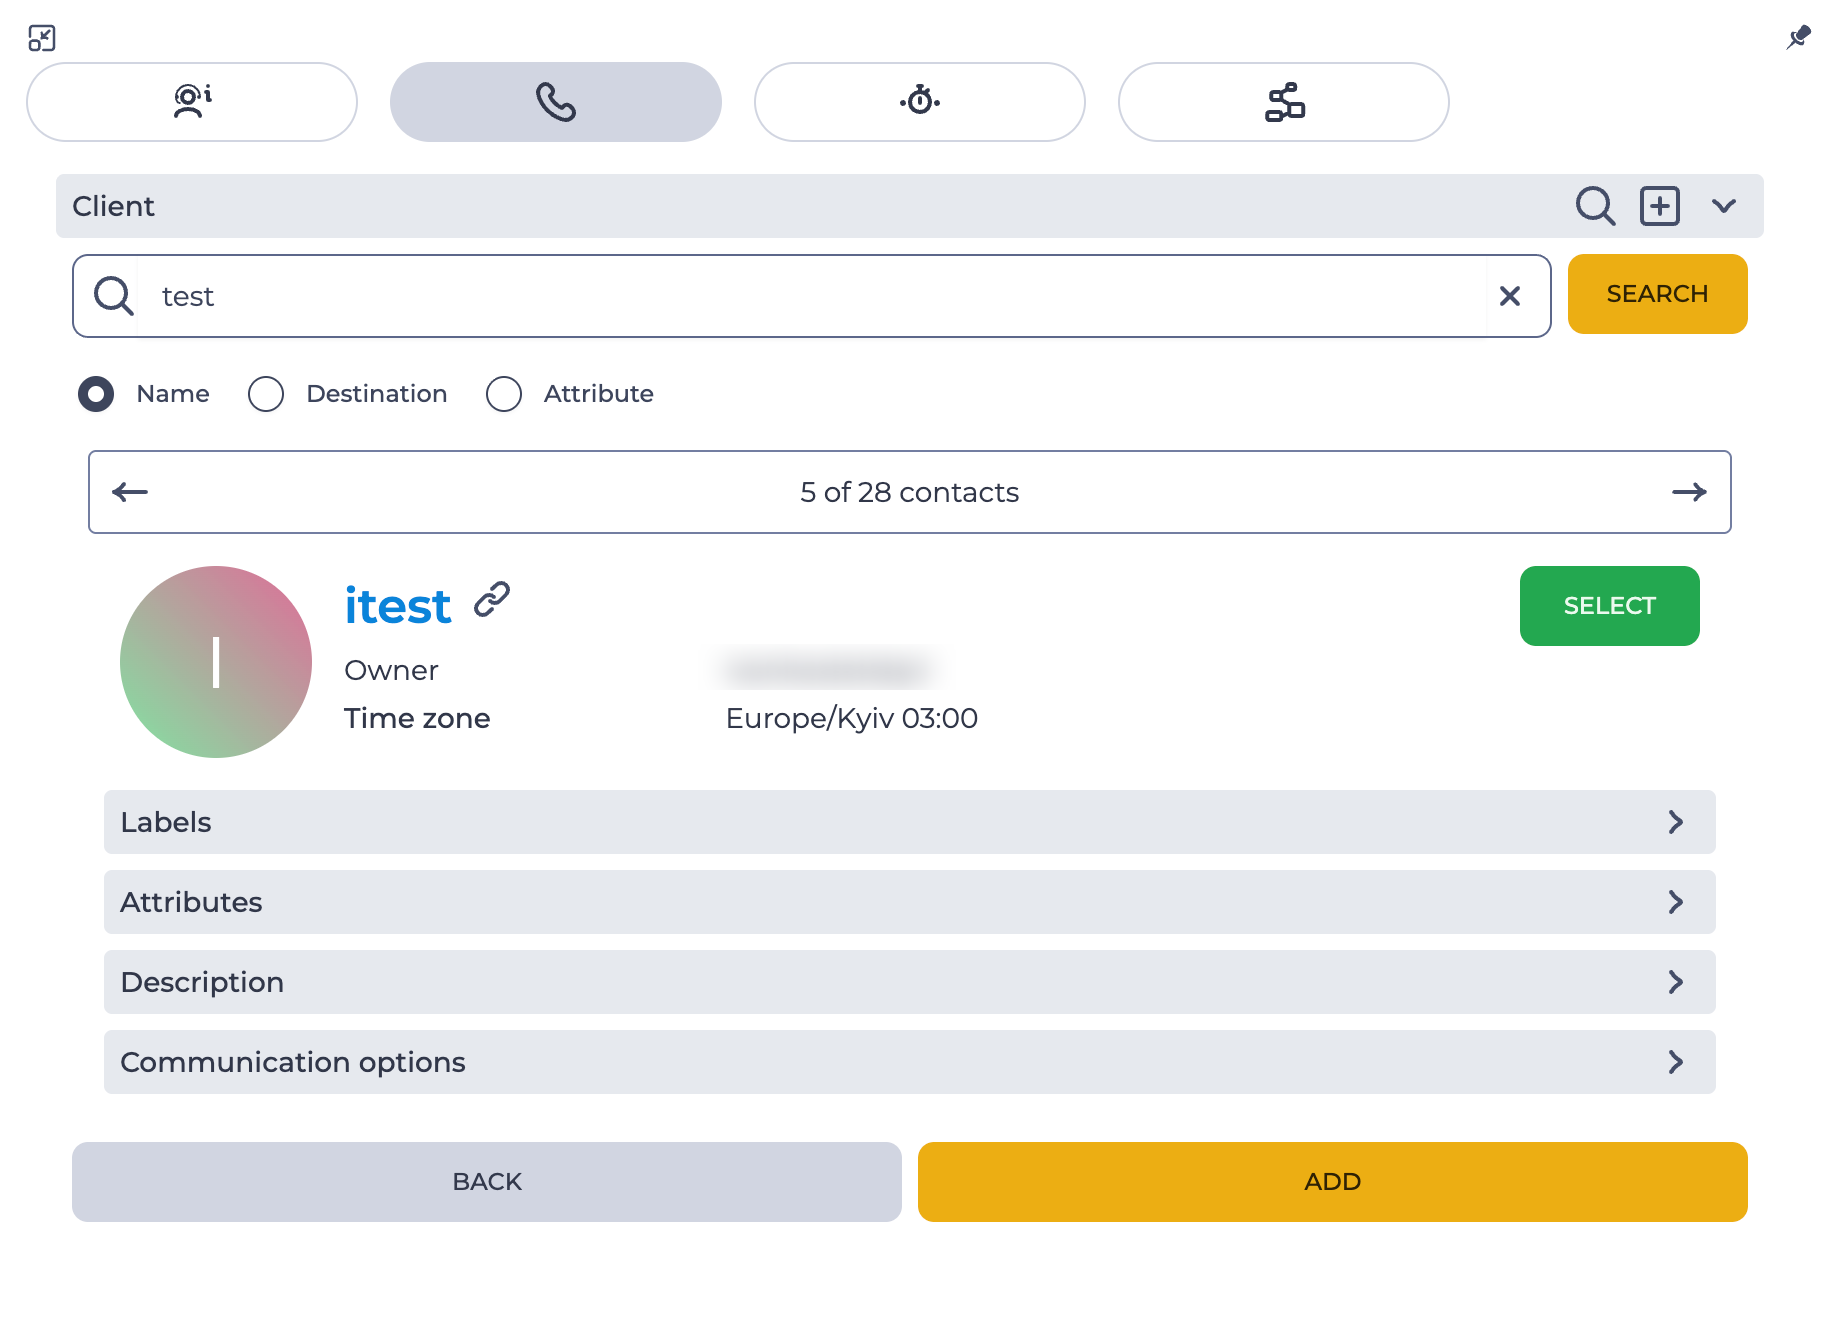

If the User has access to the “CRM” → “Contacts” section, the contact card opens in the regular view.
If access to the section is denied, the card still opens but only in read-only mode:
-
the top navigation panel (path to the section) is not displayed;
-
the list of all contacts is not displayed;
-
it is not possible to edit or delete data;
-
opening is possible only via a special link generated by the system.
The Select button binds the call to this Contact to then show it in the Contact's call history.
Sections:
-
Labels — labels of this Contact;
-
Attributes — attributes of this Contact;
-
Description — description of this Contact;
-
Communication options — a section that expands/collapses and contains the Phones, Messaging, and Emails tabs.
If there is a Contact by the current number, the information about it is displayed.
1.1.1. Phones tab
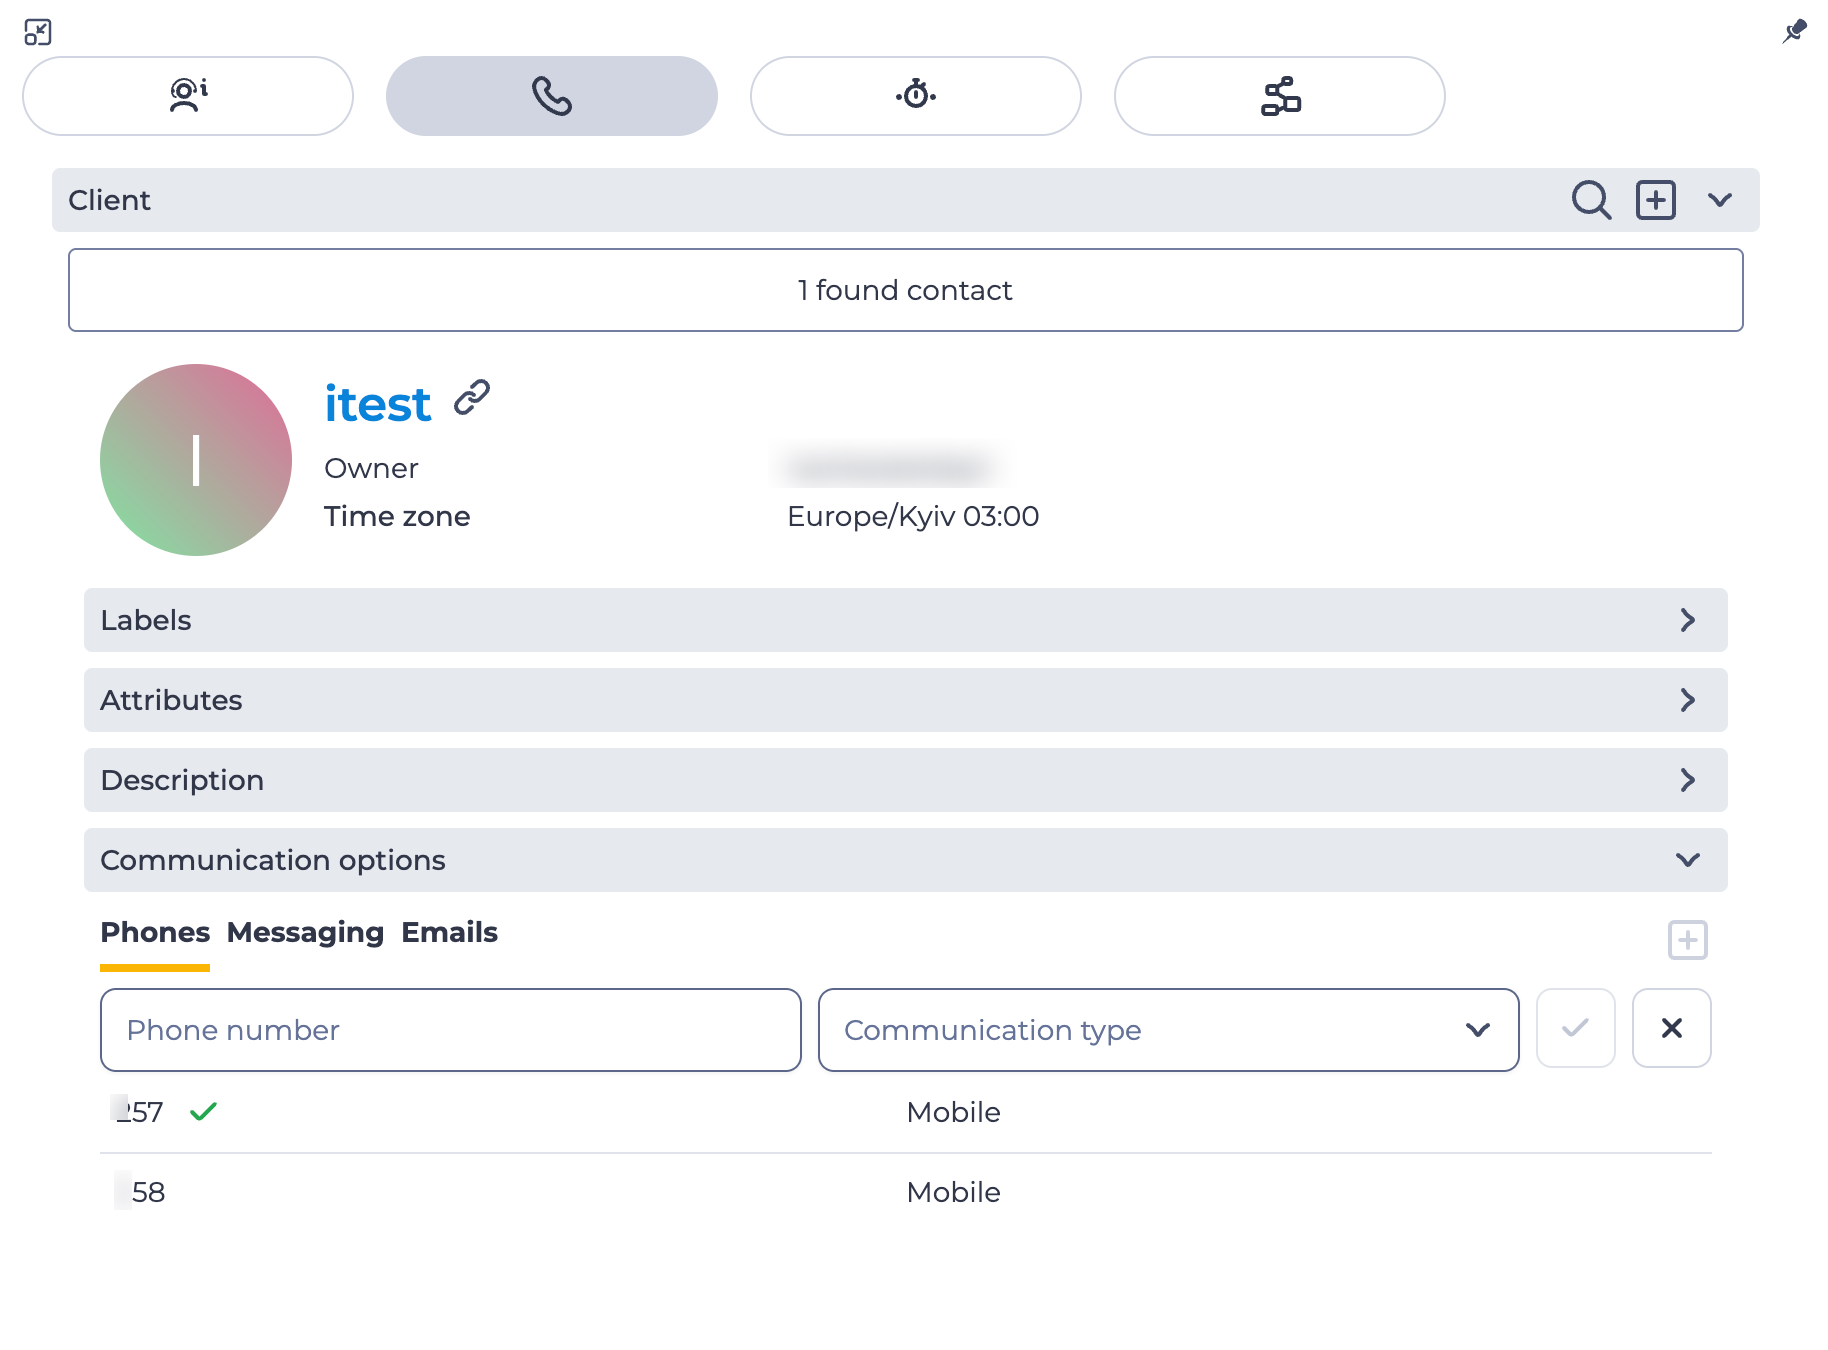
The Phones tab displays a list of the contact's phone numbers (Fig. 5). Each number is shown with its communication type. The 

-
the Phone number field — required, for entering the phone number;
-
the Communication type field — required, a dropdown list of available communication types;
-
a confirm button
-
a close button
1.1.2. Messaging tab
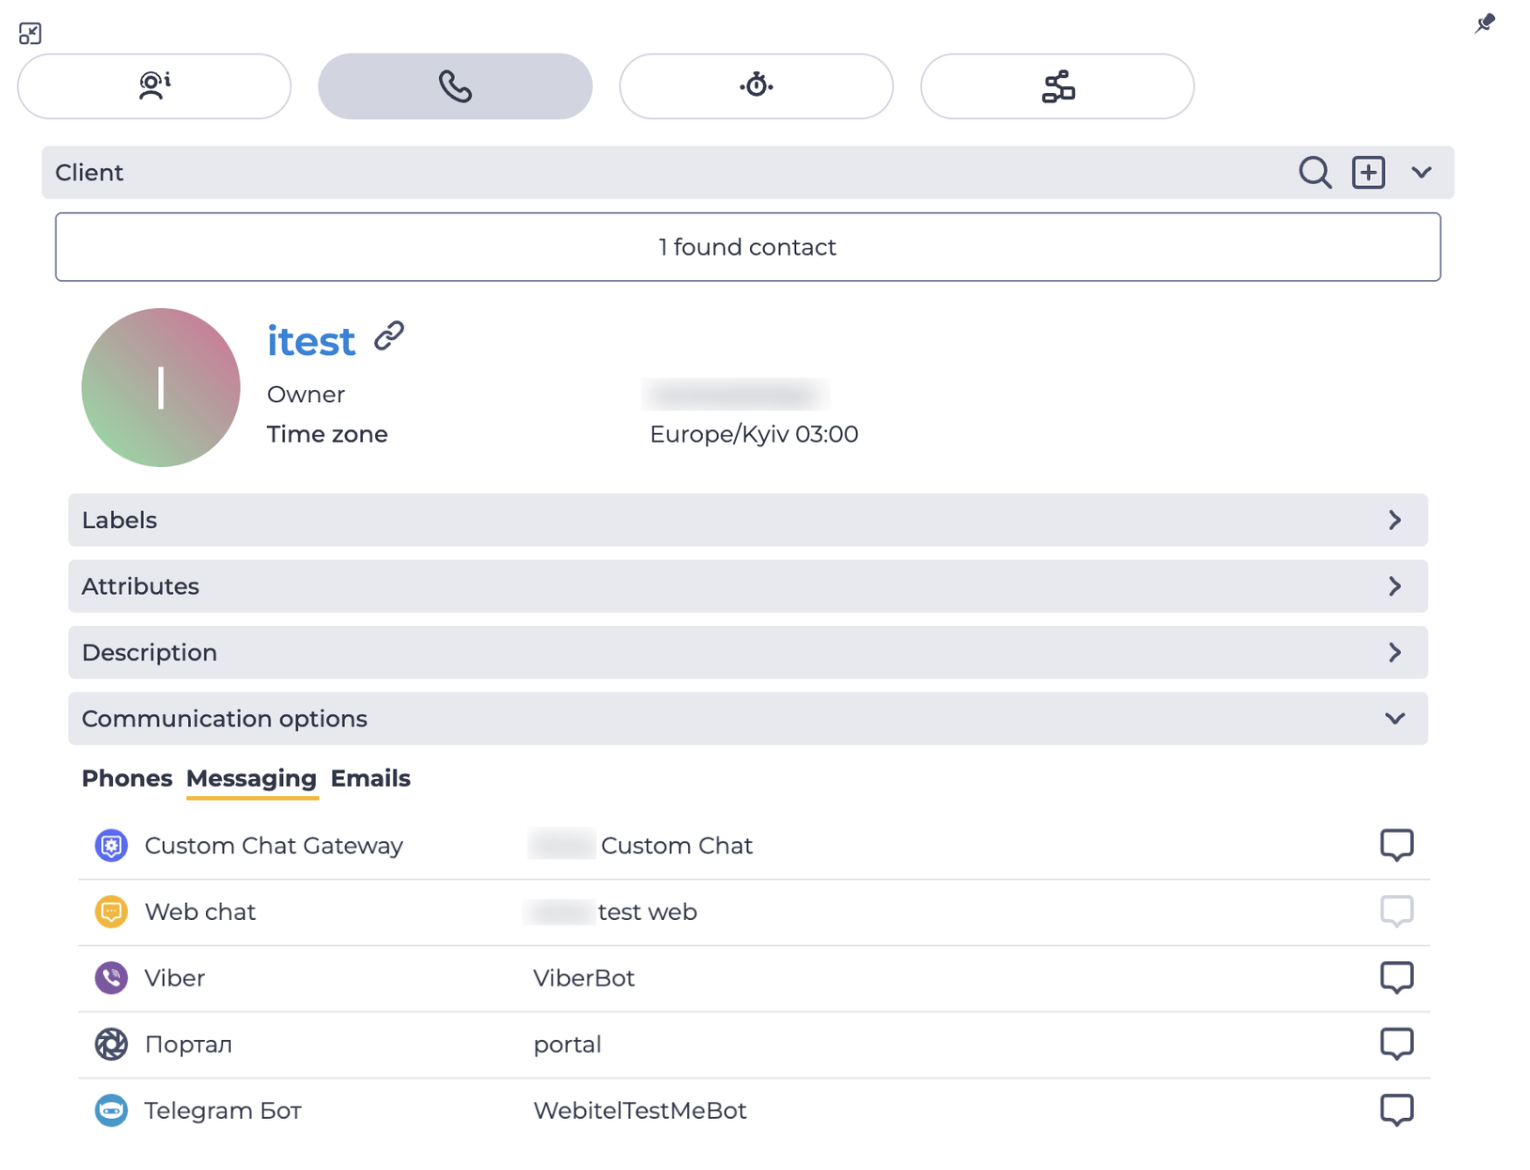
The Messaging tab displays a list of text gateways linked to the contact (Fig. 6).
The send message button 
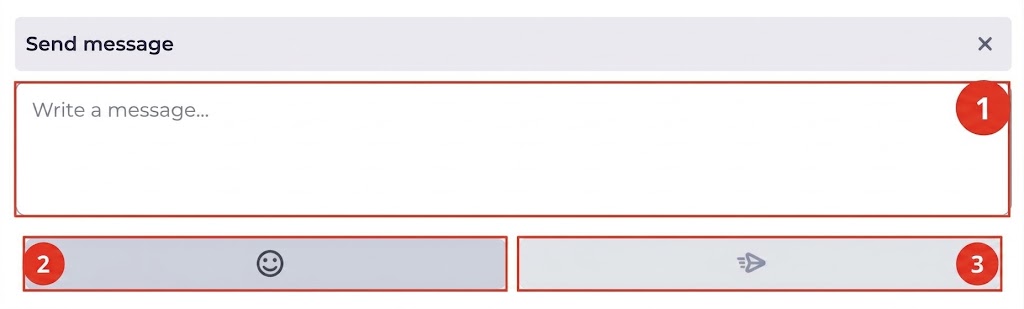
The Send message modal window consists of the following elements:
-
message input field (Fig. 7.(1)) — required; here you enter the text that will be sent to the contact;
-
emoji button (Fig. 7.(2)) — opens the emoji panel;
-
send button (Fig. 7.(3)) — sends the entered message to the contact;
-
close button

Sending a message is possible only during an active call or chat and only for an identified contact.
Sending a message is available for the following gateways:
-
Telegram Bot;
-
Mobile app (SDK);
-
Viber Bot;
-
Facebook Messenger;
-
Custom Chat Gateway.
For other gateways, sending a message is not possible.
1.1.3. Emails tab
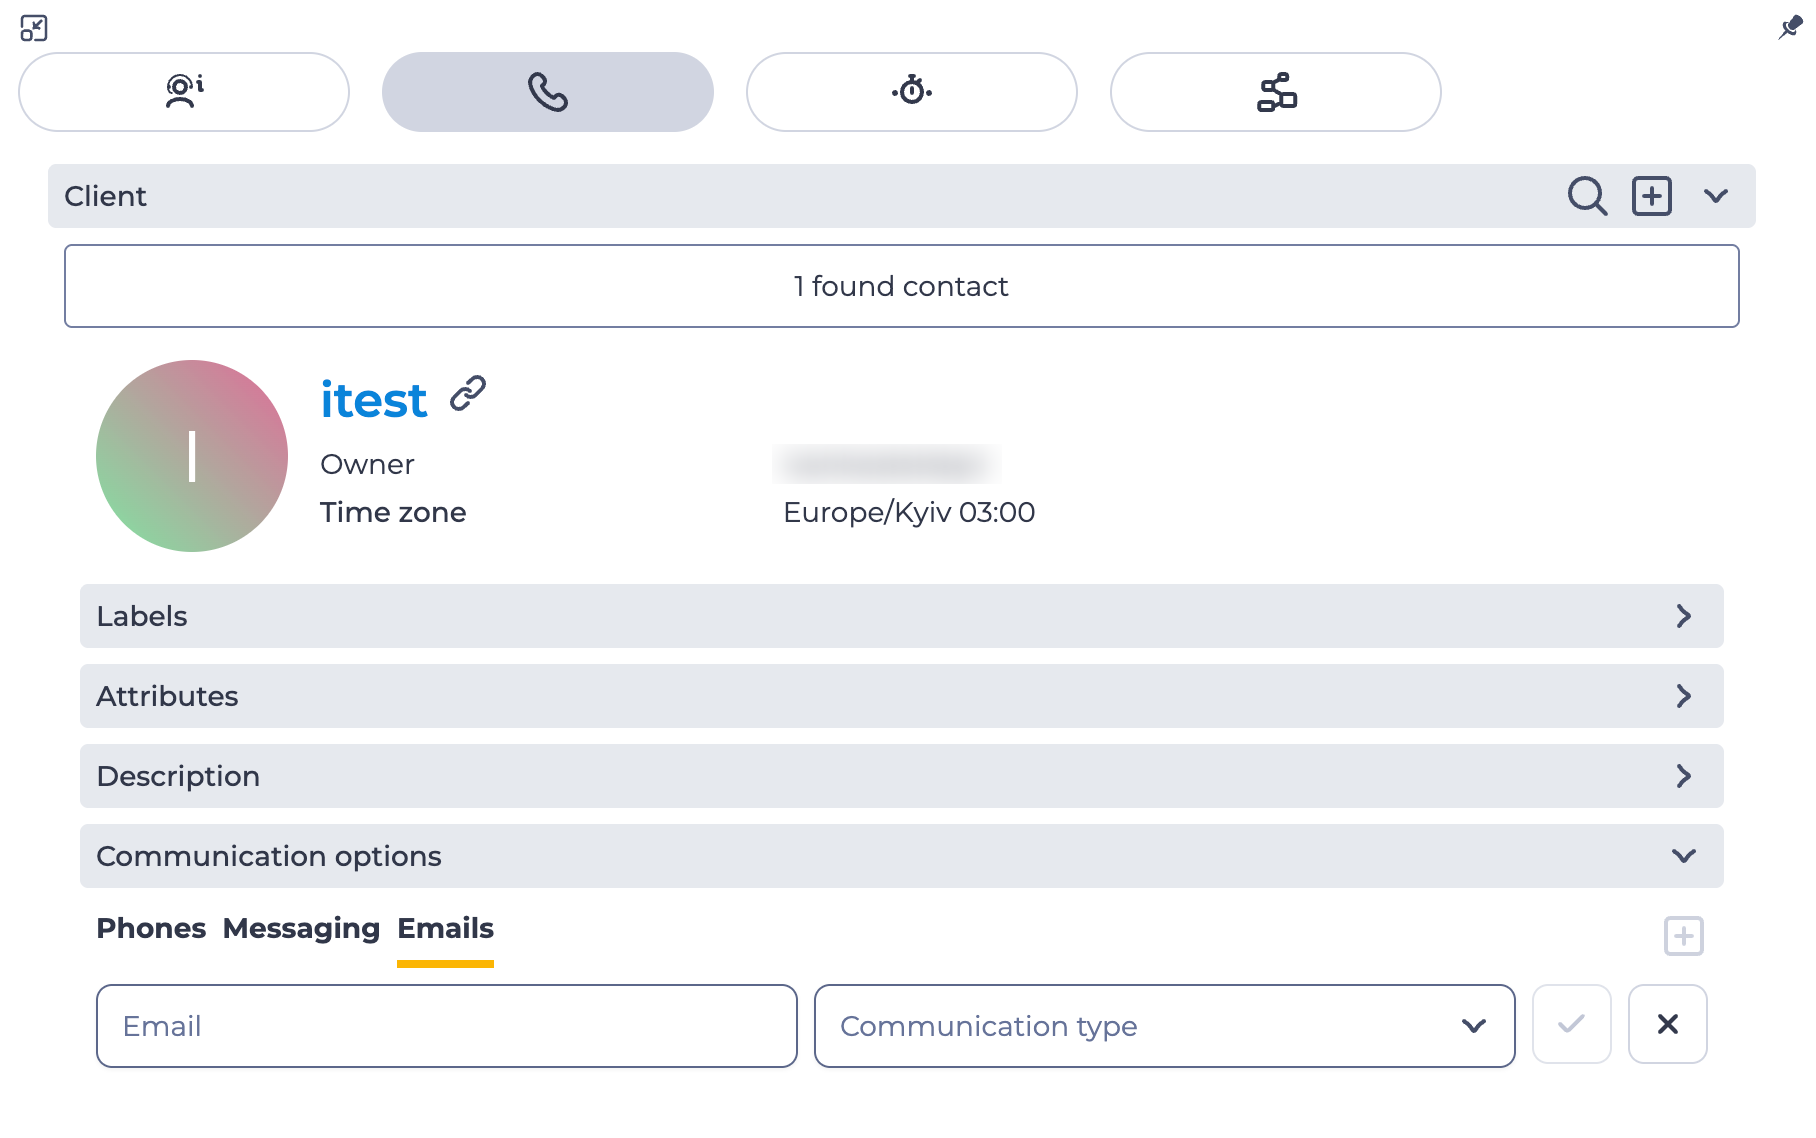
The Emails tab displays a list of the contact's email addresses (Fig. 8). The add button
-
the Email field — required, for entering the email address;
-
the Communication type field — required, a dropdown list of available communication types;
-
a confirm button
-
a close button
An email address added this way does not become primary (default) for the contact.
1.2. Member description
The number description entered when adding the Member's number is displayed here. More information about uploading can be found here.
1.3. Call variables
Information sent from routing is displayed here — for example, Member variables.