
Description
This section describes an example of creating an outbound automatic call queue of the type "Preview" in the Creatio system using the Telemarketing product.
Preconditions
-
CallManager package is installed
-
CallCenter package is installed
-
Telemarketing package is installed
-
"Contact center" workplace has "Dialer" and "Webitel users" sections added
1. Create a dialer
In order to create a new dialer, you need to open "Dialer" section (1) in the "Contact center" workplace and click the button "New" (2) (Fig. 1).
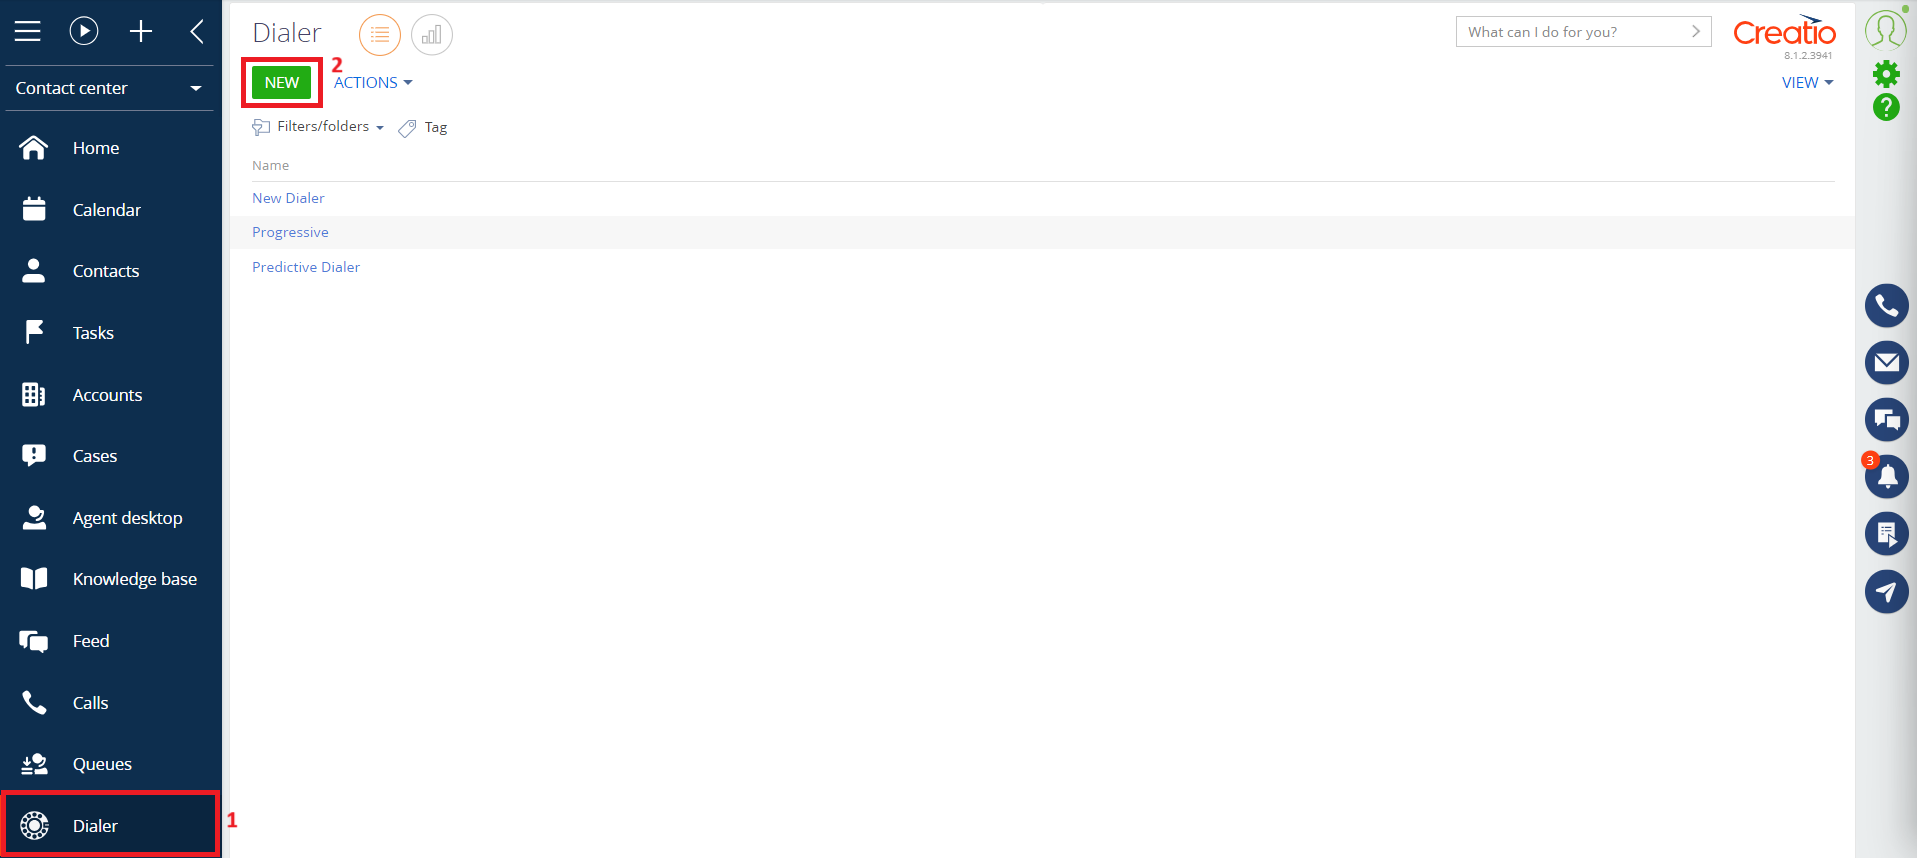
Fig. 1. Create a new dialer
On the dialer record page, you need to fill in the required fields and save. You can learn more about setting up a preview dialer here.
In this example, the following fields were filled in for the queue:
-
Name
-
Strategy
-
Dialer type
-
Calendar (must be previously created on Webitel. Learn more about calendars here)
2. Options. Timing
You need to configure timing options for this dialer as well (Fig. 2).
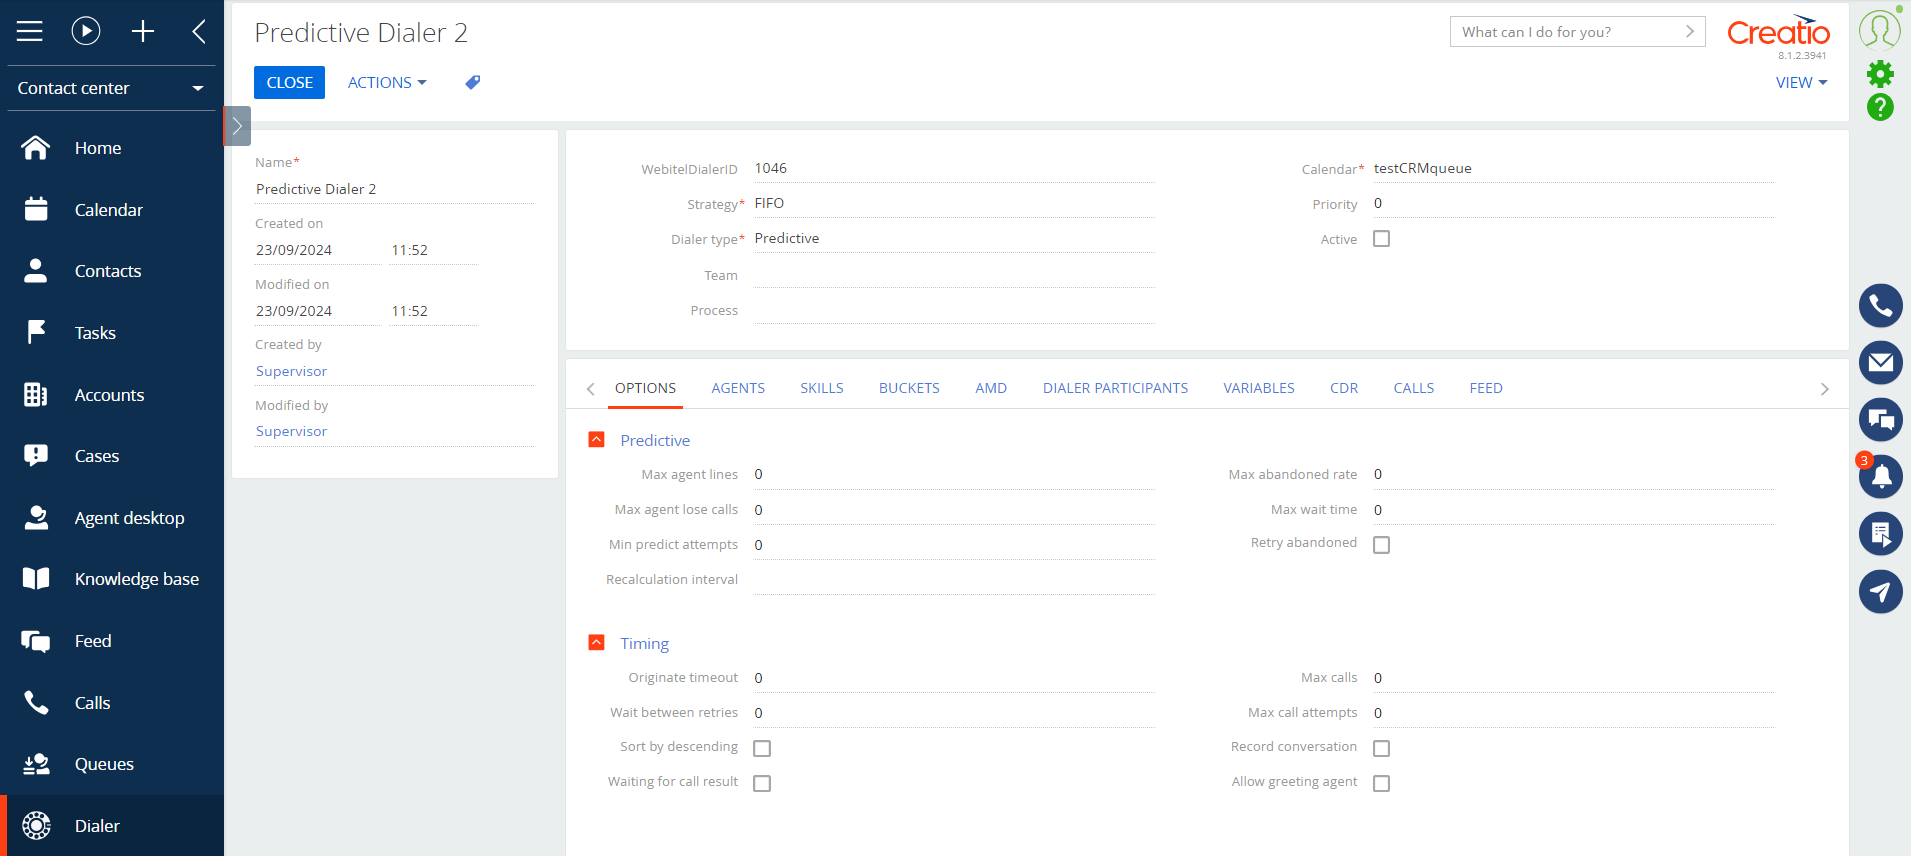
Fig. 2. Timing
3. Options. Resources
Next you need to add resources, that dialer will use. Resouce group must be previously created on Webitel. You can learn more here.
On the detail "Resources" select and add the required resource group (Fig. 3).
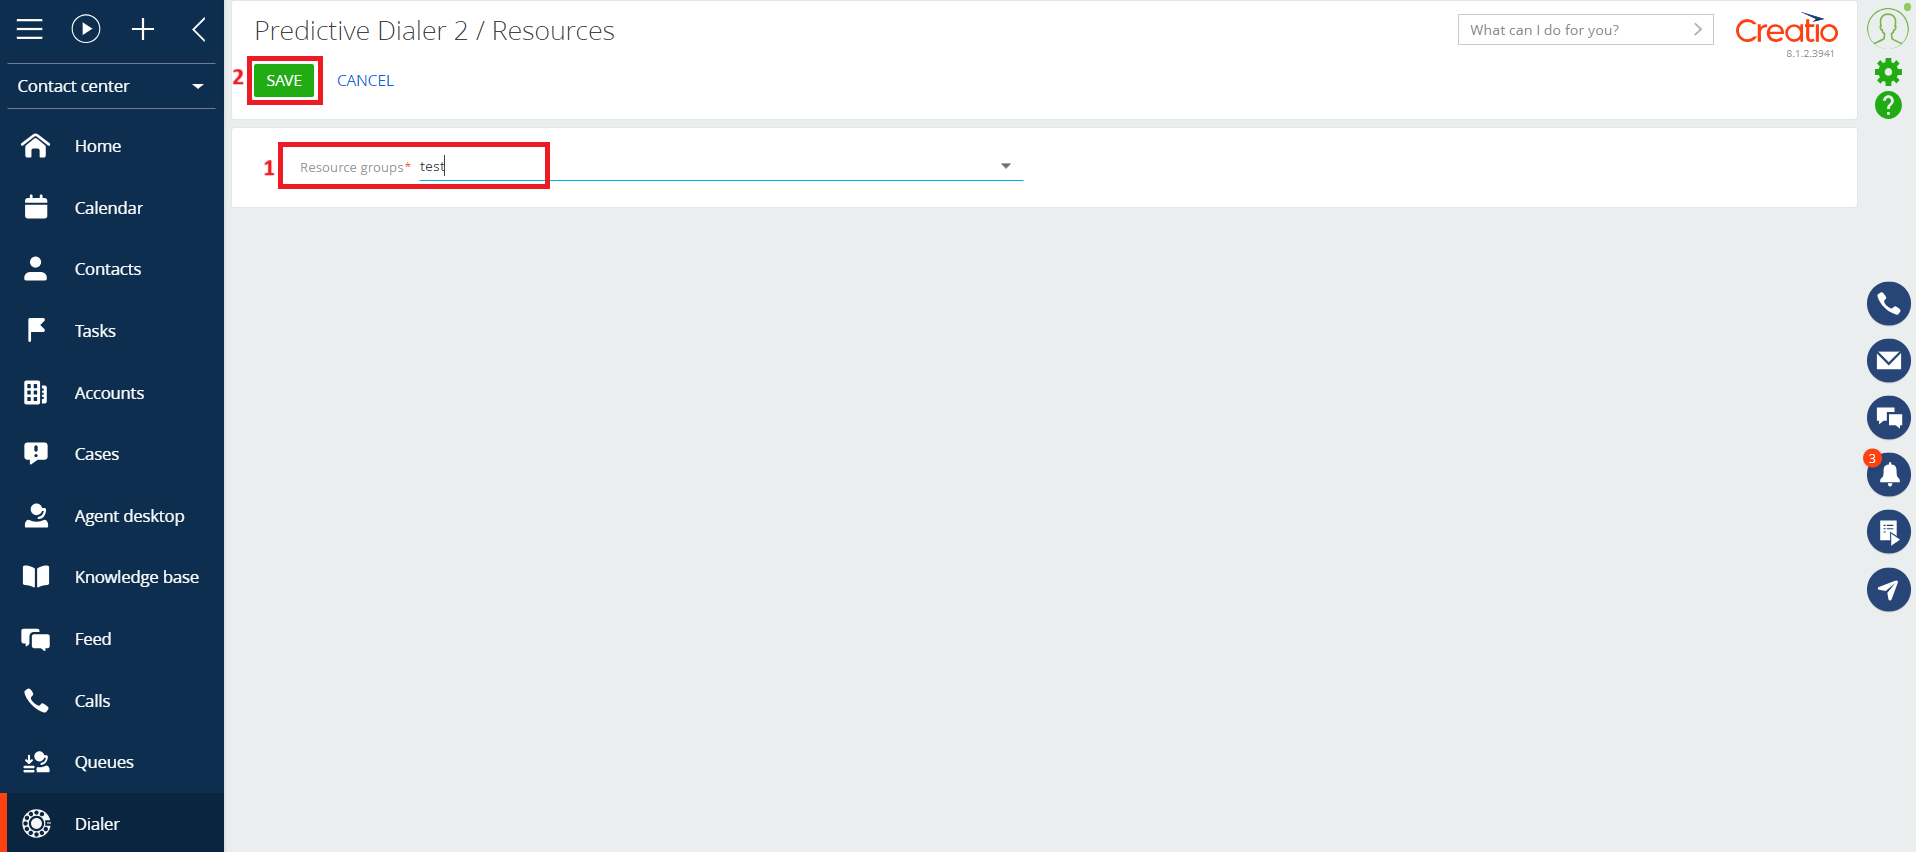
Fig. 3. Add resources to the dialer
4. Agents
Now you need to add agents who will be handling the calls from this automatic queue. To do so, you need to add the relative skill to the agents you need. In this example, that is the skill "preview_dialer". That skill must be previously created in Webitel (more information here).
You add that skill to the agent in "Webitel users" section (Fig. 4). Learn more about Webitel users here.
The selected agent "O B" has the skill "predictive" with capacity level of 40.
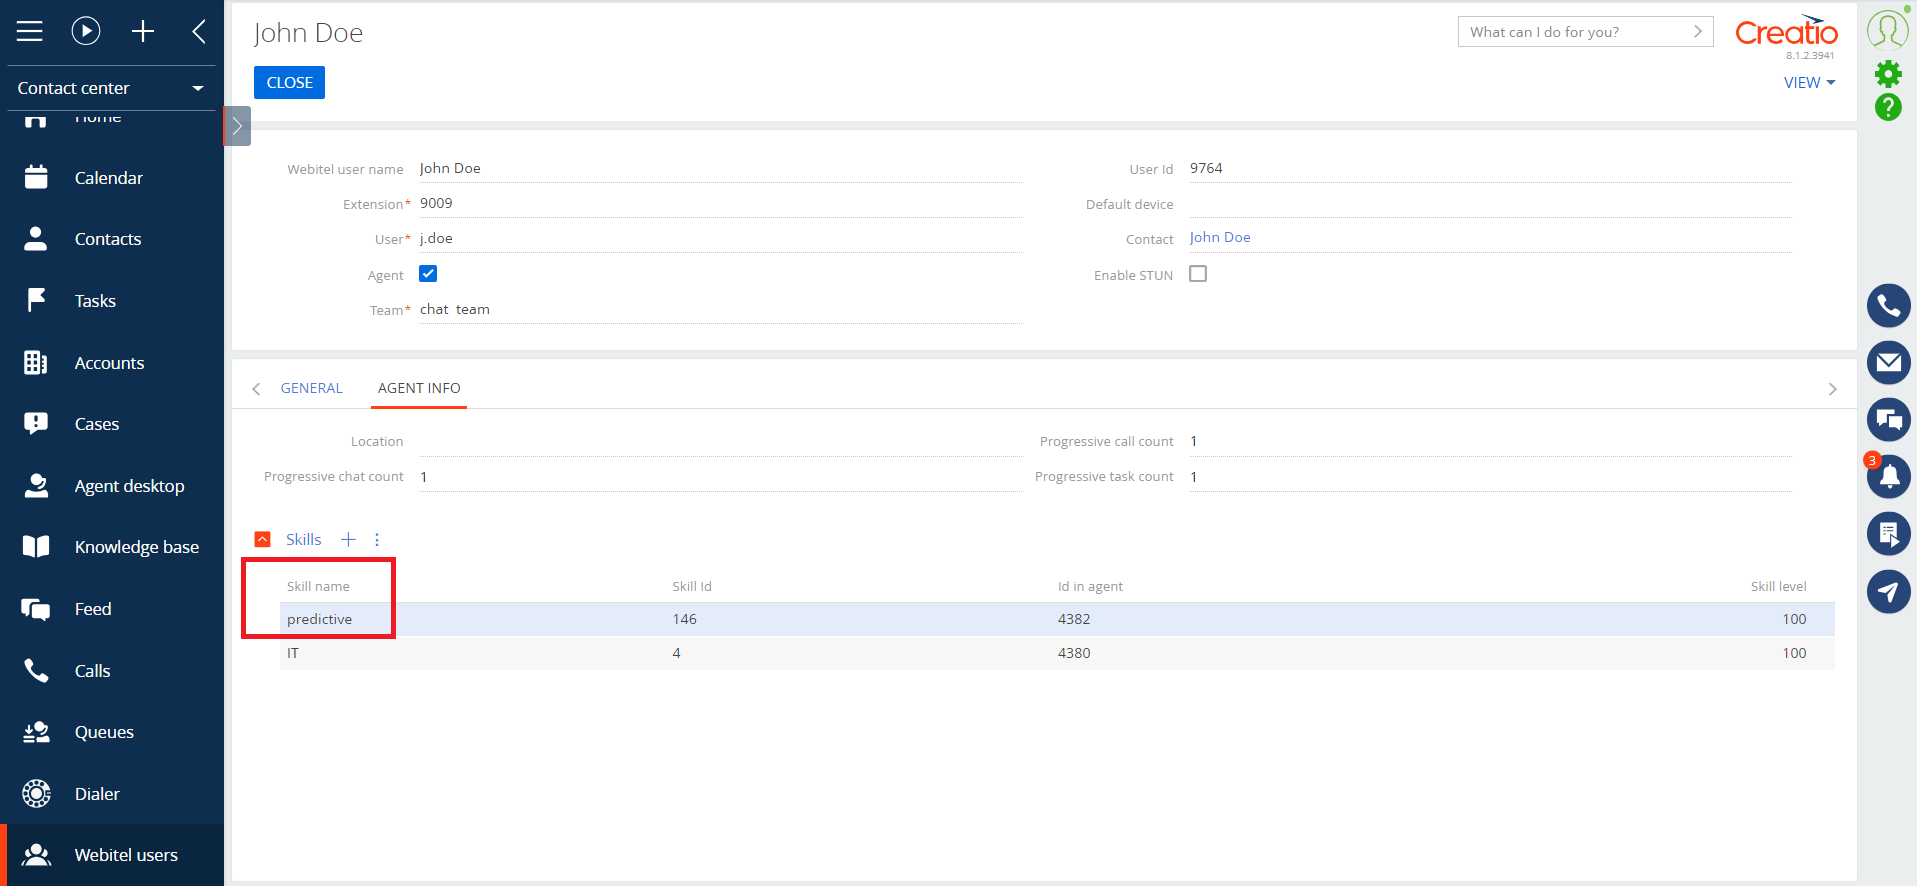
Fig. 4. Add a skill to an agent
Now the same skill has to be added to the queue on the "Skills" tab of the dialer page record (Fig. 5). In this example, the minimum and maximum capacities are set. The agents will be found and selected to handle the queue according to their values.
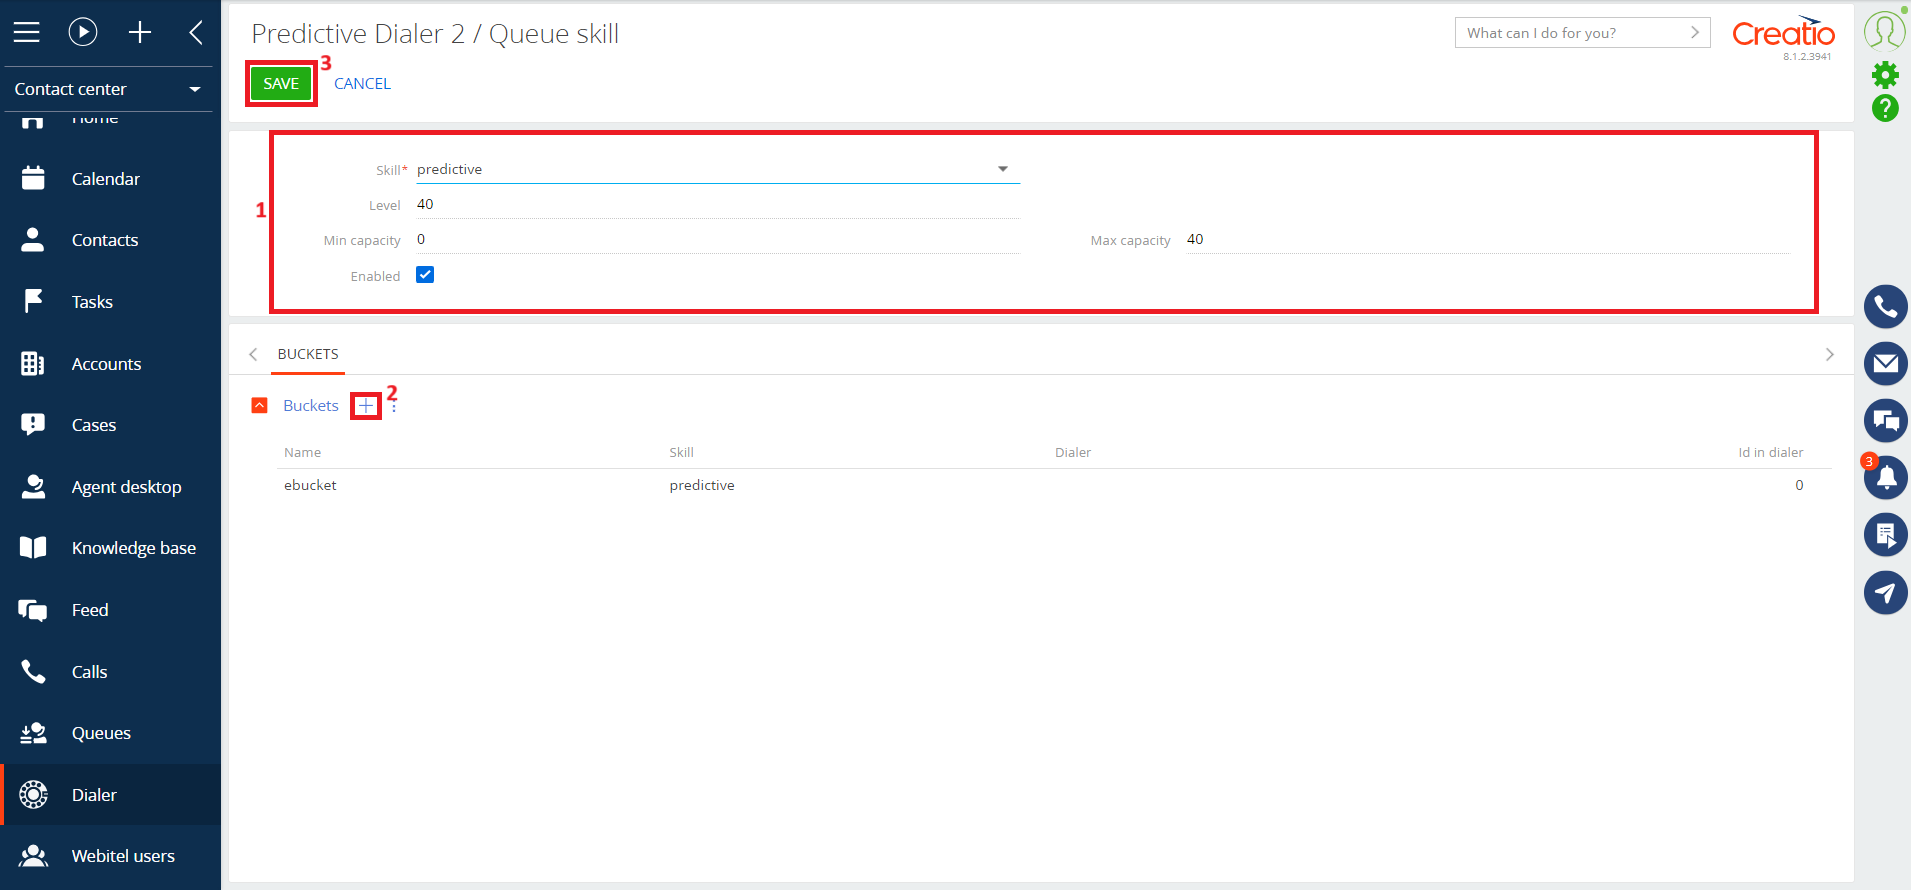
Fig. 5. Add a skill to a dialer
After this, the system looks for agents by skill and displays them on the "Agents" tab (Fig. 6).
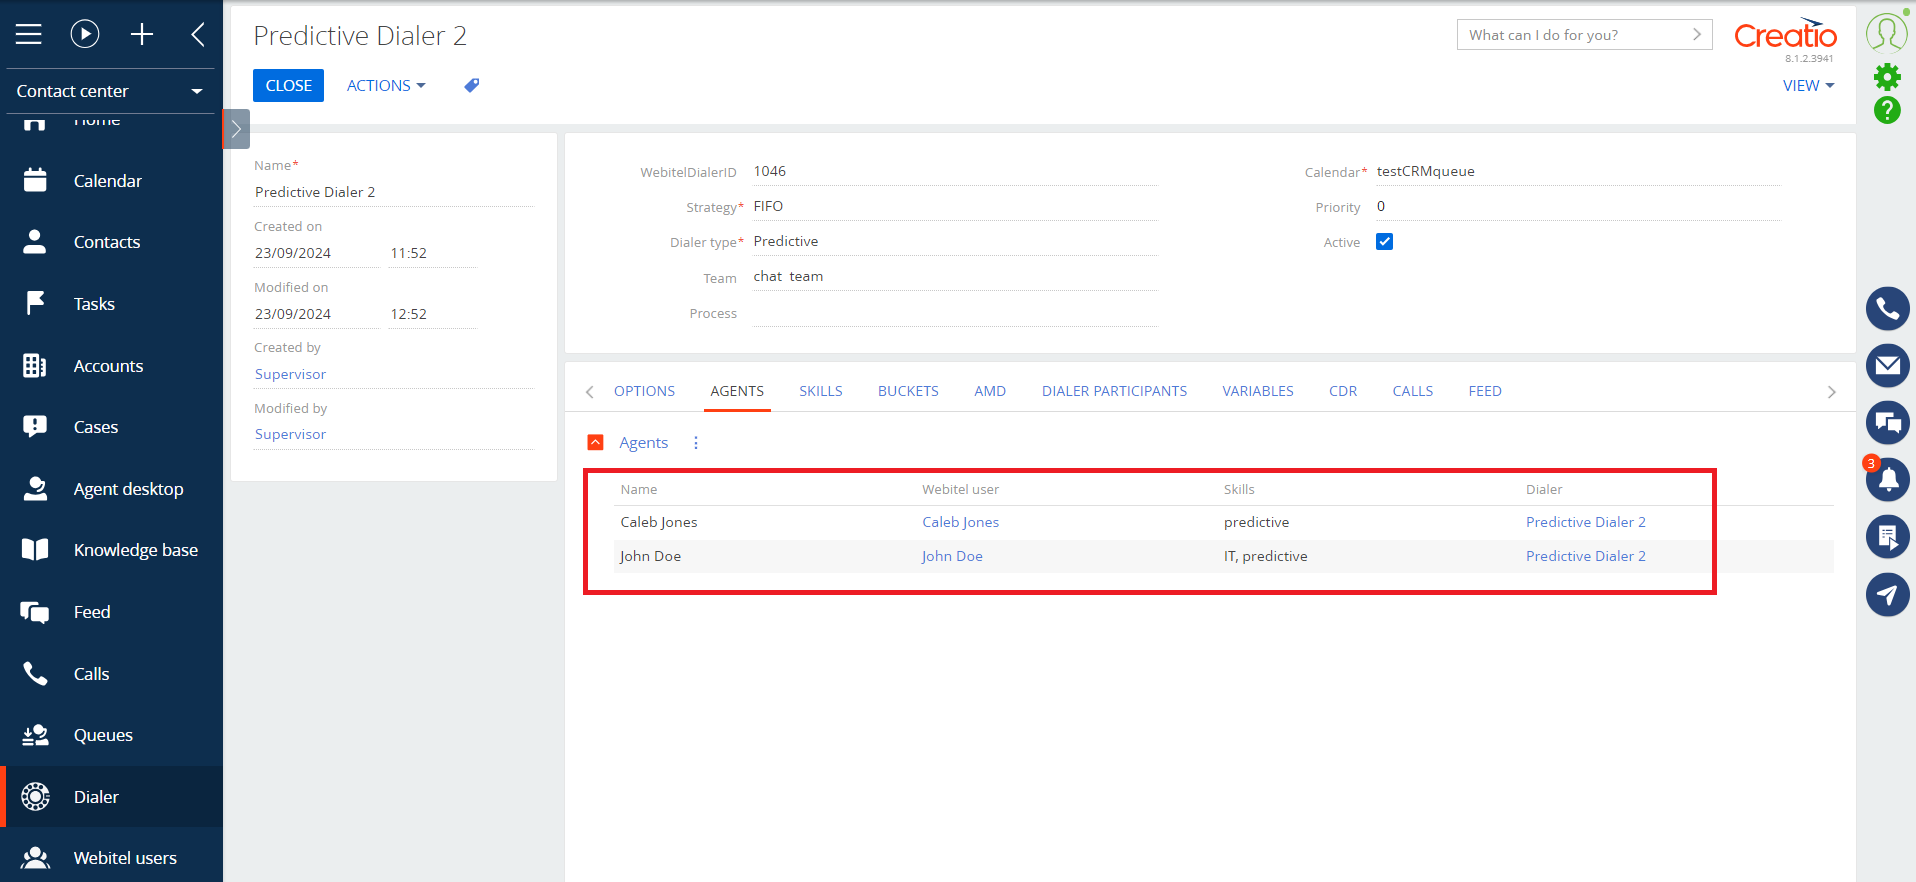
Fig. 6. Agents to handle the queue
5. Dialer participants
The dialer is configured. Now you need to add dialer participants. They can be selected from Contacts or from groups of Contacts. Let's add a dynamic group of Contacts, previously created in Creatio (Fig. 7 и Fig. 8).
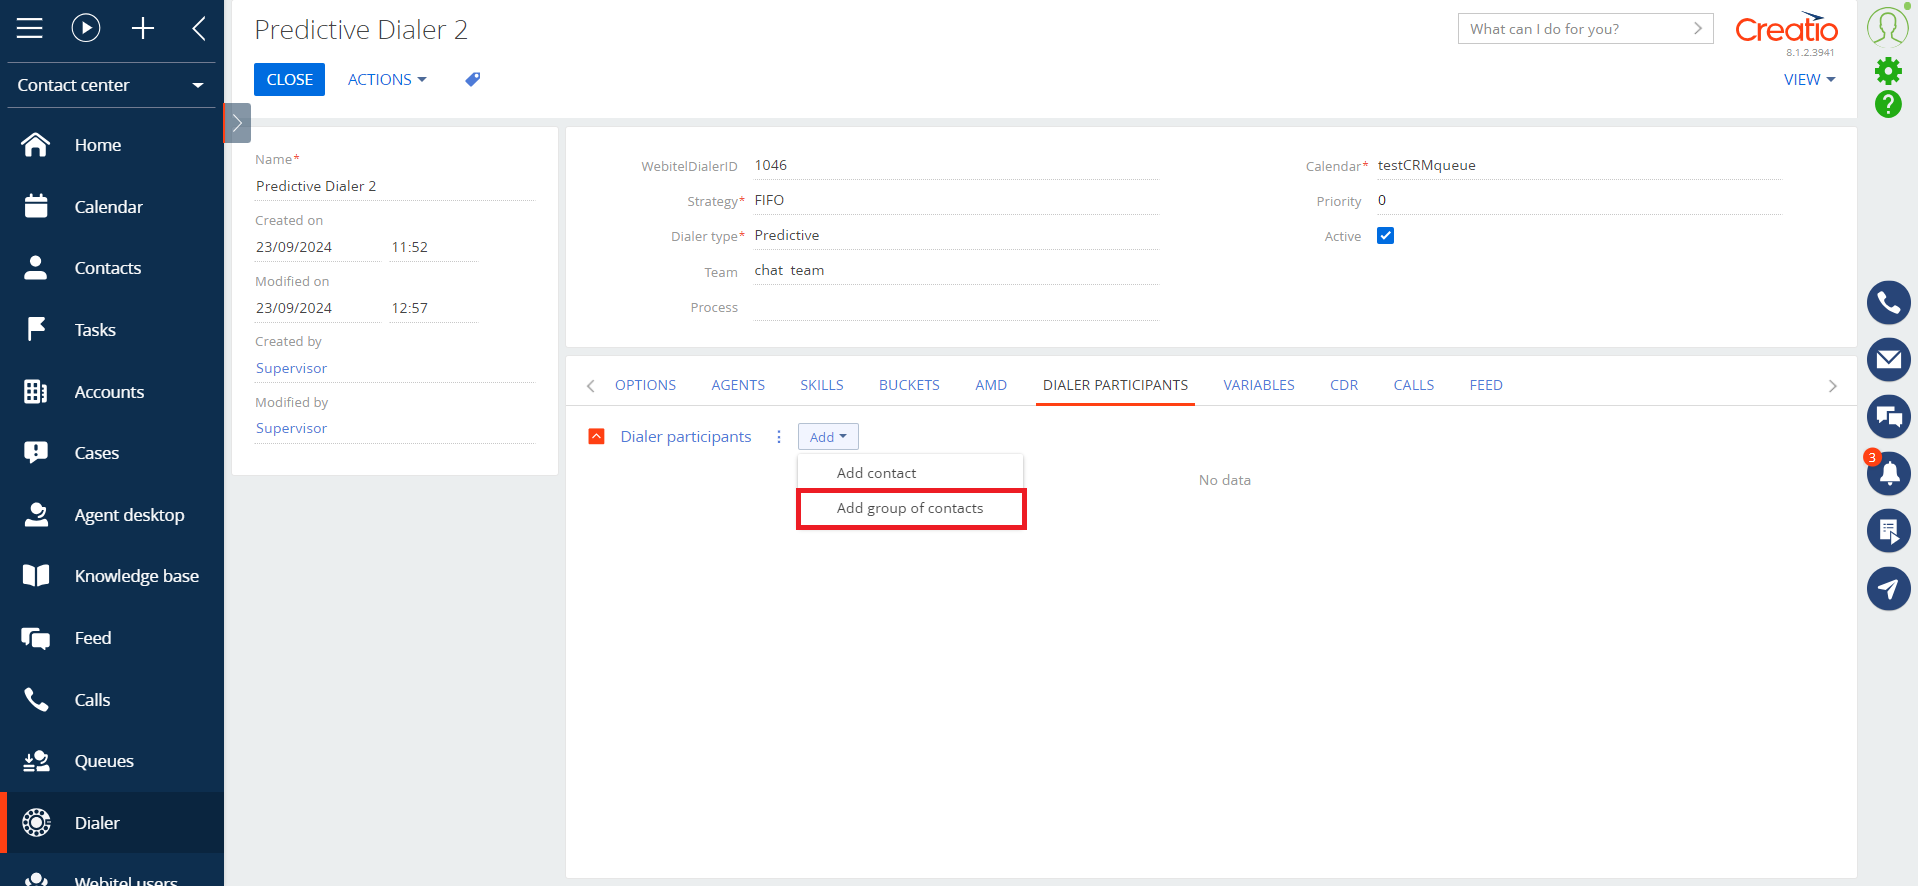
Fig. 7. Add group of Contacts as dialer participants
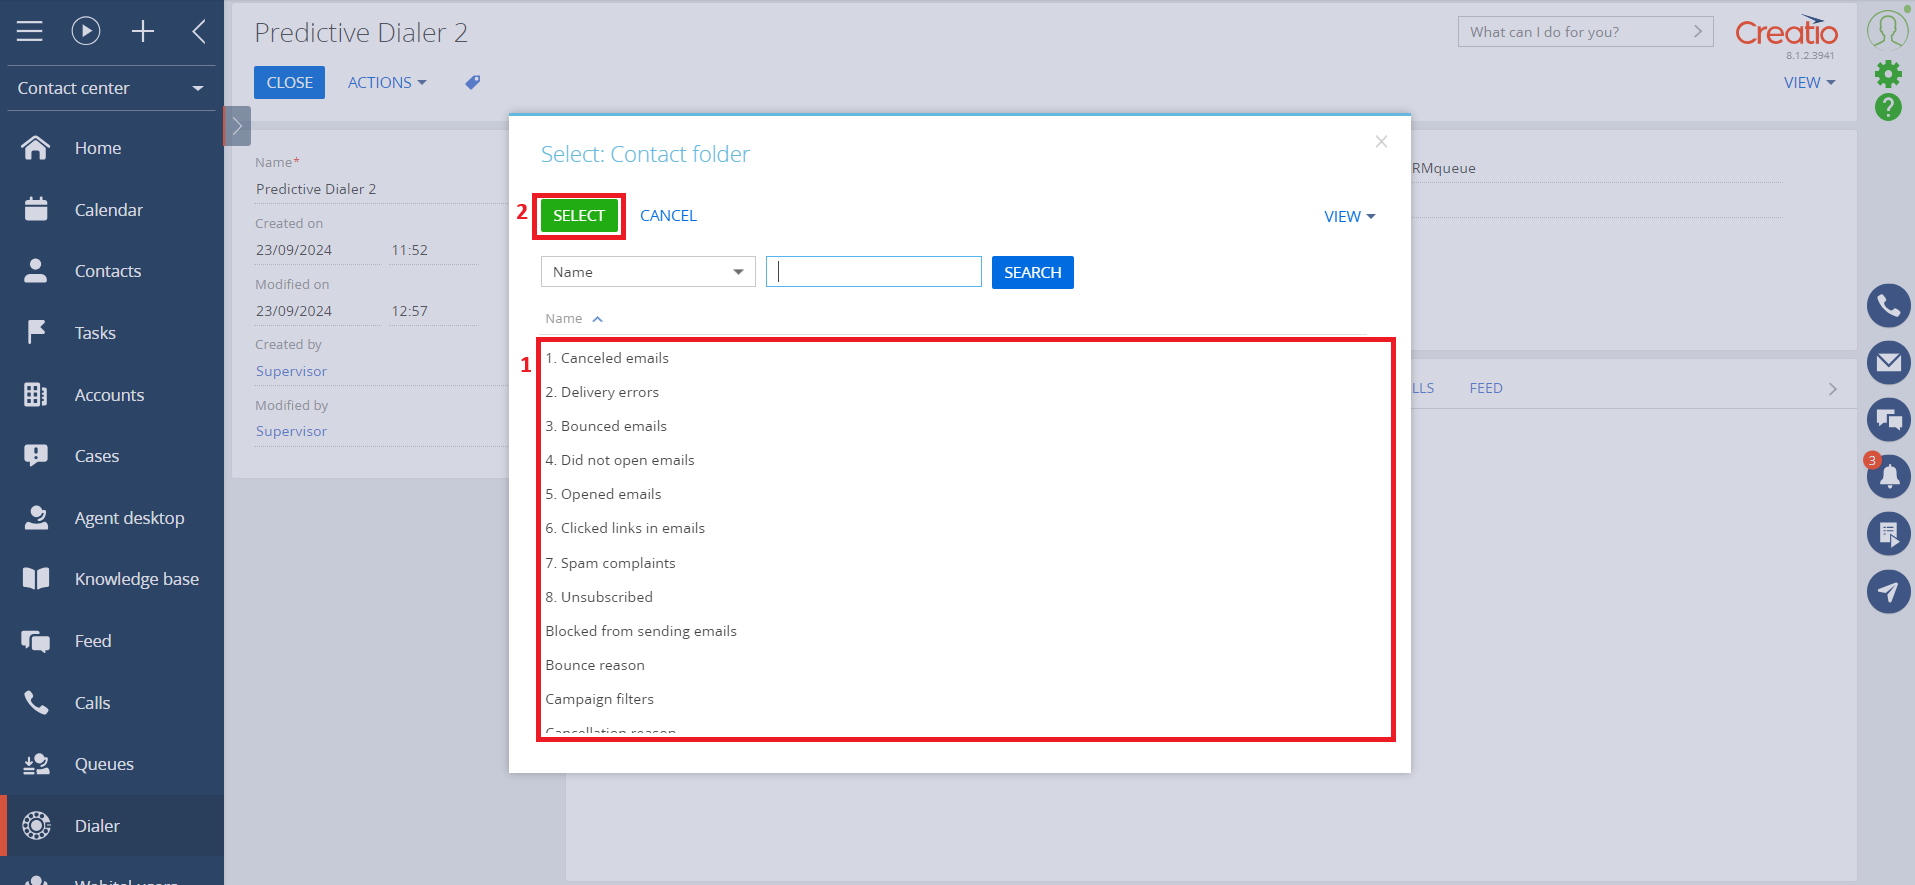
Fig. 8. Select existing group
After that, on the list there are two members from the dynamic group "test dialer" (Fig. 9).
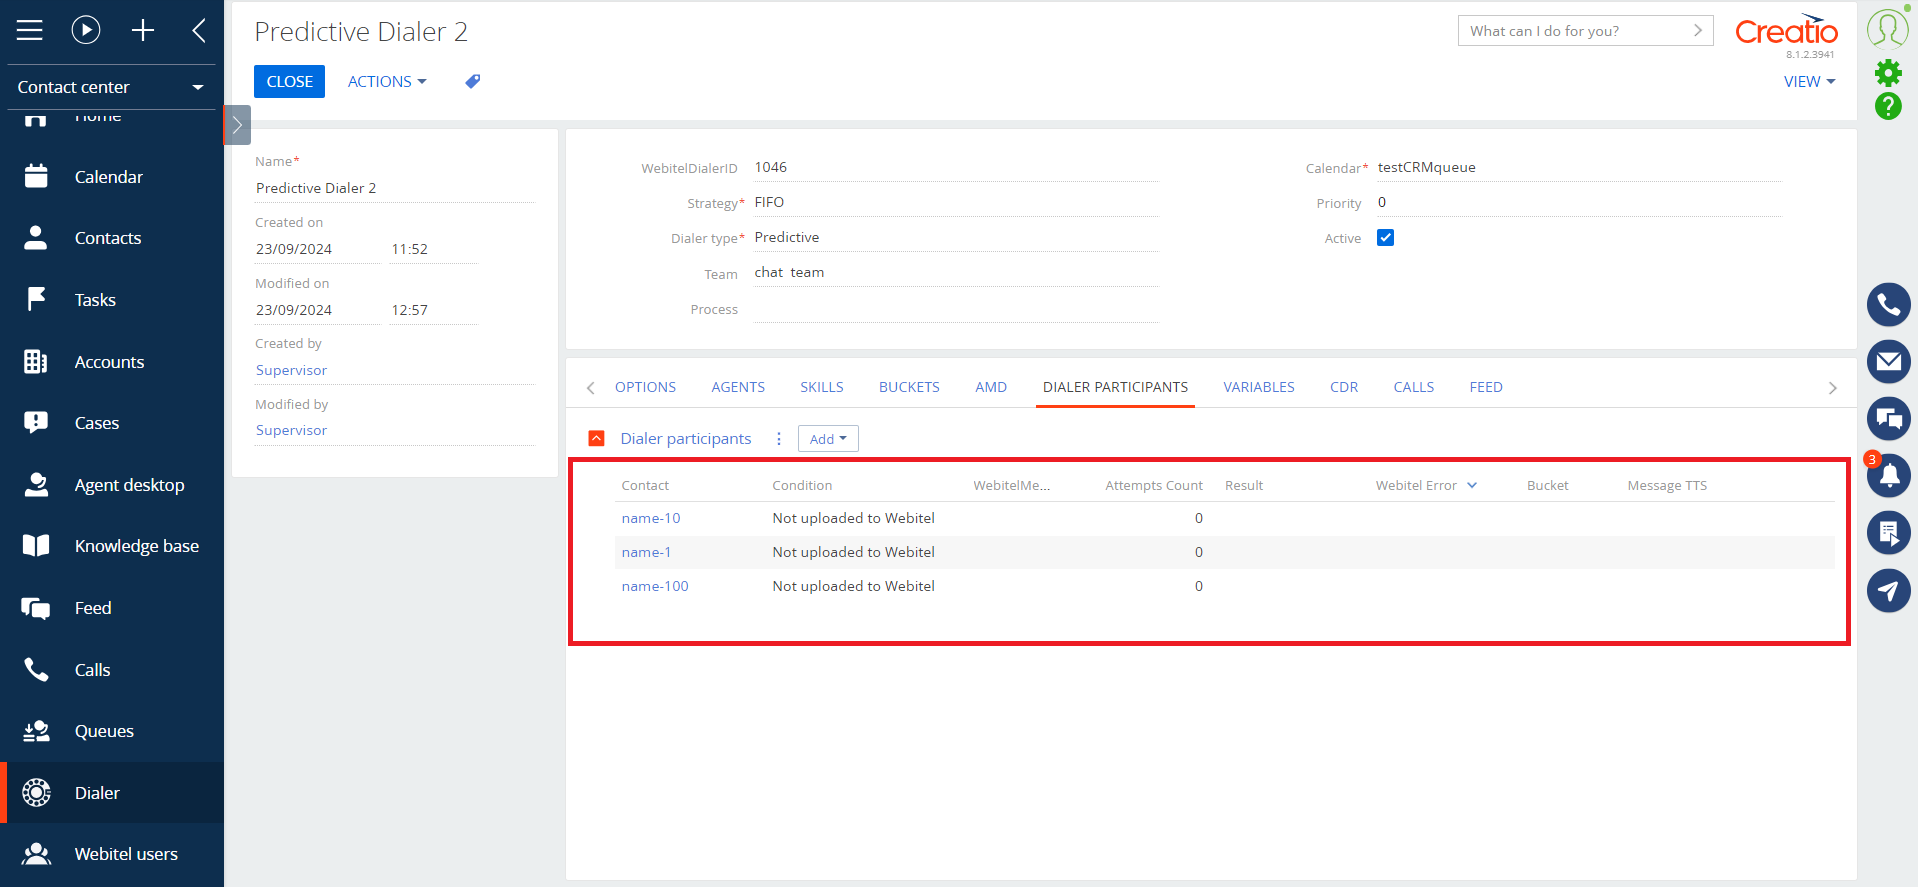
Fig. 9. Dialer participants
In order for the dialer to start making calls, these members must be uploaded to the Webitel system. To do that, you have to run the business process "Upload Webitel members" (Fig. 10).
Note: before uploading Webitel members, it is necessary to set up the "Communication option types" lookup in Creatio. See section 11 "Set communication option types".
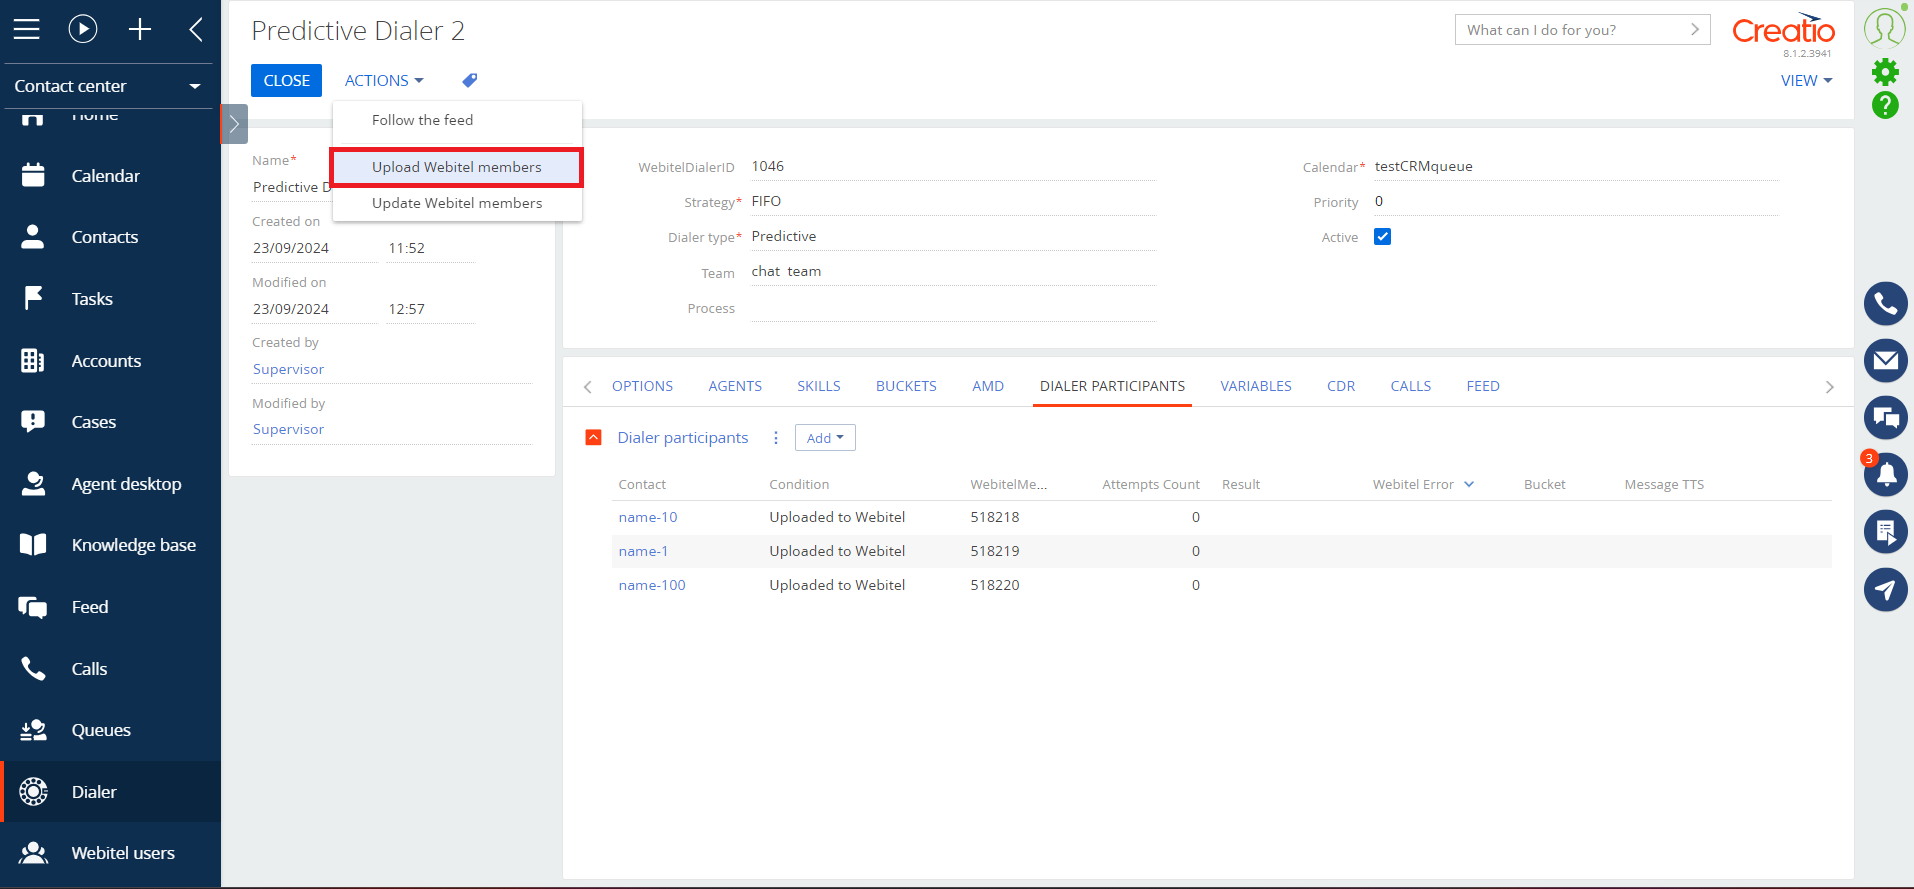
Fig. 10. Run "Upload Webitel members"
Condition of members on the list is changed to "Uploaded to Webitel" (Fig. 11).
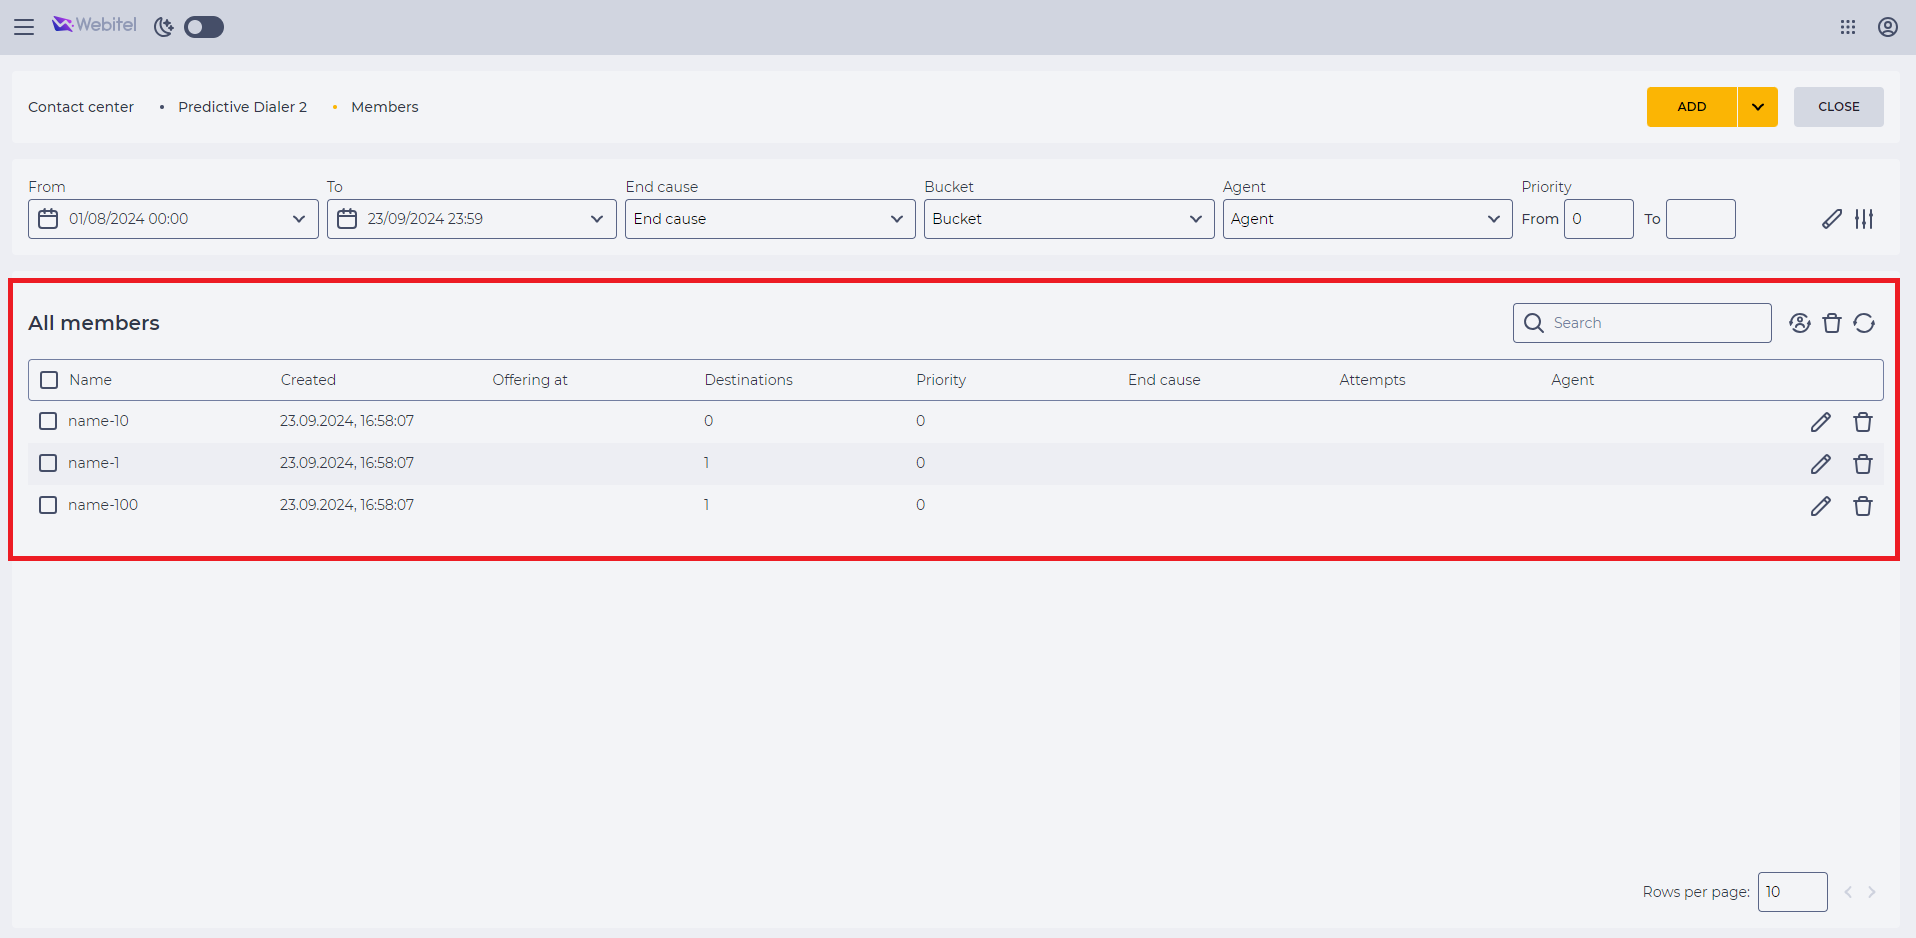
Fig. 11. Members are uploaded to Webitel
6. Activate the dialer
Dialer is created in Webitel (Fig. 12).
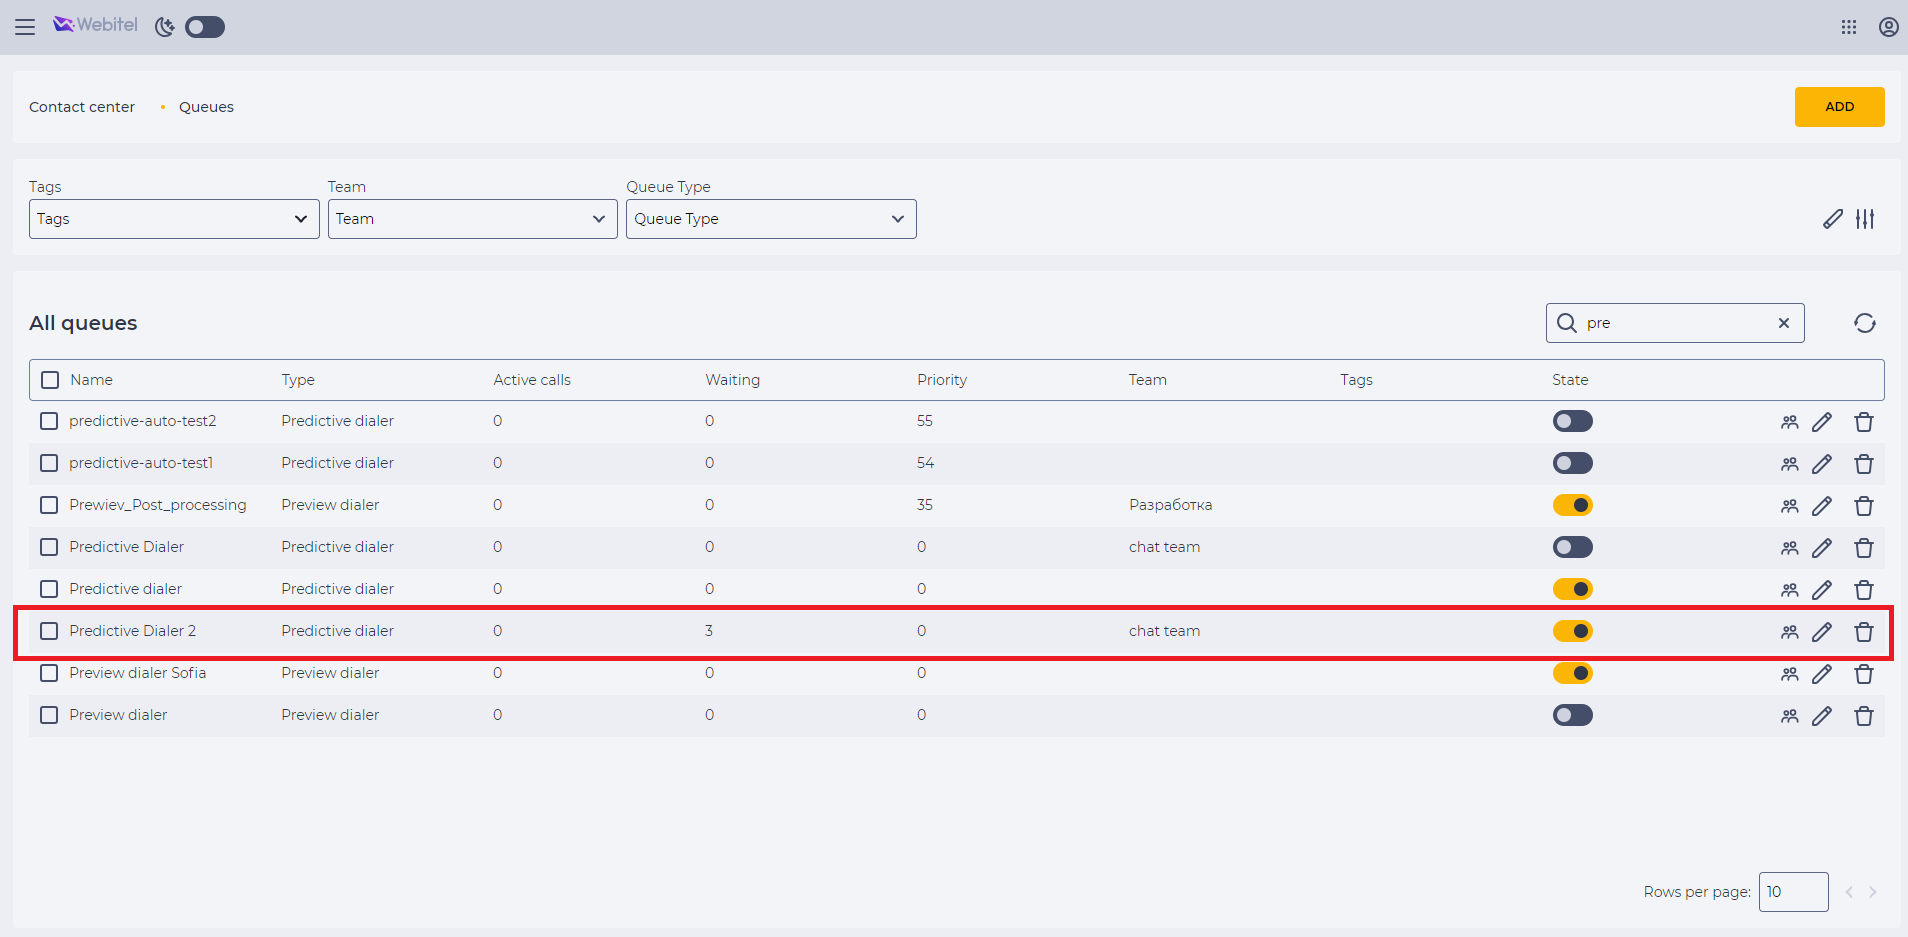
Fig. 12. Dialer is created in Webitel
Now you can activate the dialer (Fig. 13) and the system will start automatically dial uploaded members. The system will route the calls to the assigned agents.
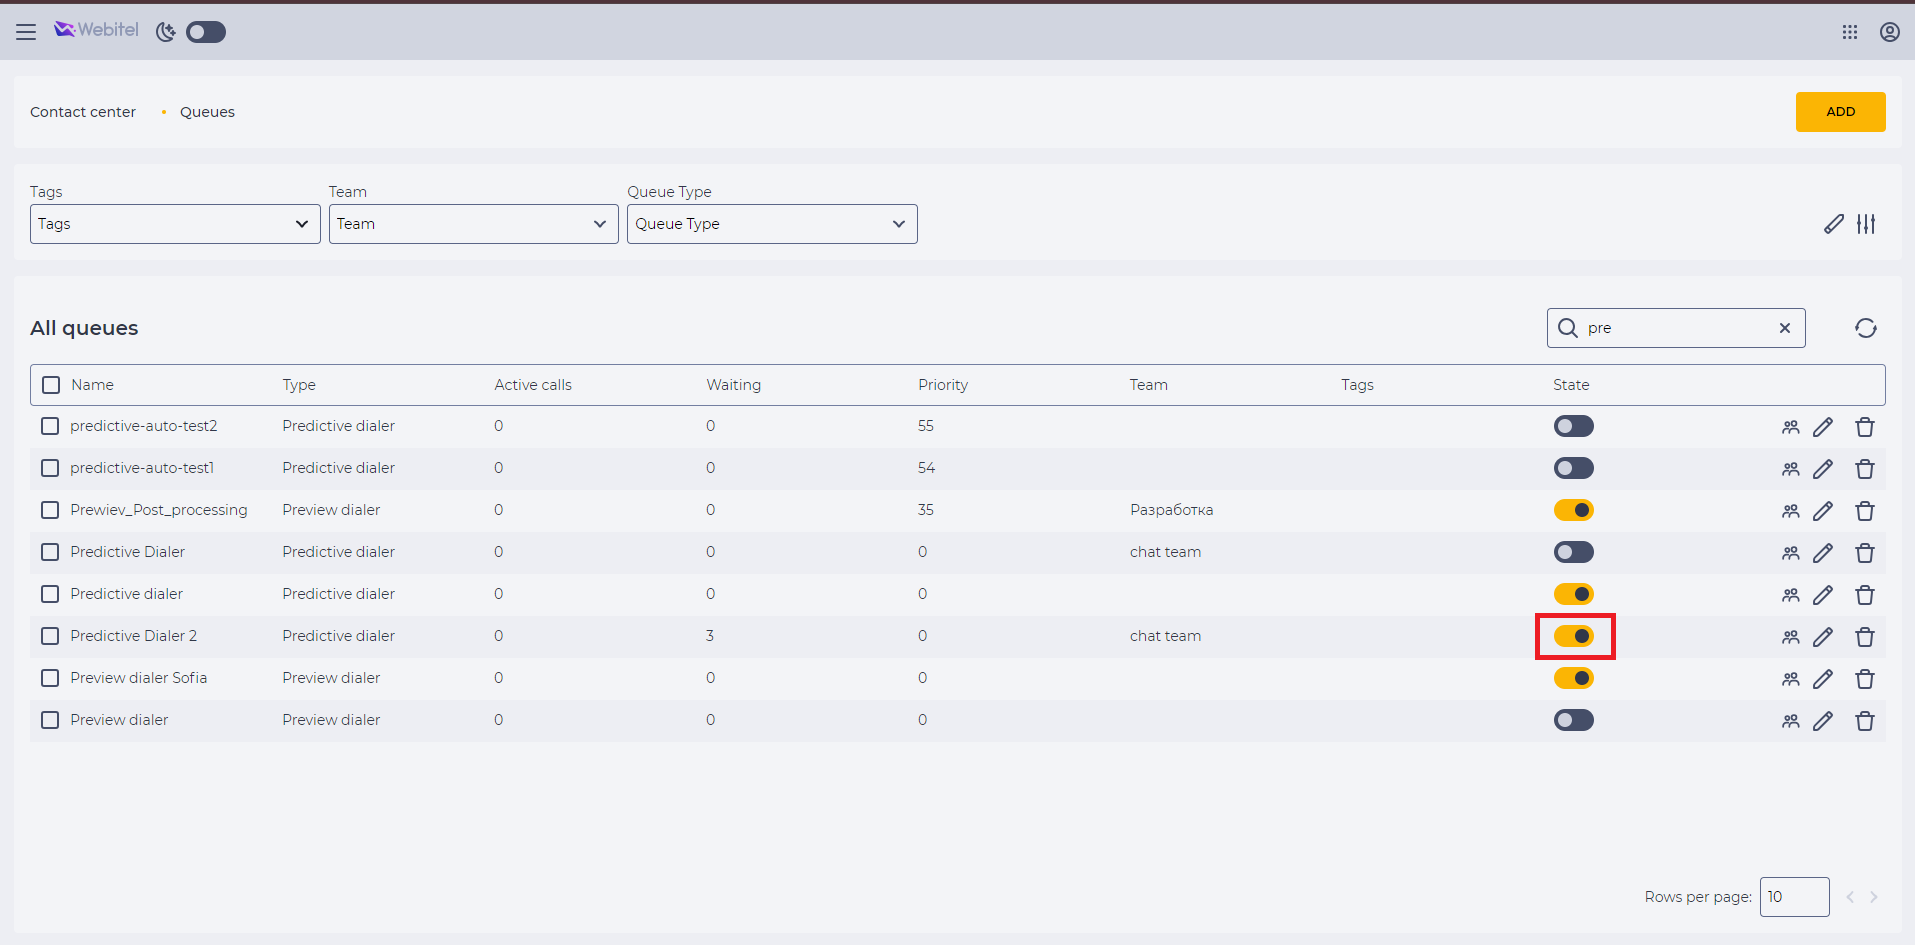
Fig. 13. Activate the dialer
If the agent is in status "Ready" and "CallCenter", the system initiates a call to him (Fig. 14). After the agent has clicked the "accept" button, the system will make a call to the member.
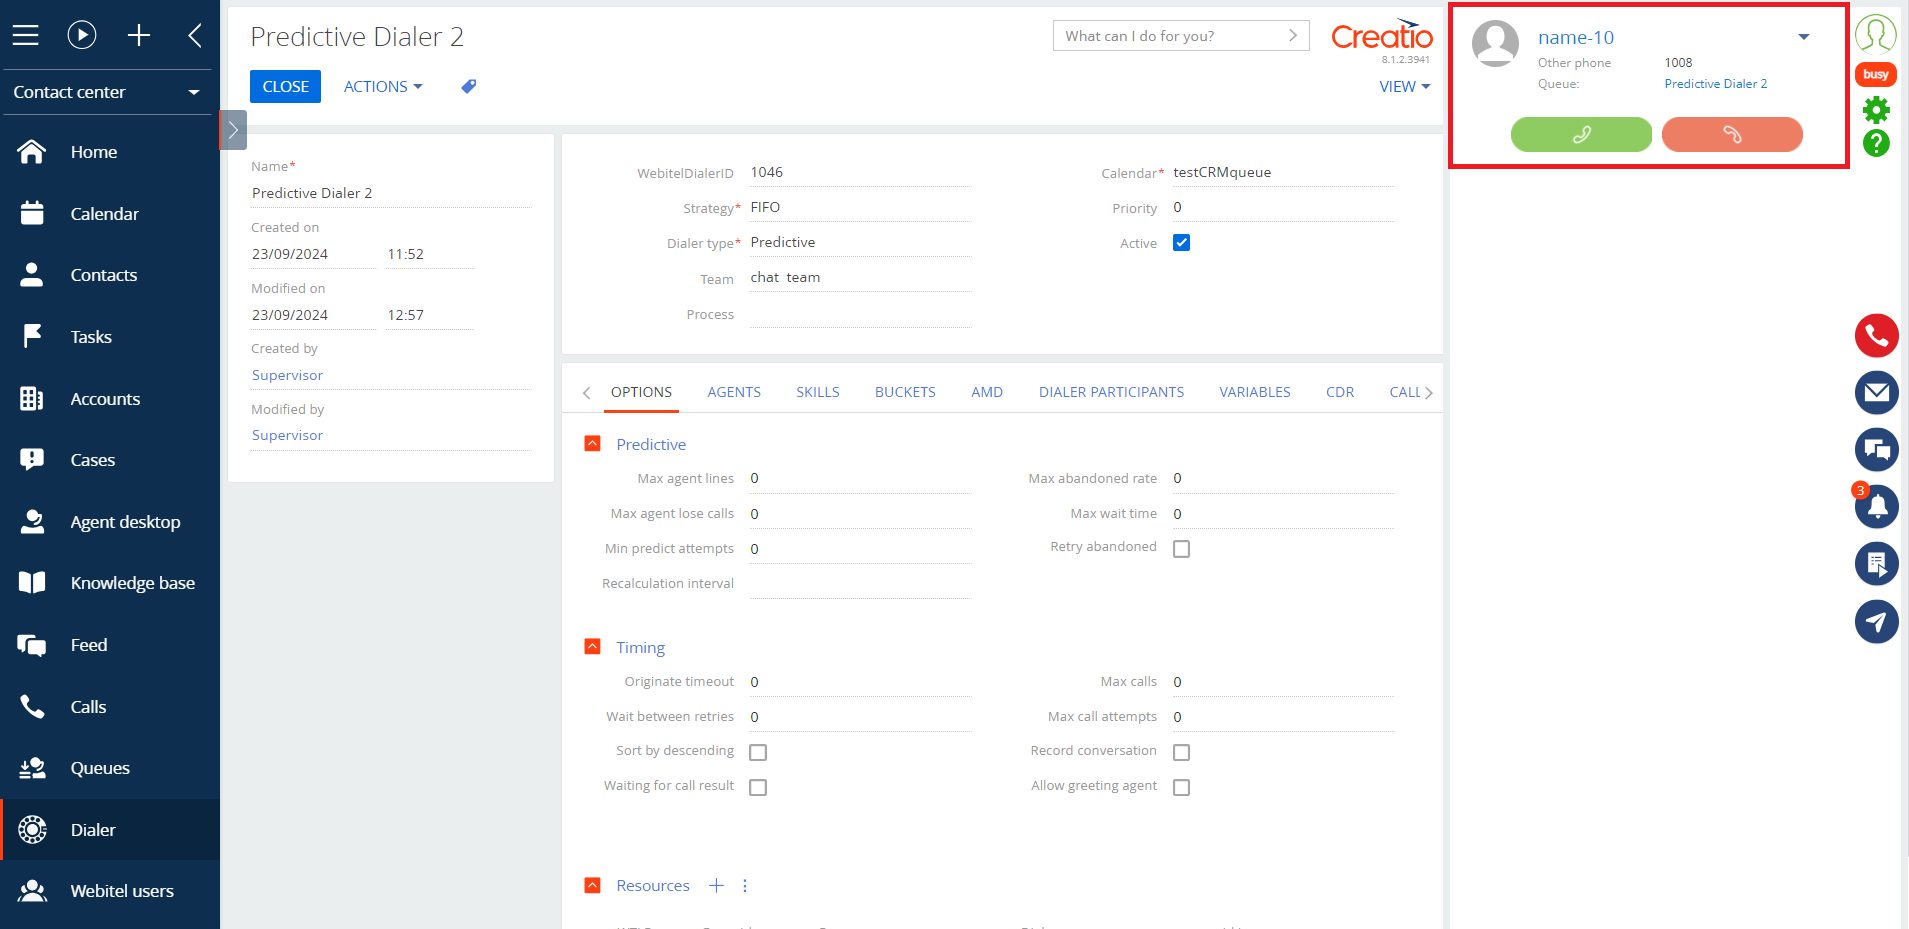
Fig. 14. Call from the dialer is distributed to the agent
7. Add a business process
To process calls from the dialer, you can set up a business process by which the agent can process them. For example, in the basic version of the Telemarketing product, there is a business process by which, when a member connects with an agent, a call post-processing page opens, where the agent can enter the results of the call ("Processed", "No answer", "Call back later"), and leave a comment. If the result is "Call back later", the agent can schedule the next call by selecting the desired call back date and time.
To add a business process to a queue, select it from the lookup on the dialer record page in the "Process" field (Fig. 15 and Fig. 16).
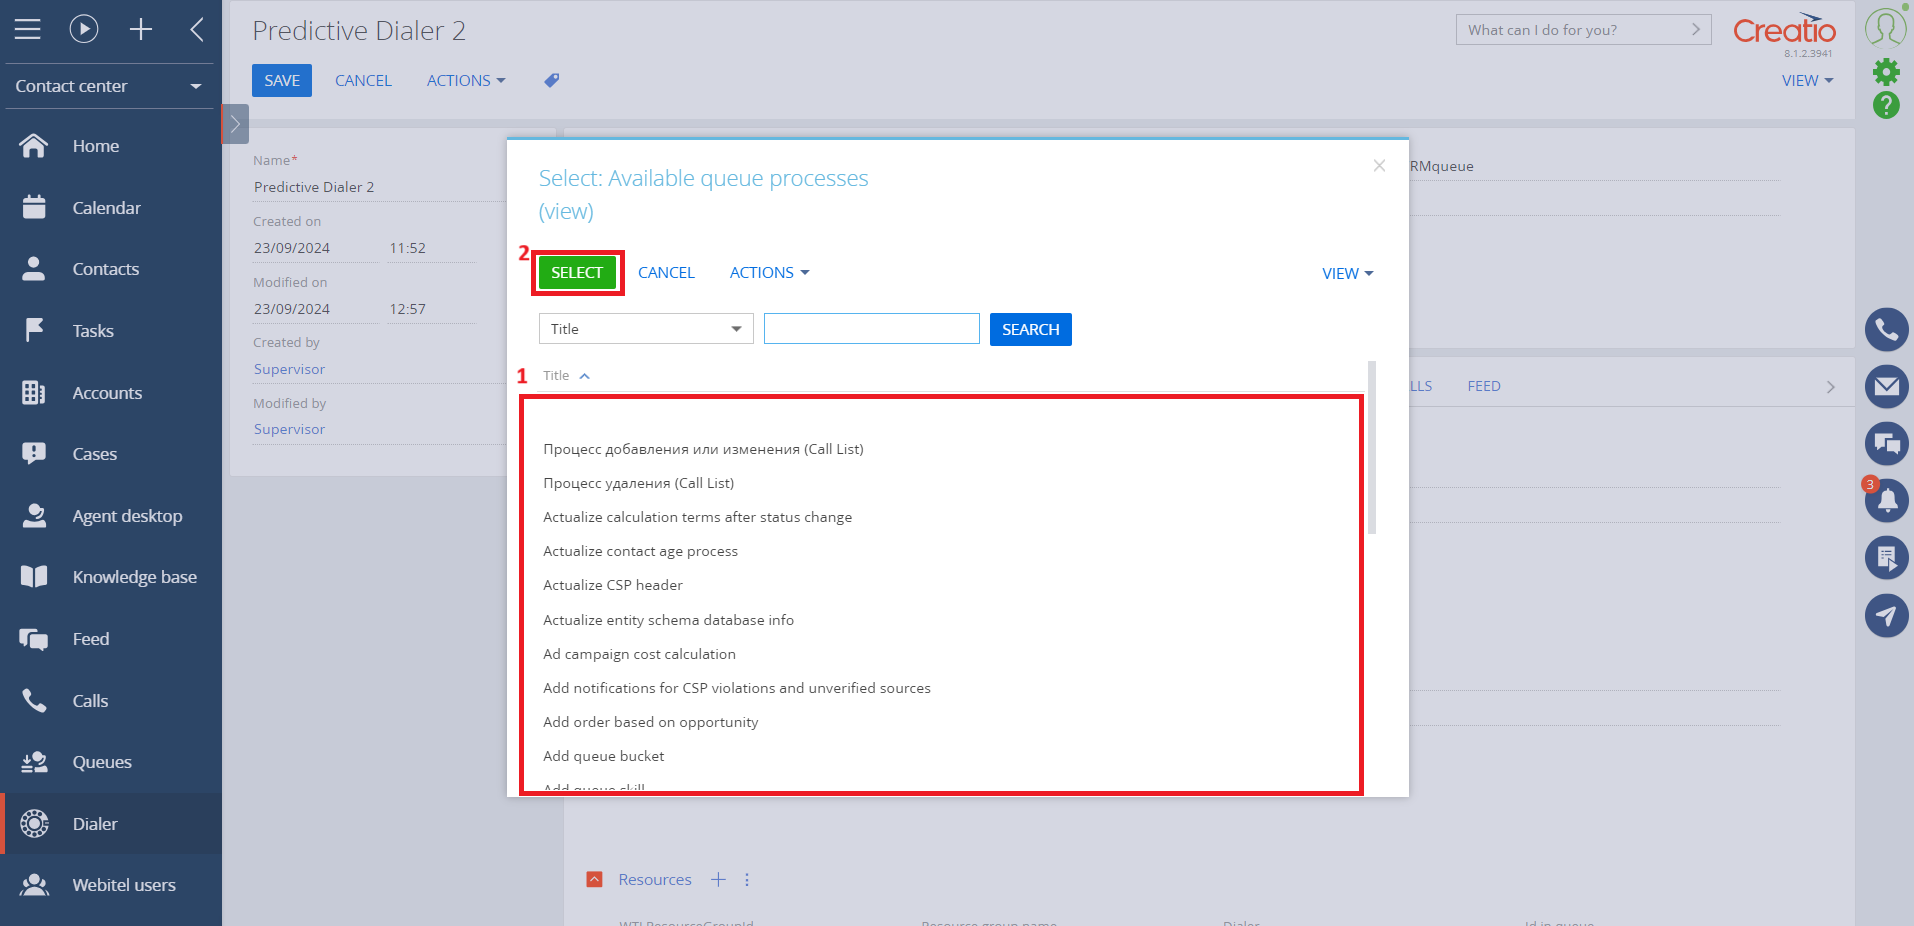
Fig. 15. Select a business process
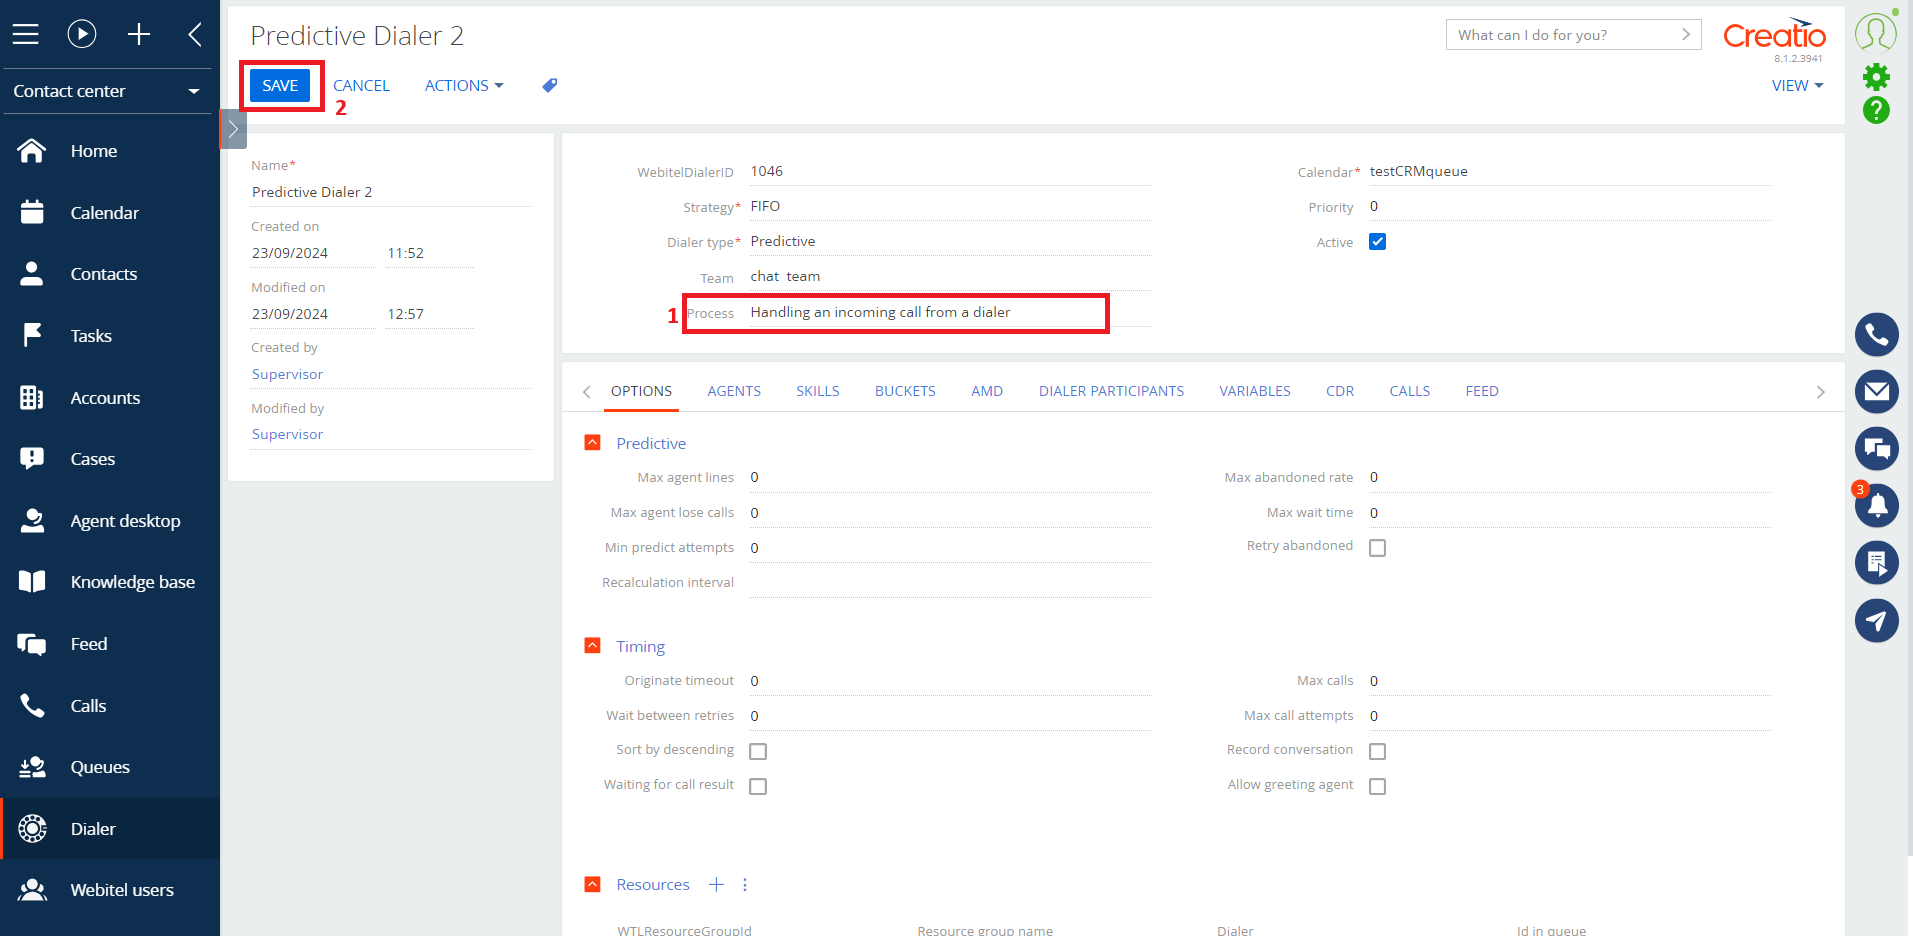
Fig. 16. Business process is added
8. Handle a call by business process
Figure 17 shows the result of a successful call processing.
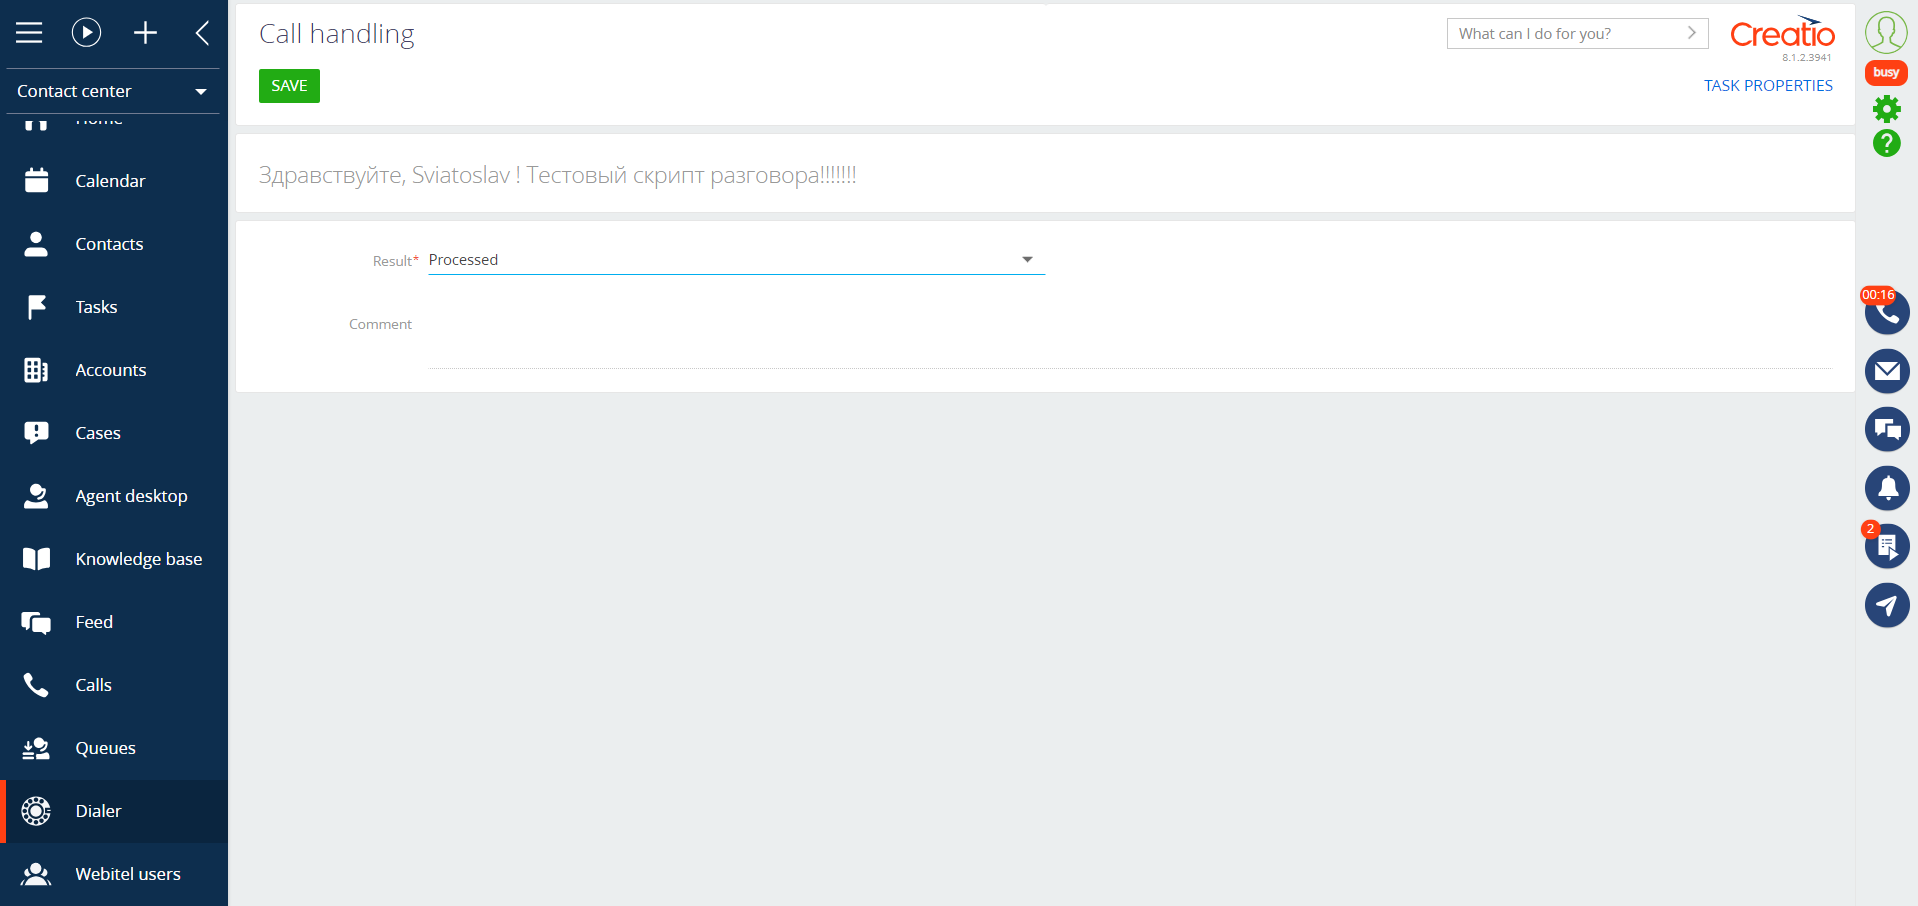
Fig. 17. Successful call processing
Figure 18 shows the result of call processing with the appointment of the date and time of the next call.
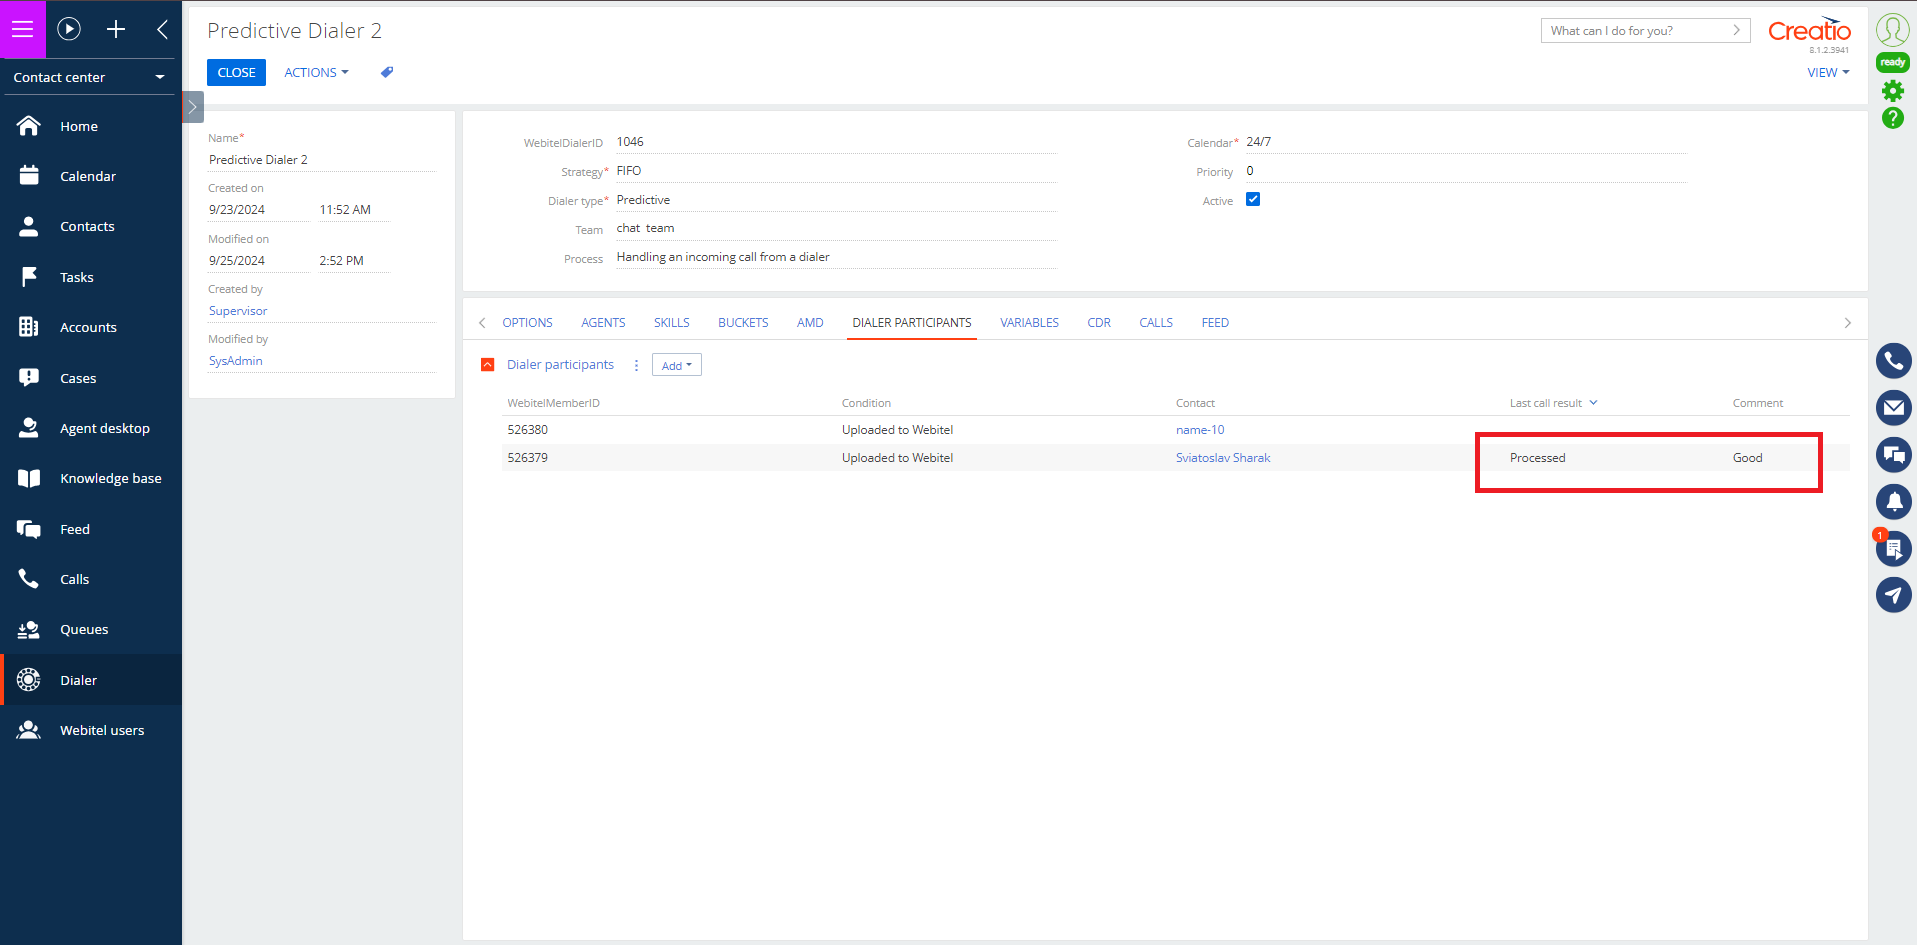
Fig. 18. Set call back time
9. Get call results
In order for the Creatio system to have up-to-date information on the results of the calls, it is necessary to run the "Update Webitel members" business process (Fig. 19).
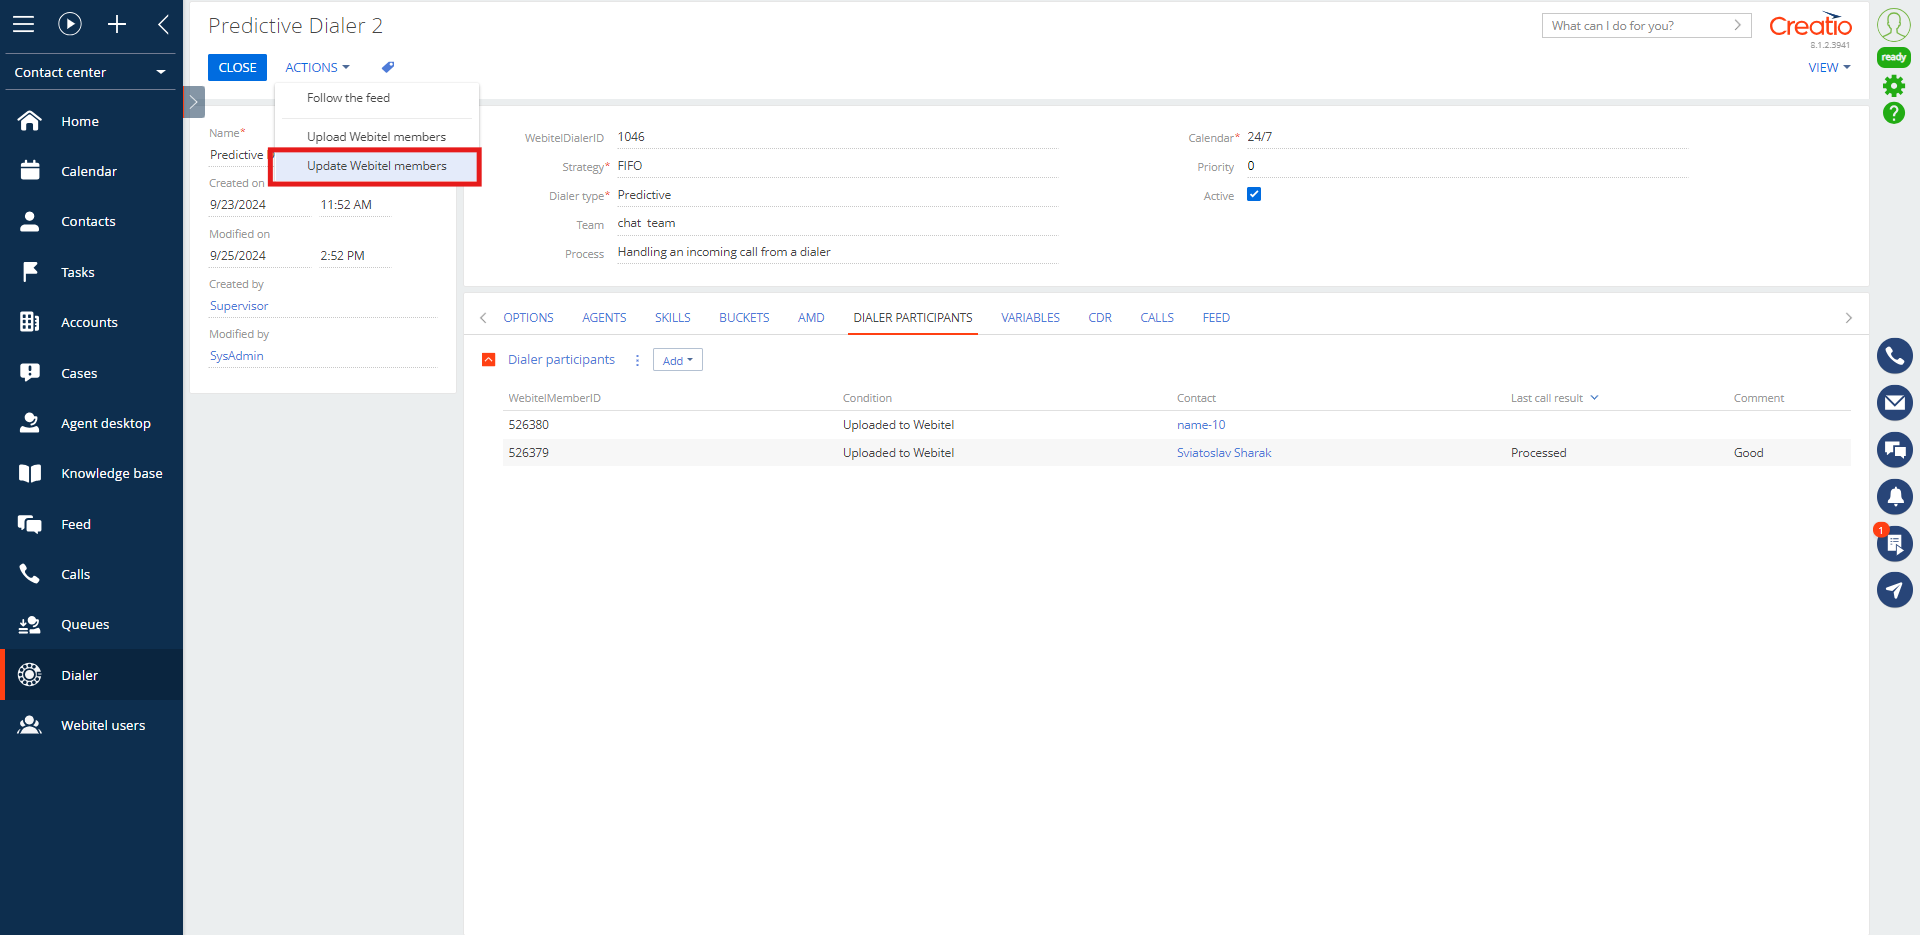
Fig. 19. Run the "Update Webitel members" business process
After that, on the "Dialer participants" tab, information about the members will be updated. For example, for members, the result of the call ("Result") is displayed.
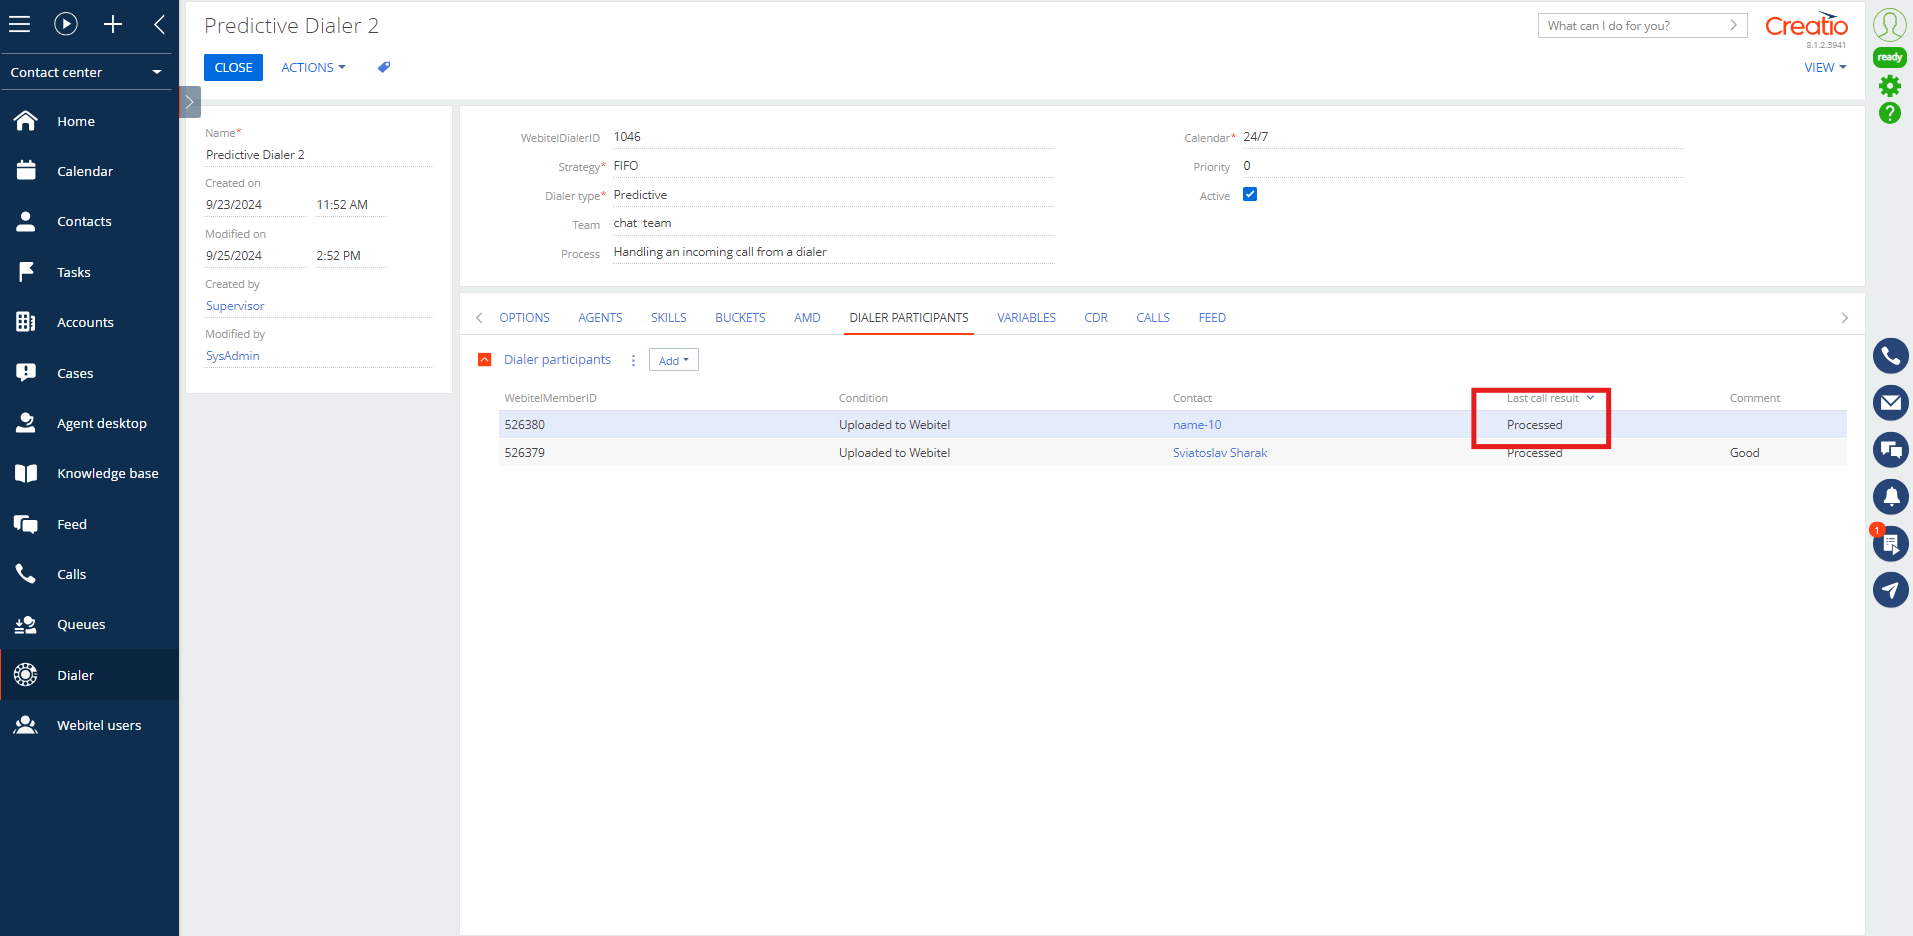
Fig. 20. Updated information on dialer participants
10. Add a bucket
To route specific members to a specific agent, you can use the "Bucket" functionality. In this example, calls will only be routed to agent O B.
All the buckets must be previously created in Webitel (learn more here) (Fig. 21).
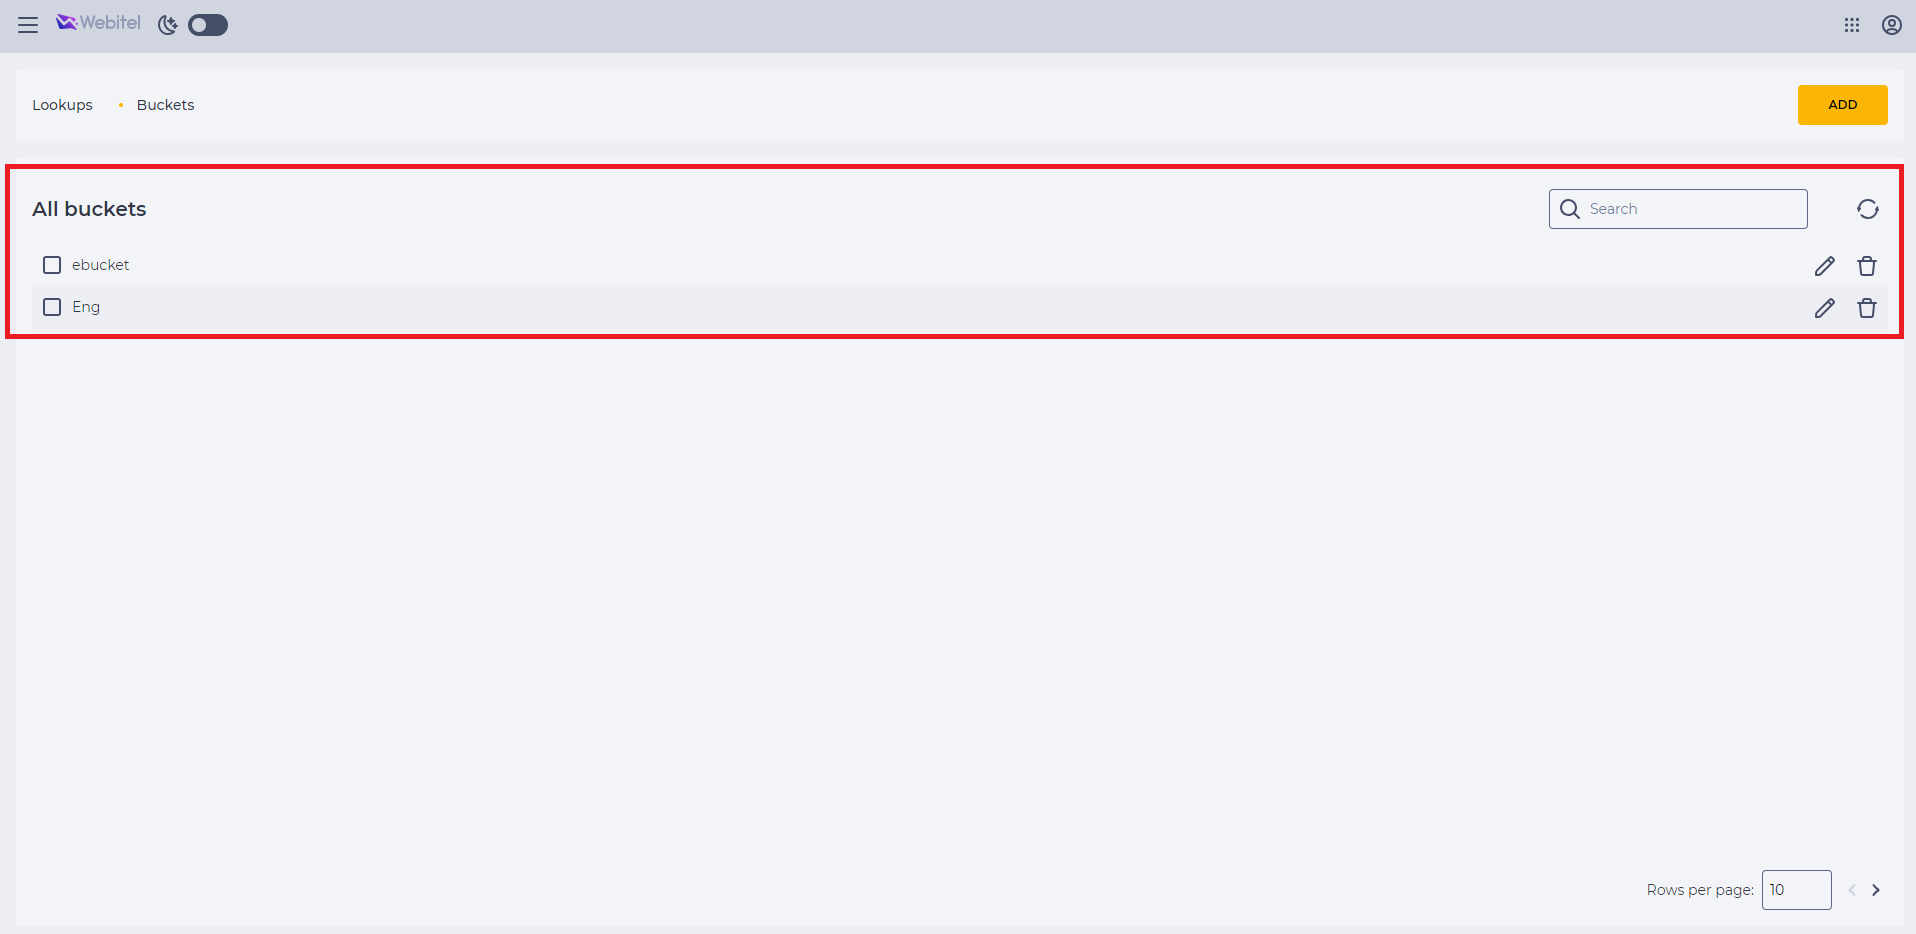
Fig. 21. Buckets are created in Webitel
You need to add the existing bucket "ENG" on the "Bucket" tab (Fig. 22 и Fig. 23).
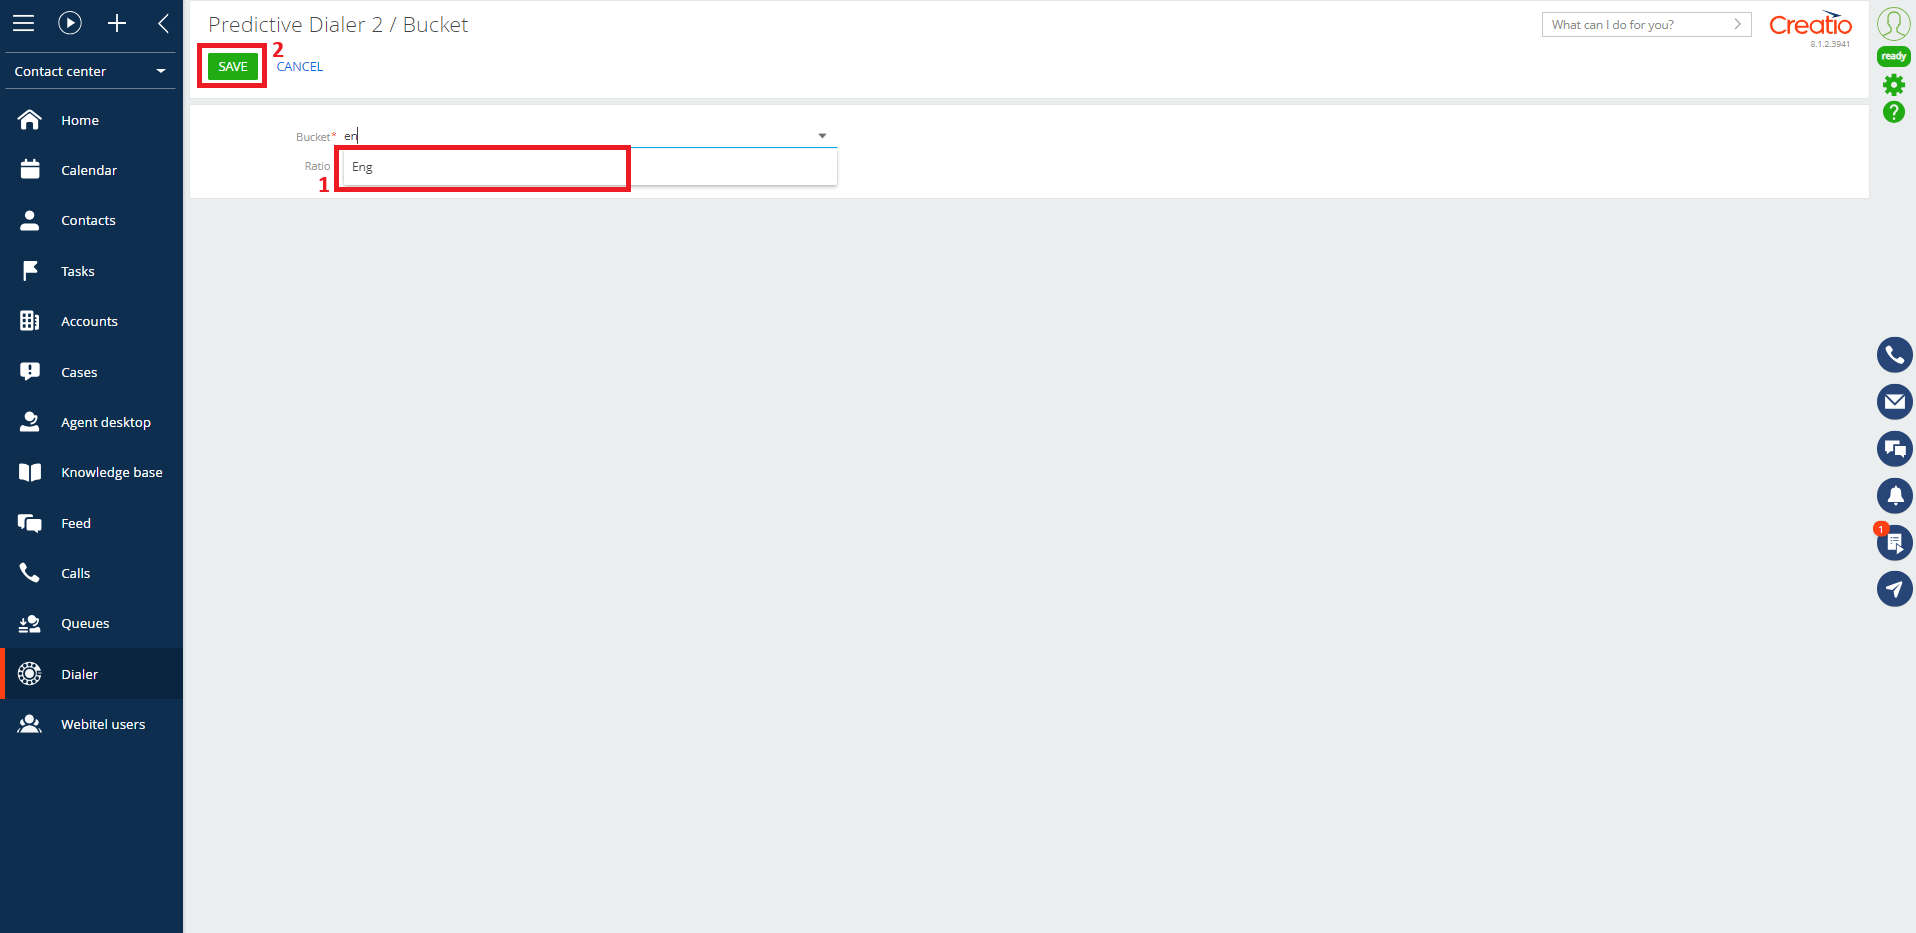
Fig. 22. Select a bucket
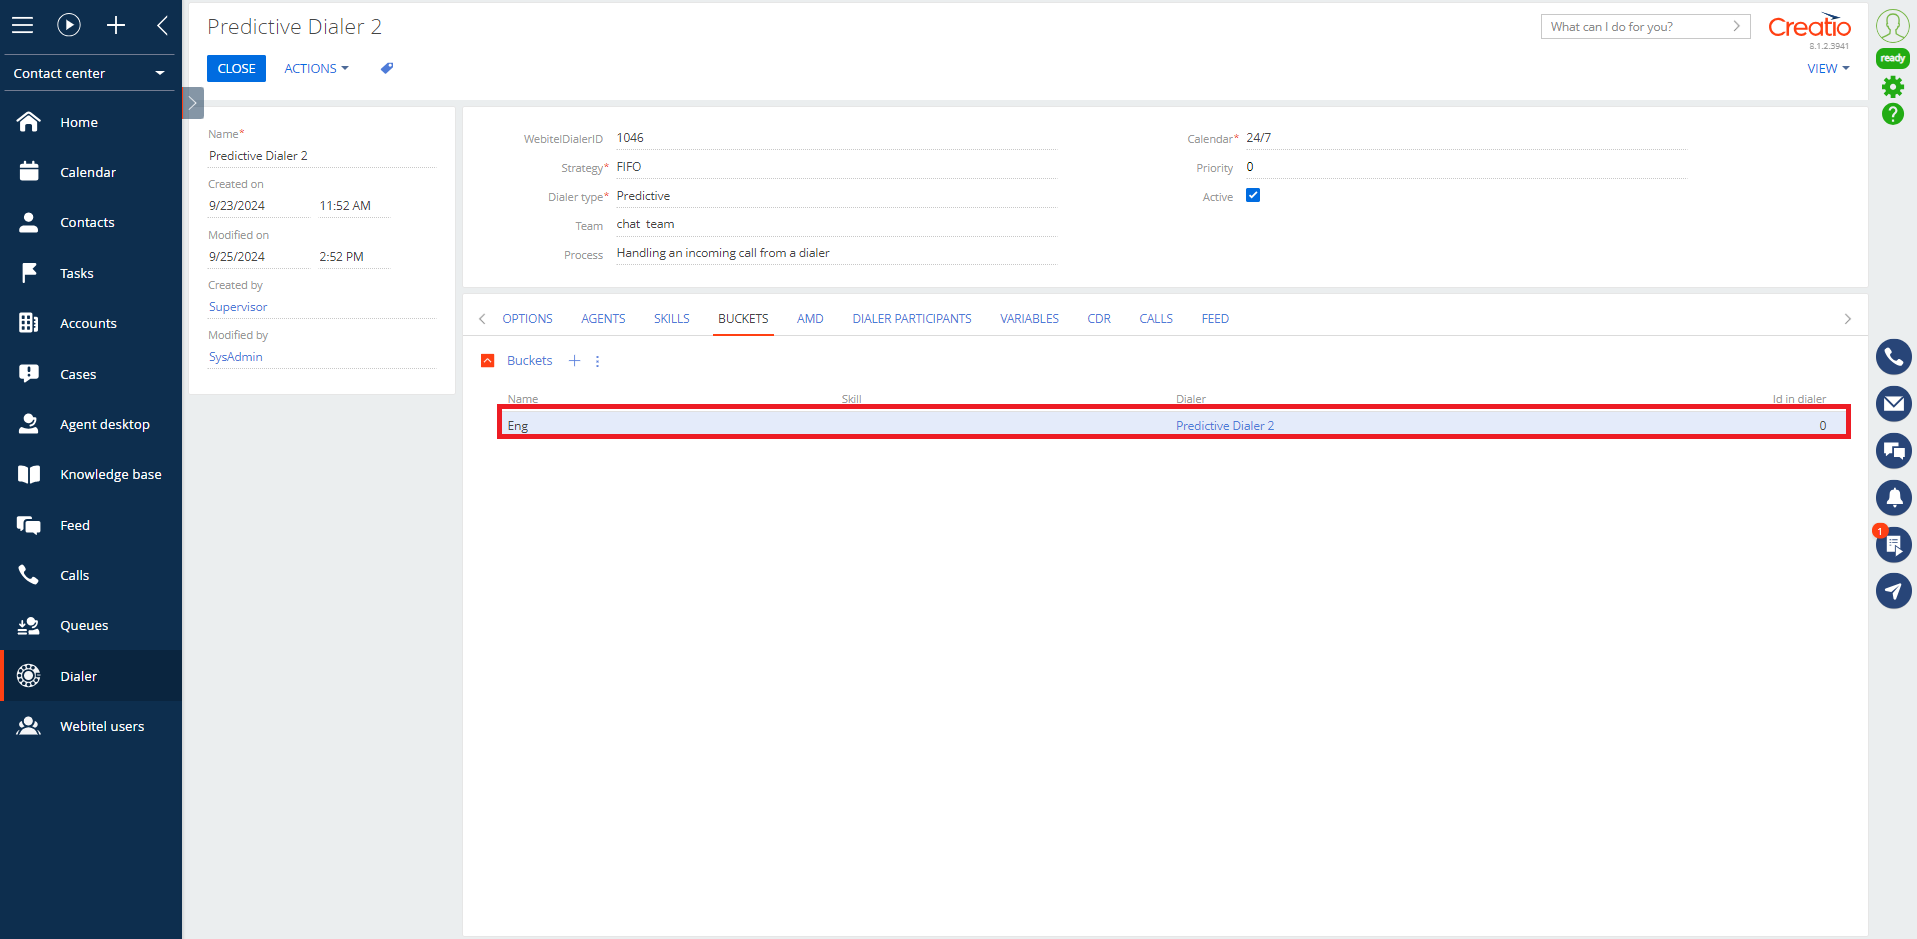
Fig. 23. The bucket is added to the dialer
Also, in the Webitel system, you need to create a skill that will correspond to the bucket ("ENG_skill") (Fig. 24).
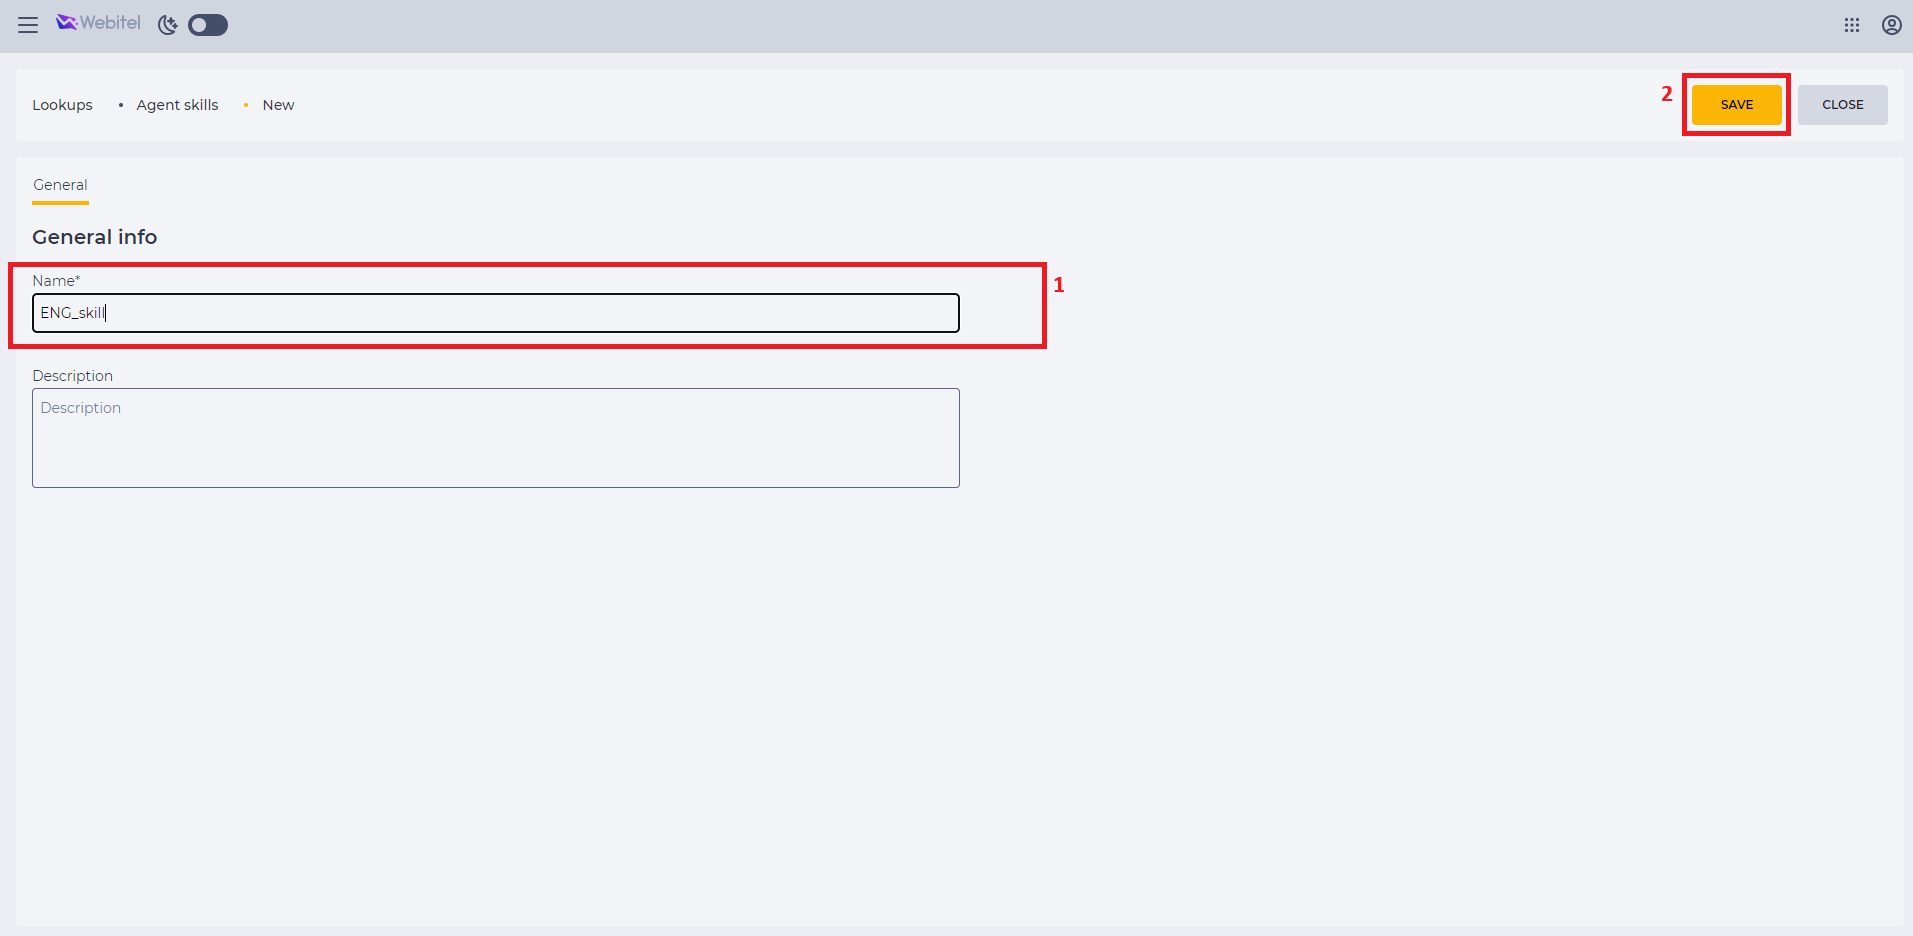
Fig. 24. Create skill "ENG_skill" in Webitel
You have to add the created skill to the agent you want the calls to be routed to by this bucket (Fig. 25).
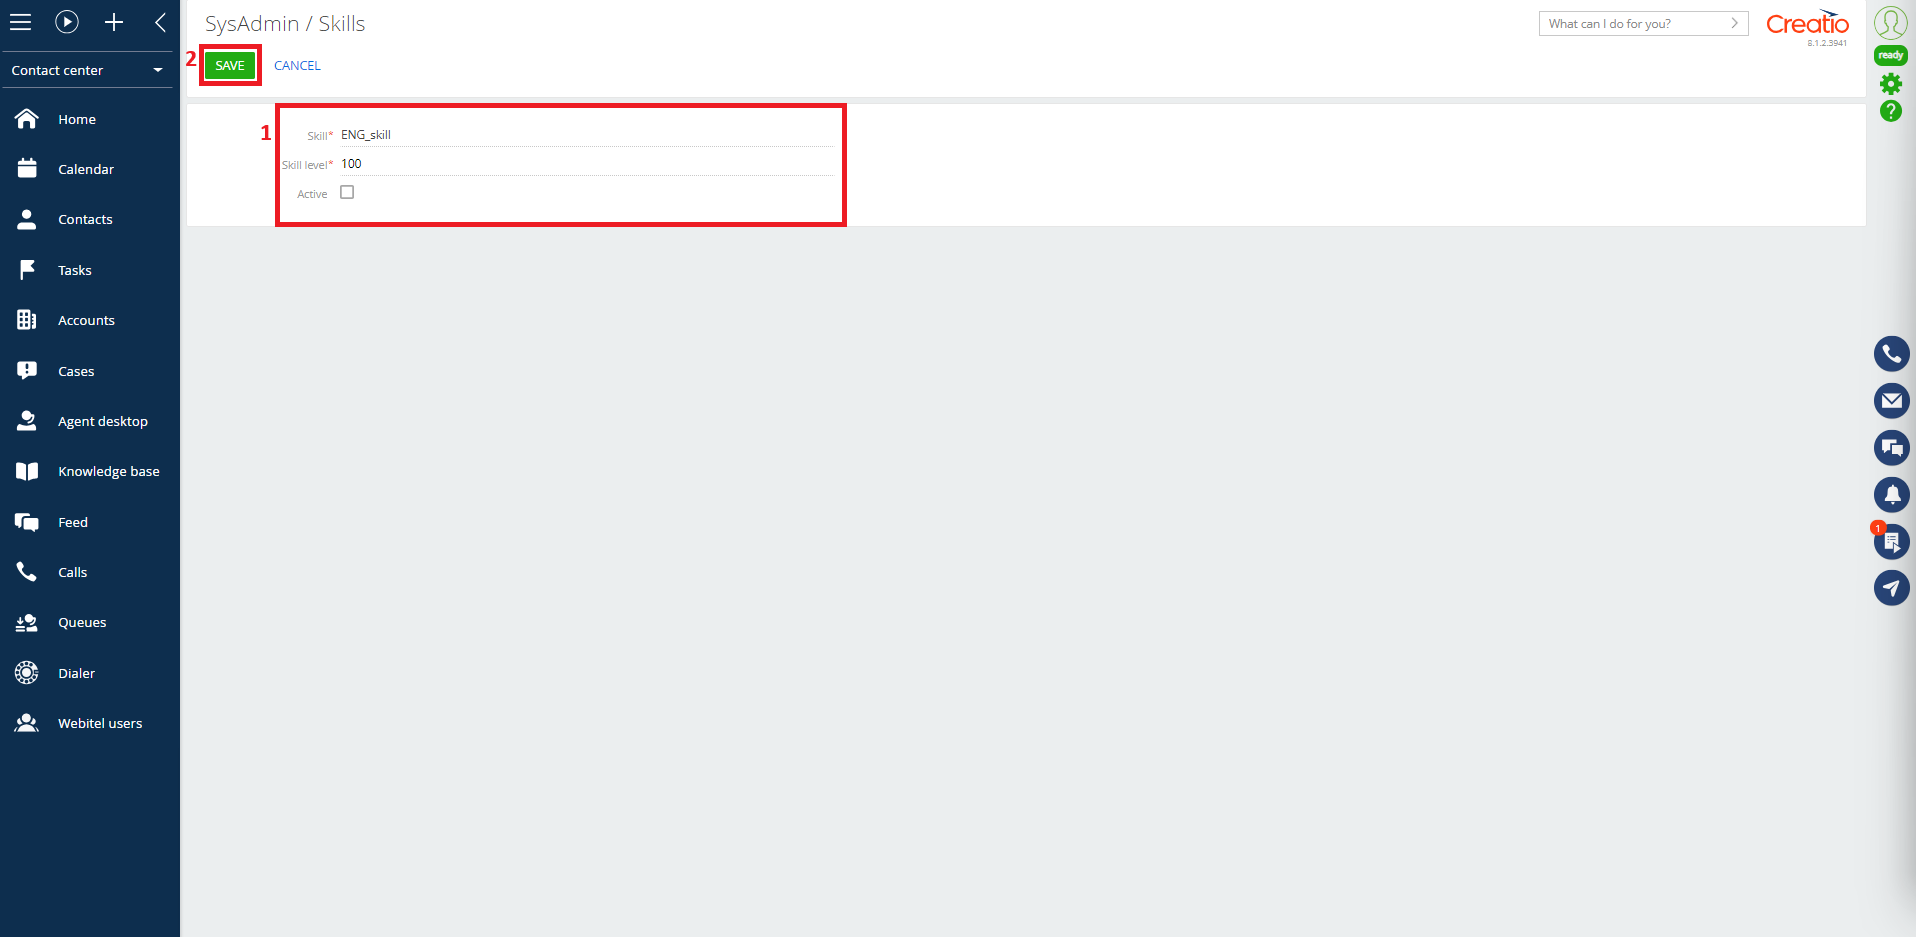
Fig. 25. Add skill "ENG_skill" to agent
Now this skill needs to be added to the dialer queue on the "Skills" tab, and associated with the bucket (Fig. 26 and Fig. 27).
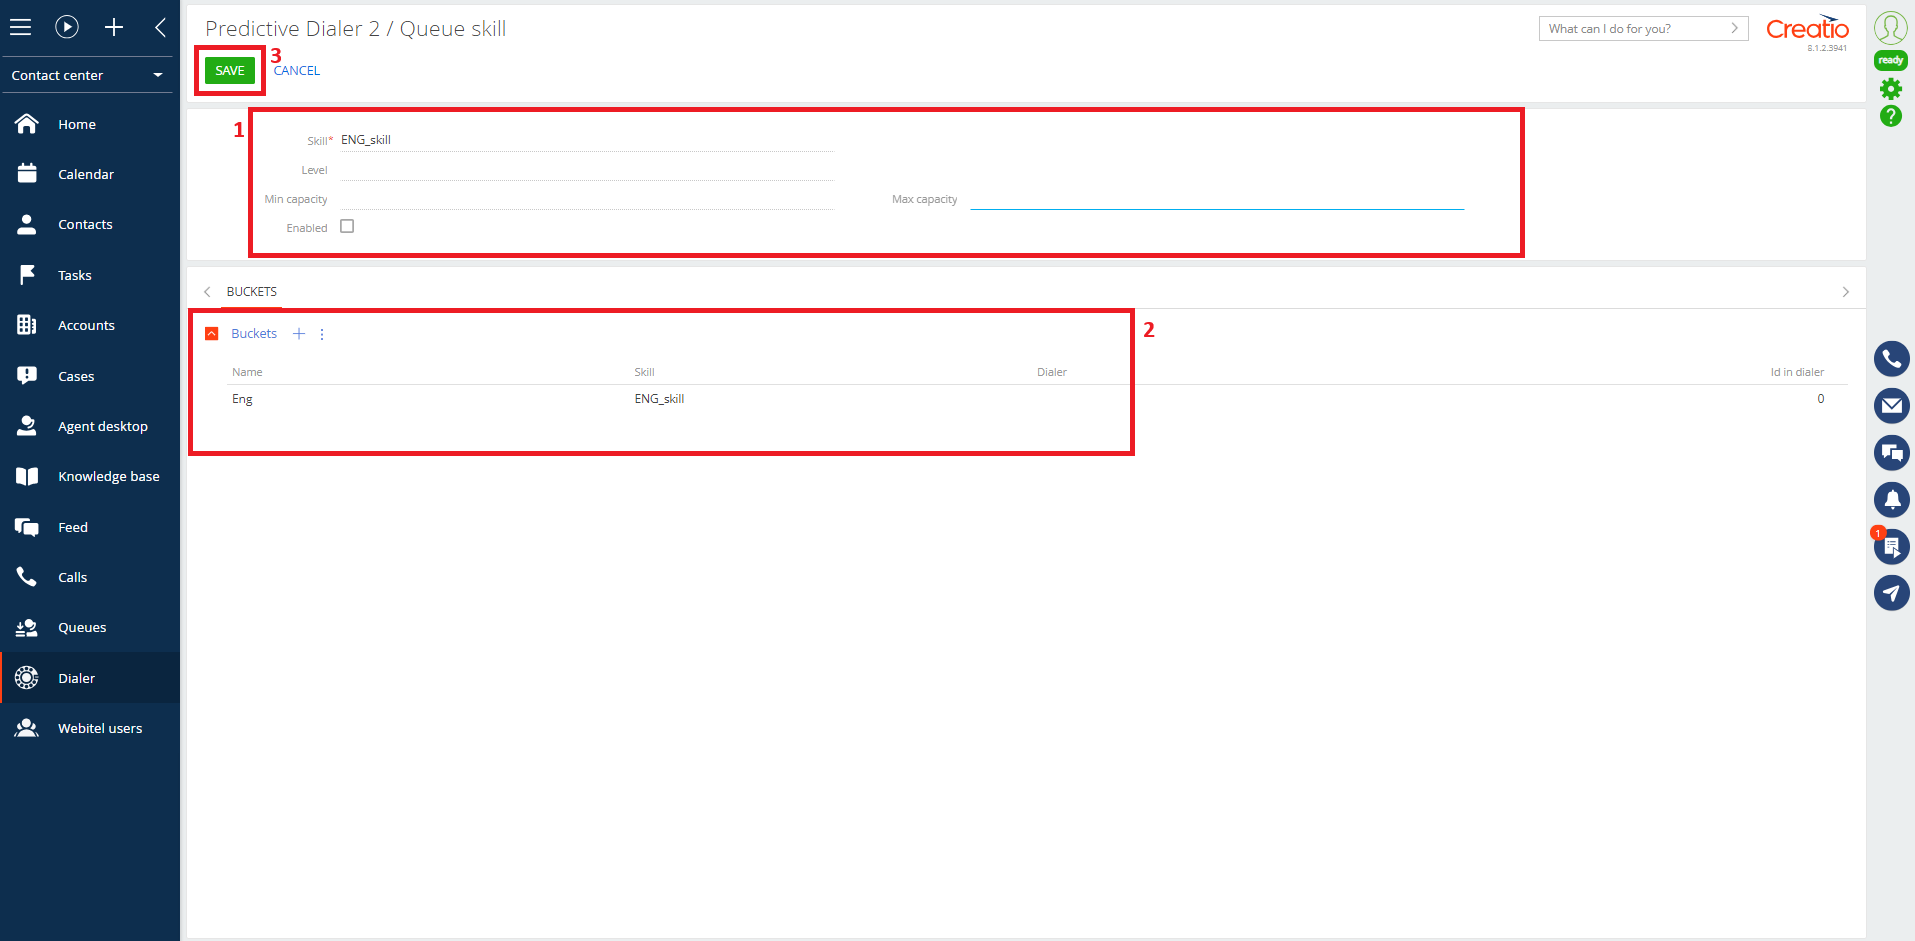
Fig. 26. Add skill "ENG_skill" to the dialer with bucket "ENG"
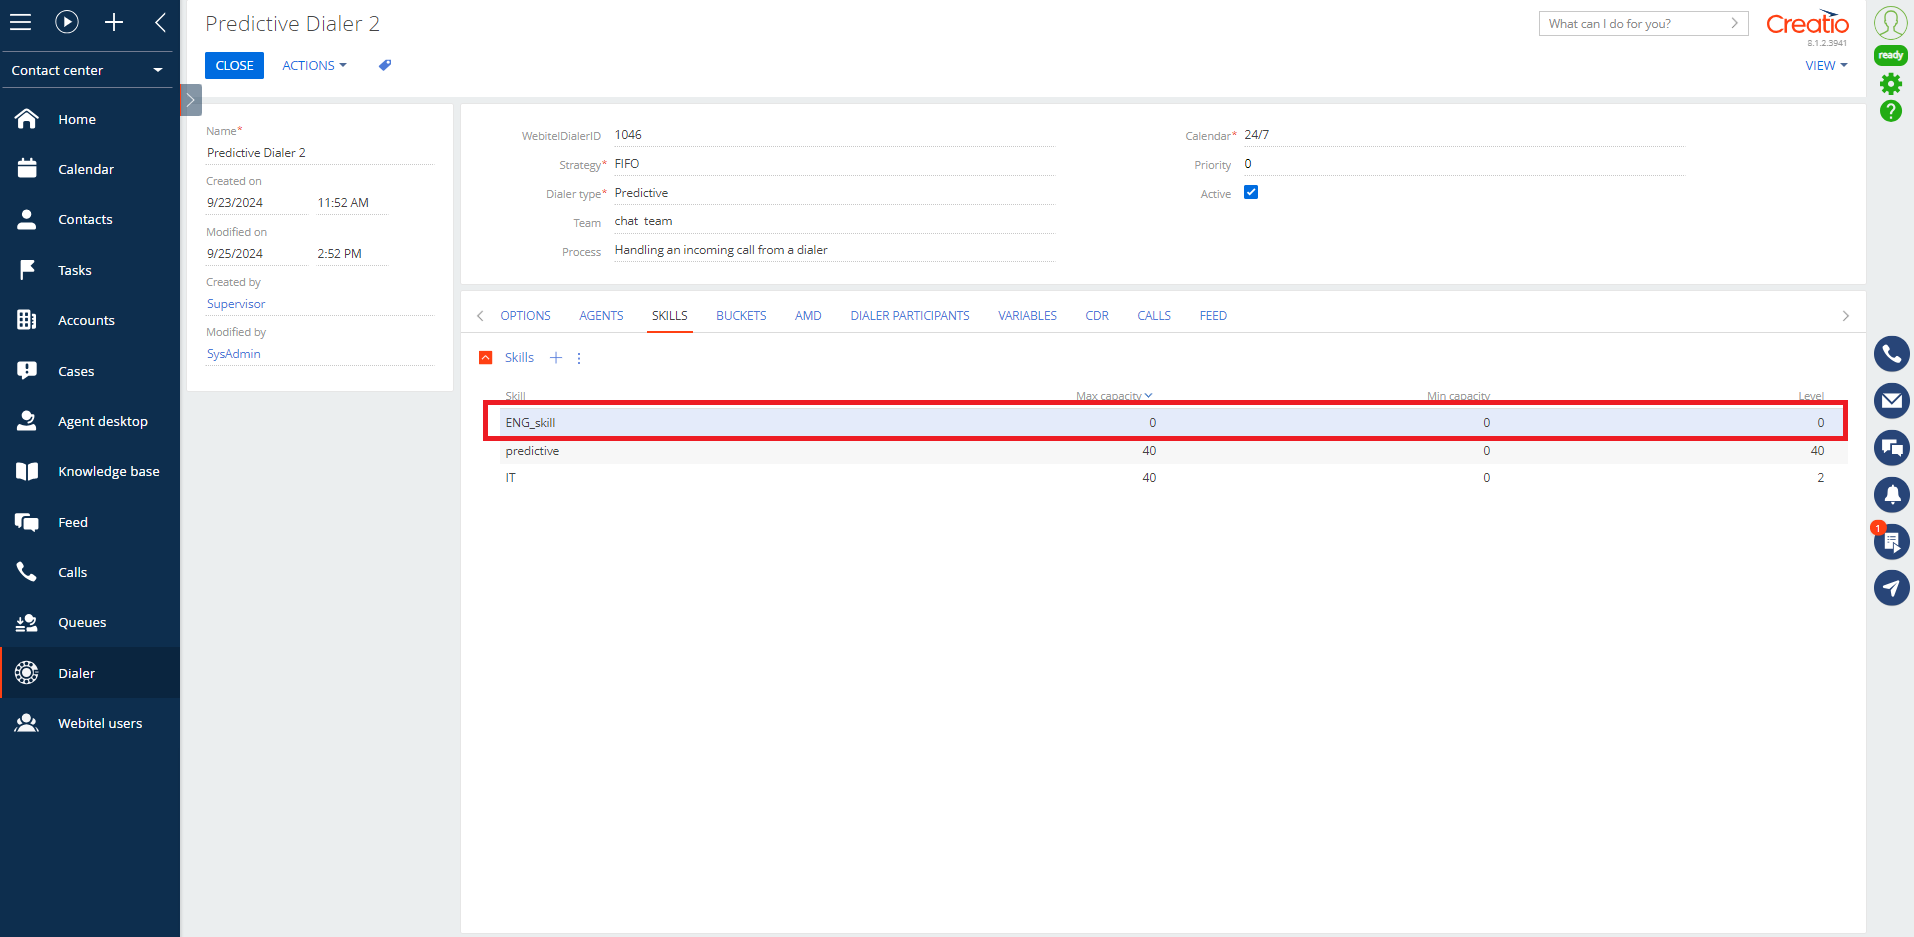
Fig. 27. Skill is added to the dialer
Next, add the group of Contacts to the dialer participants on the "Dialer participants" tab (Fig. 28).
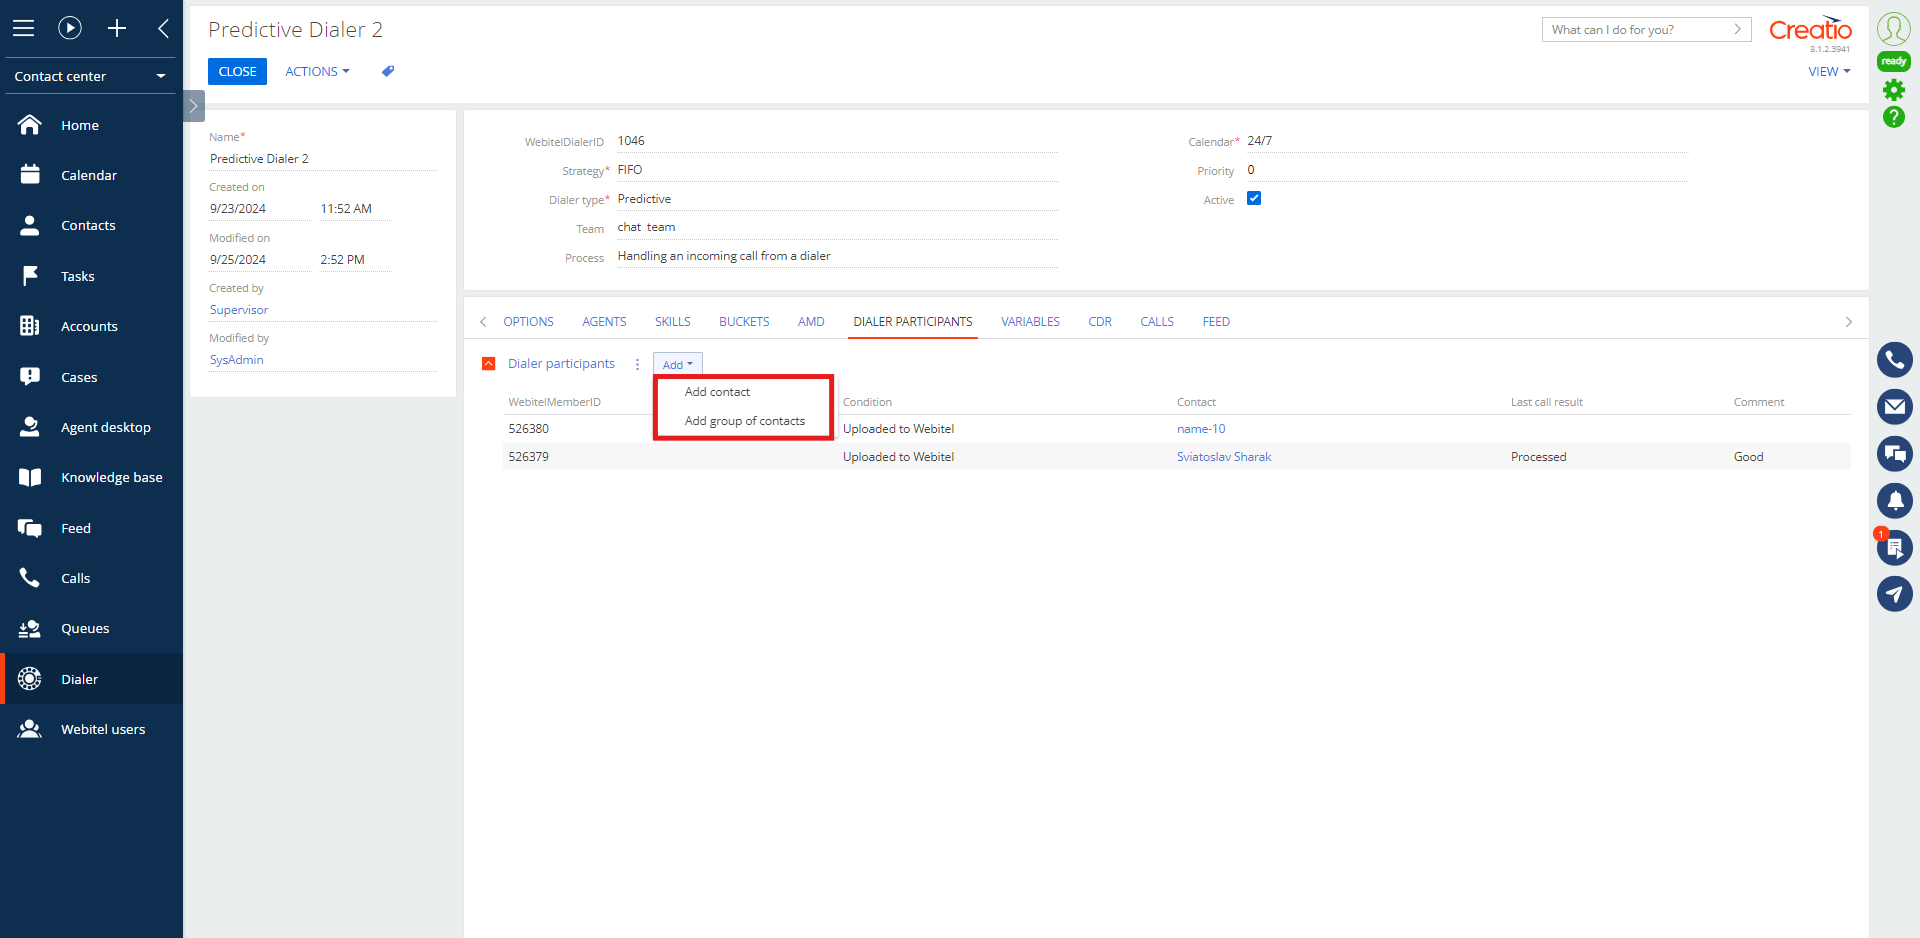
Fig. 28. Add dialer participants
By editing the member, you can add the necessary bucket to him (Fig. 29). There can only be one bucket per bucket.
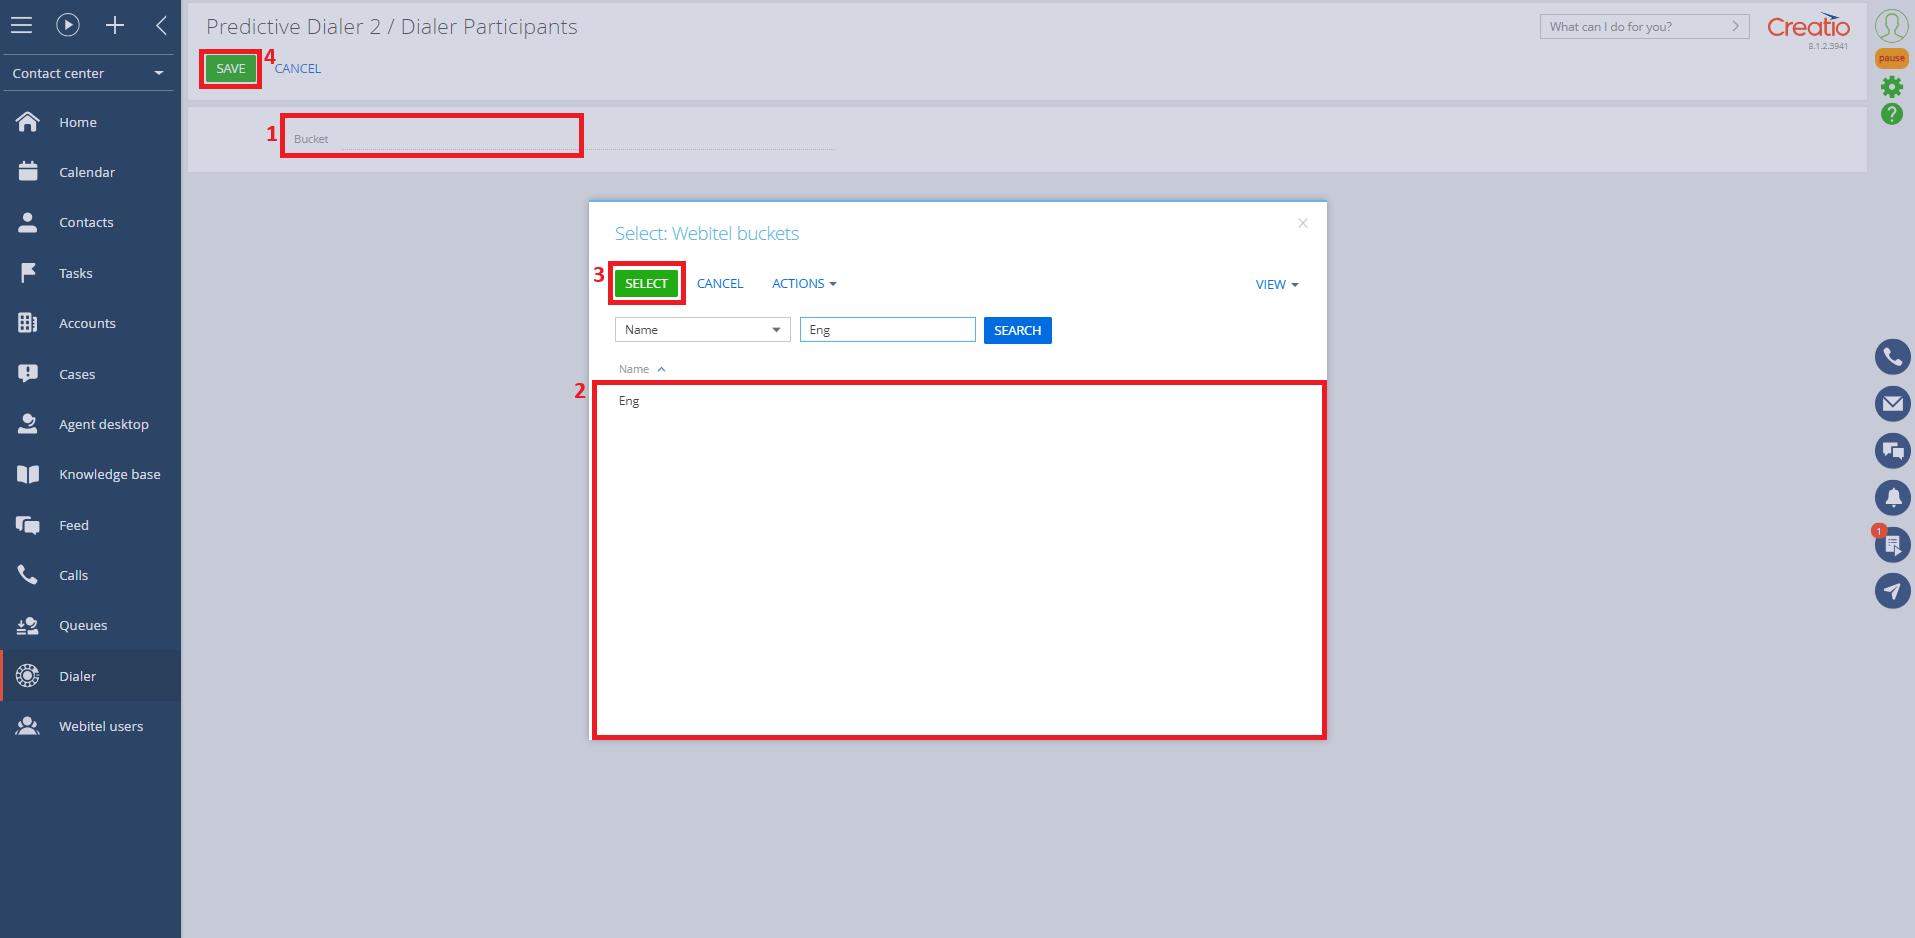
Fig. 29. Add a bucket to a member
In the list of dialer participants, there is a basket (Fig. 30).
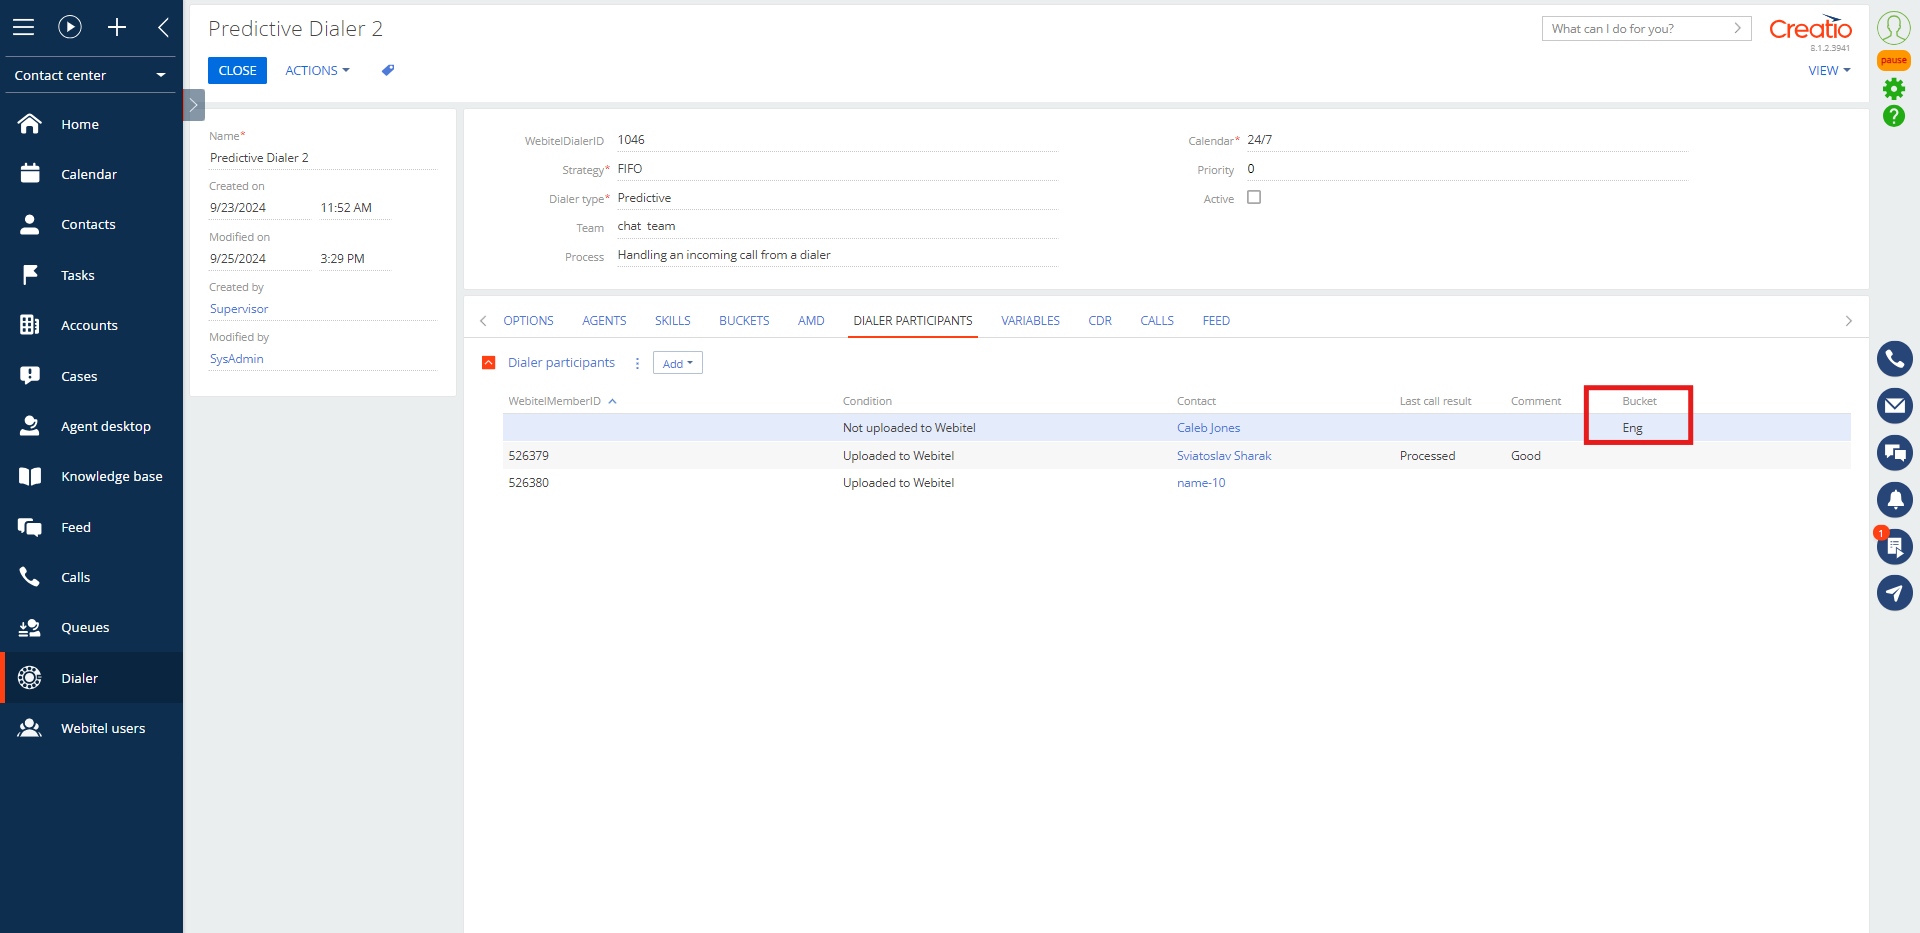
Fig. 30. Dialer participants
Now, after turning on the dialer, calls to the member Mary King will be routed to the agent with the "ENG_skill" skill, with which the "ENG" is associated. And this is the agent.
The agent may have several skills, respectively, several buckets.
Calls to the member Andrew Baker, who has not related to a bucket, will be routed to agents with the general skill - "preview_dialer".
Now you can upload dialer participants and start working with calls.
11. Set communication option types
Before adding dialer participants, it is necessary to set up the "Communication option types" lookup in Creatio.
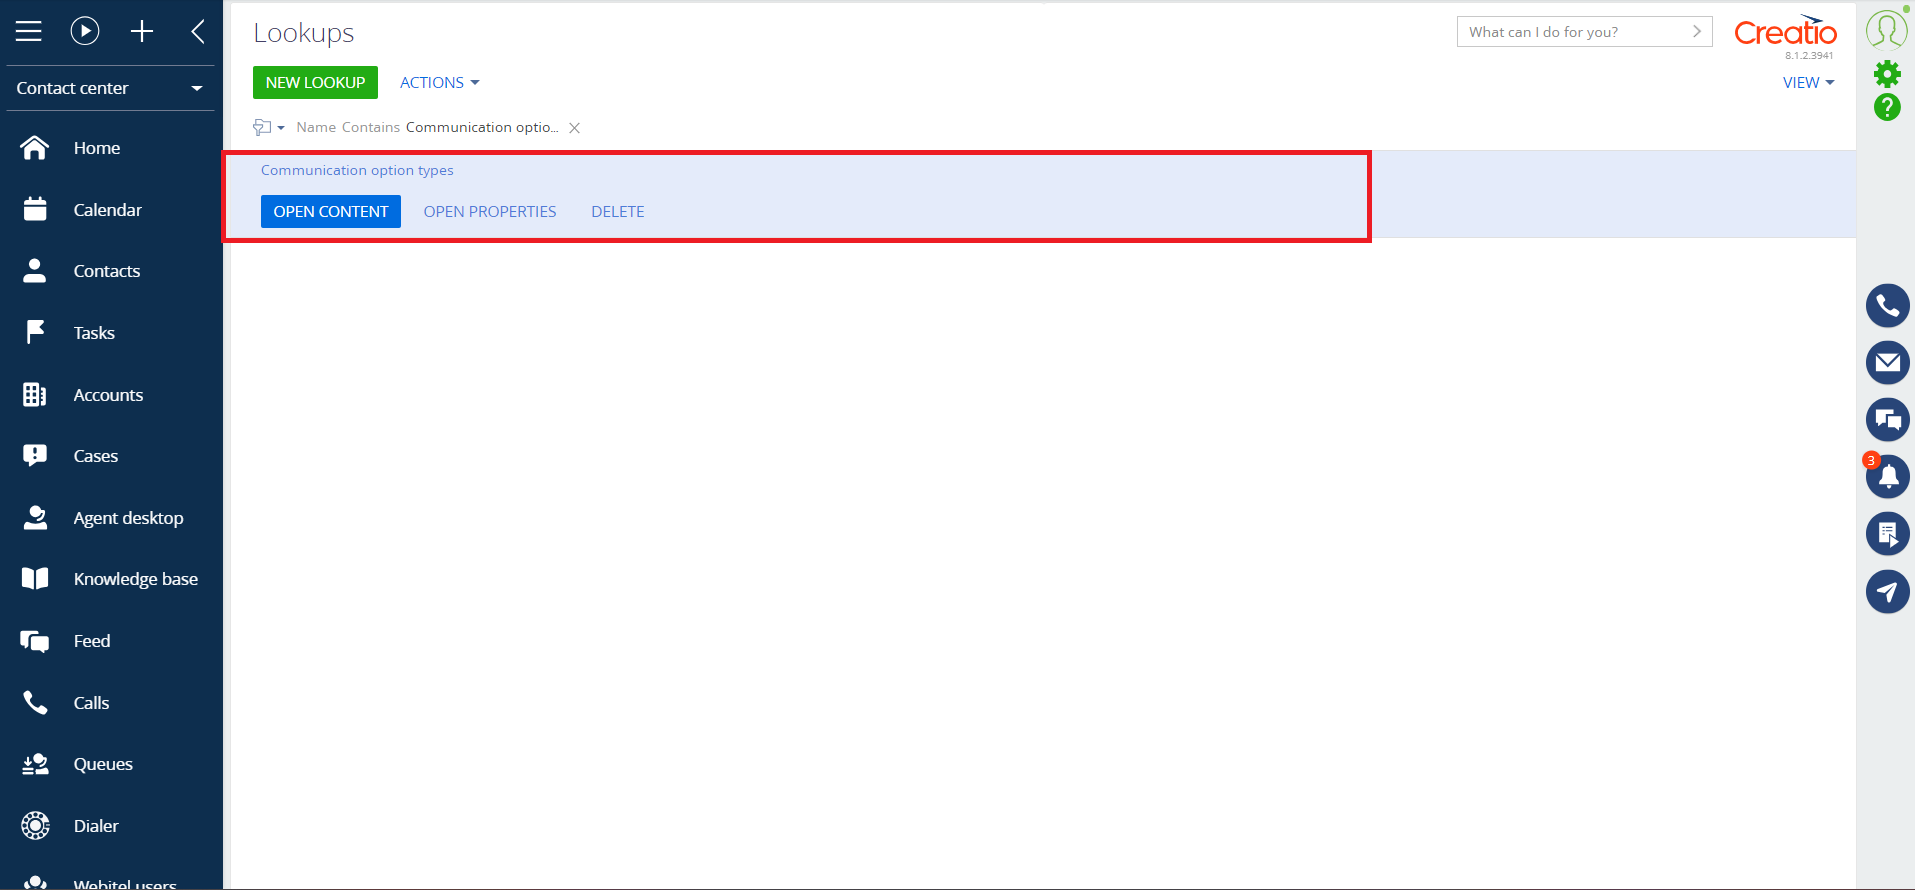
Fig. 31. Creatio lookups
The value of the column "Webitel Code" for the communication option types that will be used in calls (Fig. 32) must match the value of the communication type created in Webitel (Fig. 33). You can learn more about Webitel communication types here.
The system uses this code to select the type of communication device in order to select Contact numbers with the corresponding type.
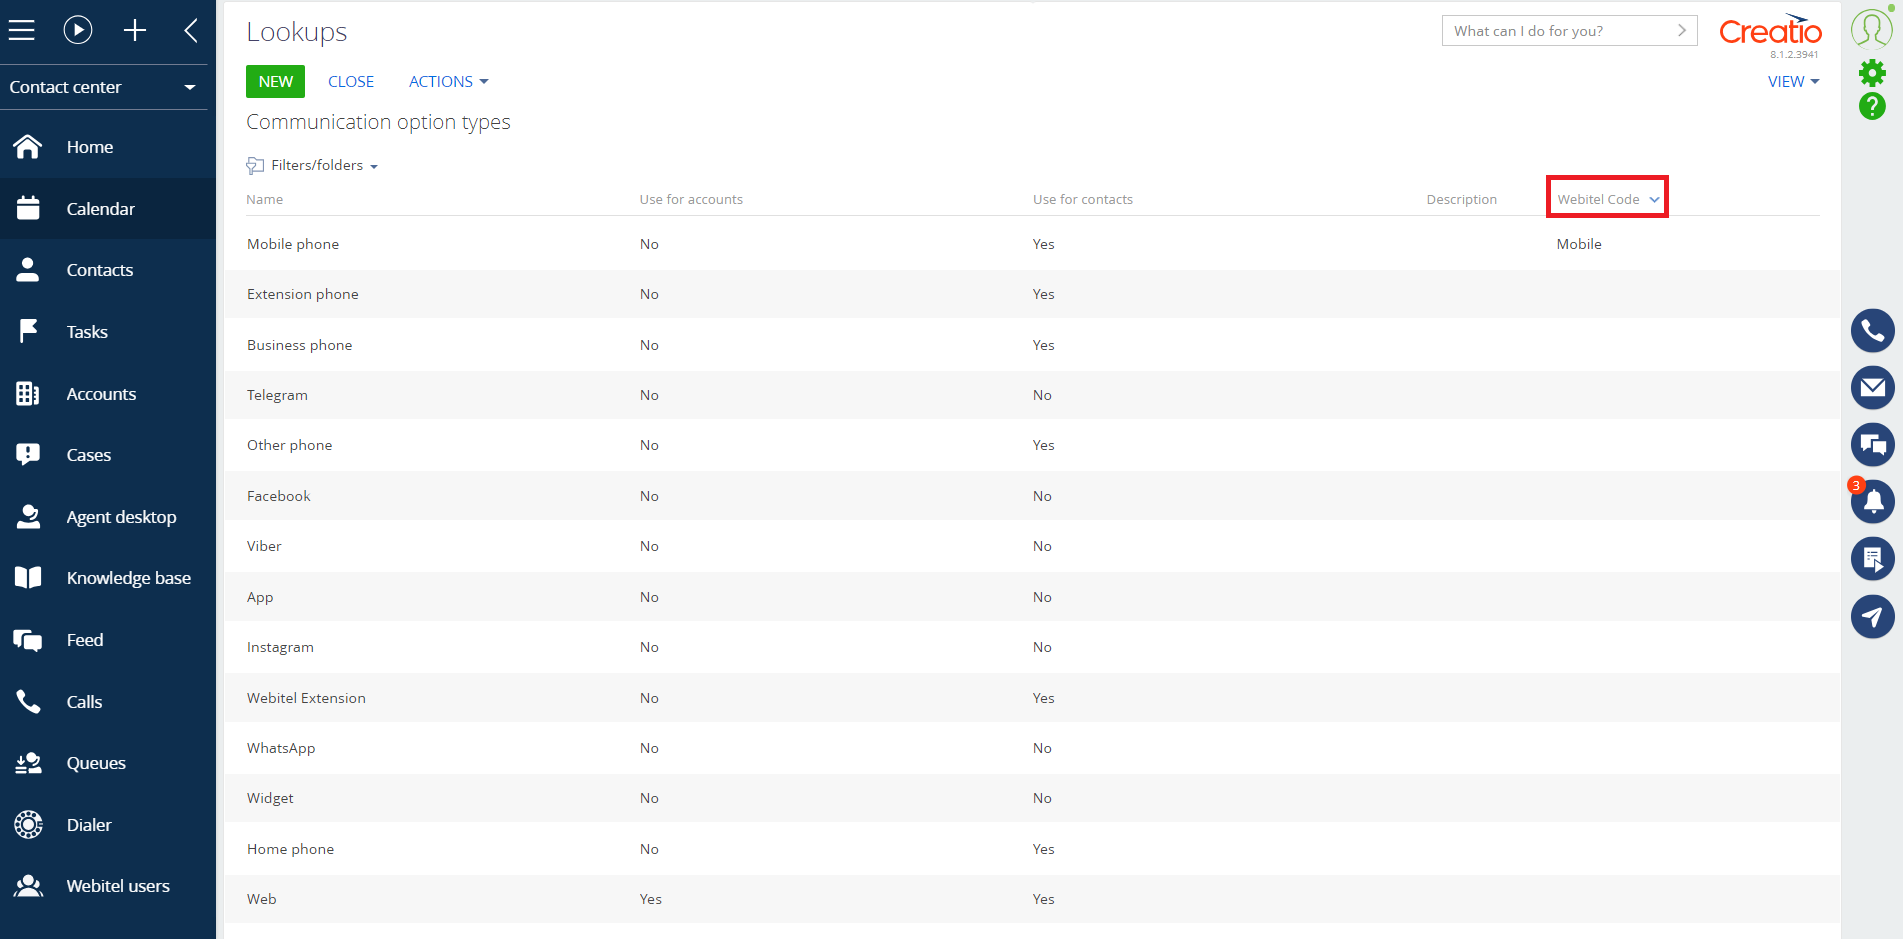
Fig. 32. "Communication option types" lookup in Creatio
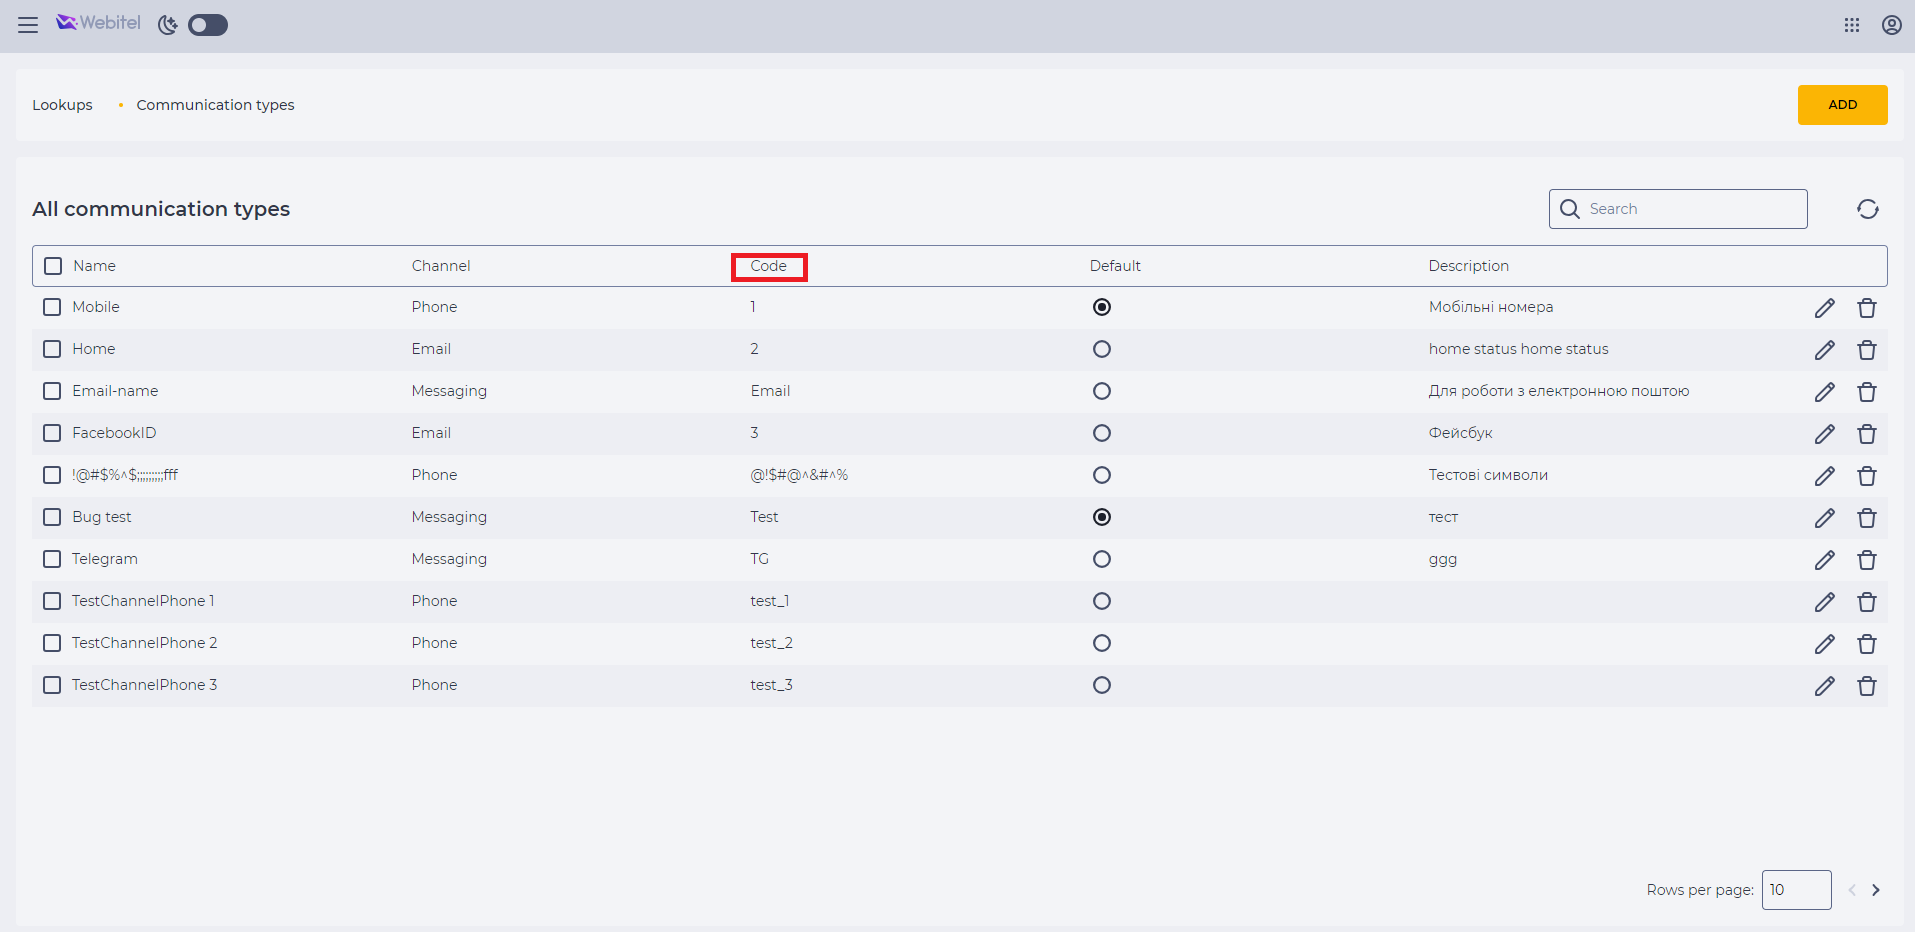
Fig. 33. "Communication types" lookup in Webitel