
1.1. Top bar
The top bar consists of the following elements:
-
Search field;
-
Transcribe button;
-
Export;
-
Download button;
-
Delete button.
1.1.1. Search field
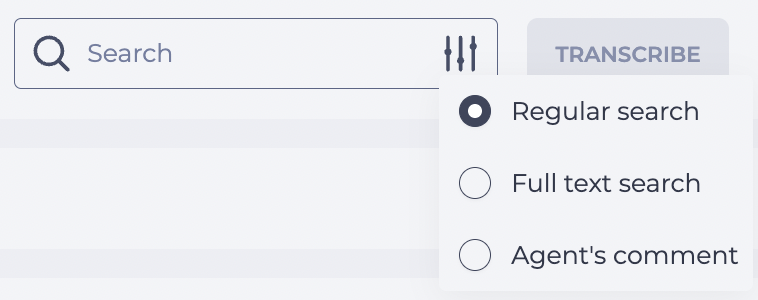
It consists of an input field and a search settings button — 
-
Regular search — search in the register;
-
Full text search — search through transcribed conversation records;
-
Agent's comment — search by comments left by Agents in processing.
To search by part of a word or number, use the * symbol.
Full text search
When searching conversation records, a single-word query displays records that contain that word.
To find a phrase, you must use the & symbol, for example:
I & can
If you need to find a record containing one word and not the second, then the following character set is used — &!
For example, the entry must contain the word good and not have the word credit. In this case, you should write:
good &! credit
For a selection of records containing at least one of the words, use |
Ok | agree | good
If an invalid query format is entered, or there is no match data for a correctly entered format, the message "Please check filters query" is displayed in the registry.
1.1.2. Transcribe button
Transcription is the conversion of speech into text. The button becomes active after selecting an entry, or entries, in the registry. The selected conversation records are translated into the text after clicking the Transcribe button, and the transcription tool in entries is changed.
Transcription is not possible if there is no recording of the conversation.
1.1.3. Export
It is designed to export data from the register.
When the Export button is clicked, a file is downloaded in the format specified by the export_settings parameter on the Configuration page.
If the parameter is not set, an Export modal window (Fig. 3) opens, allowing you to select the format.
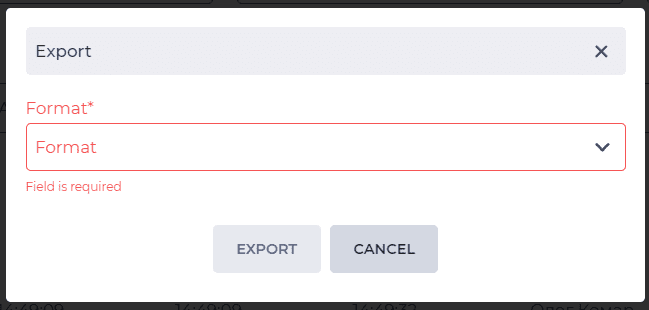
The following formats are available:
-
xls;
-
csv.
When selecting the csv format, you need to enter a delimiter in the Separator field.
The file contains data from the registry that matches the applied filters.
1.1.4. Download button
The button is used to download objects. Clicking this button opens a list with options (Fig. 4):
-
Recordings;
-
Transcriptions.
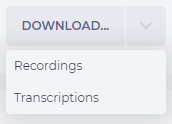
The file upload starts after selecting/clicking an option. The history-records archive file is downloaded when you choose the Recordings option. The transcripts archive file is downloaded when you select the Transcriptions option. Information about the number of downloaded files is displayed under the Download button.
1.1.5. Delete button
The button is used to delete objects using checkboxes. The button becomes active after selecting an entry, or entries, in the registry. Clicking this button opens a list with options (Fig. 5):
-
Recordings — deletes the conversation record;
-
Transcriptions — deletes the transcription of the conversation record;
-
Both — delete the recording and transcription of the conversation.
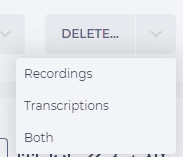
The modal window opens to confirm the deletion after selecting an option.
1.2. Filter block
It is designed to filter the data displayed in the registry.
It consists of the following elements:
-
Filter fields (Fig. 6.(1));
-
Apply preset tool (Fig. 6.(2));
-
Save preset tool (Fig. 6.(3));
-
Reset filters tool (Fig. 6.(4));
-
Close filter block tool (Fig. 6.(5));
-
Select visible columns tool (Fig. 6.(6));
-
Select variables columns tool (Fig. 6.(7));
-
Expand filters tool (Fig. 6.(8));
-
Refresh register tool (Fig. 6.(9)).

1.2.1. Filter fields
Available fields for filtering:
-
Created on;
-
Agent;
-
AMD result;
-
Contact;
-
Direction;
-
Rated;
-
Gateway;
-
Grantee;
-
Hangup cause;
-
Queue;
-
Rated by;
-
Recording;
-
Score:
-
From;
-
To.
-
-
Tag;
-
Talk duration (mm:ss):
-
From;
-
To;
-
-
Team;
-
Total duration (mm:ss):
-
From;
-
To;
-
-
Transcription;
-
User;
-
Variable.
The number of fields may vary depending on the User's rights to view the page.
1.2.2. Apply preset tool
It is designed to apply previously saved presets.
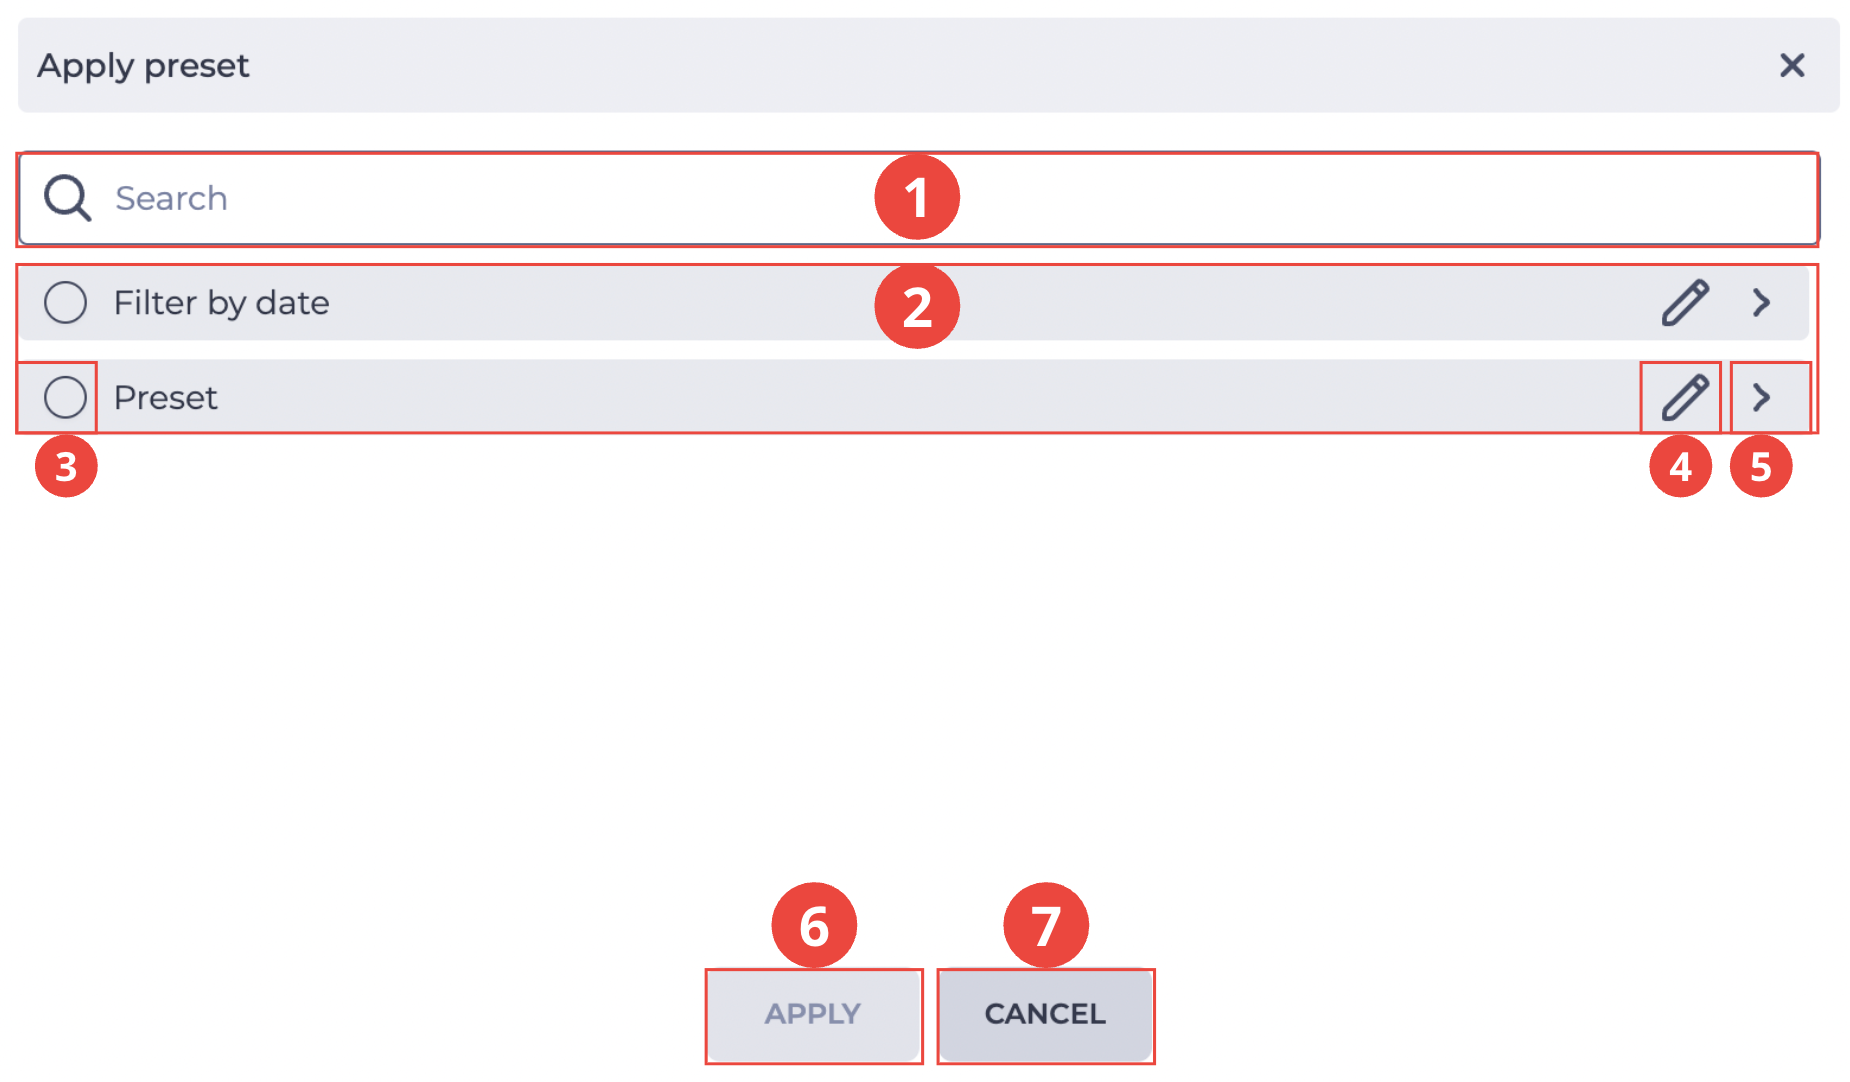
After clicking the Apply preset tool (Fig. 6.(2)), the “Apply preset” modal window opens (Fig. 7).
The window contains the following elements:
-
Search field (Fig. 7.(1)) — used to search among available presets.
-
Presets list (Fig. 7.(2)) — a list of all saved presets.
-
Checkbox (Fig. 7.(3)) — allows you to select one of the presets to apply.
-
Edit tool (Fig. 7.(4)) — opens the selected preset in edit mode.
-
Expand tool (Fig. 7.(5)) — opens preset details (name, columns, description).
At the bottom of the window are located:
-
"Apply" button (Fig. 7.(6)) — confirms the selection and applies the preset.
-
"Cancel" button (Fig. 7.(7)) or icon

When the user selects a preset, the system substitutes the values from the saved preset into the filter fields and applies them to the list of calls displayed in the register.
1.2.3. Save preset tool
It is designed to create a new preset or edit an existing preset.
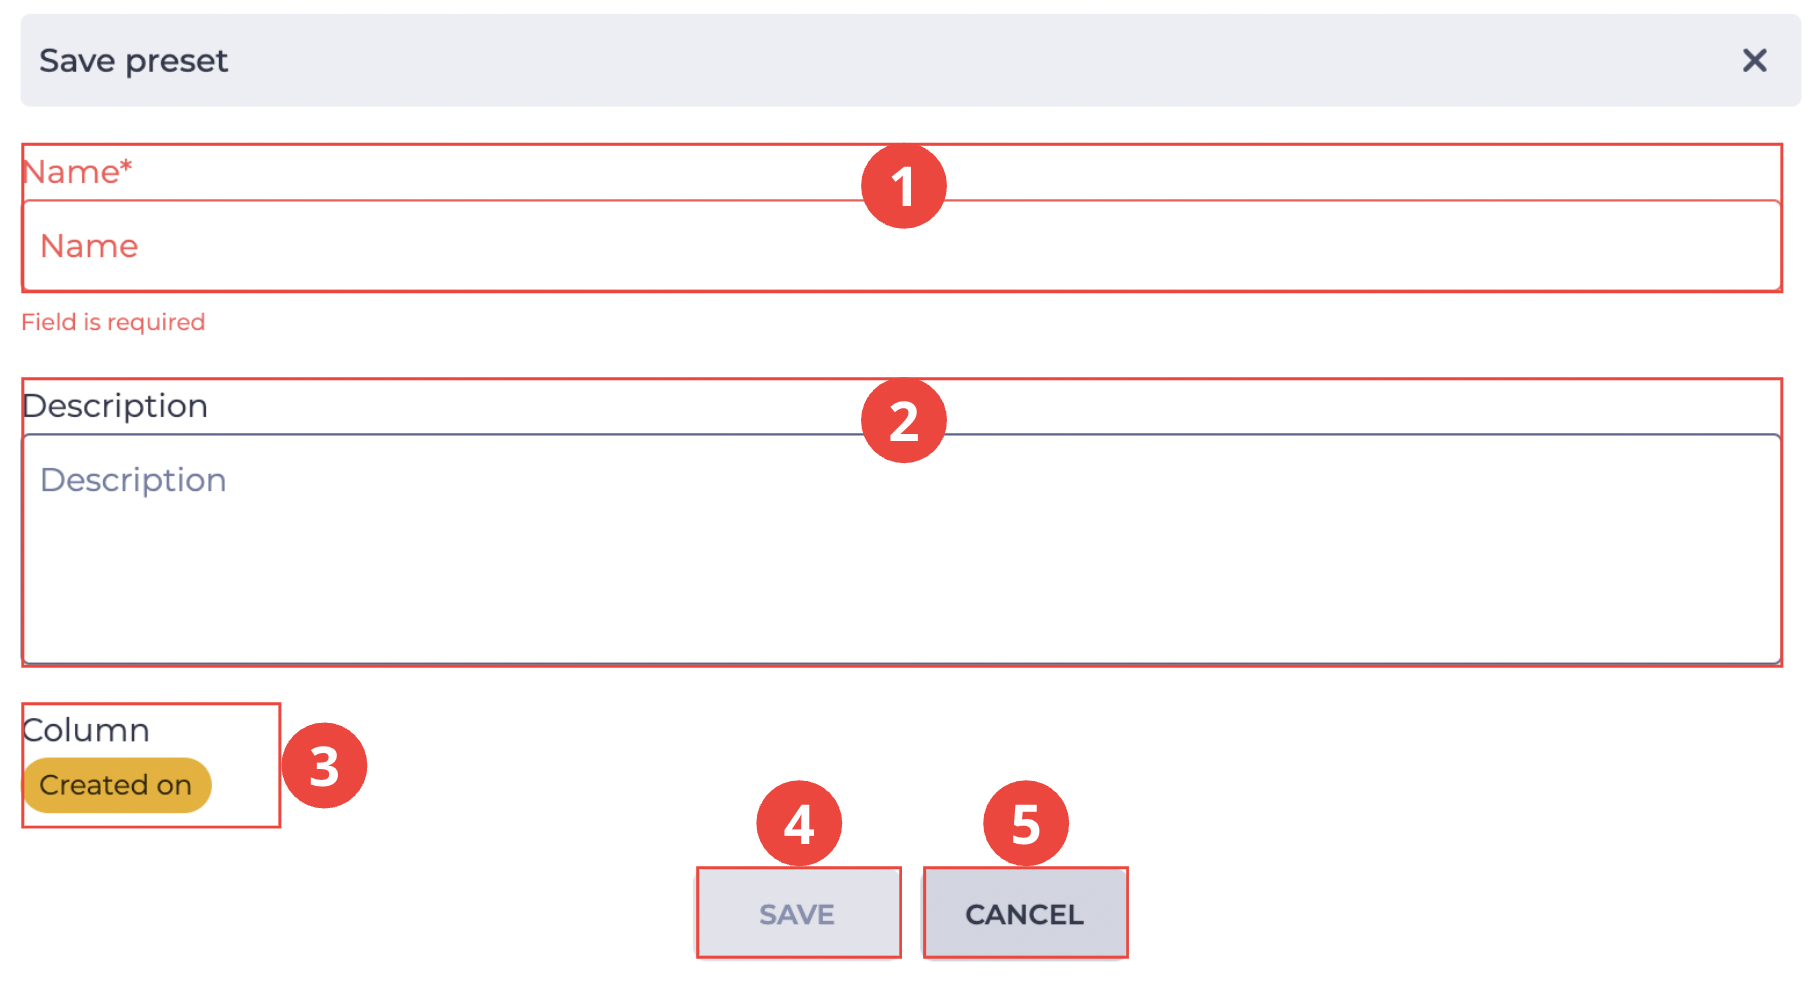
After clicking the Save tool (Fig. 6.(3)), the "Save preset" modal window opens (Fig. 8). It saves all the conditions set in the filter fields.
The window contains the following elements:
-
"Name" field (Fig. 8.(1)) — required to fill in, used to enter the preset name.
-
"Description" field (Fig. 8.(2)) — optional, used to provide additional information about the purpose of the preset.
-
"Column" field (Fig. 8.(3)) — displays the column by which the filter is built (for example, Created).
-
"Save" button (Fig. 8.(4)) — saves the filter conditions as a preset.
-
"Cancel" button (Fig. 8.(5)) or icon
Preset names are unique within one user.
1.2.4. Reset filters tool
It is represented as an icon 
1.2.5. Close filter block tool
When you click the close tool (Fig. 6.(5)), the filter panel collapses and is no longer displayed on the page. Reopening the panel is possible through the expand filters tool (Fig. 6.(8)).
1.2.6. Select visible columns
It is designed to select the columns displayed in the records registry table, including variable columns added via the Select Variables Columns modal window.
The Select visible columns modal window to display opens (Fig. 7), when you click the 
.png?cb=2595bf9fb36978cb188d00dd8cbba3bb)
-
Select the checkbox (Fig. 9.(1)) — this column is displayed in the registry;
-
Clear checkbox (Fig. 9.(2)) — this column is not displayed in the registry.
1.2.7. Select variables columns
It is used to add call variable columns to the records registry. Clicking the button 
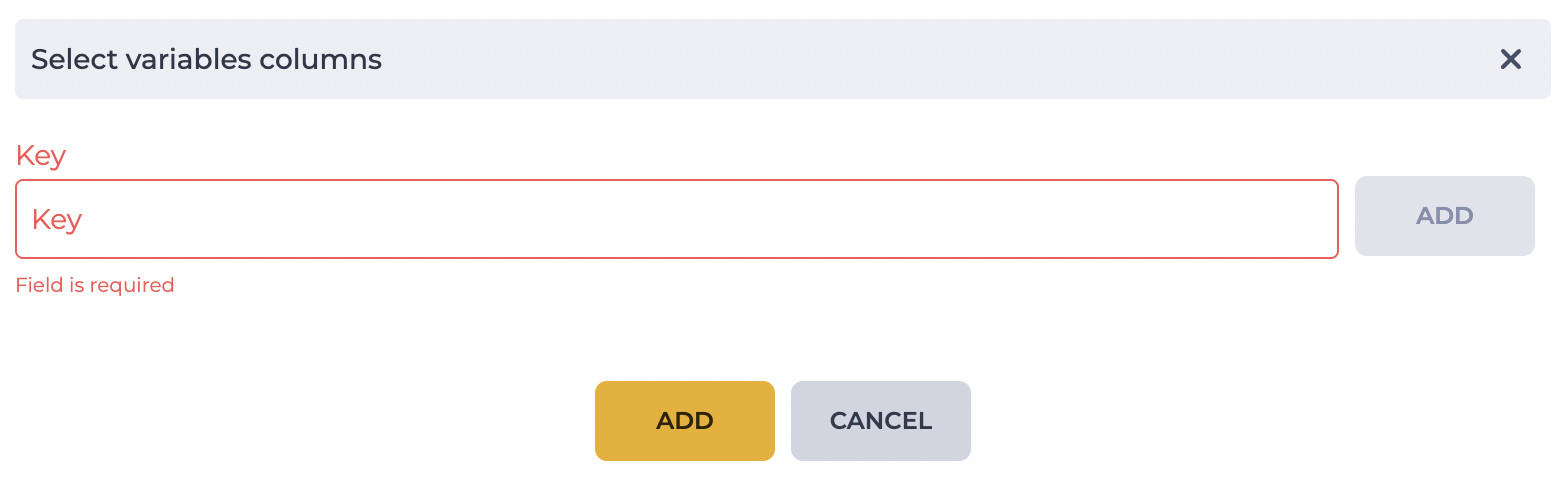
Enter the variable name in the Key field. It will be displayed in a new column in the records registry.
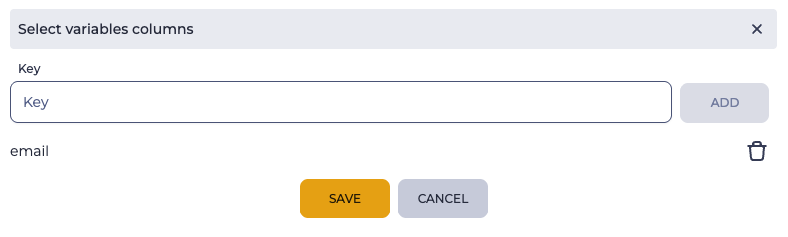
After entering the key, click the Add button — the variable is added to the list in the modal window. To save the changes, click the Save button. The modal window closes, and the corresponding column is automatically displayed in the records registry (Fig. 11b).
Click the 
The column displays the value of the corresponding variable if it exists in the call. If the variable is not present, the field remains empty.
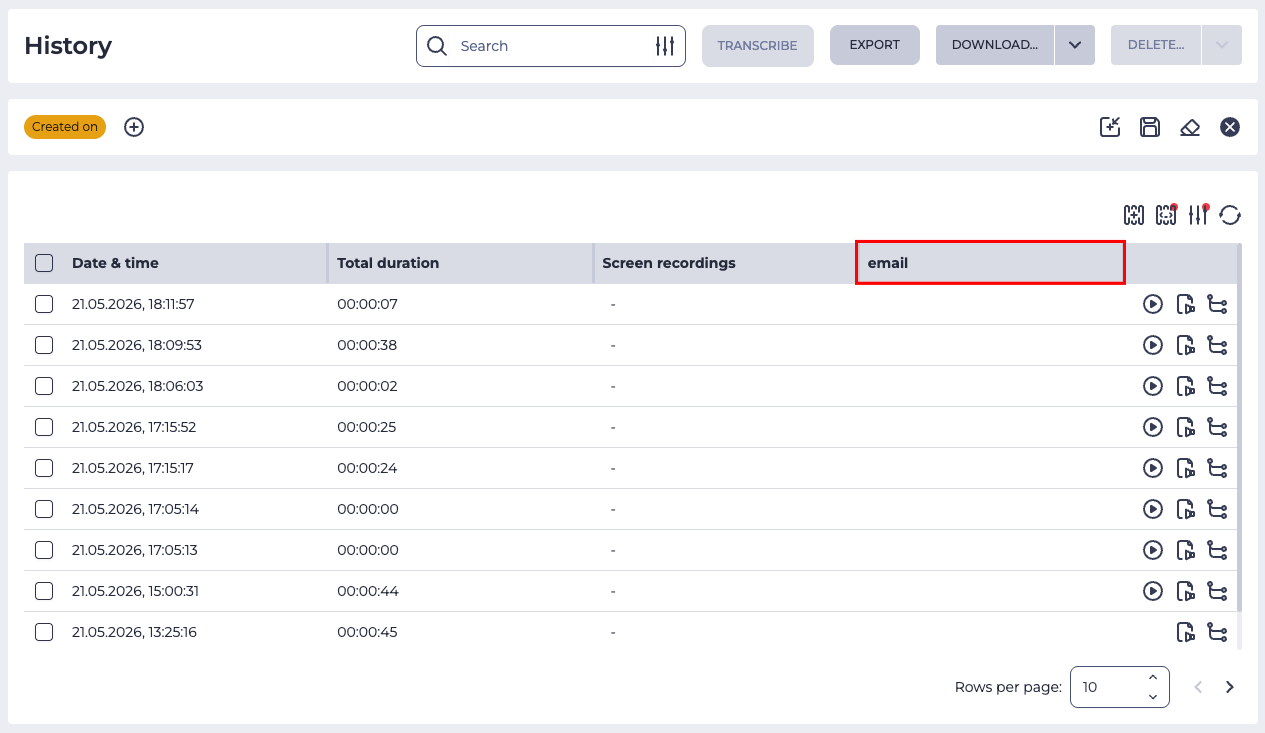
Several variables can be added. Visibility of the added columns in the registry is managed exclusively through the Select visible columns modal window (see section 1.2.6).
1.2.8. Expand filters tool
Represented as a 
Note
The number of fields displayed may vary depending on the browser window size. Use the
1.2.9. Refresh tool
Updating the register table is performed by clicking on the refresh icon - 