
1. Description
Call visualization — call markup.
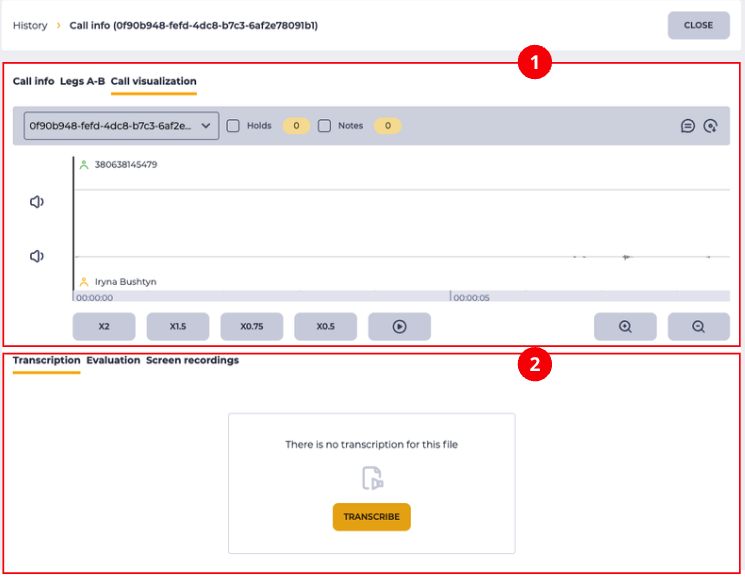
It consists of the following elements (Fig. 1):
-
Call wave;
-
Tabs.
1.1. Call wave
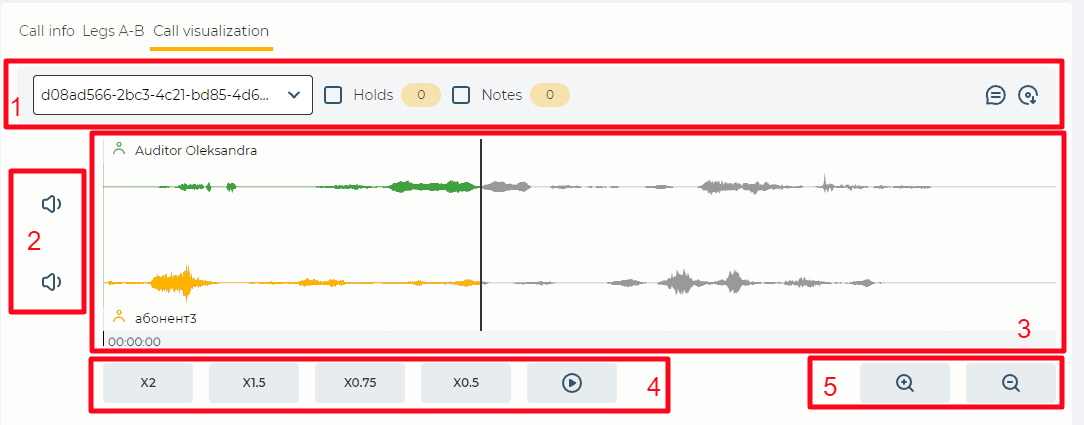
Consists of the following elements:
-
Toolbar (Fig. 2(1));
-
Sound volume panel (Fig. 2(2));
-
Wave (Fig. 2(3));
-
Playback bar (Fig. 2(4));
-
Zoom (Fig. 2(5)).
1.1.1. Toolbar
Consists of the following elements:
-
File
-
Holds;
-
Notes;
-
Note tool;
-
Download tool.
1.1.1.1. File
It is designed to select a conversation recording file.
1.1.1.2. Holds
Responsible for displaying the period when the call was on hold. The number of times the call was on hold is indicated next to the checkbox.


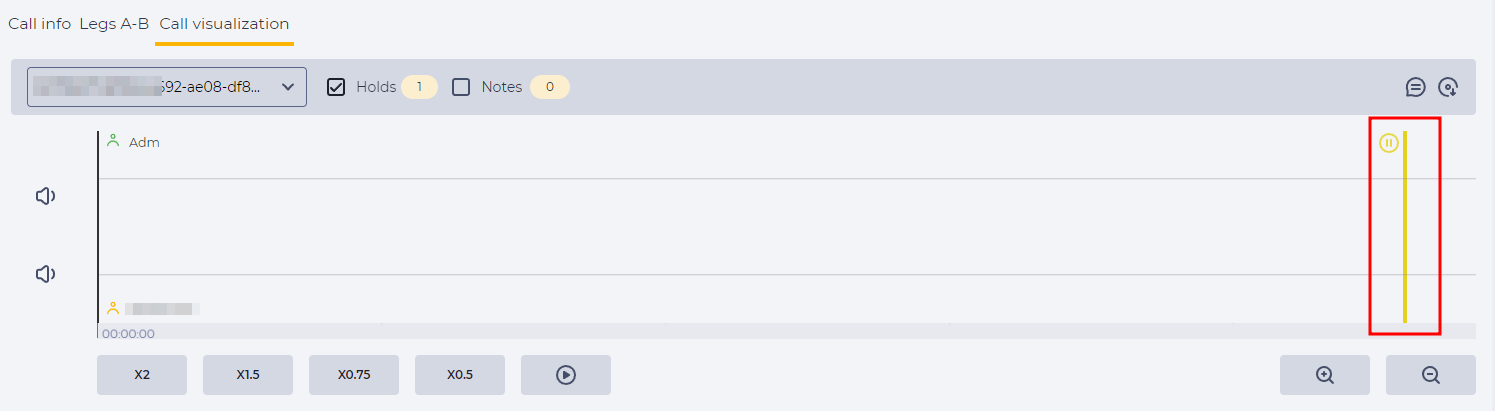
A hold is marked with a yellow vertical line at the start of the hold. Hovering over this line displays the call's start time on hold. Hovering over the 
1.1.1.3. Notes
Responsible for displaying added notes. The number of notes is displayed next to the checkbox name.


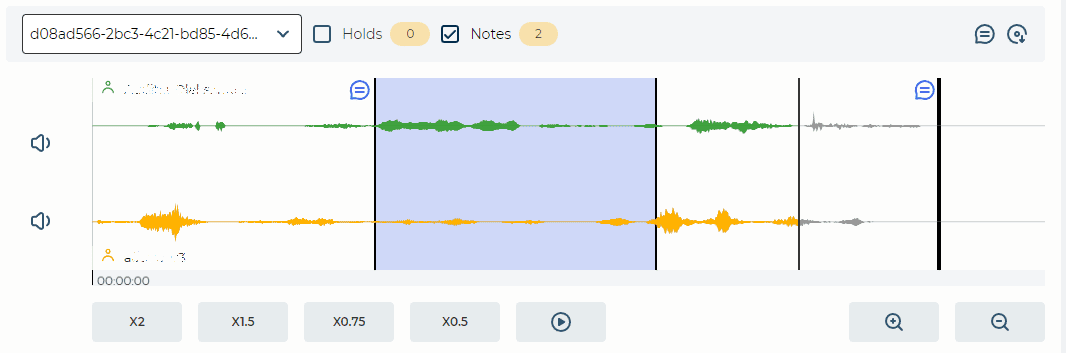
Hovering over 
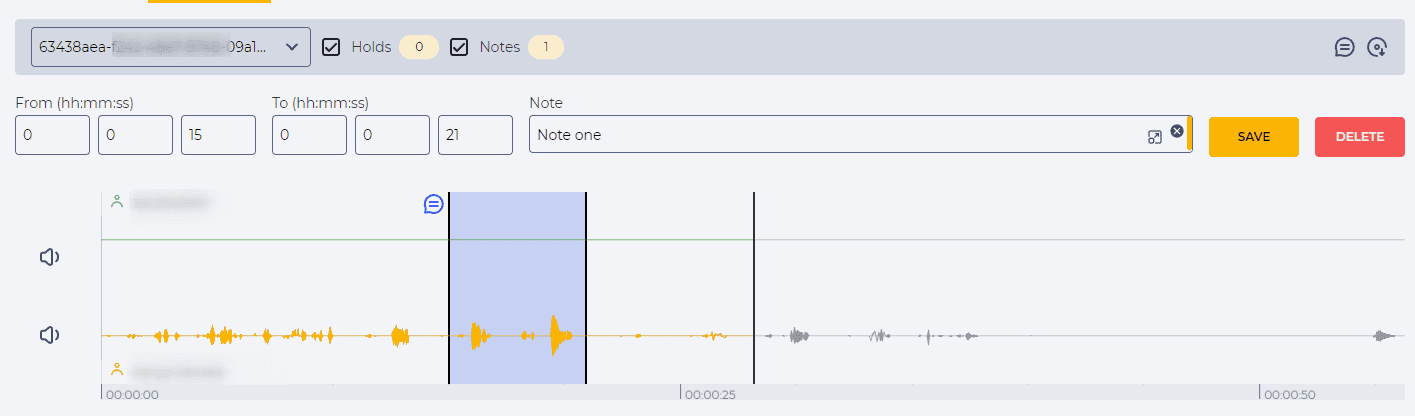
You can add or edit a note using the Note tool.
1.1.1.4. Note tool
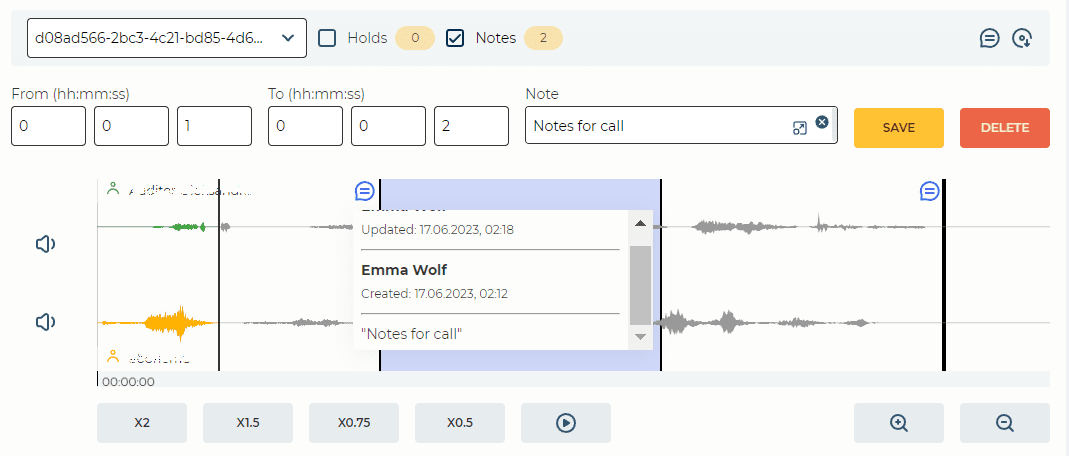
Clicking the 
-
From - the start time of the time interval for which the note is made;
-
To - the end time of the time interval for which the note is made;
-
Note - the text of the note enters here. The

-
Save button - saves the note.

Clicking the Save button creates a note on the entered period. The time interval with the note is colored blue. Click the
Click on the
1.1.1.5. Download tool
Click the 
1.1.2. Sound volume panel
The sound volume panel (Fig. 2(2)) is designed to adjust the volume of audio tracks.
1.1.3. Wave
The audio tracks of the parties in the call are displayed here (Fig. 2(3)). The names of the participants in the conversation are displayed on the left. Below is the scale of the duration of the conversation.
1.1.4. Playback bar
It consists of buttons indicating at what speed to play the call recording and the playback button (Fig.2(4)). For example, to listen to a recording at a doubled pace, you must click the x2 button and then the play button. To listen at a regular tempo, click the x2button again.
1.1.5. Zoom
There are + and - buttons on the panel for scaling the wave display (Fig.2(5)).
1.2. Tabs
The following tabs are available:
-
Transcription;
-
Evaluation;
-
Screen recordings.
1.2.1. Transcription
The display of this element depends on the presence of a file transcription. Consider the following options:
-
There is no transcription of the file (Fig. 1(2));
-
The file is being transcribed (Fig. 8);
-
The file is transcripted (Fig. 9).
1.2.1.1. There is no transcription of the file
The recording file is transcripted into text when you click the Transcribe button.
1.2.1.2. The file is being transcribed
It is displayed after clicking the Transcribe button.
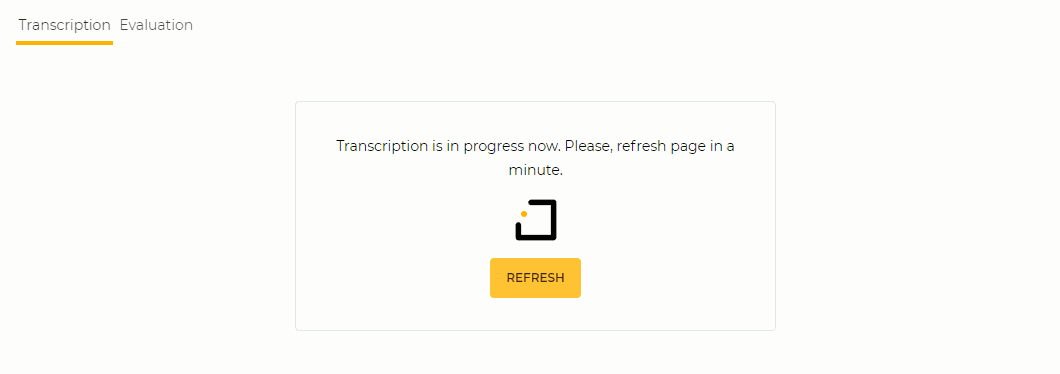
After some time, click the Refresh button to open the file's transcription.
Attention!
Transcription does not work if a trial (demo key) key is installed. There must be a commercial key with a connected card.
The key is entered in the General tab of the used cognitive profile.
1.2.1.3 The file is transcripted
It is presented as a table and a toolbar (Fig. 9).
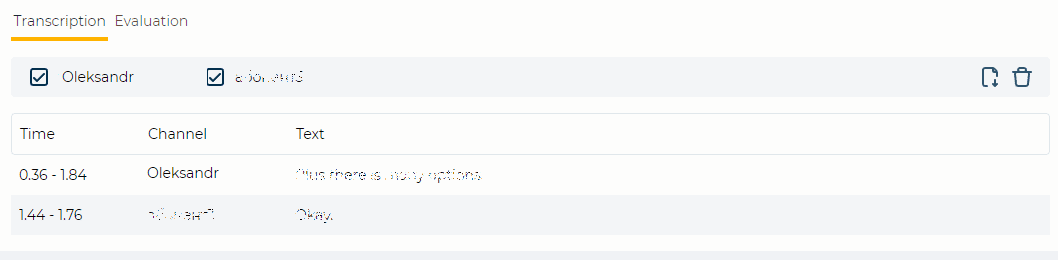
Checkboxes are responsible for displaying spoken phrases of the Channel.


The table consists of the following columns:
-
Time - indicates the time interval in which the phrase was spoken. The count is in milliseconds, where 0 is the beginning of the conversation;
-
Channel - indicated by whom the phrase was uttered;
-
Text - the phrase that was spoken.
1.2.2. Evaluation
The display of this detail depends on the presence of an evaluation:
-
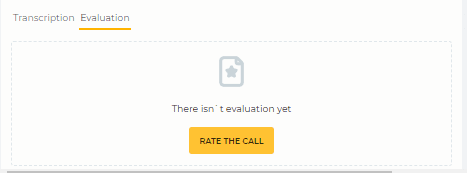
No evaluation (Fig. 10);
-
Evaluation in progress (Fig. 12);
-
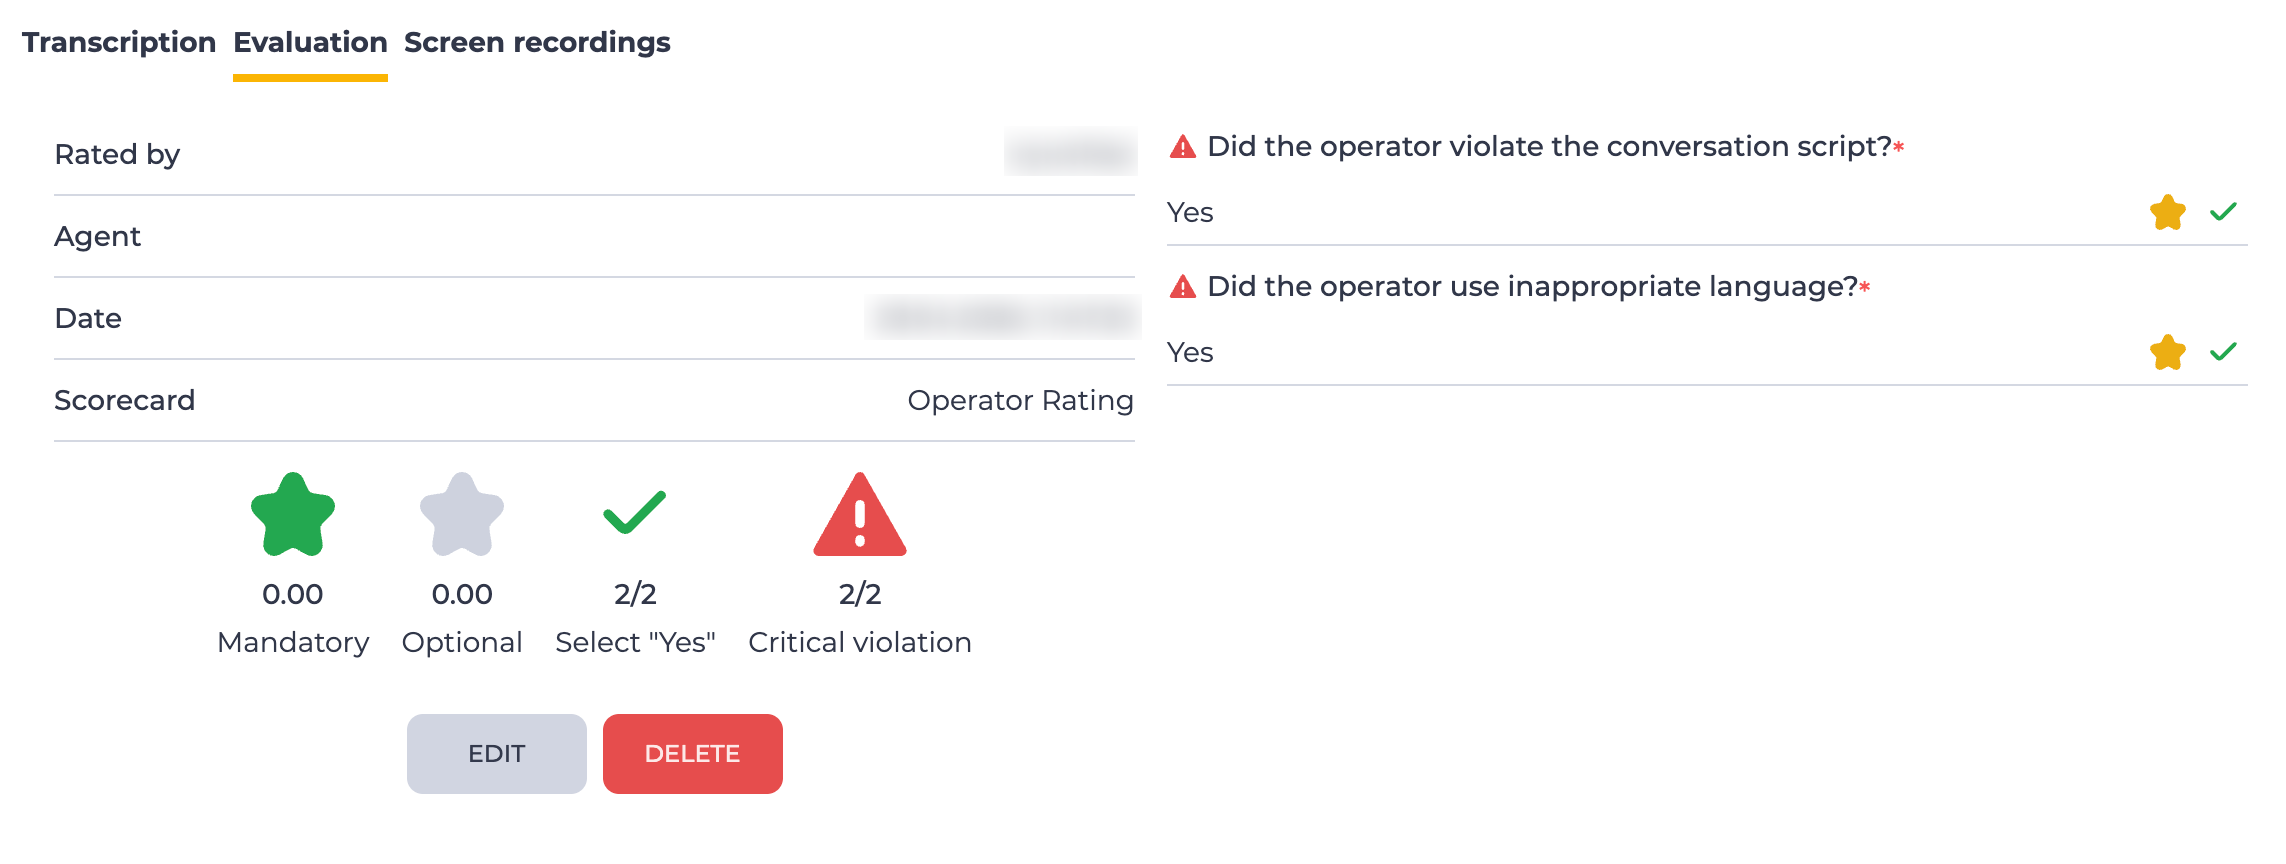
Call evaluated (Fig. 14).
A QUALITY_AUDITOR license is required to evaluate a call.
Only calls with a saved recording can be evaluated.
This includes calls from dialers, inbound queues, outbound IVR queues and manual calls — these are the only call types available for evaluation.
Calls involving transfers (blind or consultative) are not fully recorded and therefore cannot be evaluated.
To evaluate a call, click the Evaluate call button. The Select form modal window will open (Fig. 11).
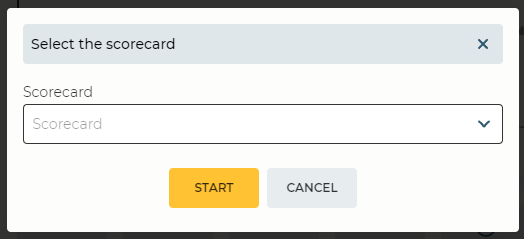
When clicking the Form field, a list of forms created in the Audit application appears. The dropdown list includes forms not assigned to any team as well as those assigned to the team the agent belongs to — the one who handled the call.
After selecting a form, click the Start button.
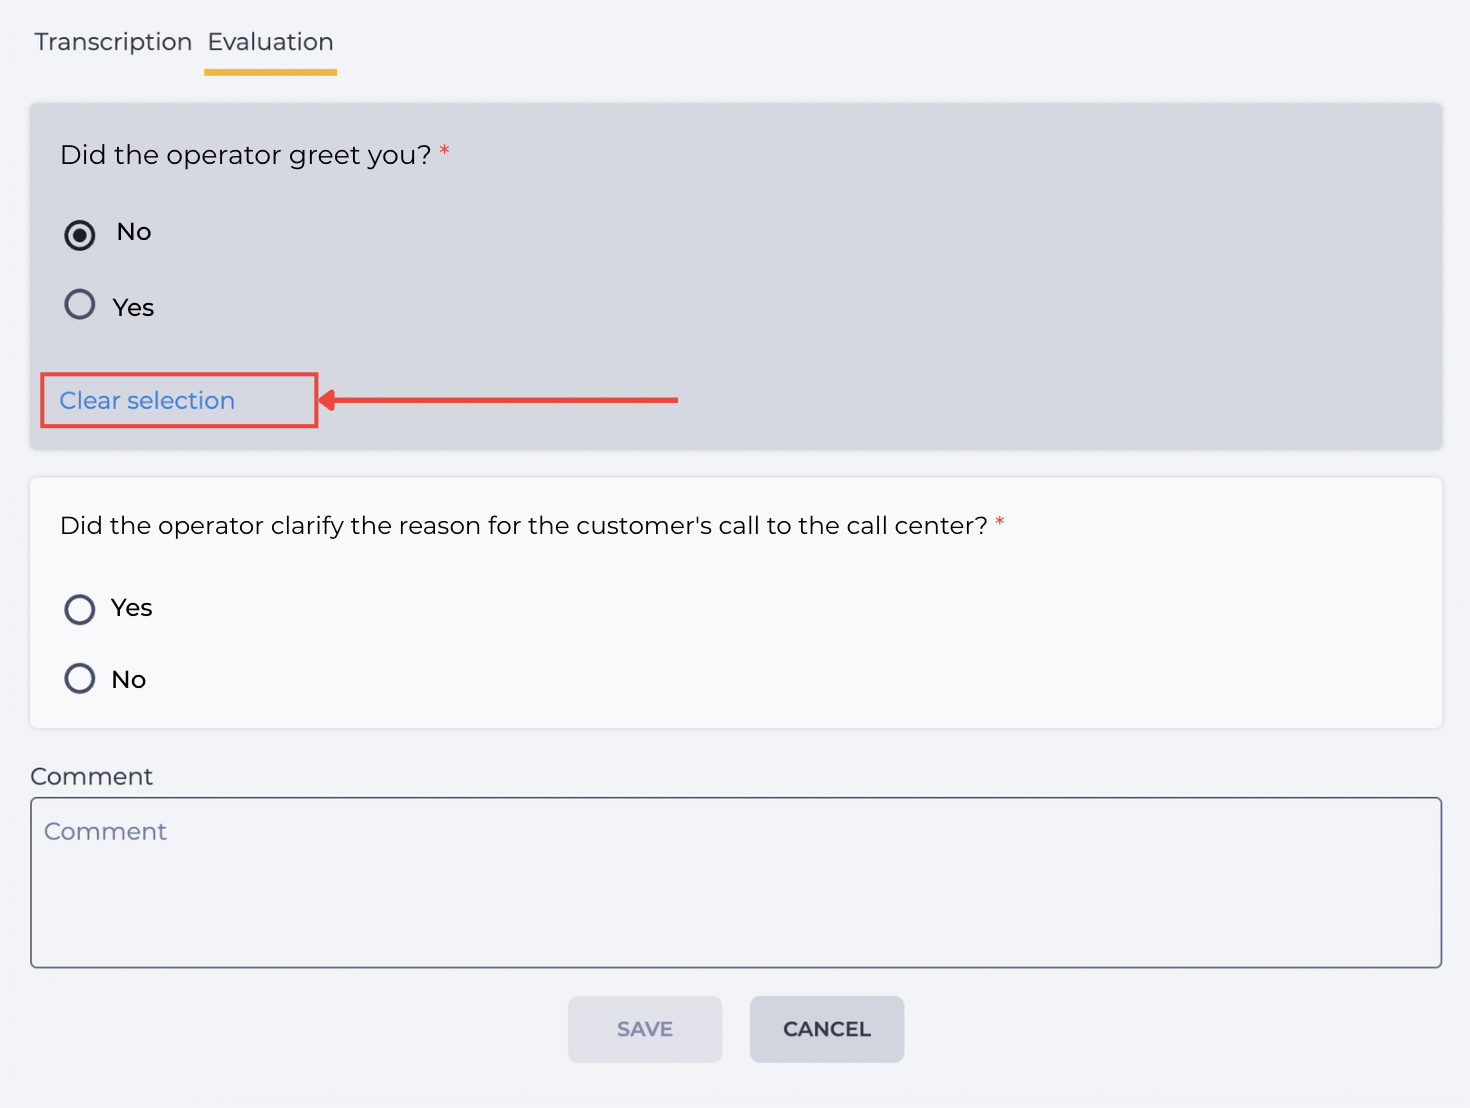
The modal window will close, and the selected form will be displayed in the Evaluation detail page (Fig. 12).
The form layout depends on its configuration. It includes:
-
criteria defined in the form;
-
fields for adding comments;
-
buttons to save or cancel the entered data.

Criteria with the answer type Select “Yes” that are marked as mandatory must be filled in during evaluation.
Once an answer is selected, a Clear selection link appears to cancel the chosen option (Fig. 13).
After clicking the Save button, the evaluation result is displayed (Fig. 14).
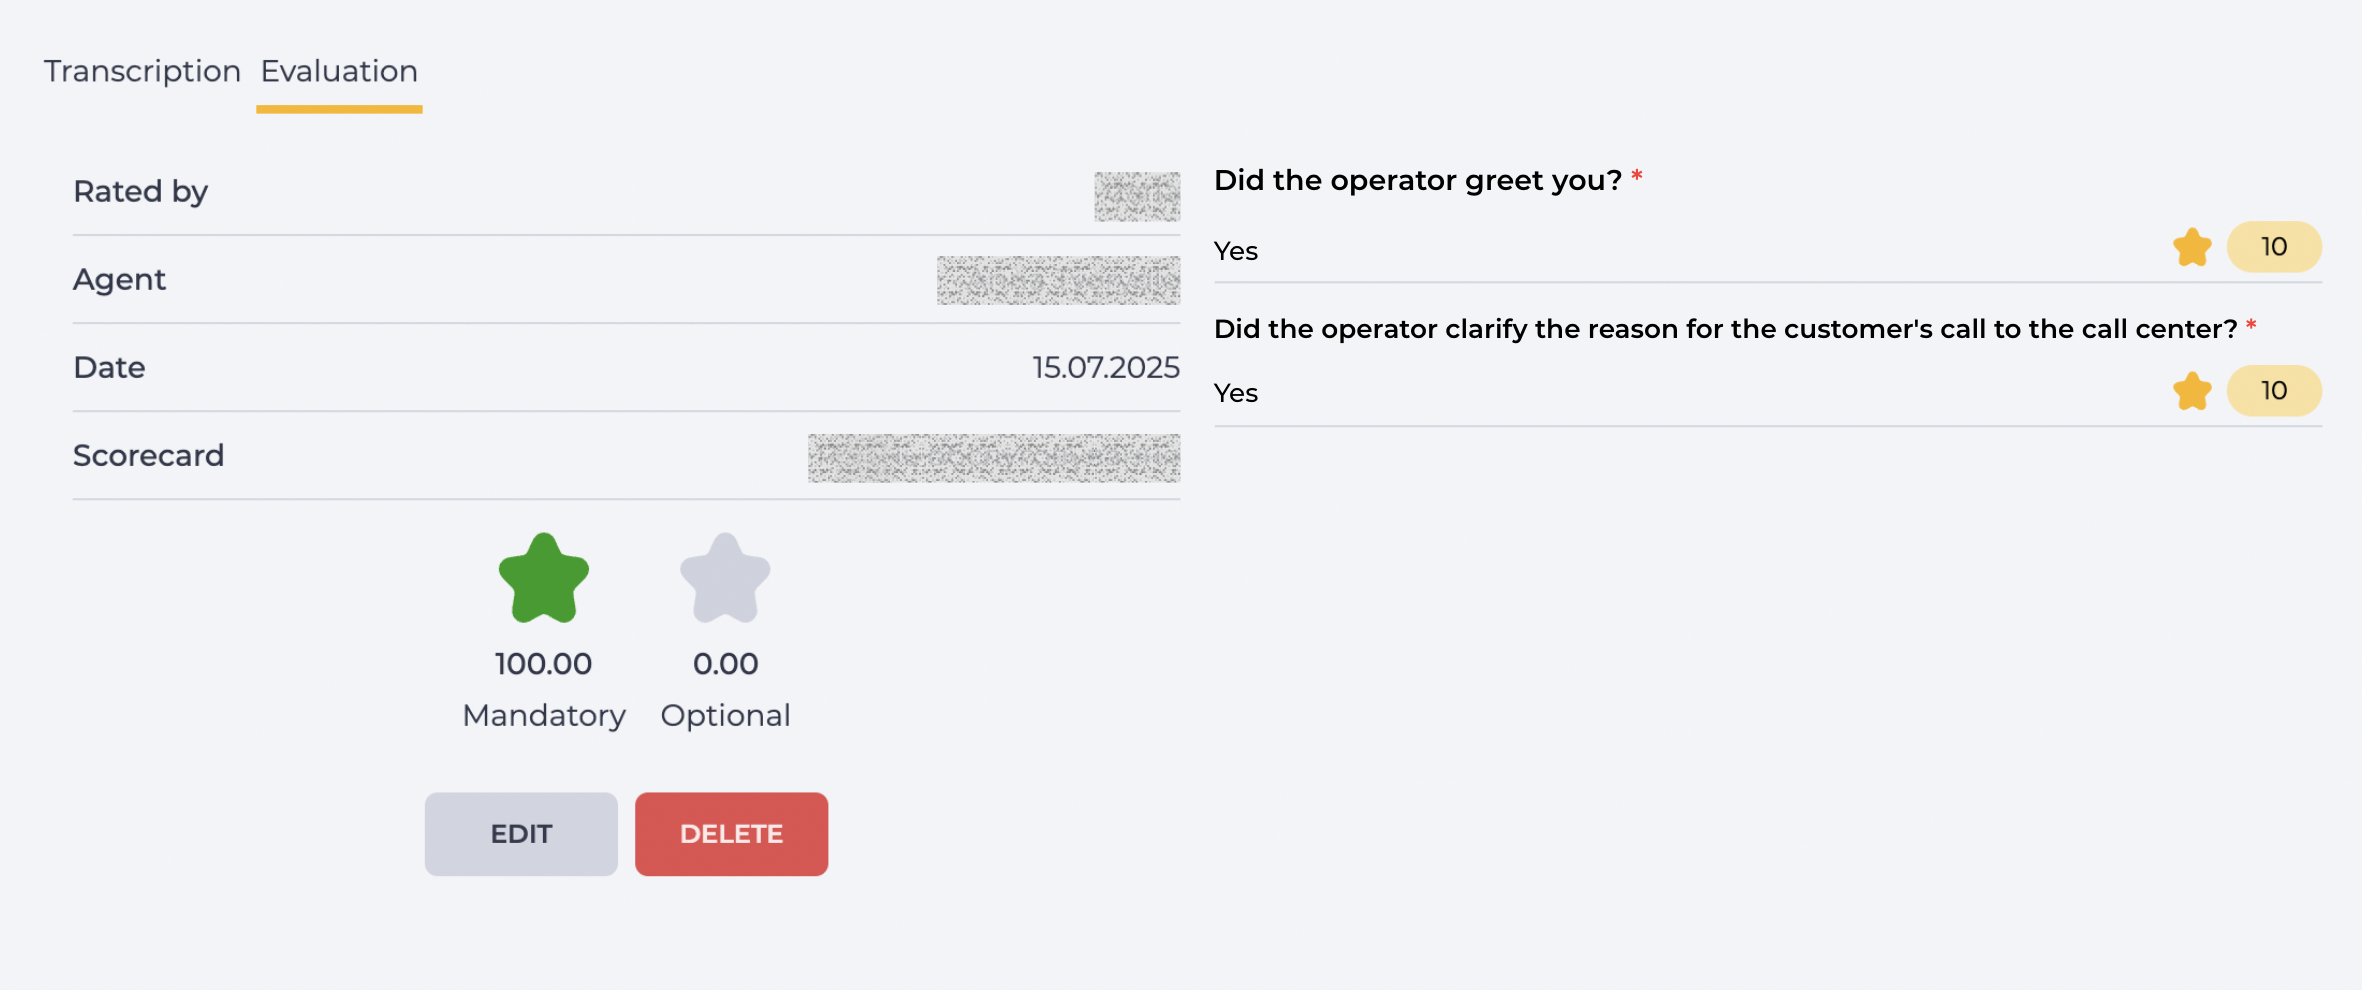
-
Required = (sum of points for required questions × 100%) / (maximum points for required questions).
-
Optional = (sum of points for optional questions × 100%) / (maximum points for optional questions).
Values are rounded to two decimal places.
A call can have only one evaluation. If needed, it can be edited or deleted — after deletion, the call becomes available for evaluation again.
The following buttons are available:
-
Edit — returns to form editing mode;
-
Delete — opens the confirmation modal window (Fig. 15).
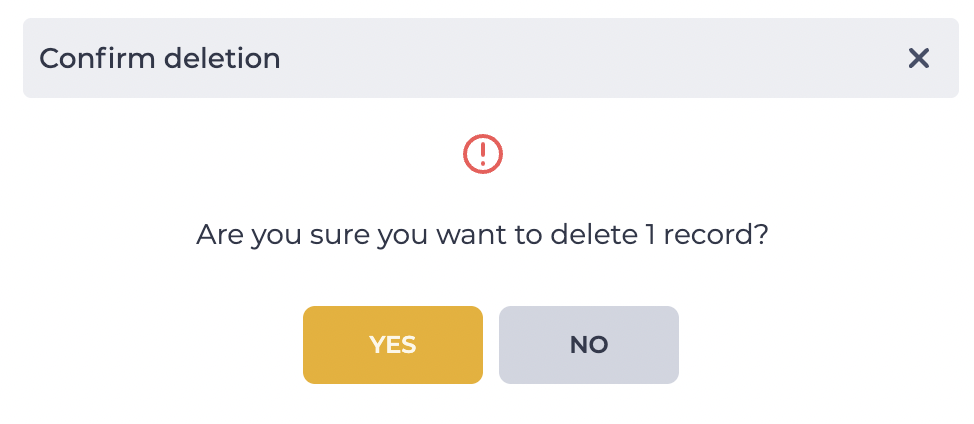
For calls from the outbound IVR queue, the “Operator” field in the evaluation results remains empty, since the call takes place without the participation of an operator.
1.2.2.1. Display of criteria with the answer type Select “Yes”
If the questionnaire contains criteria with the answer type Select “Yes”, they are displayed in the evaluation results separately.
Displaying the answer to a criterion:
-
if the Critical violation toggle is not enabled for the criterion — only the answer type Select “Yes” is displayed next to the criterion;
-
if the Critical violation toggle is enabled and the answer Yes is selected — the Critical violation icon is displayed next to the criterion –

-
if the Critical violation toggle is enabled and the answer Yes is not selected — the Critical violation icon is also displayed next to the criterion –

After saving the questionnaire, a widget is displayed in the evaluation results showing the number of marked Critical violation flags out of the total number of questions with the answer type Select “Yes” (Fig. 16).
The Critical violation widget is displayed only if the questionnaire contains criteria with the enabled Critical violation toggle. If there are no such criteria — the widget is not displayed.
1.2.3. Screen recordings
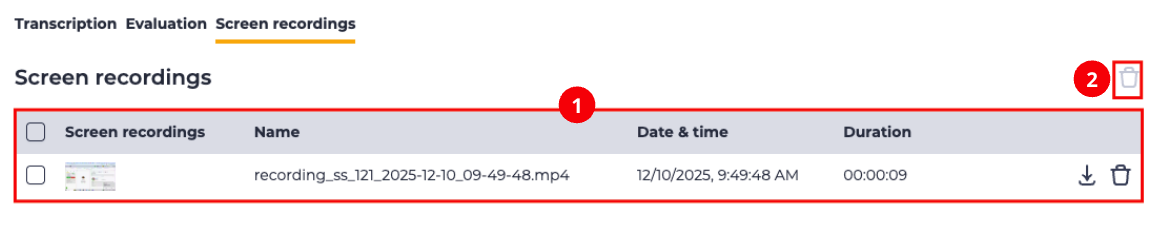
The Screen recordings detail displays all video recordings that were created during the call using the agent screen recording feature.
The section consists of the recordings registry (Fig. 17.(1)) and an additional delete tool (Fig. 17.(2)).
1.2.3.1. Recordings registry
The registry displays a list of all video recordings related to the selected call.
Each row of the registry contains the following columns:
-
Checkbox;
-
Screen recording;
-
Name;
-
Date & time created;
-
Duration;
-
Download tool;
-
Delete tool.
If there are no video recordings, the text “There are no records yet” is displayed.
1.2.3.1.1. “Checkbox” column
Used to select one or more recording objects.
Selecting the checkbox in the header selects all records on the page.
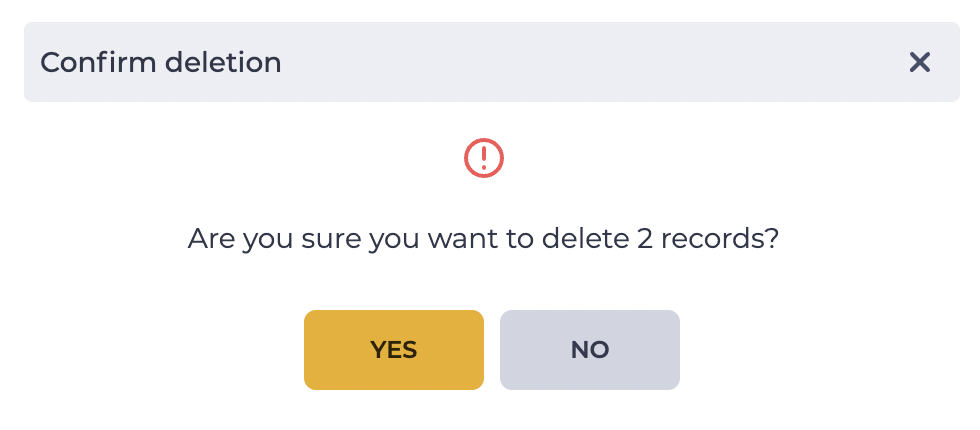
After selecting one or more records, an additional delete tool (Fig. 17.(2)) appears above the registry. It allows deleting all selected records.
When hovering over the delete tool, information about the number of selected recordings appears.
Clicking the tool opens a confirmation modal window containing the Yes, No, and Close buttons.
-
Clicking Yes deletes the recordings.
-
Clicking No closes the modal window without deleting the recordings.
1.2.3.1.2. “Screen recording” column
This column displays a preview of the video file.
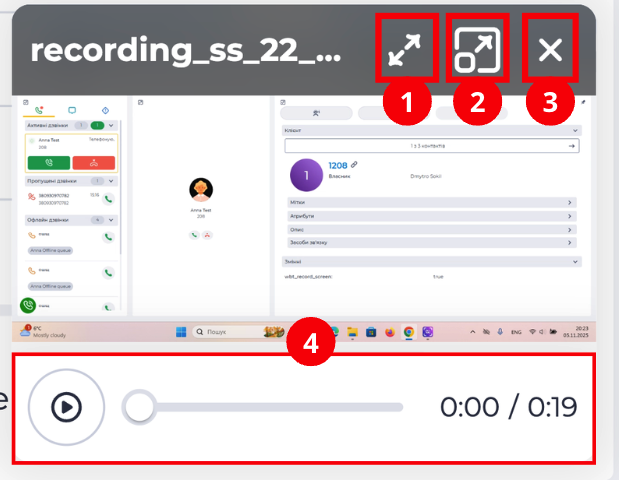
When hovering over the preview, a playback icon appears (Fig. 19). Clicking the icon opens a mini-player window (Fig. 20).
|
|
|---|
When hovering over the mini-window, the following control icons appear:
-
Full-screen mode icon (Fig. 20.(1));
-
Medium window size icon (Fig. 20.(2));
-
Close window icon (Fig. 20.(3)).
At the bottom of the mini-window, a player is displayed with a play/pause button and a timeline (Fig. 20.(4)).
Clicking the button starts or pauses playback.
When switching to medium or full-screen mode, the corresponding expand icon is replaced with a collapse icon 
1.2.3.1.3. “Name” column
Displays the name of the video file.
1.2.3.1.4. “Date and time” column
Displays the date and precise time when the recording was created.
1.2.3.1.5. “Duration” column
Indicates the duration of the video recording in the format hh:mm:ss.
1.2.3.1.6. Download tool
Clicking the icon 
1.2.3.1.7. Delete tool
Clicking the icon 
After confirmation, the video recording is permanently deleted from the registry.
2. Opportunities
2.1. Commentary on the wave
|
Goal |
Comment on the call recording in the period from 10 seconds to 22 seconds |
|---|---|
|
Preconditions |
|
|
Steps: |
|
|
Result |
The number changes near the Note checkbox. The note is added. |
