
1. Description
Lookups (Fig. 1) are structured system settings used to standardize and automate business processes for handling Cases.
They allow storing the configurations applied in Case processing workflows, defining categories, priorities, statuses, sources of Cases, and assigning responsibility for each Case.
Using lookups helps to avoid errors, speed up operator work, and ensure a unified approach to Case processing.
Creation, editing, and configuration of lookups are performed in the section: CRM → Configuration → Lookups.
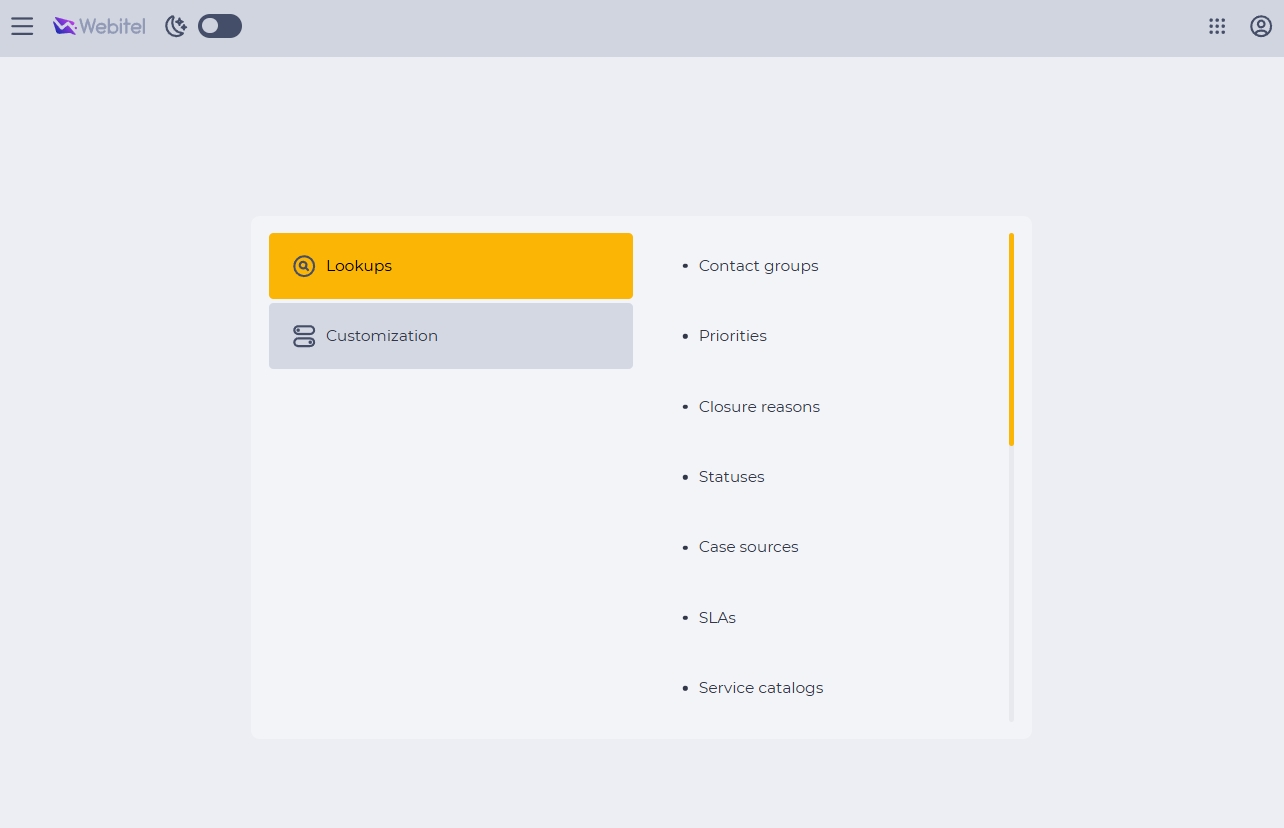
1.1. Contact Groups Lookup
The "Contact Groups" lookup (Fig. 2) contains the names of groups that a Contact can belong to. A Contact may belong to groups assigned during creation or editing. Certain Contact Groups may be accessible only to specific users. Contact Groups can be used as executor groups for Cases. A Contact may belong to one or multiple groups, or not belong to any.
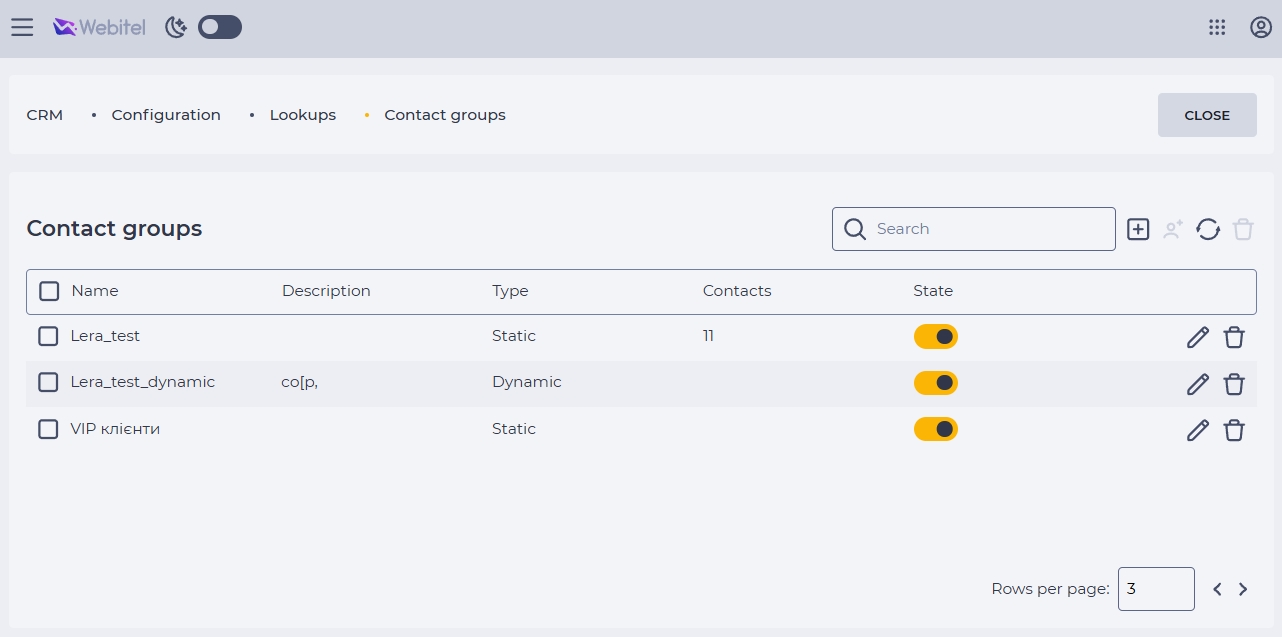
To create a "Contact Groups" lookup (Fig. 2), follow these steps:
-
Navigate to CRM → Configuration → Lookups → Contact Groups.
-
Click the Add icon

-
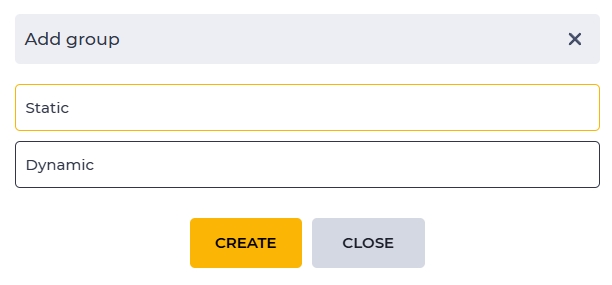
Select the group type: static or dynamic.
Important! When creating a contact group, you can select one of two types — static or dynamic.
When a Case is registered, the system checks its Service. If a dynamic group is selected for the Service, the condition will be verified, and the corresponding values will be set for the "Group" or "Assignee" fields: a static target group (Group) and/or a target contact (Assignee).
1.1.1. Static Group
If a static group is selected:
-
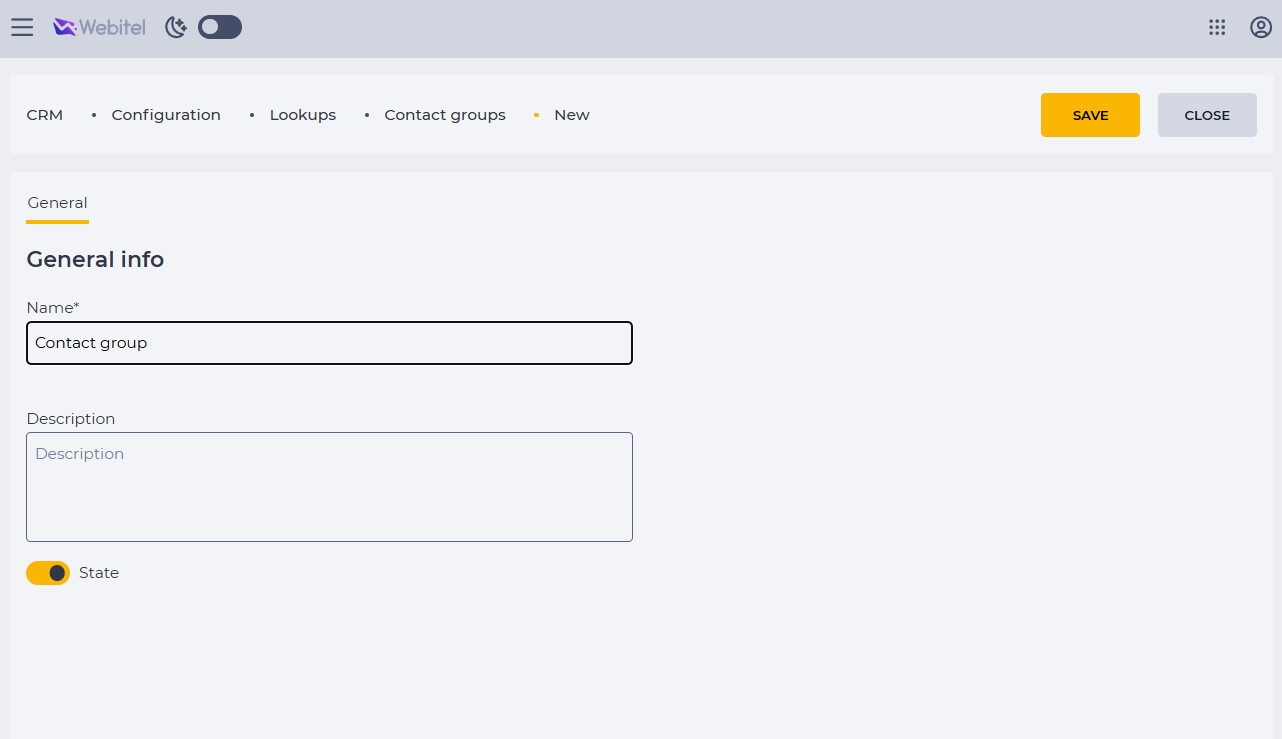
In the "General" tab (Fig. 4), fill in the fields:
-
Name — required, editable. The user-defined name of the group.
-
Description — optional, editable.
-
State — required, editable. Enabled by default

-
Click the Save button.
After saving the "General" details (Fig. 4), the Permissions section becomes available (Fig. 5).
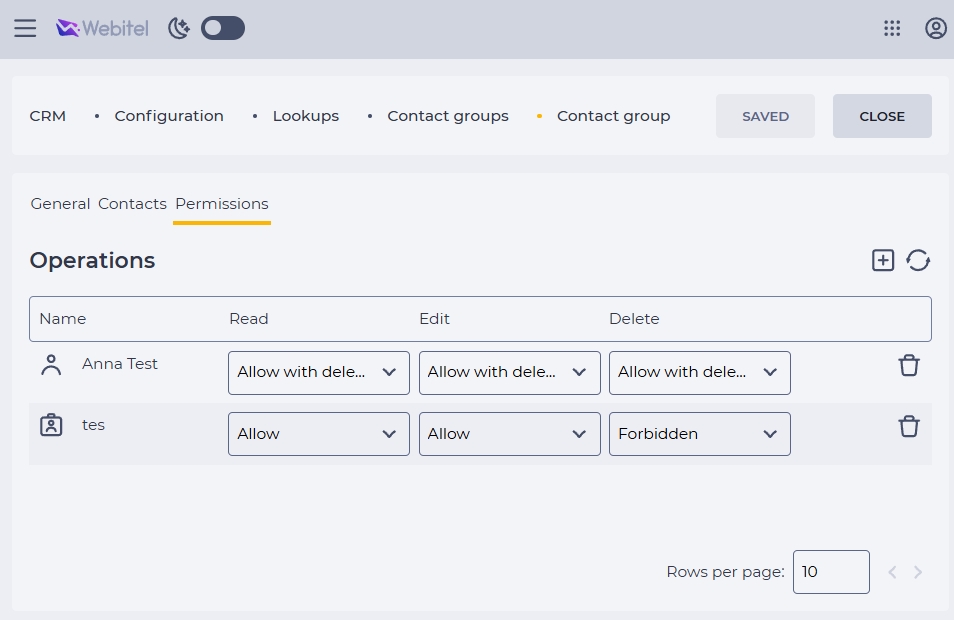
To add a user to the group and assign permissions:
-
Navigate to the Permissions tab (Fig. 5).
-
Click the Add icon
-
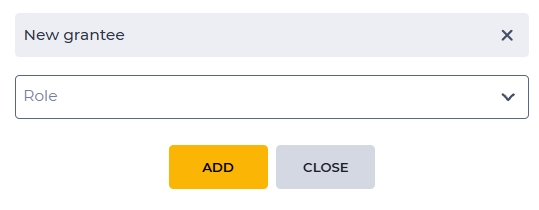
In the modal window, select a Role.
-
Click one of the buttons:
-
Add — adds a new grantee; the user remains on the "Permissions" tab.
-
Close or the close icon

-
1.1.2. Dynamic Group
If a dynamic group is selected:
-
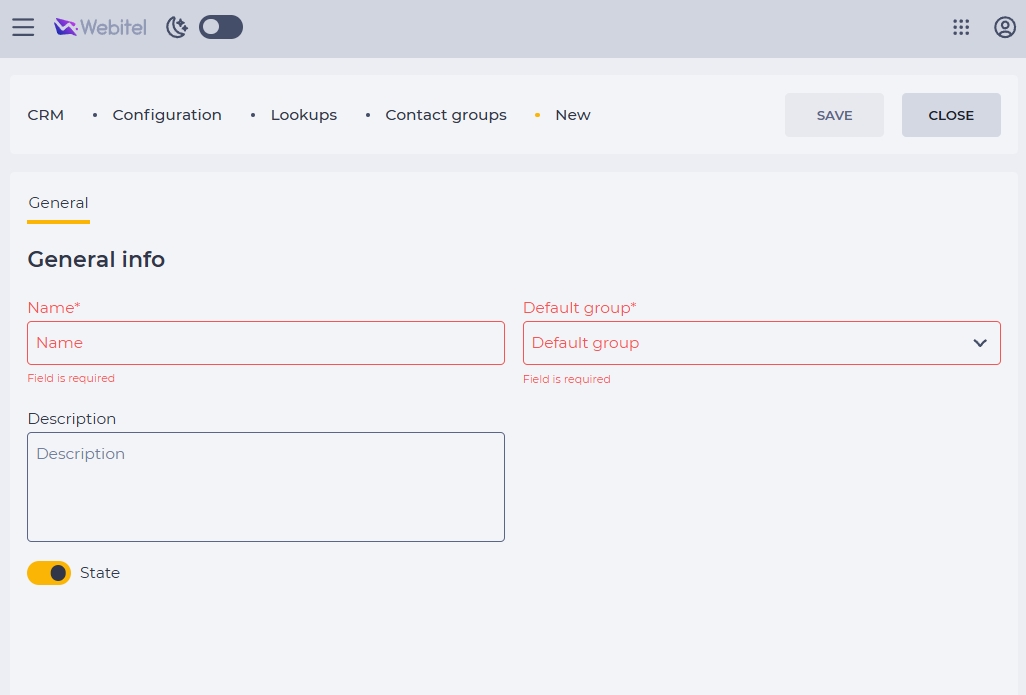
In the General tab (Fig. 7), fill in the following fields:
-
Name — required, editable.
-
Description — optional, editable.
-
State — required, editable. Enabled by default
-
Default Group — required, editable. Only a Contact Group of type Static can be selected.
-
Click the Save button.
After saving the "General" details (Fig. 7), the “Conditions” and “Permissions” sections become available.
To add a new Condition:
-
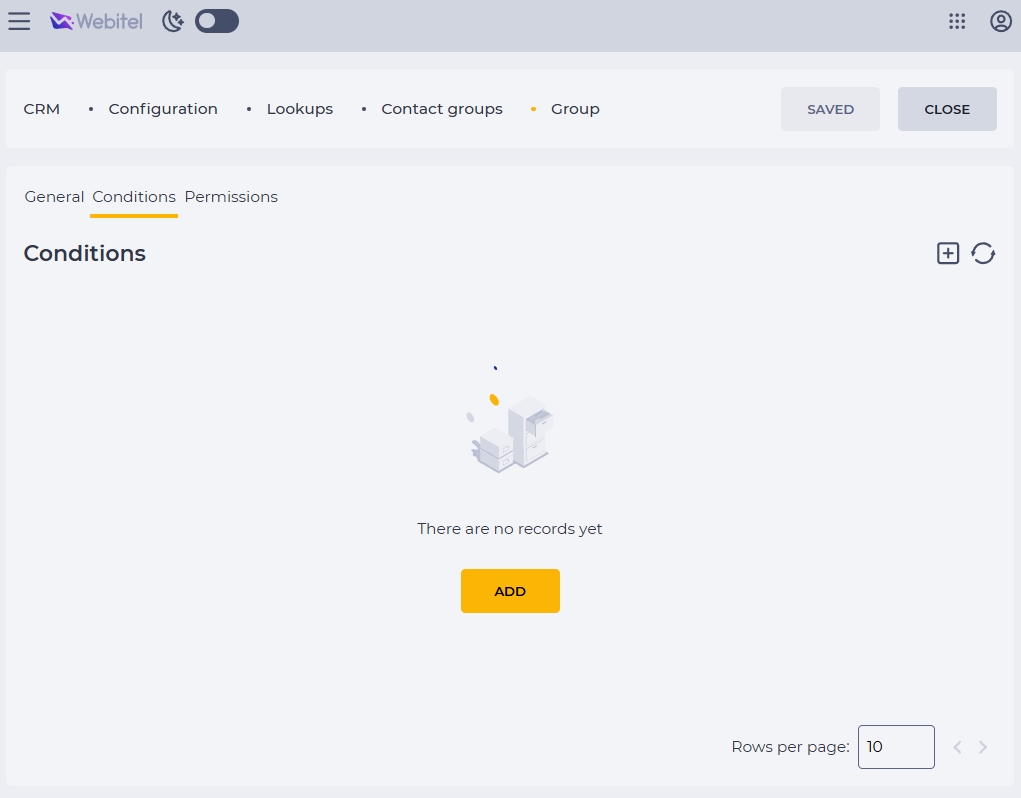
Navigate to the Conditions tab (Fig. 8).
-
Click the Add button or the icon

-
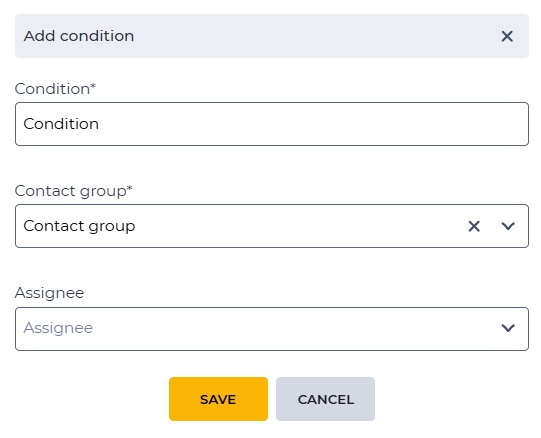
In the Add Condition modal window (Fig. 9), fill in:
-
Condition — required, editable field.
-
Contact Group — required field. Select a static group from the "Contact Groups" directory. Only static groups can be selected in this field.
-
Assignee — optional field. Select a Contact from the members of the selected static Contact Group.
-
Click the Save button.
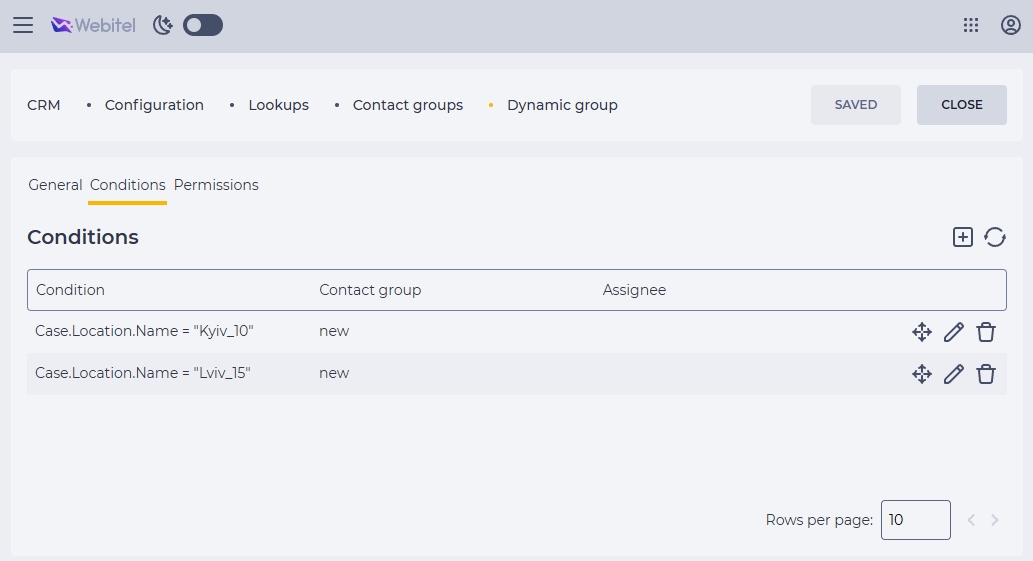
Important: When the user drags and drops conditions by holding the icon (Fig. 10), the record changes its position in the table. Conditions are unique across all three fields.
Conditions are evaluated top to bottom in the list.
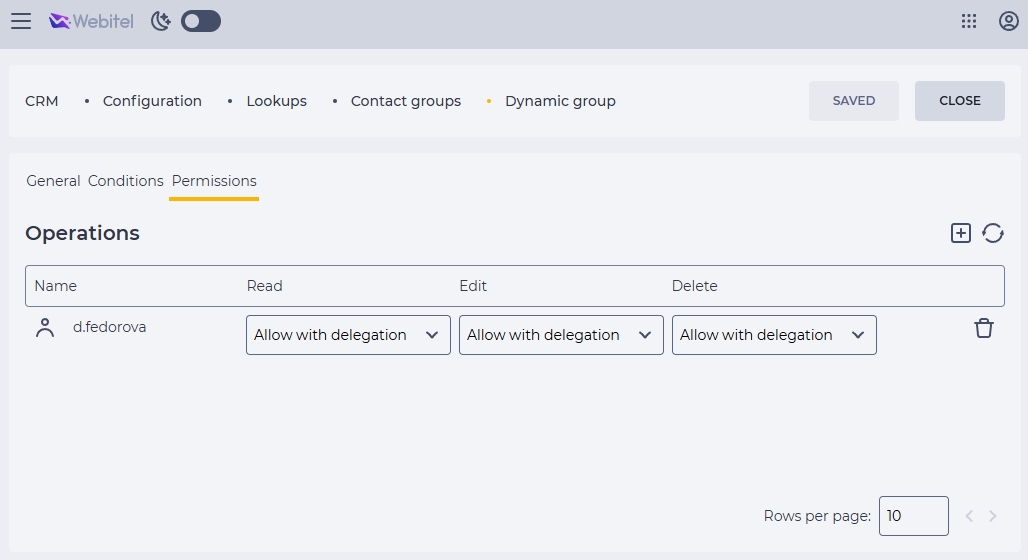
To add a user to the group and assign Permissions:
-
Navigate to the Permissions tab (Fig. 11).
-
Click the Add icon"
-
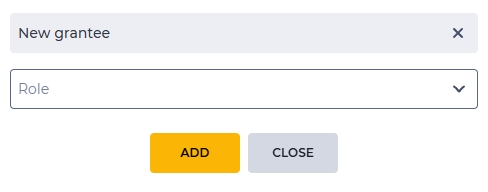
In the New Grantee modal window, select a Role.
-
Click one of the buttons:
-
Add — adds the new grantee.
-
Close or the close icon
-
1.2. Priorities Lookup
The Priorities Lookup (Fig. 13) contains the list of priorities that can be assigned to a Case.
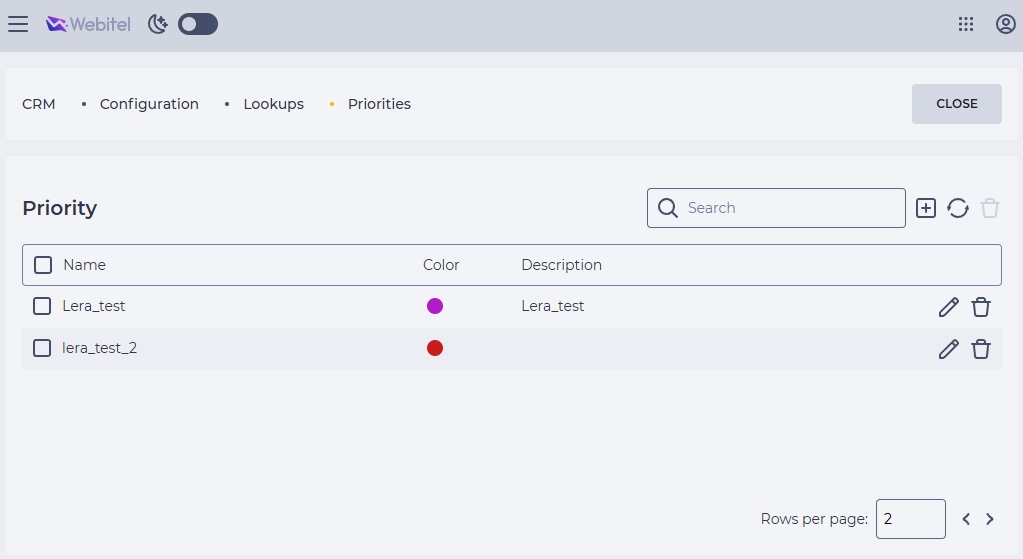
To populate the "Priorities" lookup:
-
Navigate to CRM → Configuration → Lookups → Priorities.
-
On the priorities list page (Fig. 13), click the Add icon

-
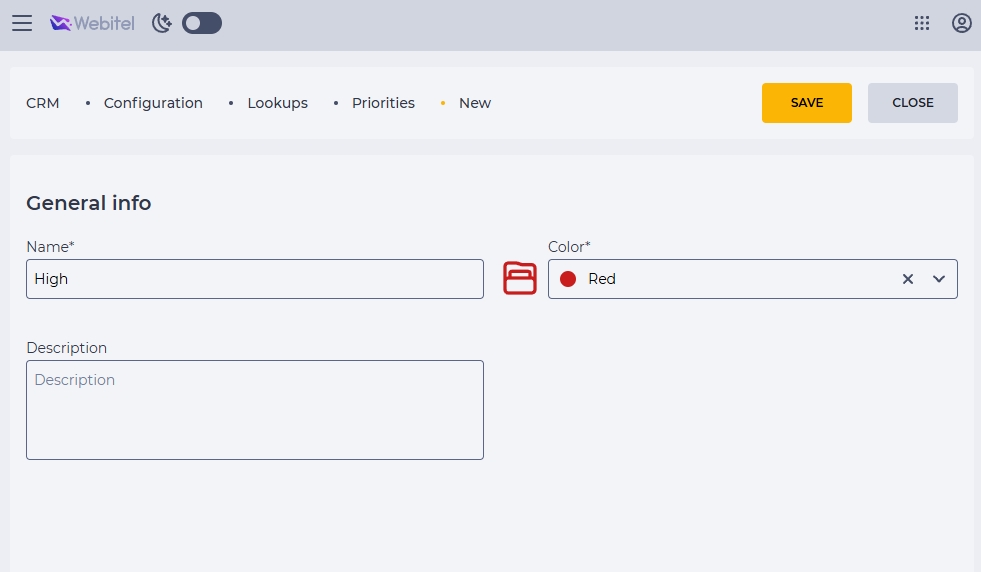
In the General tab (Fig. 14), fill in the following fields:
-
Name — required, editable.
-
Description — optional, editable.
-
Color — required, editable.
-
Click the Save button.
1.3. Closure Reasons Lookup
The Closure Reasons Lookup contains the list of reasons used to close a Case when it is moved to the final status. Multiple closure reasons lookups can be created in the system for different use cases.
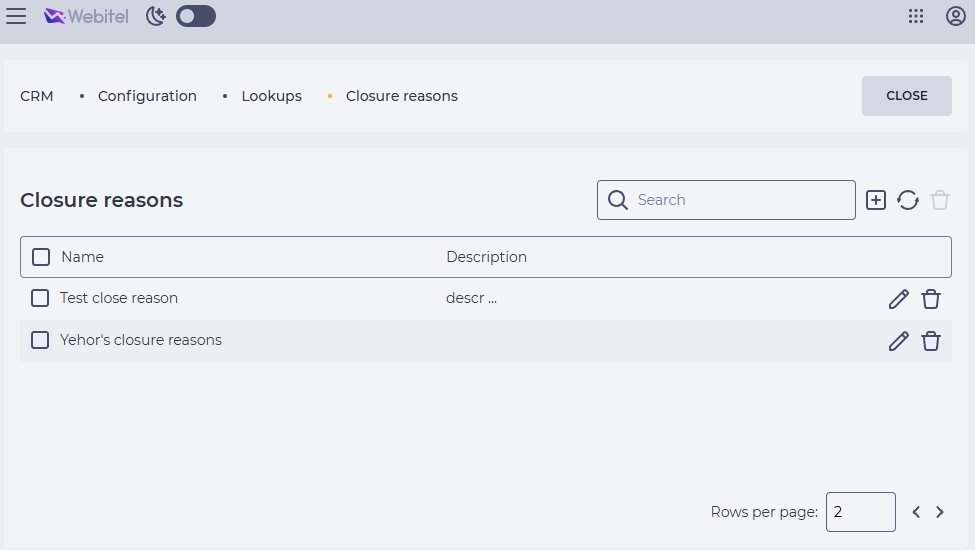
To create a new "Closure Reasons" lookup:
-
Navigate to CRM → Configuration → Lookups → Closure Reasons.
-
Click the Add icon
-
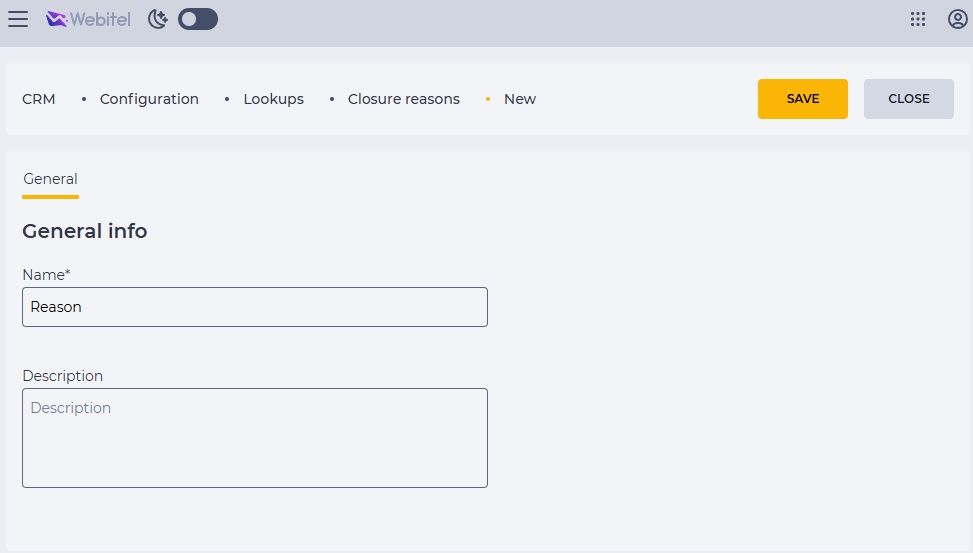
In the General tab (Fig. 16), fill in the following fields:
-
Name — required, editable.
-
Description — optional, editable.
-
-
Click the Save button.
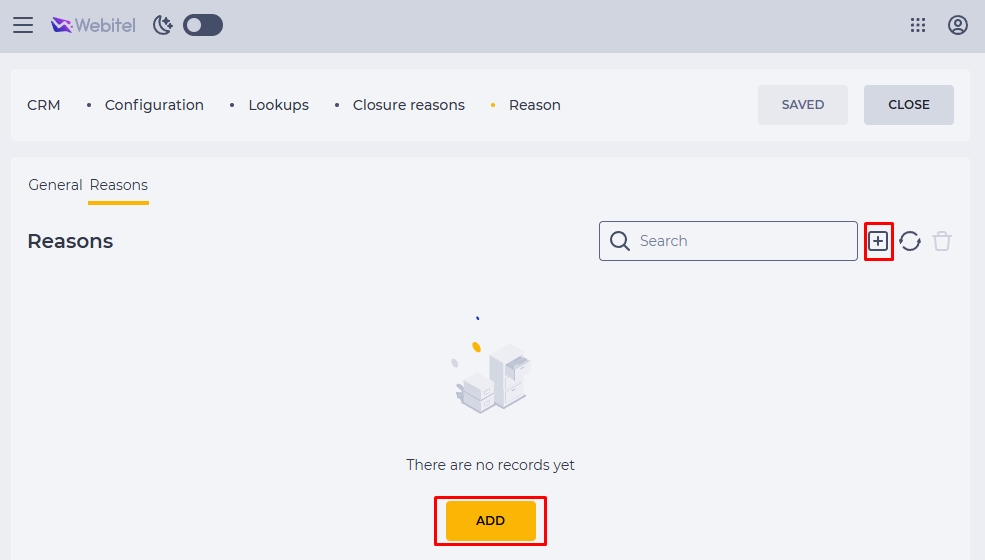
Once the "General" section (Fig. 16) is saved, the Reasons section (Fig. 17) becomes available.
After creating the "Closure Reasons" lookup, you can populate it with specific reasons that will be available when closing Cases:
-
Go to the Reasons tab (Fig. 17).
-
Click the Add button or icon
-
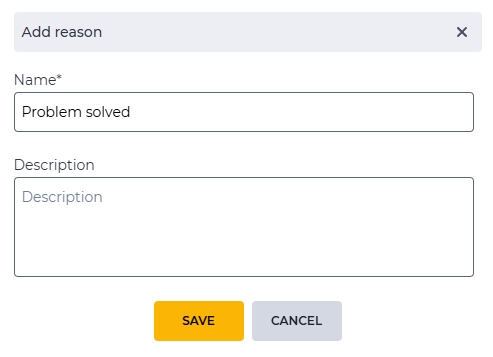
In the modal window, fill in the following fields:
-
Name — required, editable.
-
Description — optional, editable.
-
-
Click the Save button.
1.4. Statuses Lookup
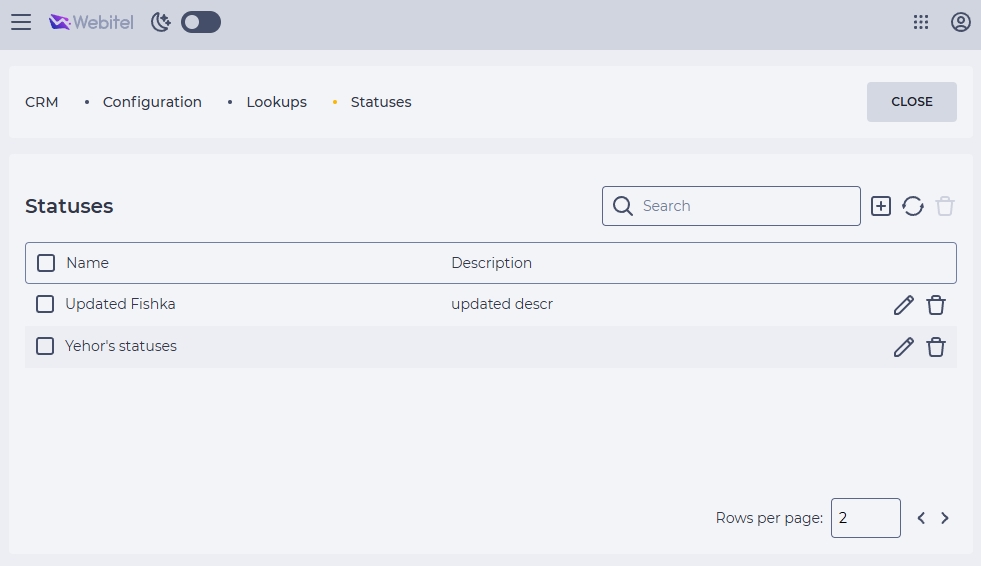
The Statuses Lookup (Fig. 19) contains the list of statuses (processing stages) that a Case can have. Multiple status lookups can be created in the system for different use cases.
To create a new lookup:
-
Go to CRM → Configuration → Lookups → Statuses (Fig. 19).
-
Click the Add icon
-
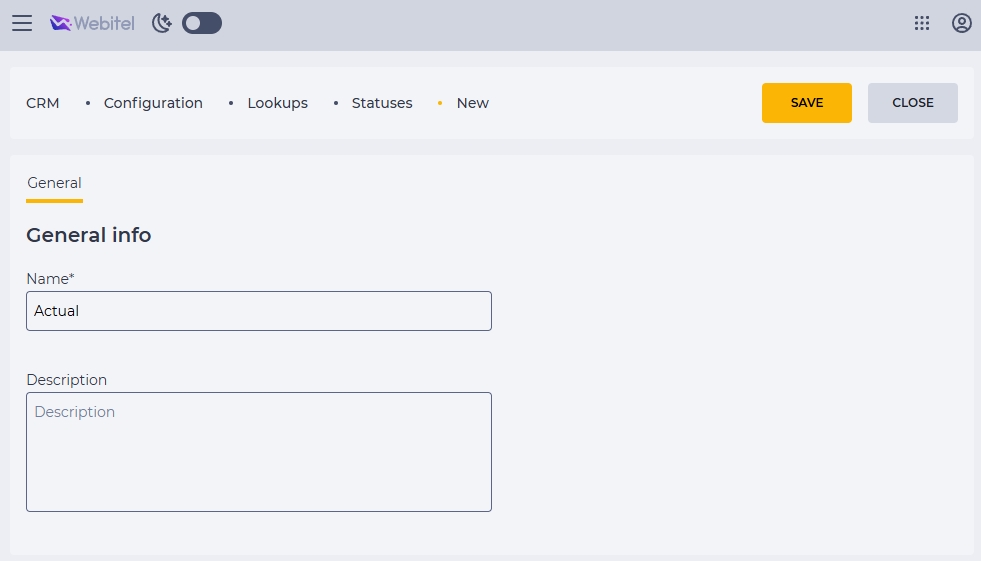
In the General tab (Fig. 20), fill in the following fields:
-
Name — required, editable.
-
Description — optional, editable.
-
-
Click the Save button.
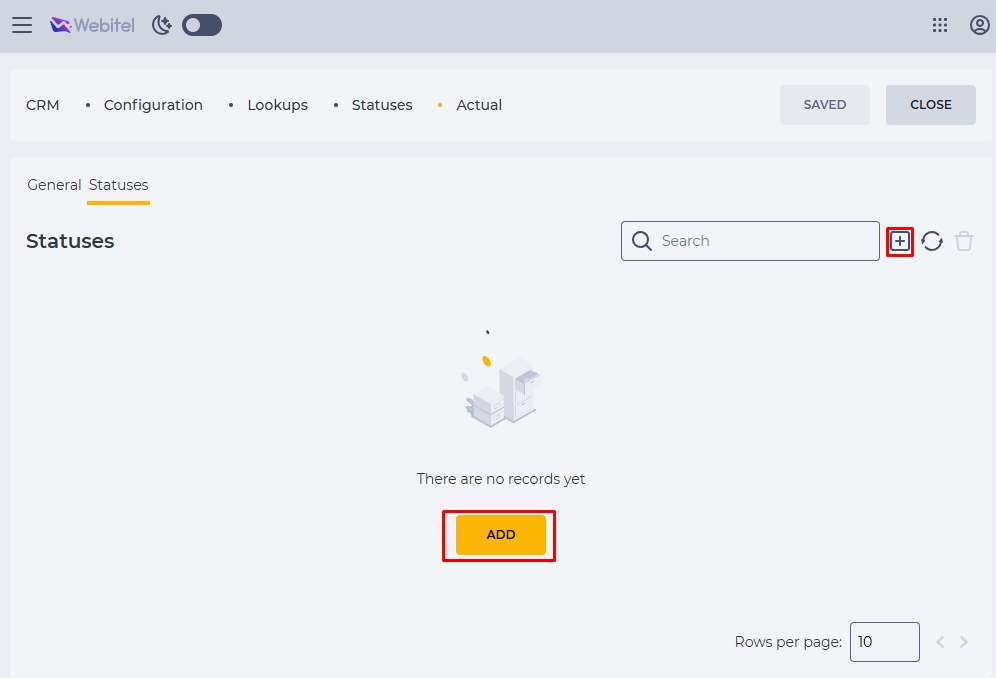
After saving the "General" section (Fig. 20), the Statuses section becomes available (Fig. 21).
To add a new status:
-
Go to the Statuses tab (Fig. 21).
-
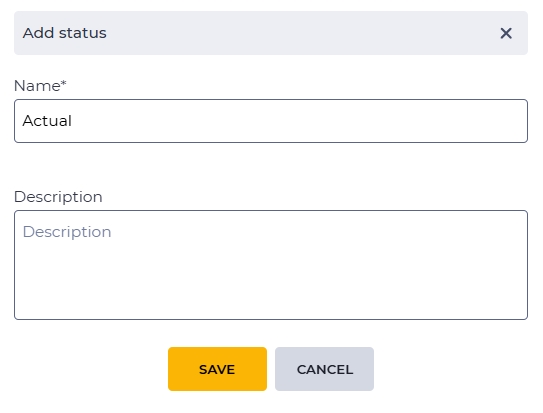
Click the Add button or icon
-
Name — required, editable.
-
Description — optional, editable.
-
Click the Save button.
Mandatory conditions in the system:
-
There must be only ONE initial status.
-
There must be AT LEAST one final status.
-
The first status is created by default as both initial and final.
-
The second and all subsequent statuses are created as regular (neither initial nor final). They can be manually marked as initial or final if needed.
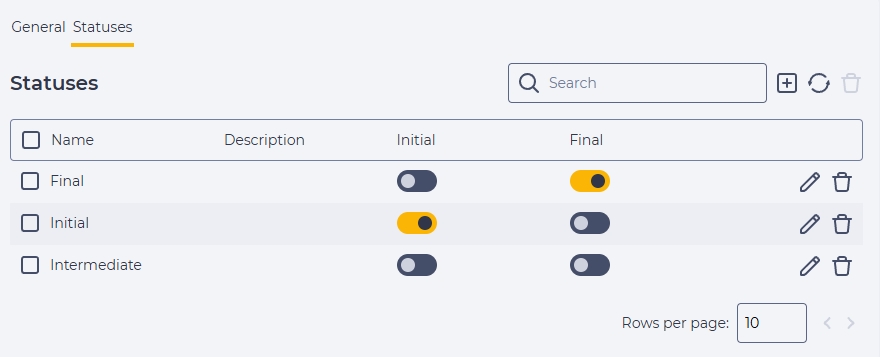
Important! The system must have only ONE active Initial status → only one “Initial” toggle can be enabled at a time.
-
If the user enables the “Initial” toggle on a second status, the previous one will be automatically disabled.
-
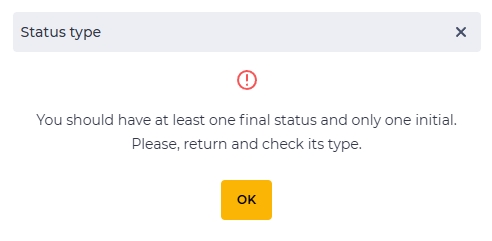
If the user disables the only “Initial” status, a warning modal window will open (Fig. 24).
Important! The system must have AT LEAST one Final status → at least one “Final” toggle must be enabled.
-
If the user disables the last “Final” status, a warning modal window will also open (Fig. 24).
1.5. Case Sources Lookup
The Case Sources Lookup (Fig. 25) contains the list of sources from which a Case can be created. This lookup is used by the system or user when filling in the Source field in the Case.
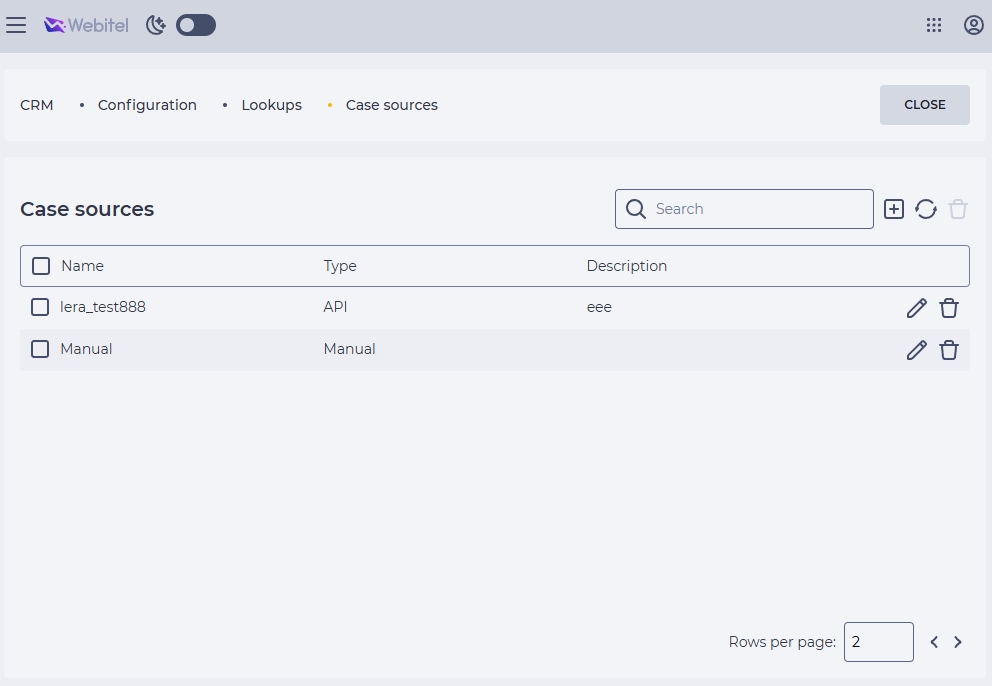
To populate the Case Source:
-
Go to CRM → Configuration → Lookups → Case Sources.
-
Click the Add icon
-
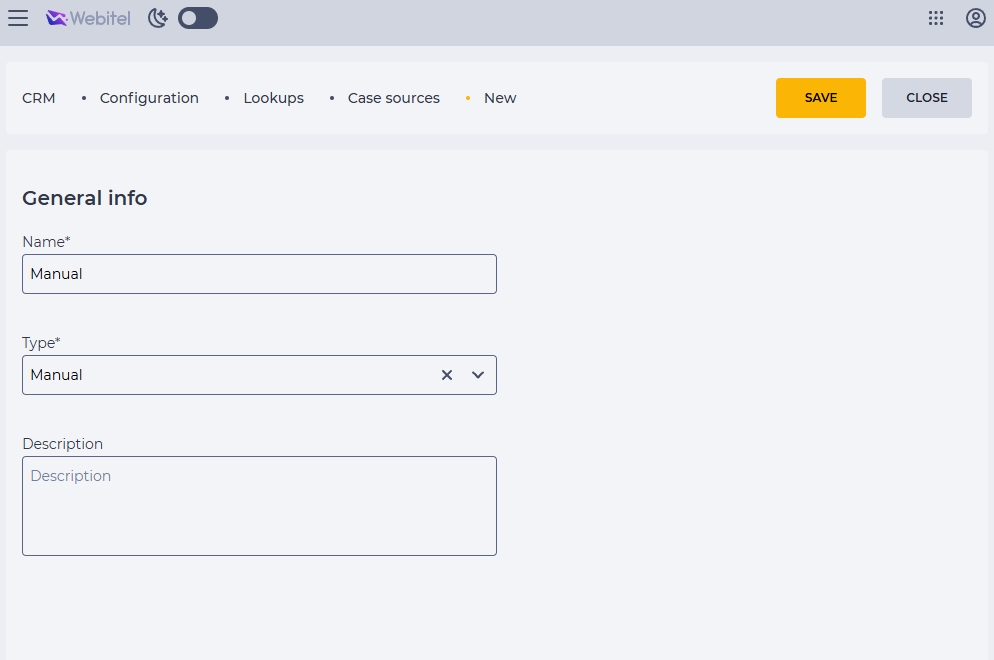
In the General tab (Fig. 26), fill in the following fields:
-
Name — required, editable field.
-
Type — required field selected from the list:
-
Call;
-
Chat;
-
Social Network;
-
Email;
-
API;
-
Created manually.
-
-
Description — optional, editable field.
-
Click the Save button.
1.6. SLAs Lookup
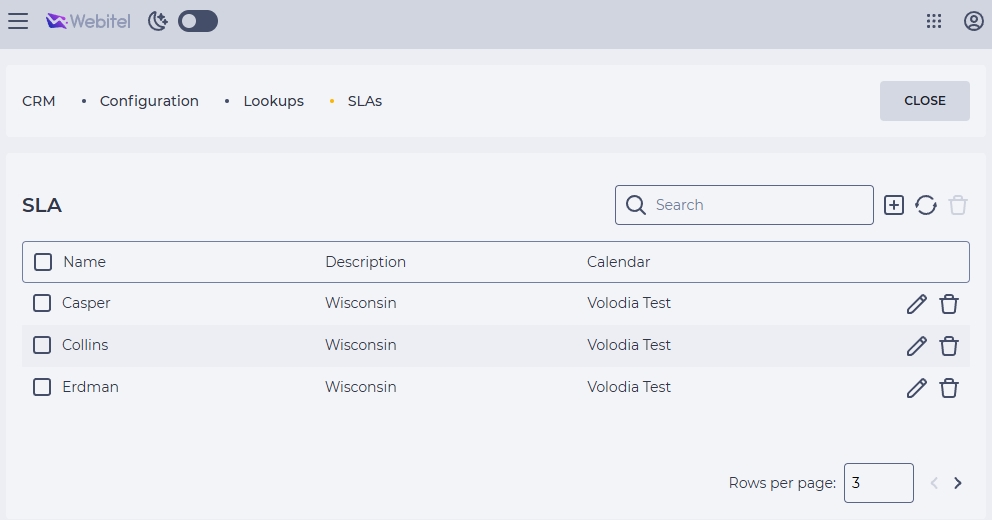
The SLAs Lookup (Fig. 27) is used to configure rules for calculating the planned response and resolution times for a Case depending on its type or Contact.
A single SLA can be extended with Conditions, specifically Priorities.
When adding a Condition to an SLA, the user selects priorities from the list created in the "Priorities" lookup and enters the response and resolution times for each. This allows configuring different response and resolution times depending on the priority assigned to the Case.
If the Case is classified under a specific Service and has a priority specified in the SLA Condition for that Service, this SLA will be applied to calculate the planned response and resolution times.
If there are no Conditions, the general SLA for the Service is applied. The "SLA" lookup is always linked to a catalog level in the "Service Catalogs" lookup and can also be linked to any lower service level.
When calculating SLA for a Case, the system always applies the SLA from the lowest level of classification for that Case.
To create a new "SLAs" lookup:
-
Navigate to CRM → Configuration → Lookups → SLAs (Fig. 27).
-
Click the Add icon

-
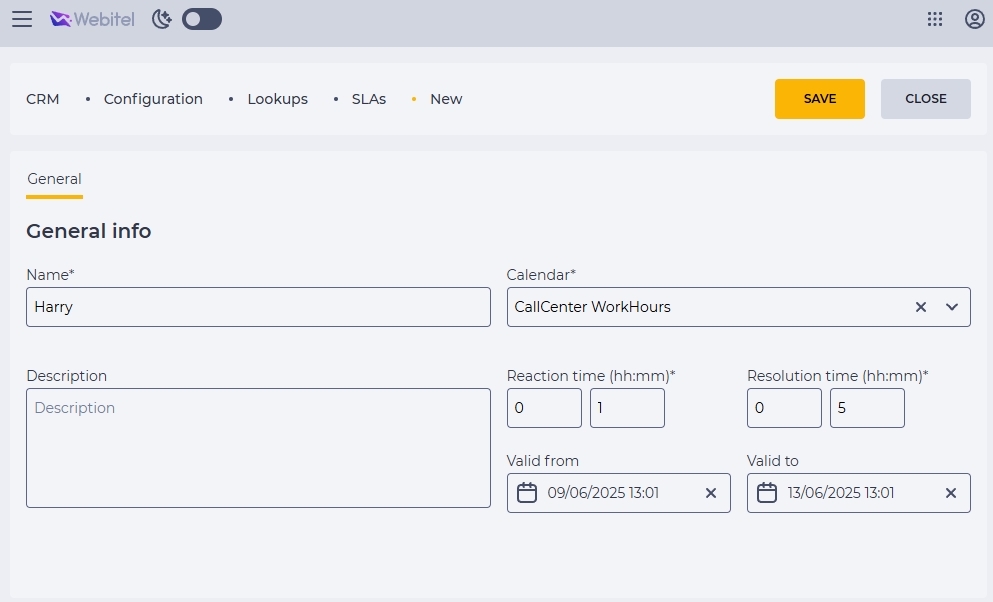
In the General tab (Fig. 28), fill in the following fields:
-
Name – required, editable.
-
Description – optional, editable.
-
Calendar – required, editable. Used to calculate the "Planned Resolution Time" and "Planned Response Time" fields. Selected from the list of previously created Calendars.
-
Planned Response Time (hh:mm) – required, editable. The number of hours and minutes within which a response must be provided (i.e., changing the status to anything other than the initial status). Always applied if no Conditions are met.
-
Planned Resolution Time (hh:mm) – required, editable. The number of hours and minutes within which the Case must be resolved (i.e., moved to a final status). Always applied if no Conditions are met.
-
Valid From/To – optional, editable. The effective period of the SLA, e.g., as specified in a client agreement.
-
Click the Save button.
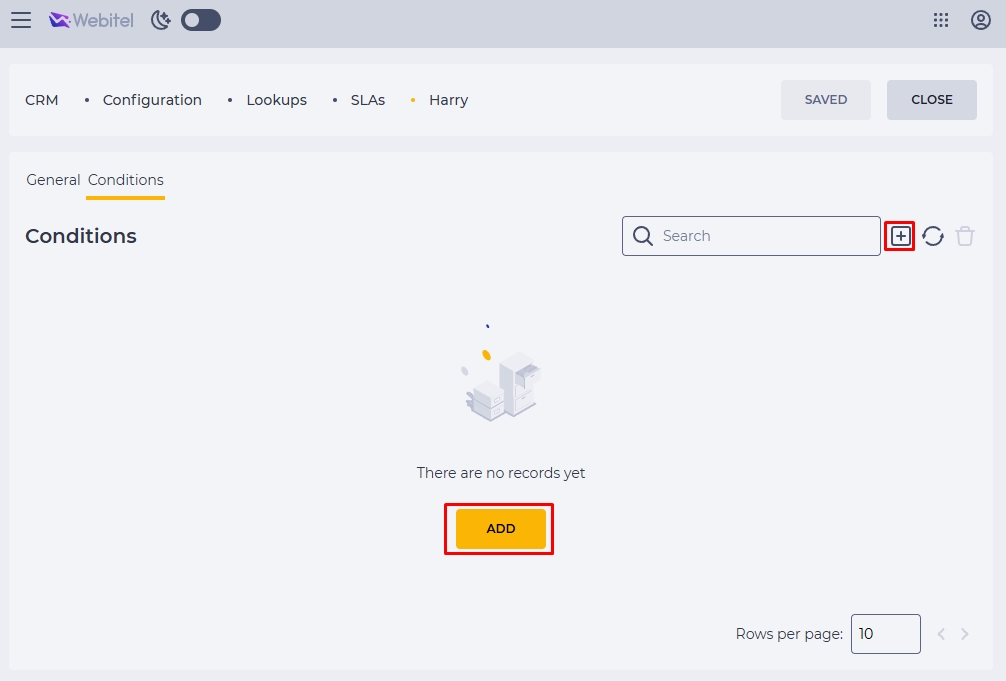
After saving the General details (Fig. 28), the Conditions section becomes available (Fig. 29).
To add a new Condition:
-
Navigate to the Conditions tab (Fig. 29).
-
Click the Add button or the icon
-
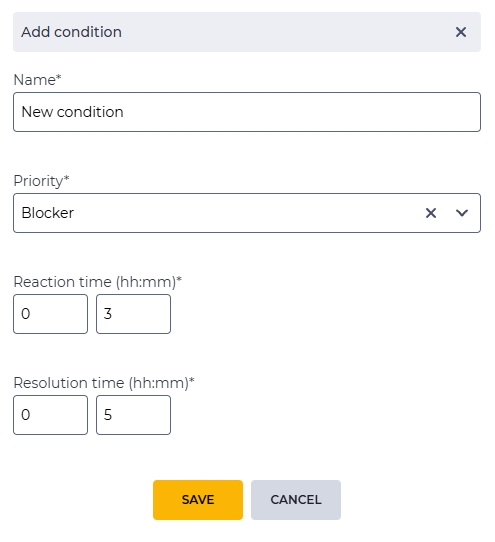
In the window, fill in the following fields:
-
Name — required field.
-
Priority — required multi-select field from the "Priorities" lookup.
-
Planned Response Time (hh:mm) — the time that will be applied to Cases with the selected priorities.
-
Planned Resolution Time (hh:mm) — required field.
Important! The same priority cannot be used in multiple Conditions within the same SLA. The list will only display priorities that have not yet been used in any existing Conditions.
-
Click the Save button.
1.7. Service Catalogs Lookup
The Service Catalogs Lookup (Fig. 31) is used to classify Cases through a multi-level structure. It allows you to configure Services (categories and subcategories) that can either be selected manually by the operator while processing a Case or assigned automatically by the system.
Before creating a Service Catalog, the following lookups must be configured, as they are used during catalog setup:
-
Statuses;
-
Closure Reasons;
-
SLAs.
The system allows you to create multiple Service Catalogs.
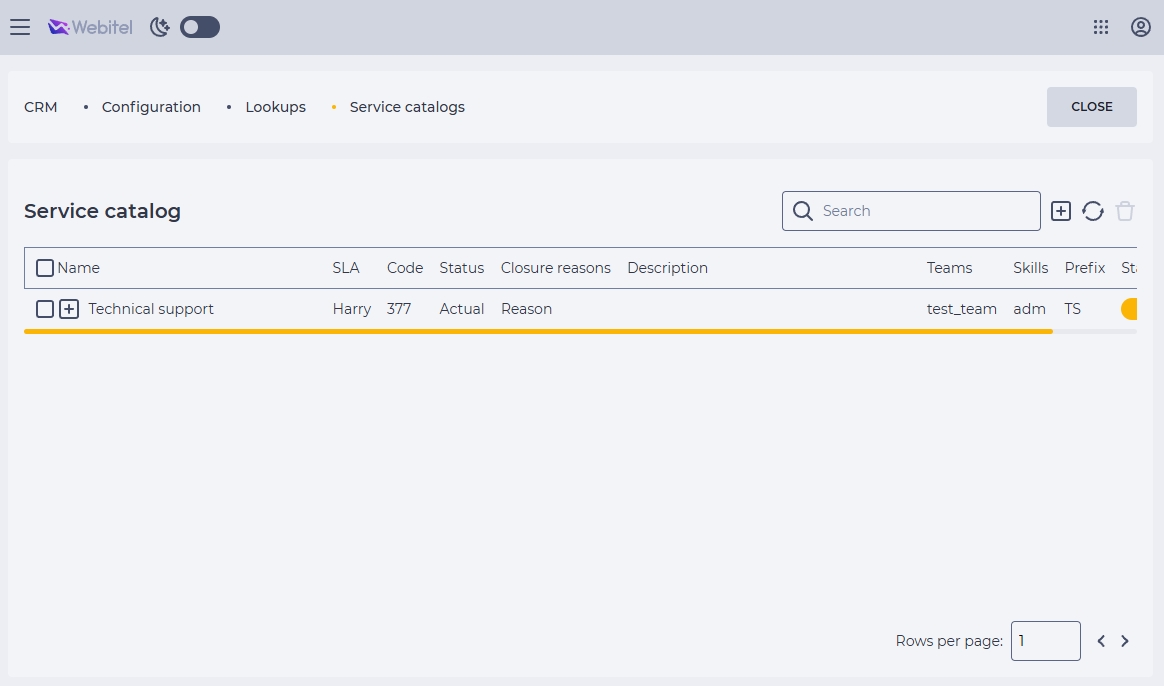
Cases are always linked to a Catalog. After selecting a Service, the system automatically pulls the corresponding Subservices available to te operator based on their Team or Skills.
-
If Teams are assigned, the Catalog Services will only be visible to operators who belong to these Teams.
-
If Skills are assigned, the Catalog Services will only be available to operators who have the corresponding Skills.
The lookup can support multiple levels of nesting. The two main levels are:
-
Catalog
-
Service
It is not possible to select only the Catalog in a Case. The Service must be selected from the lowest level of the hierarchy.
Location in the system: CRM → Configuration → Lookups → Service Catalogs.
To create a new Service Catalog: Click the Add icon
1.7.1. First Level: Catalog
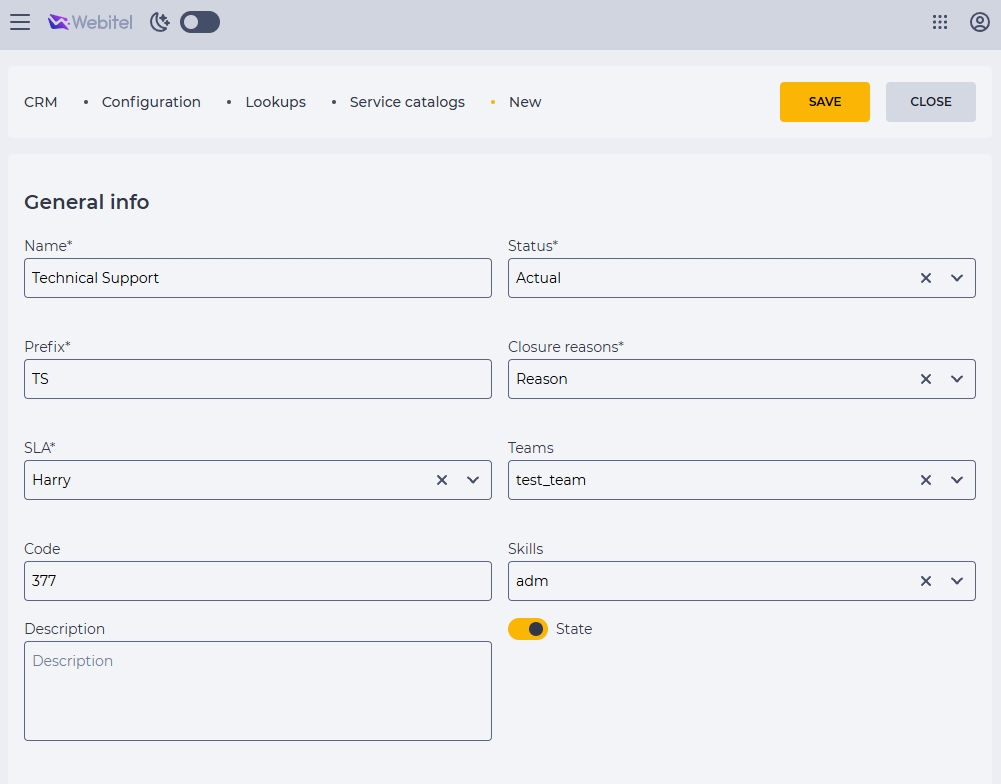
On the new lookup creation page, in the General tab Name — required, editable.
-
Prefix — required, editable. The Case ID generated under this catalog will include this prefix.
-
SLA — required, editable. The SLA at the catalog level defines the resolution and response times if no SLA is selected at the lower Service level.
-
Code — optional, editable. Can be used for integrations or custom configurations.
-
Description — optional, editable.
-
Statuses — required, editable. Cases created under this catalog can only use statuses from this linked lookup.
-
Closure Reasons — required, editable. Closure reasons from this linked lookup will be available when closing Cases under this catalog.
-
Teams — optional, editable. If Teams are linked to the catalog, Services will only be available to operators who belong to these Teams.
-
Skills — optional, editable. If Skills are linked to the catalog, Services will only be visible to operators who have these specific Skills.
-
State — required, editable. Catalog State: enabled

Click Save to store the record.
Important! If both Teams and Skills are linked, Services will be available to operators who belong to either assigned Teams OR have the required Skills.
To create the second level (Services), click on the catalog name, for example, Technical support (Fig. 33).

1.7.2. Second Level: Services
To create a Service, click the Add button or the icon
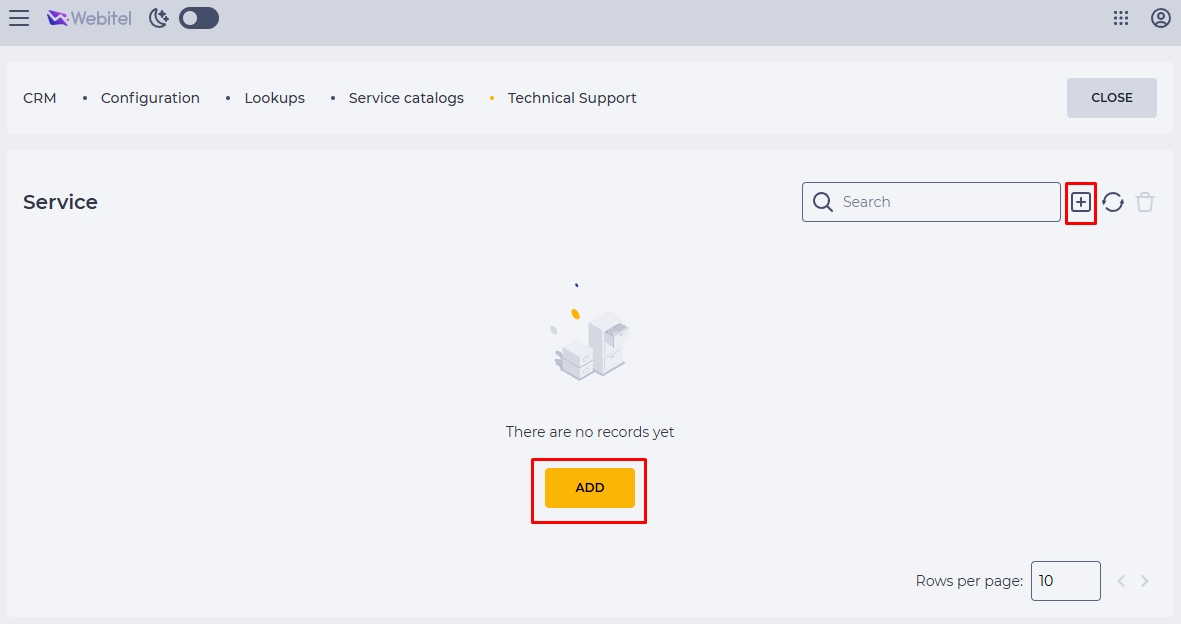
On the new lookup creation page, in the General tab (Fig. 35), fill in the following fields:
-
Name — required, editable.
-
SLA — required, editable. SLA can be set at each service level. By default, the Case will use the SLA of the selected Service. If no SLA is specified, the SLA from the higher level will apply.
-
Code — optional, editable.
-
Description — optional, editable.
-
Assignee — optional, editable. Since Webitel Contacts can also be Webitel Users, one Contact can be assigned to the Service. If a Dynamic Contact Group is assigned, the Assignee field will be disabled.
-
Assignee Group — optional, editable.
-
State — required, editable. Catalog State: enabled
Click Save to store the service record.
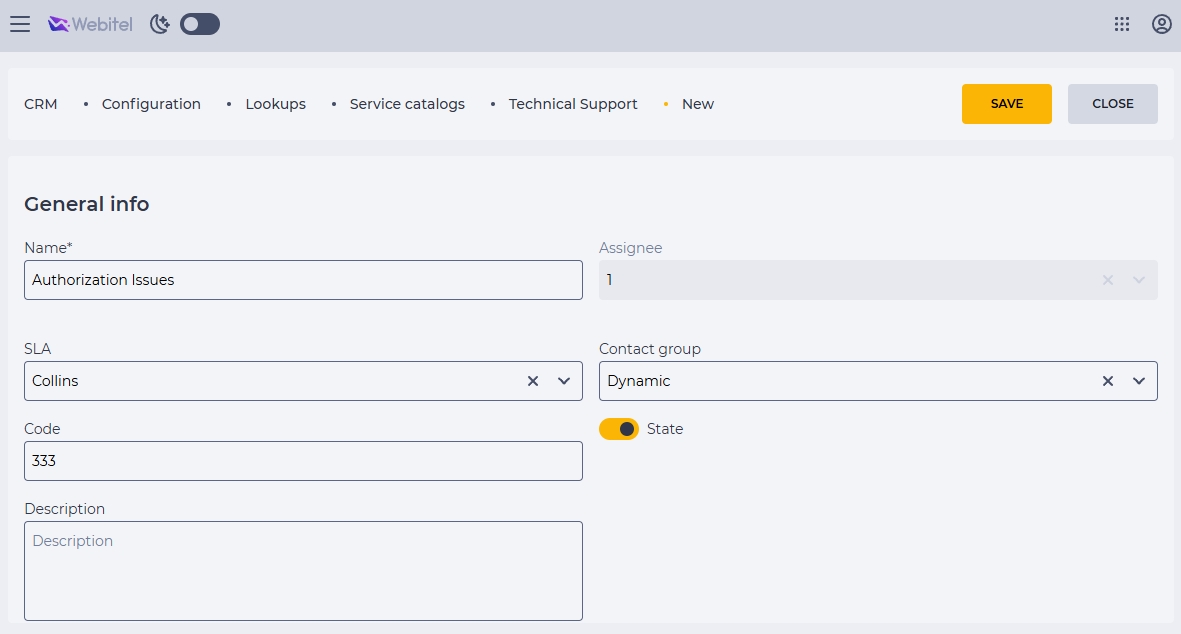
To create the third or any lower level (Subservices), click the name of the previous level, for example, Authorization Issues (Fig. 36), and repeat the same steps as for Service creation.

2. Editing a Lookup
To edit a record at any level, click on its name or on the icon 
To save the changes, be sure to click the Save button.
3. Deleting a Lookup
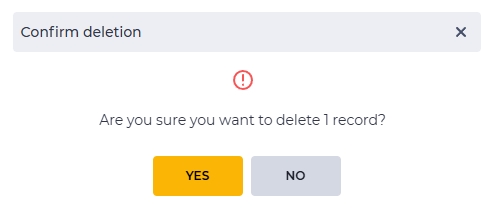
To delete a lookup, click on the icon 
4. Interface Features
Required fields are marked with "*".
To save the lookup page, click the Save button.
The Save button becomes active:
-
after entering data into required fields when creating a record;
after modifying any field when editing.
To exit the tab without saving changes, click the Close button.
To save data in a modal window, use the Save button.
To exit without saving, click the Cancel button or the close icon