
This document describes the process of configuring an outbound IVR dialer in the Webitel system. The instruction includes uploading a media file, creating a voice scheme, configuring resources and a queue. After completing all steps, the system will be ready for automatic outbound calling to customers.
1. Navigation
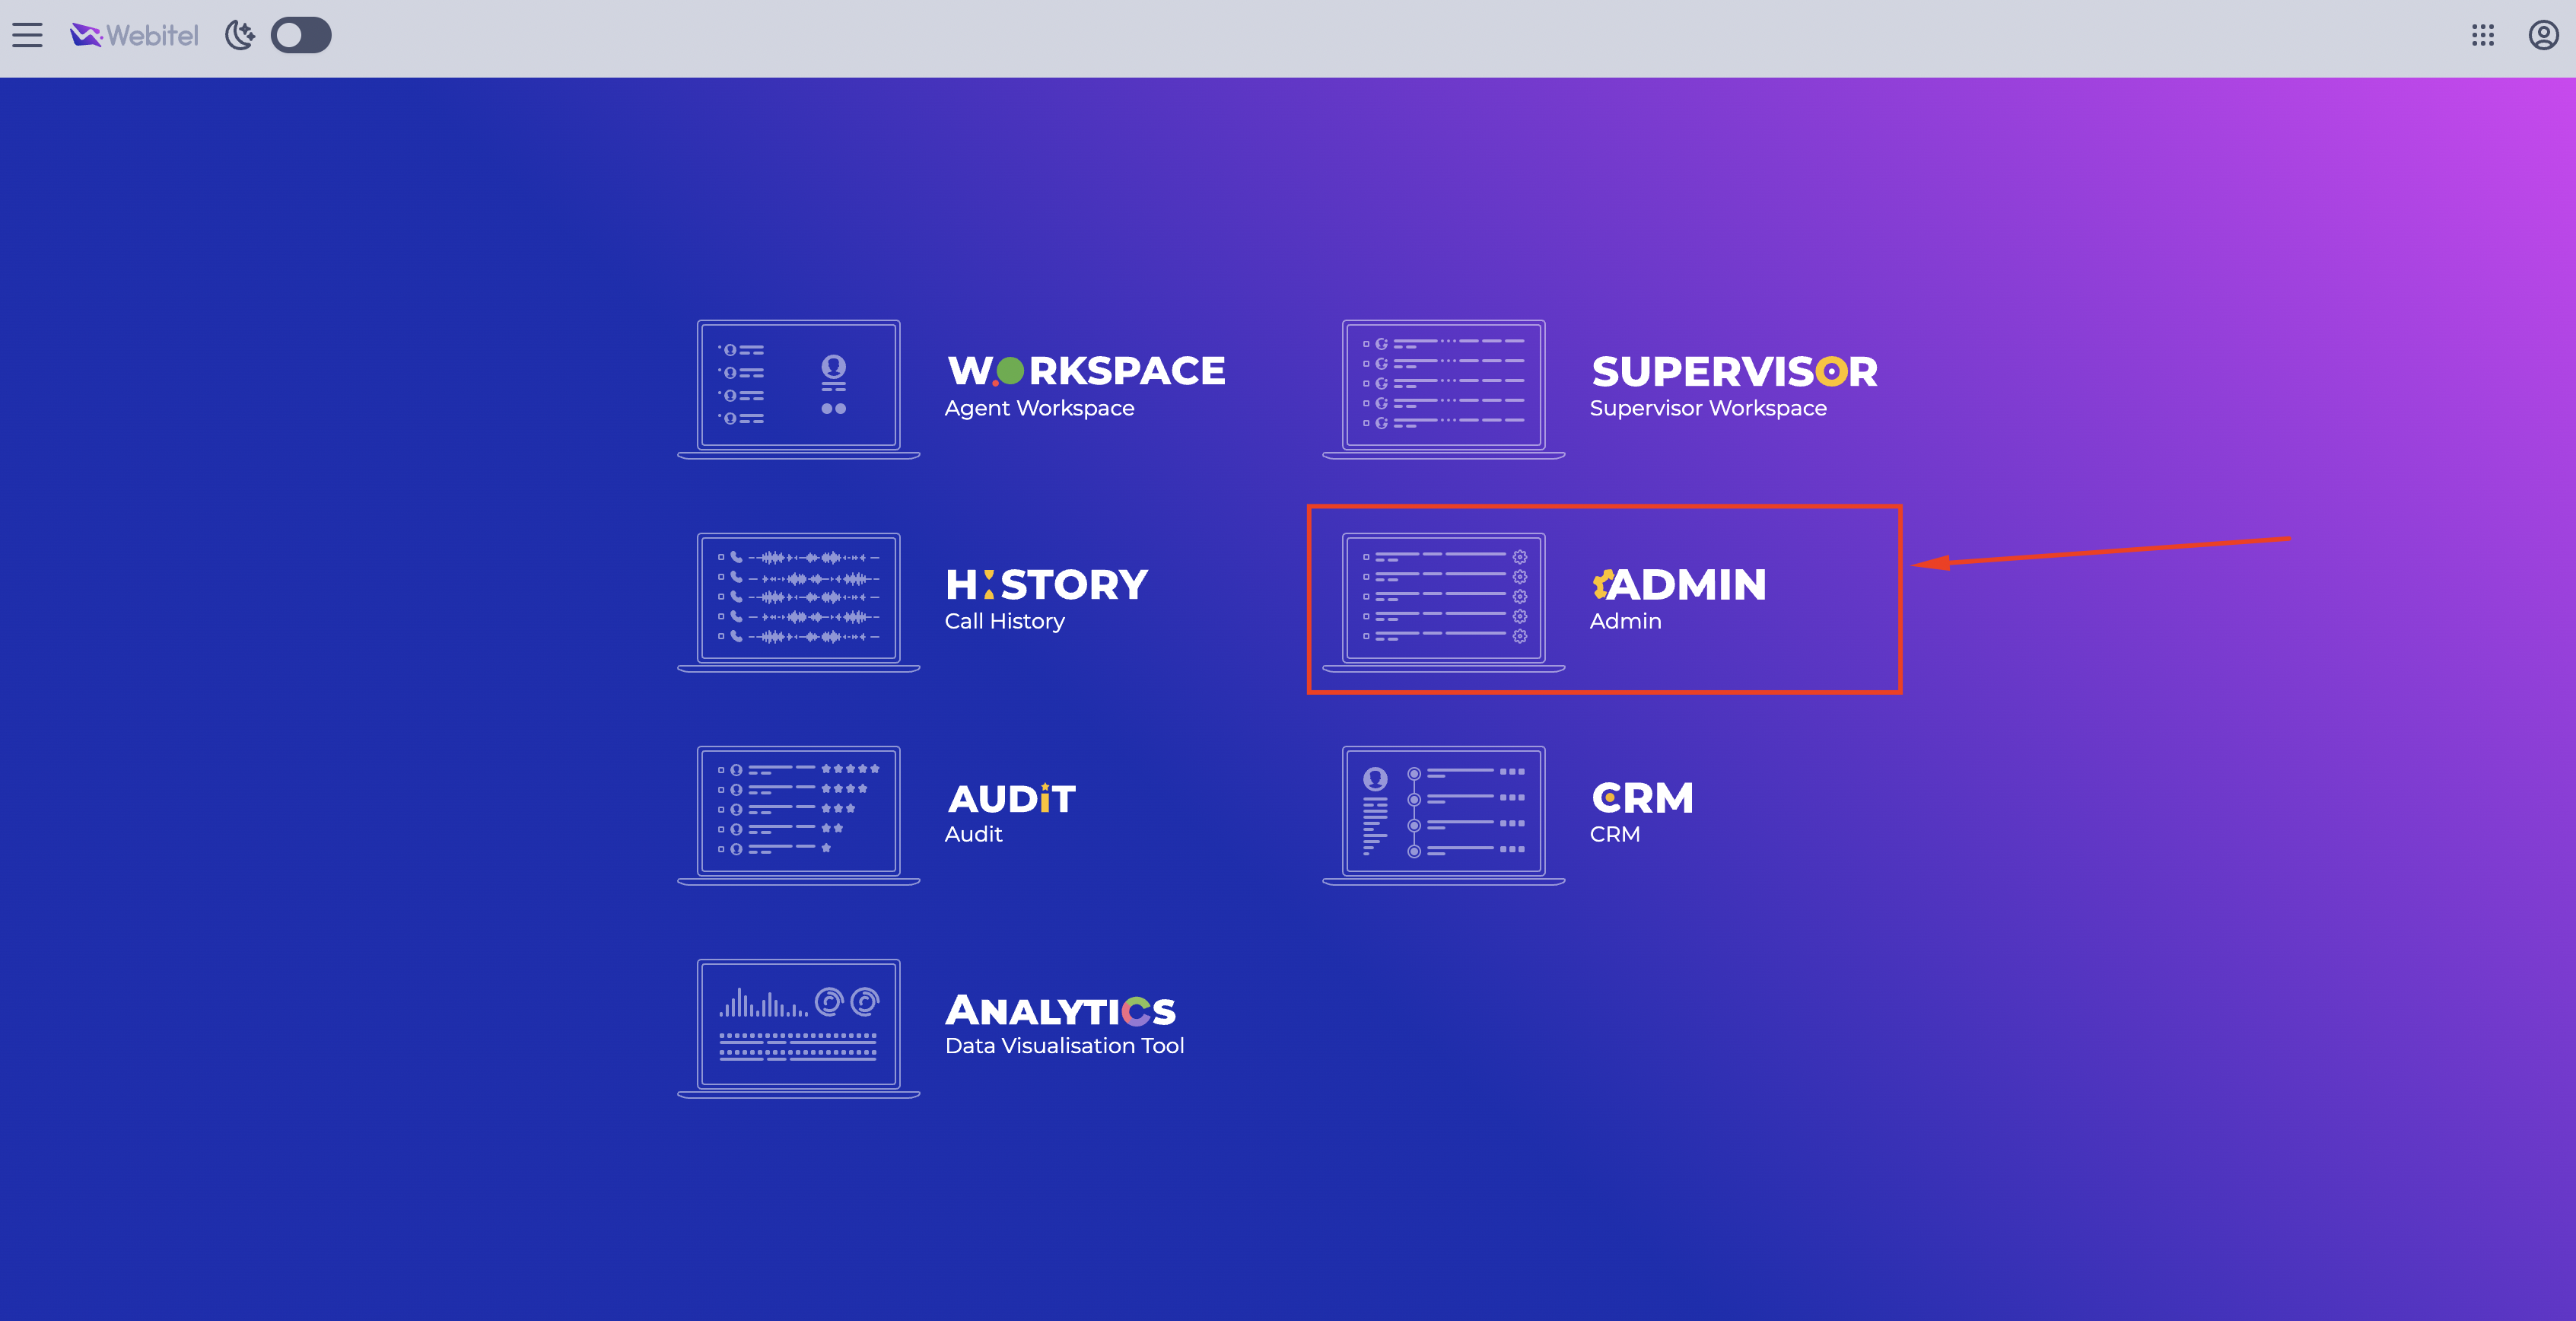
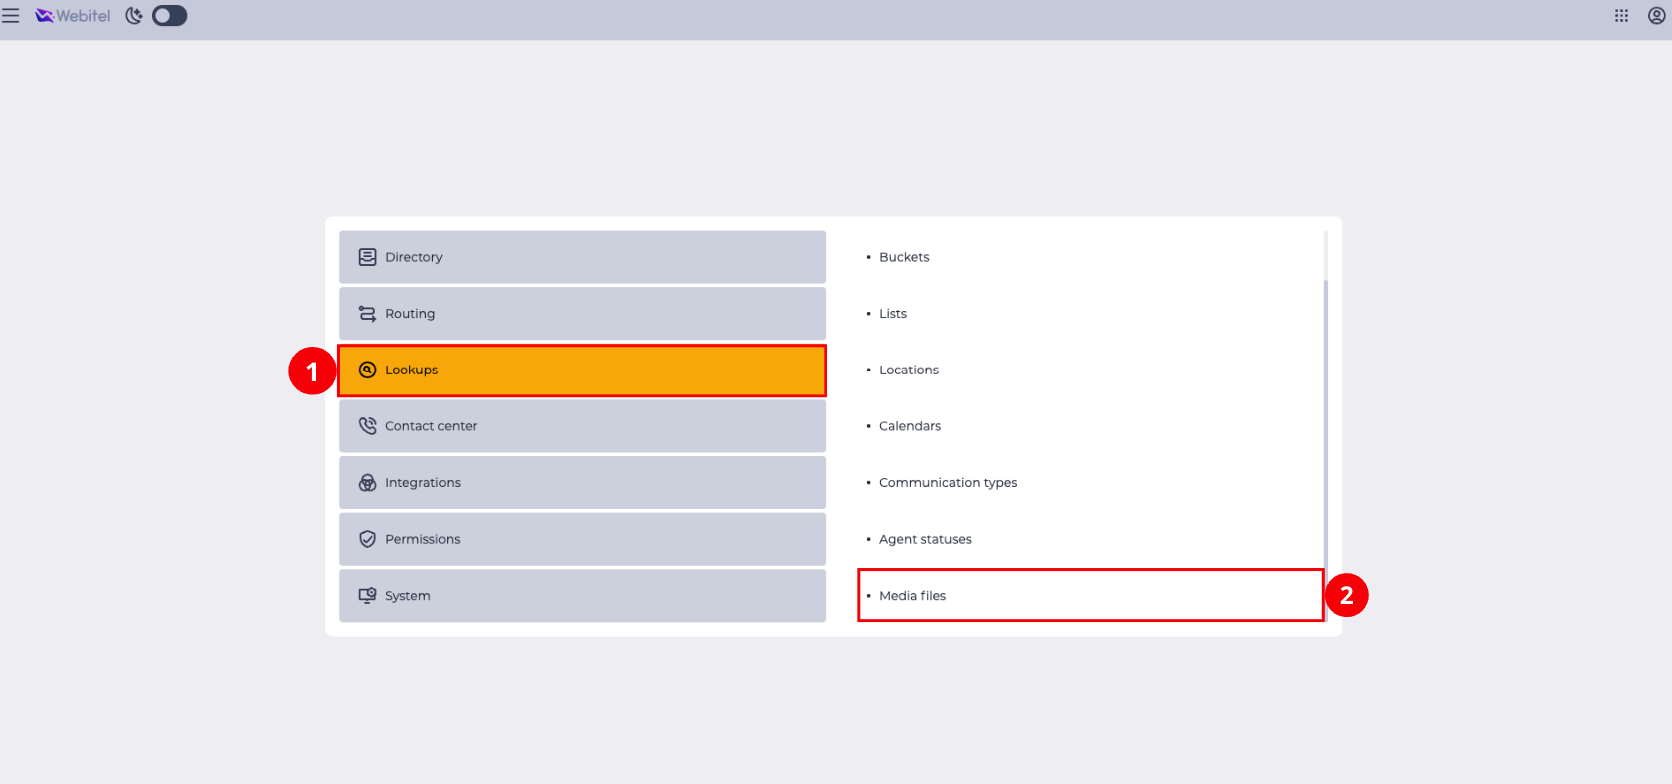
To upload a media file, go to Admin (Fig. 1) → Lookups (Fig. 2.(1)) → Media files (Fig. 2.(2)).
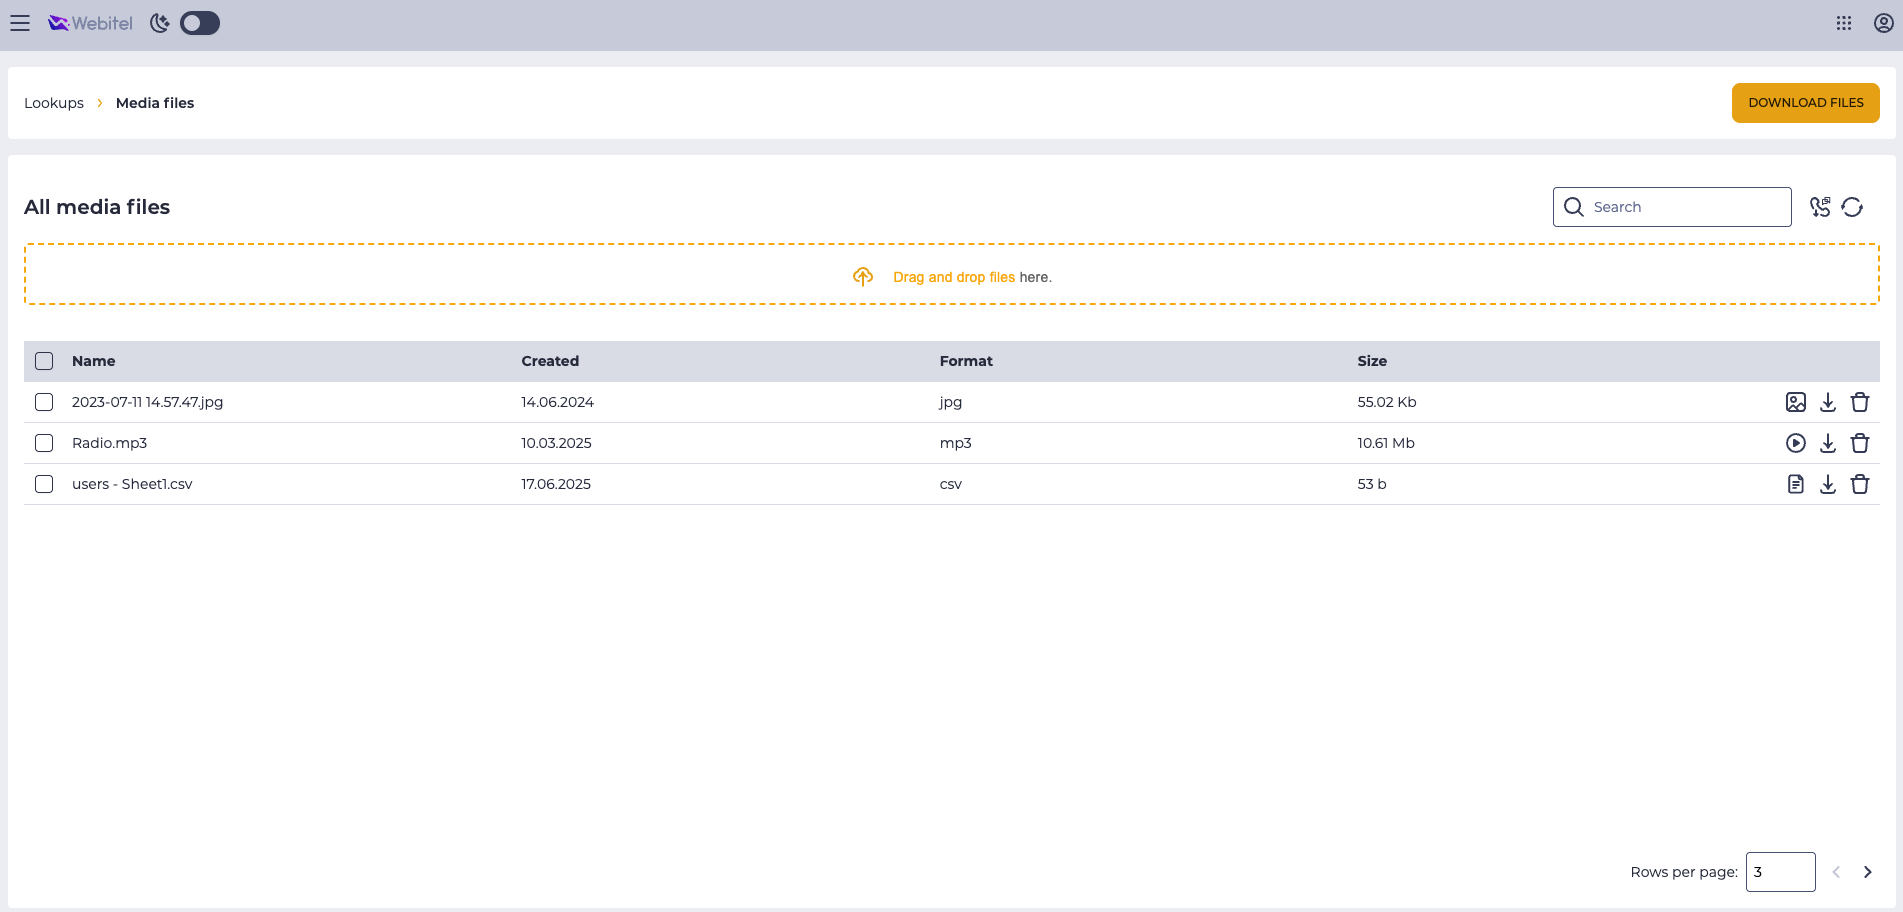
After navigating, the Media files page will open (Fig. 3).
2. Uploading a Media File
To upload a new media file:
-
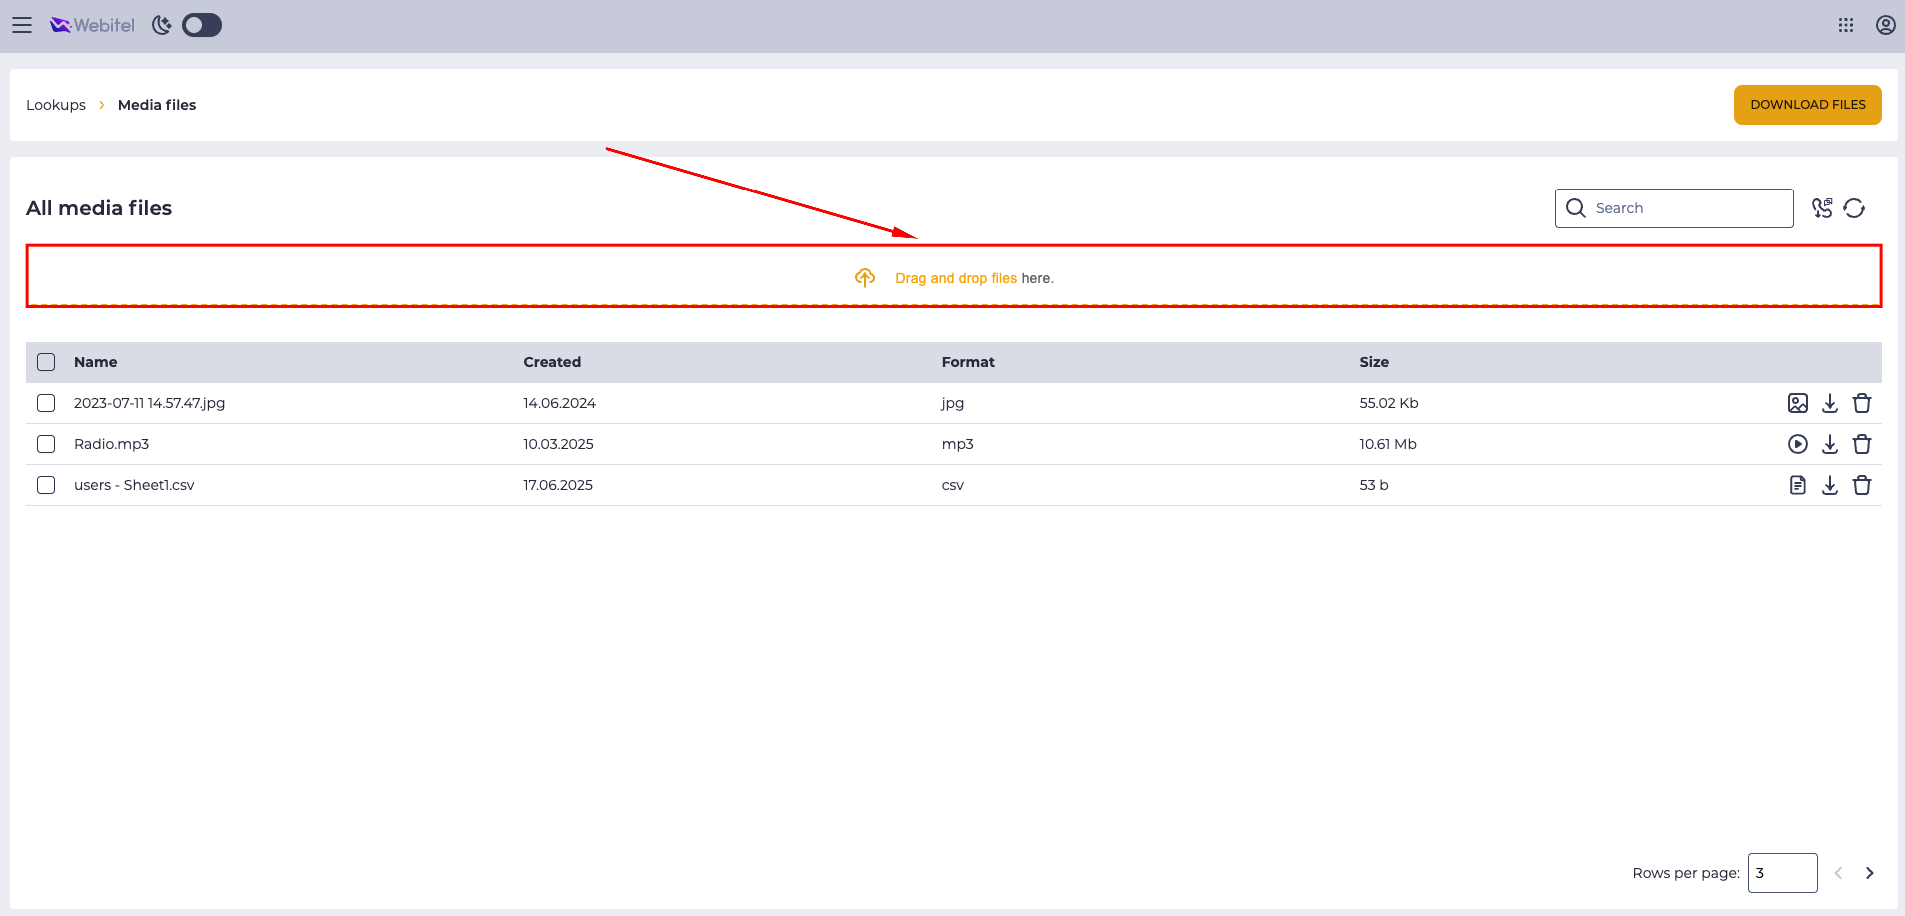
Click the Drag and drop files here. area at the top of the page (Fig. 4).
-
Select a file from your device.
-
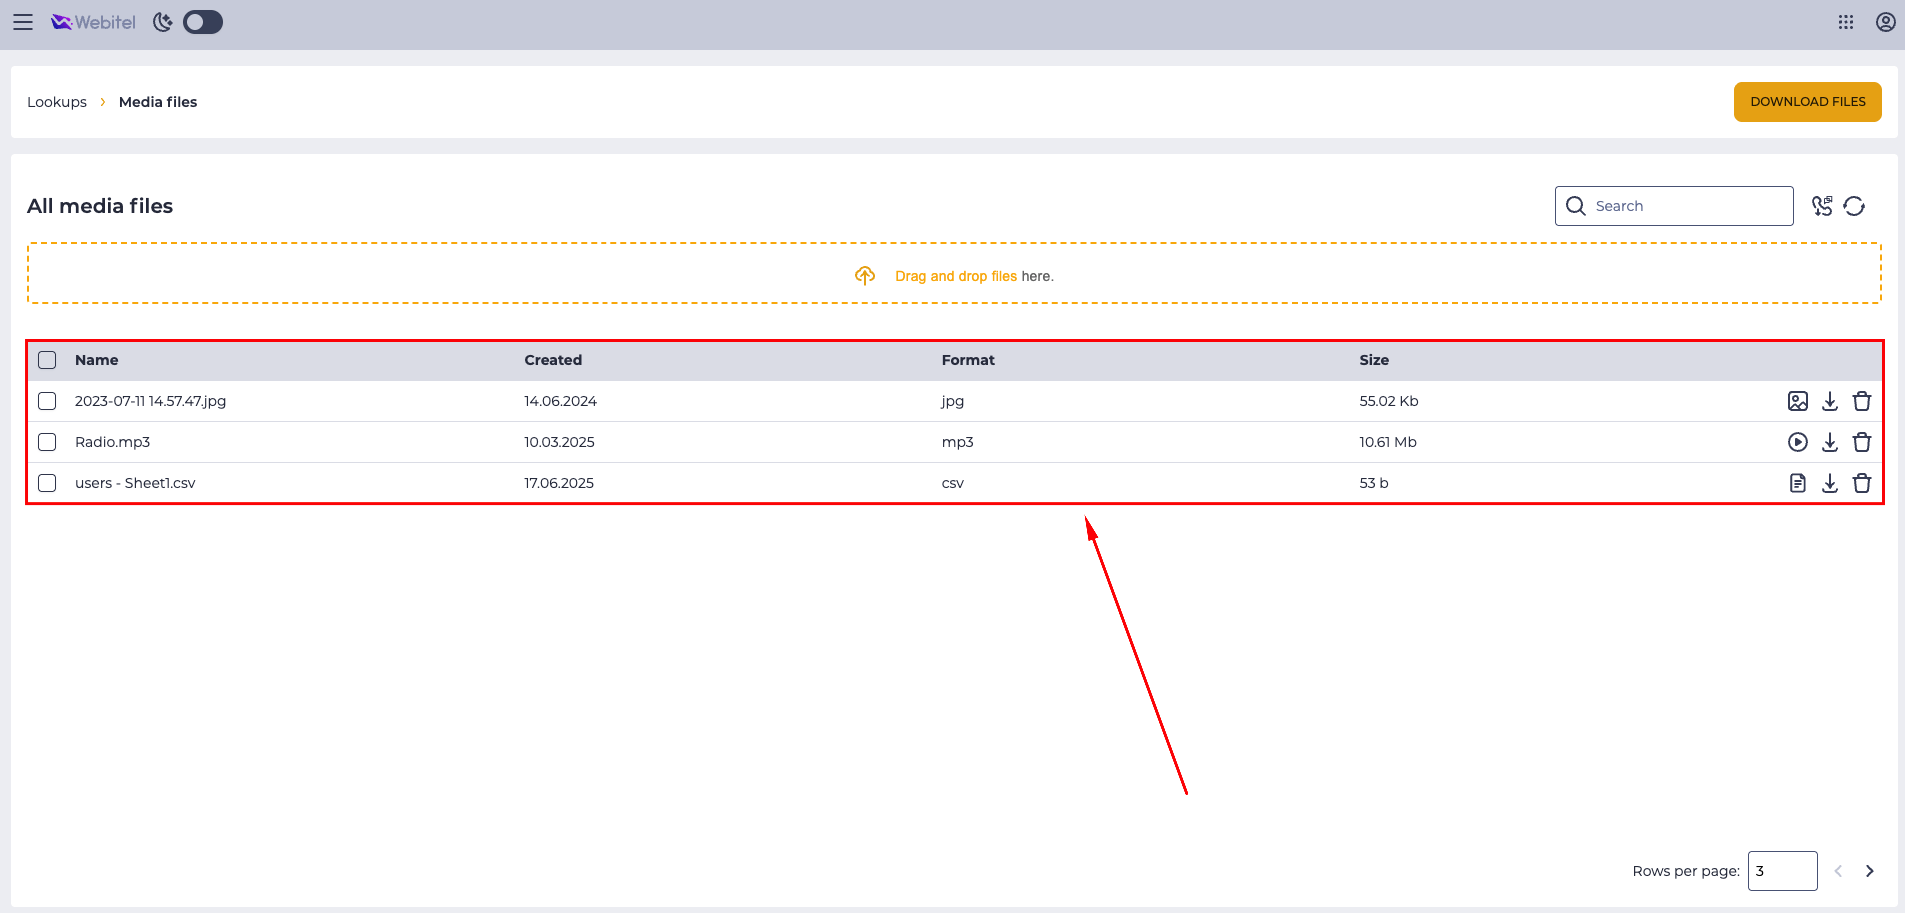
Wait until the upload is completed — the file will appear in the registry (Fig. 5).
2.1. File Requirements
The following formats are supported:
-
mp3;
-
wav (8 kHz, 16 bit, mono — standard for SIP channel frequency).
It is recommended to use the wav format.
The file size must not exceed 5 MB.
3. Creating a Flow Scheme
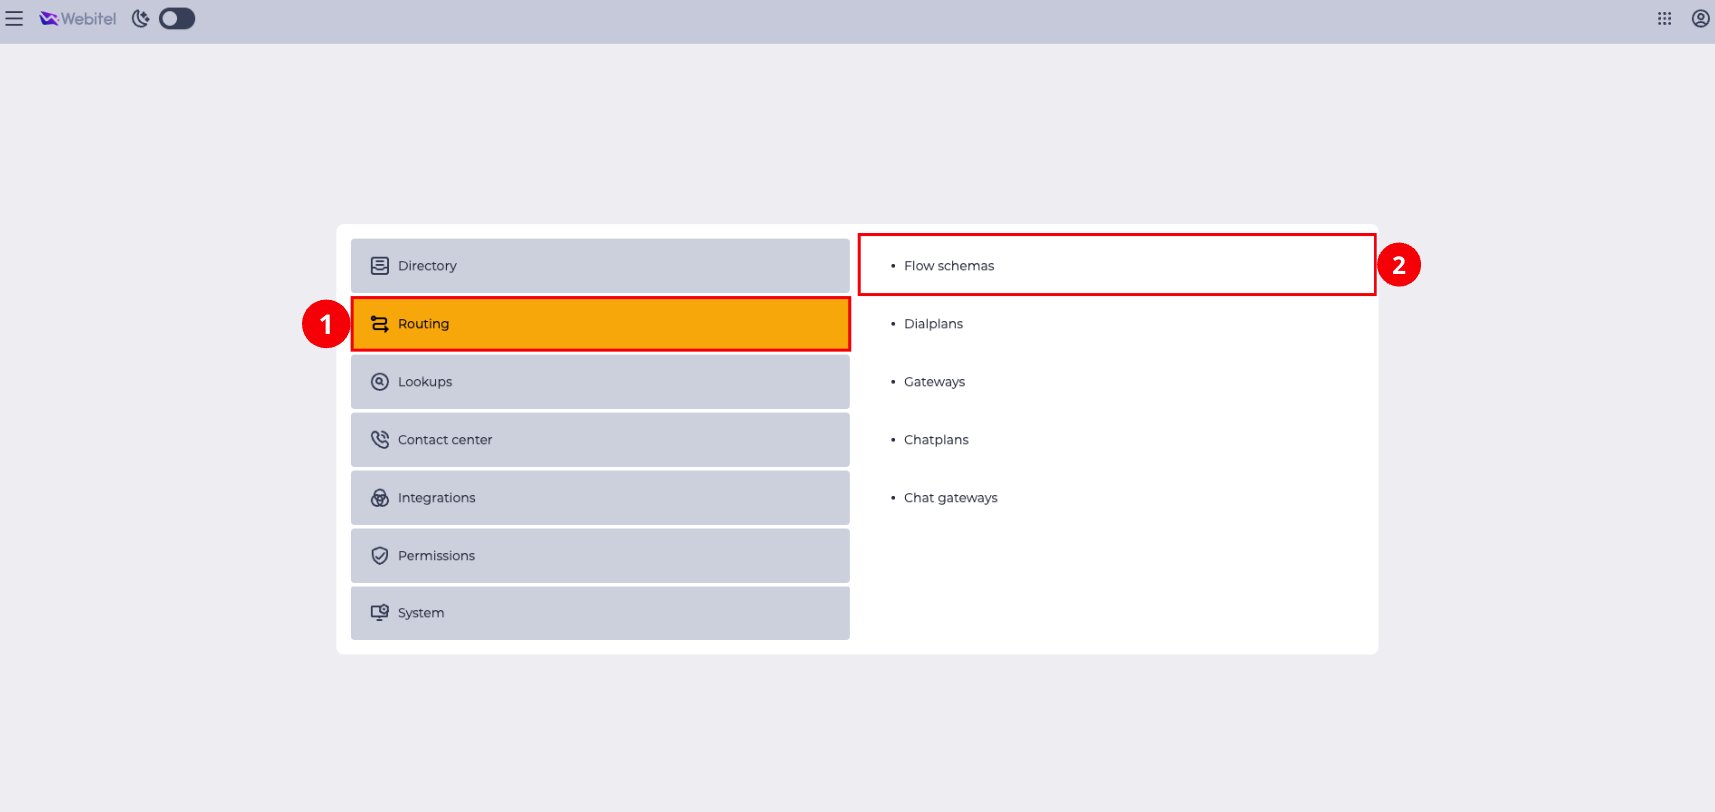
To create a Flow scheme for playing a previously uploaded media file, go to Admin (Fig. 6) → Routing (Fig. 7.(1)) → Flow schemas (Fig. 7.(2)).
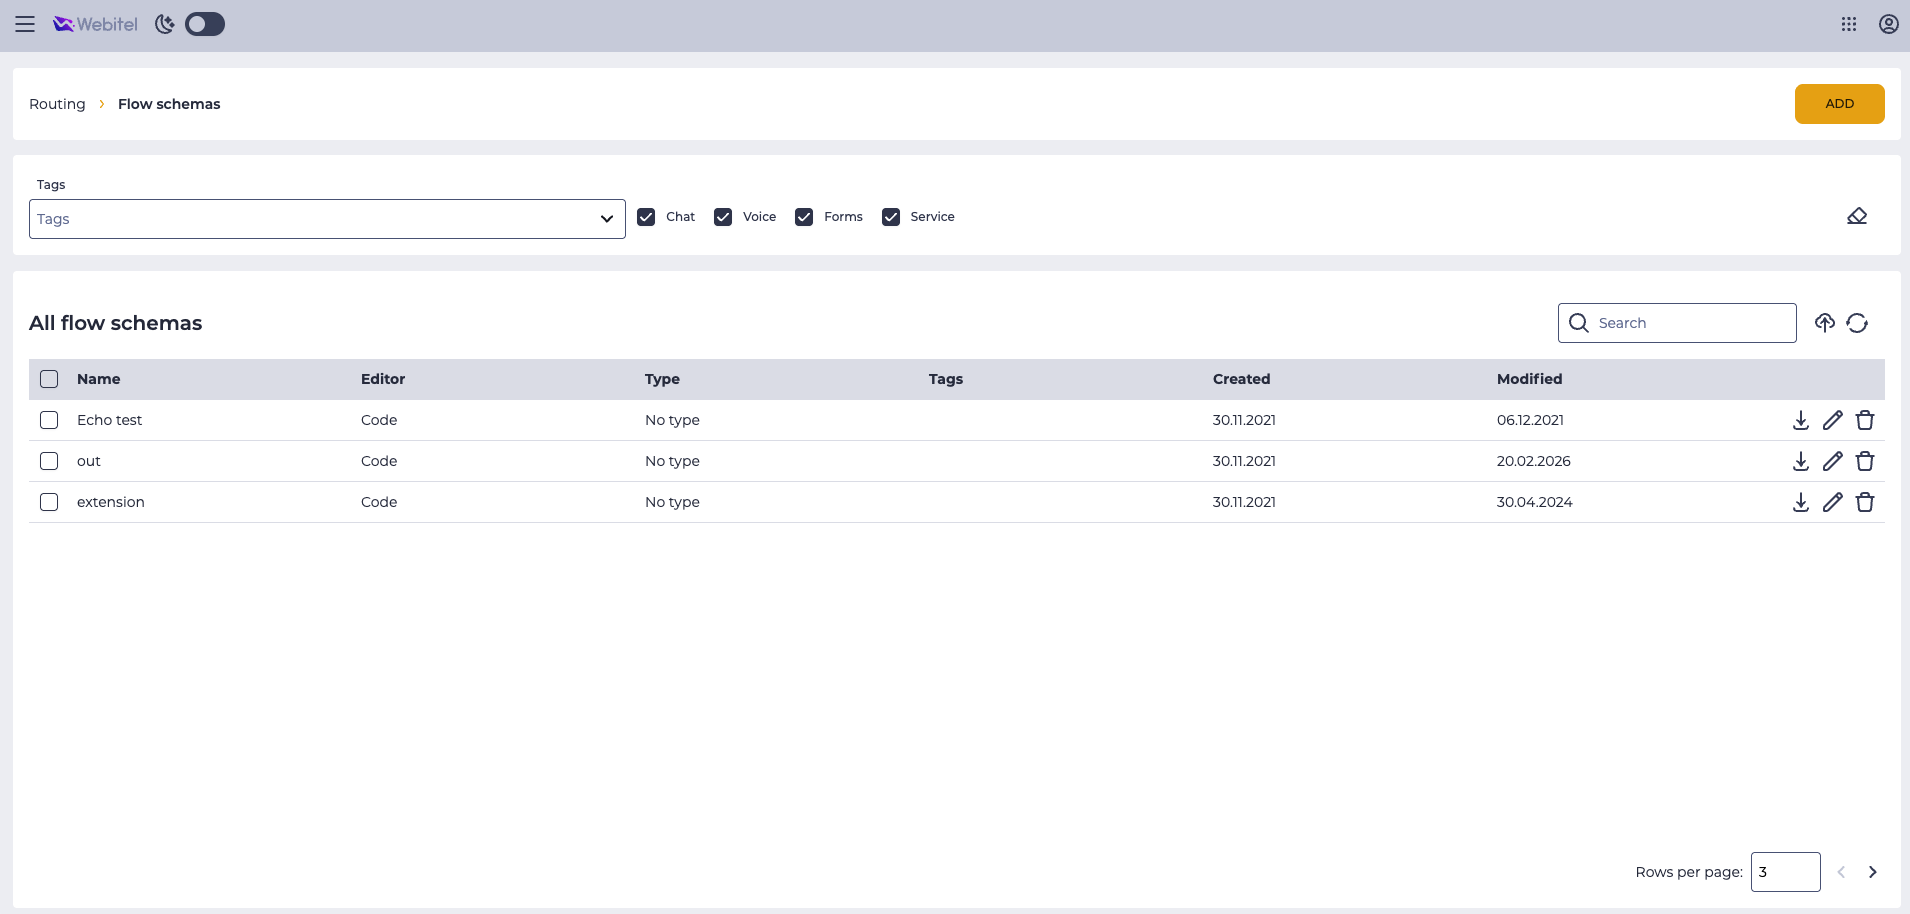
The page with the list of all schemes will open (Fig. 8).
3.1. Creating a New Scheme
To create a new flow scheme:
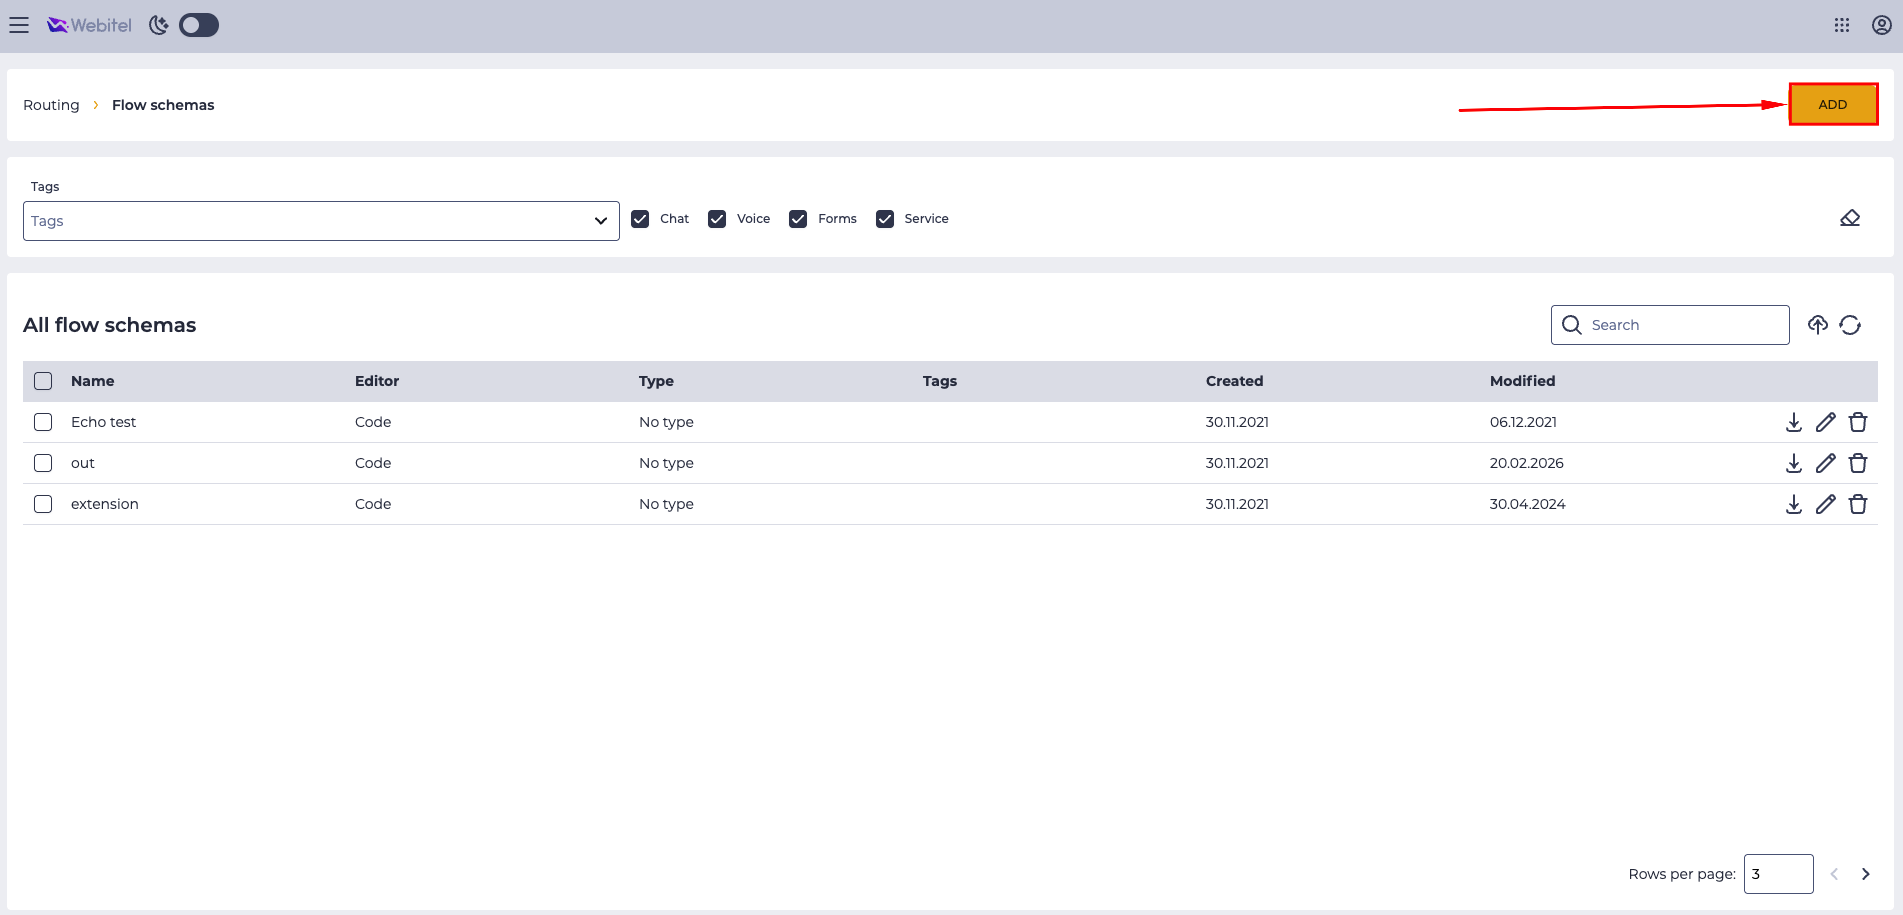
Click the Add button in the upper right corner of the page (Fig. 9).
The flow scheme creation modal window will open (Fig. 10).
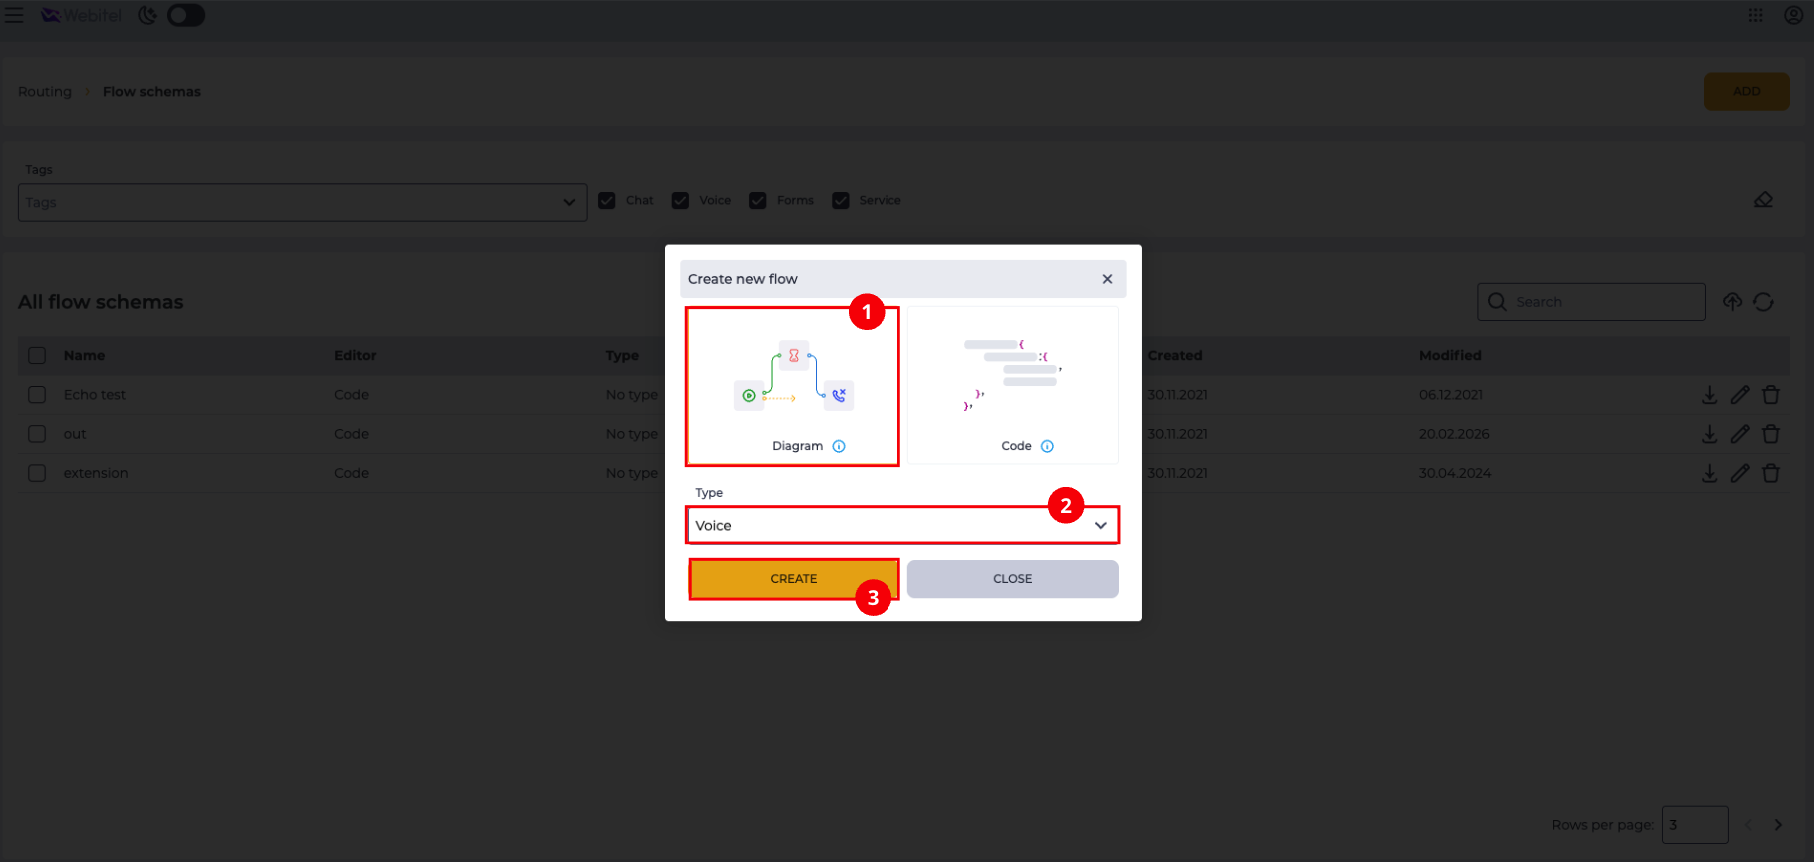
In the modal window, perform the following actions:
-
Select the Diagram creation method (Fig. 10.(1)).
-
In the Type field, select Voice (Fig. 10.(2)).
-
Click the Create button (Fig. 10.(3)).
3.2. Editing the Scheme
After creation, the flow scheme editing window will open (Fig. 11).
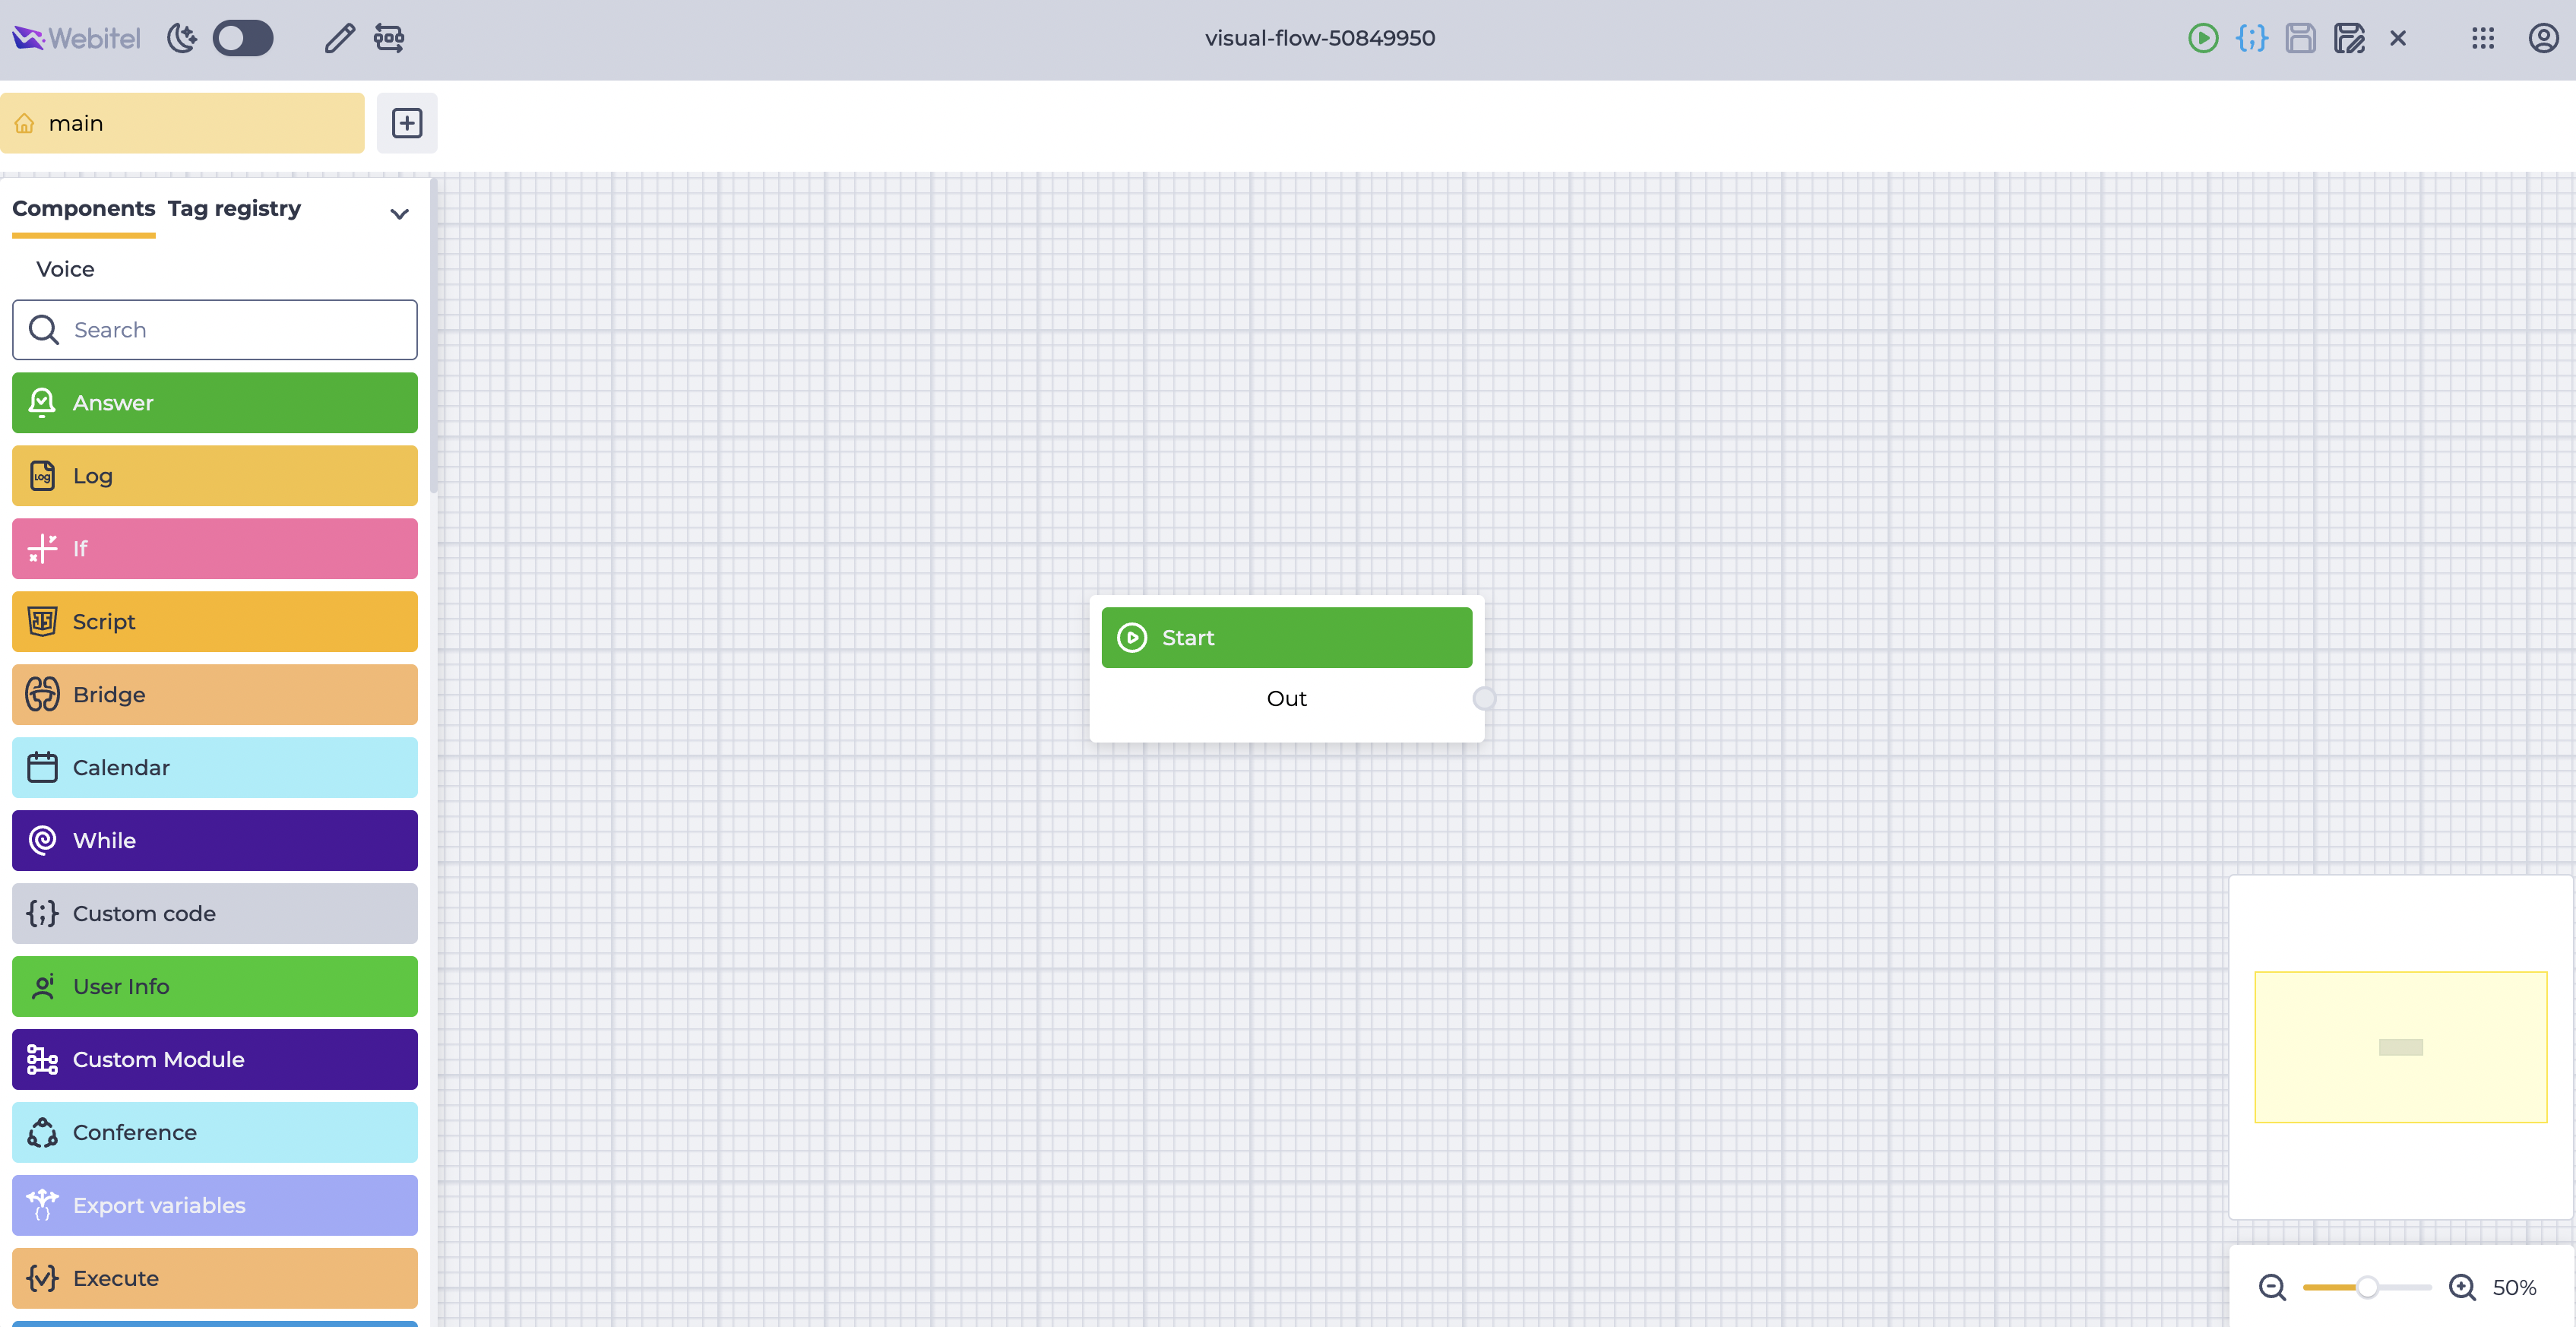
In the workspace, you need to add two elements:
3.3. Adding the Playback Element
The Playback element is responsible for playing the media file at the beginning of the call.
To add the element:
-
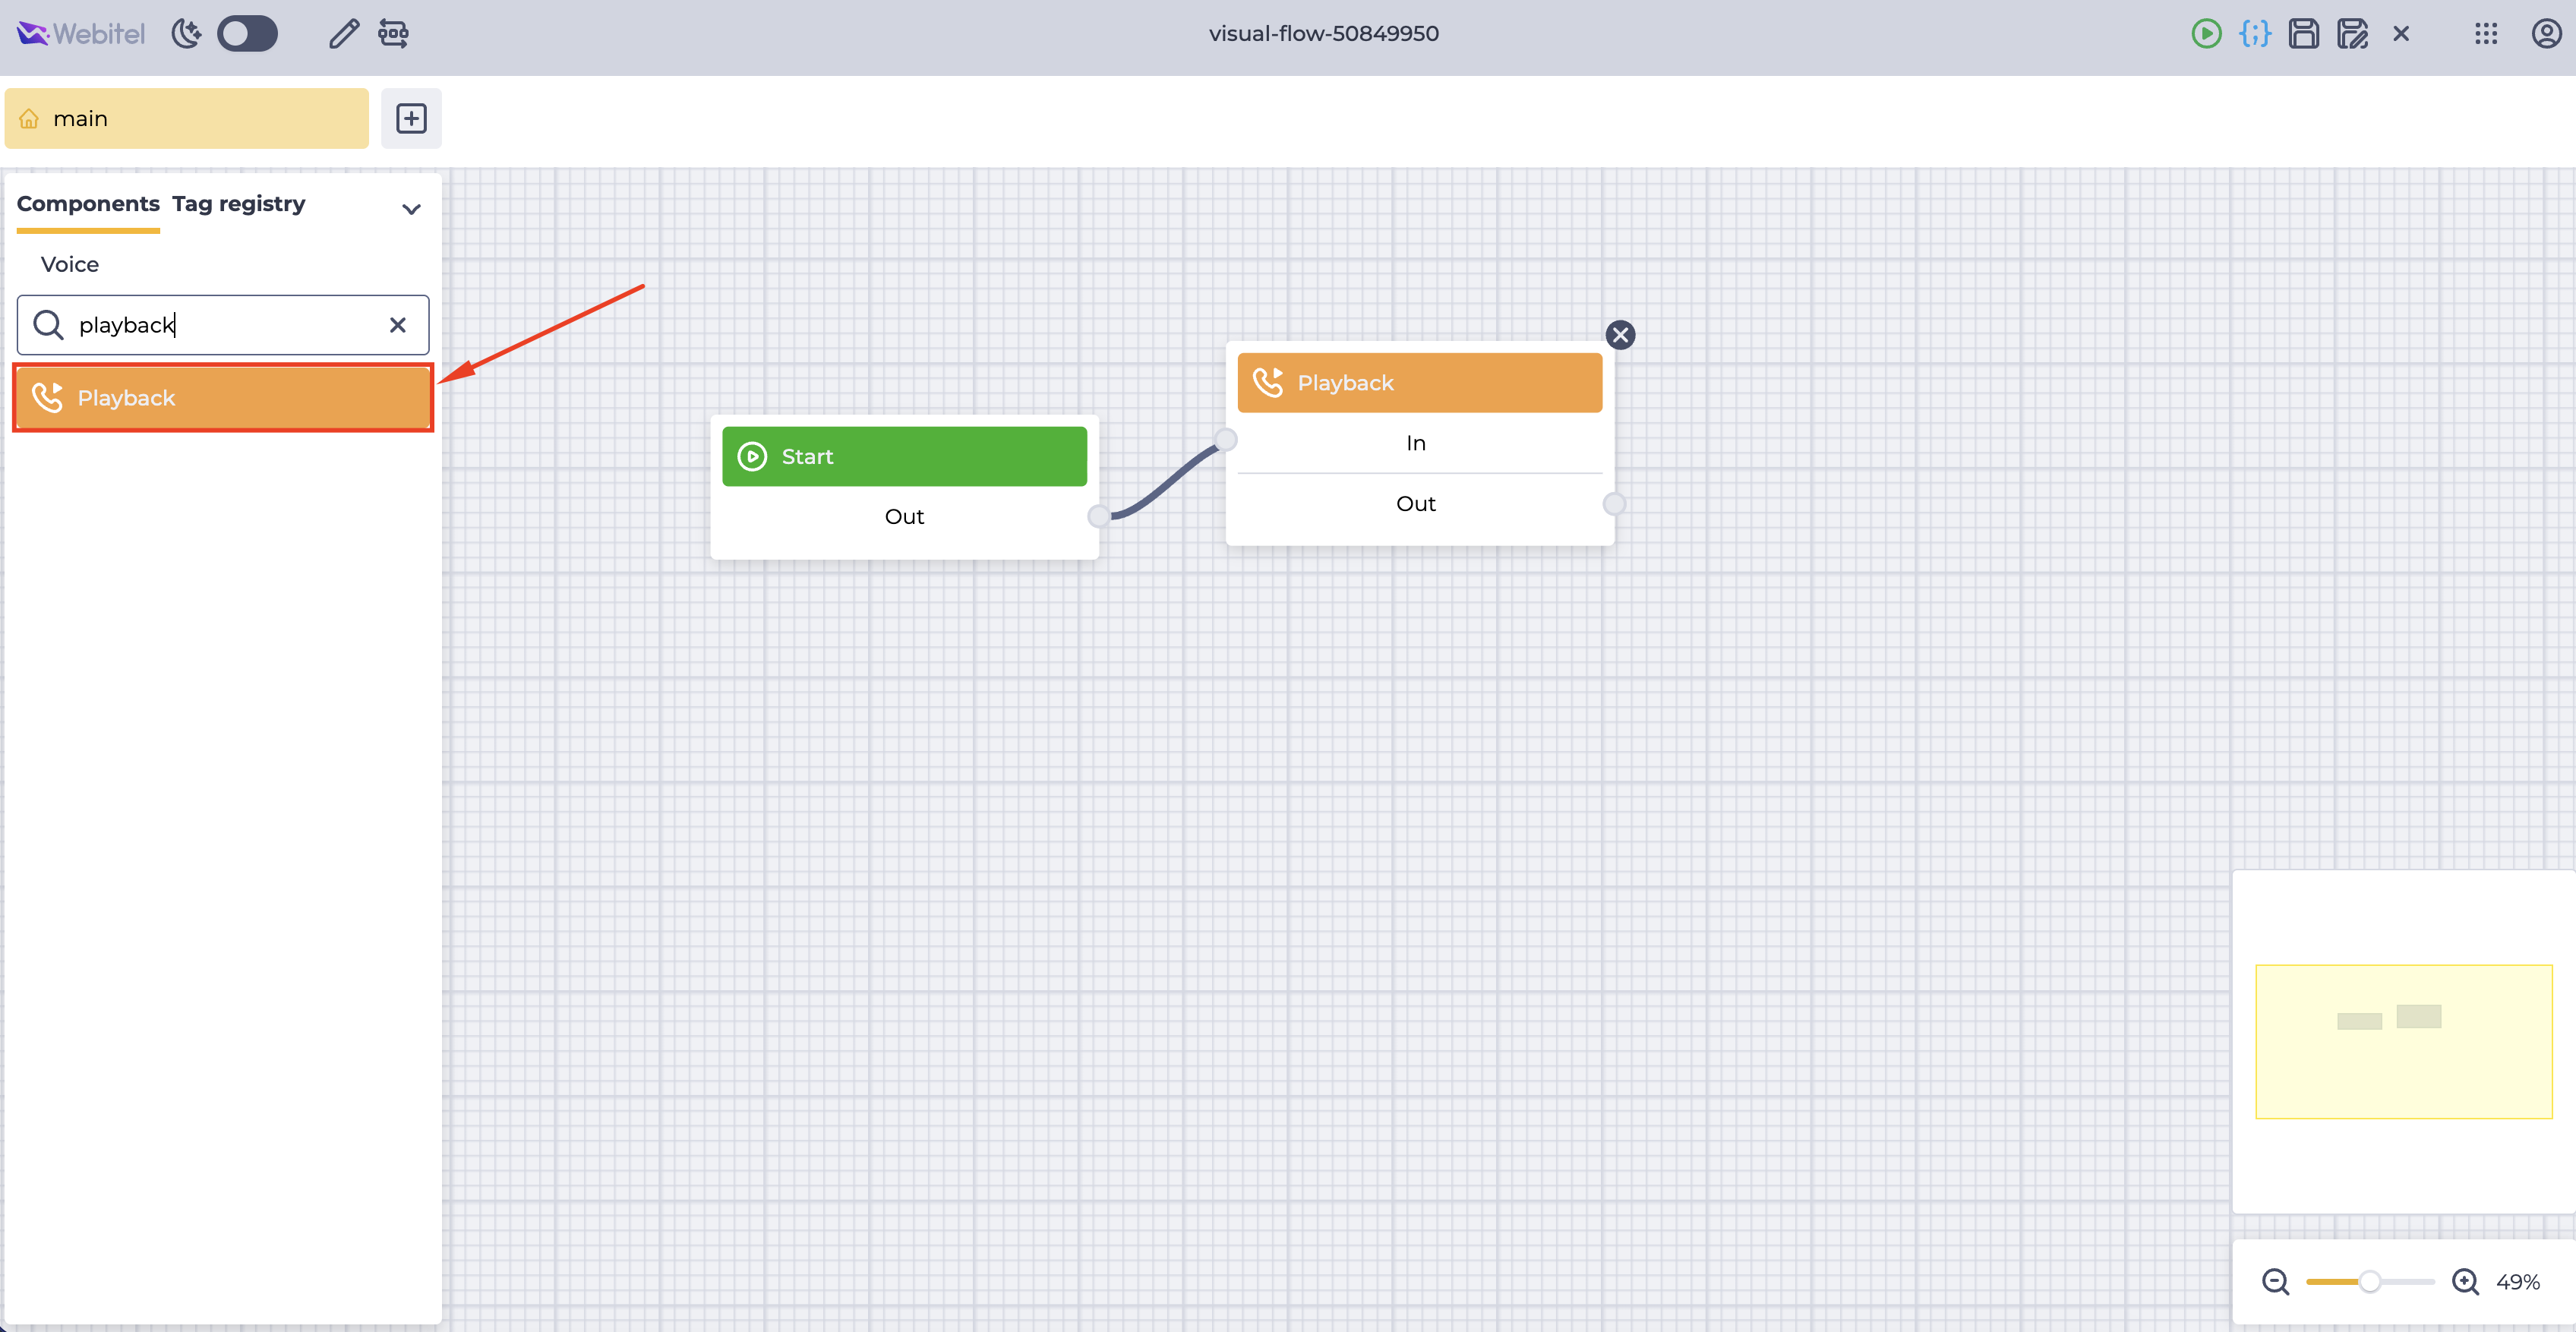
In the left panel, find the Playback component (you can use the search) (Fig. 12).
-
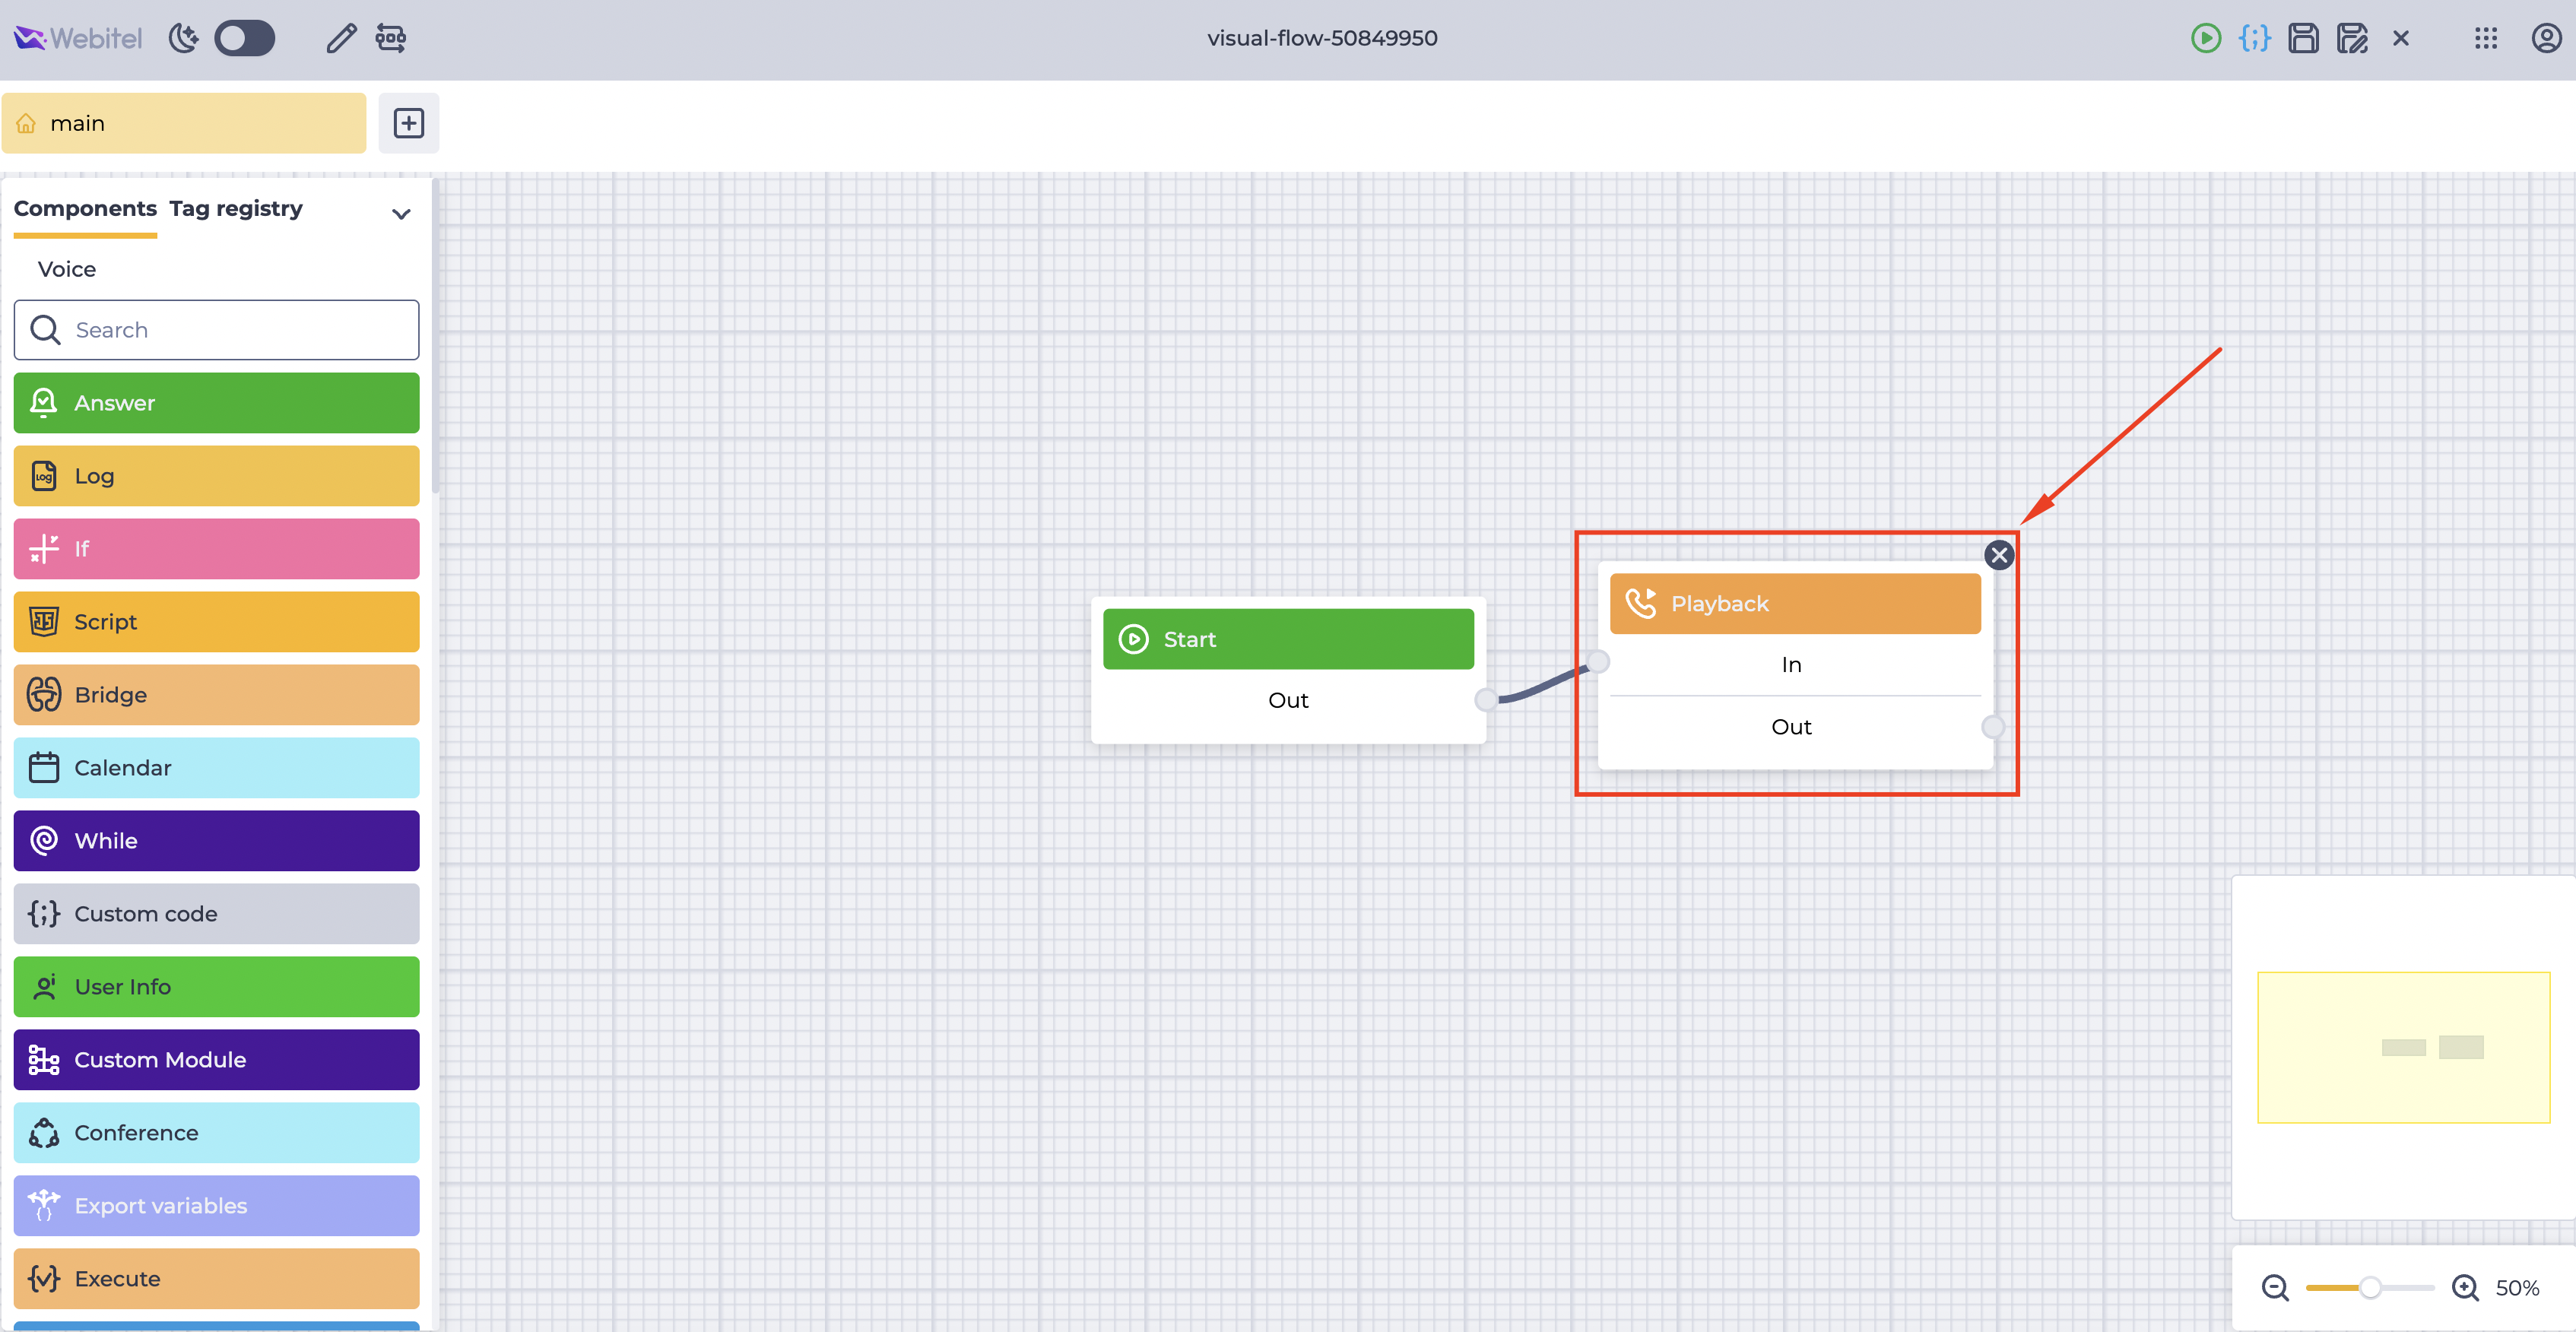
Drag the Playback component to the scheme workspace (Fig. 13). Connect the Start block to the Playback block.
-
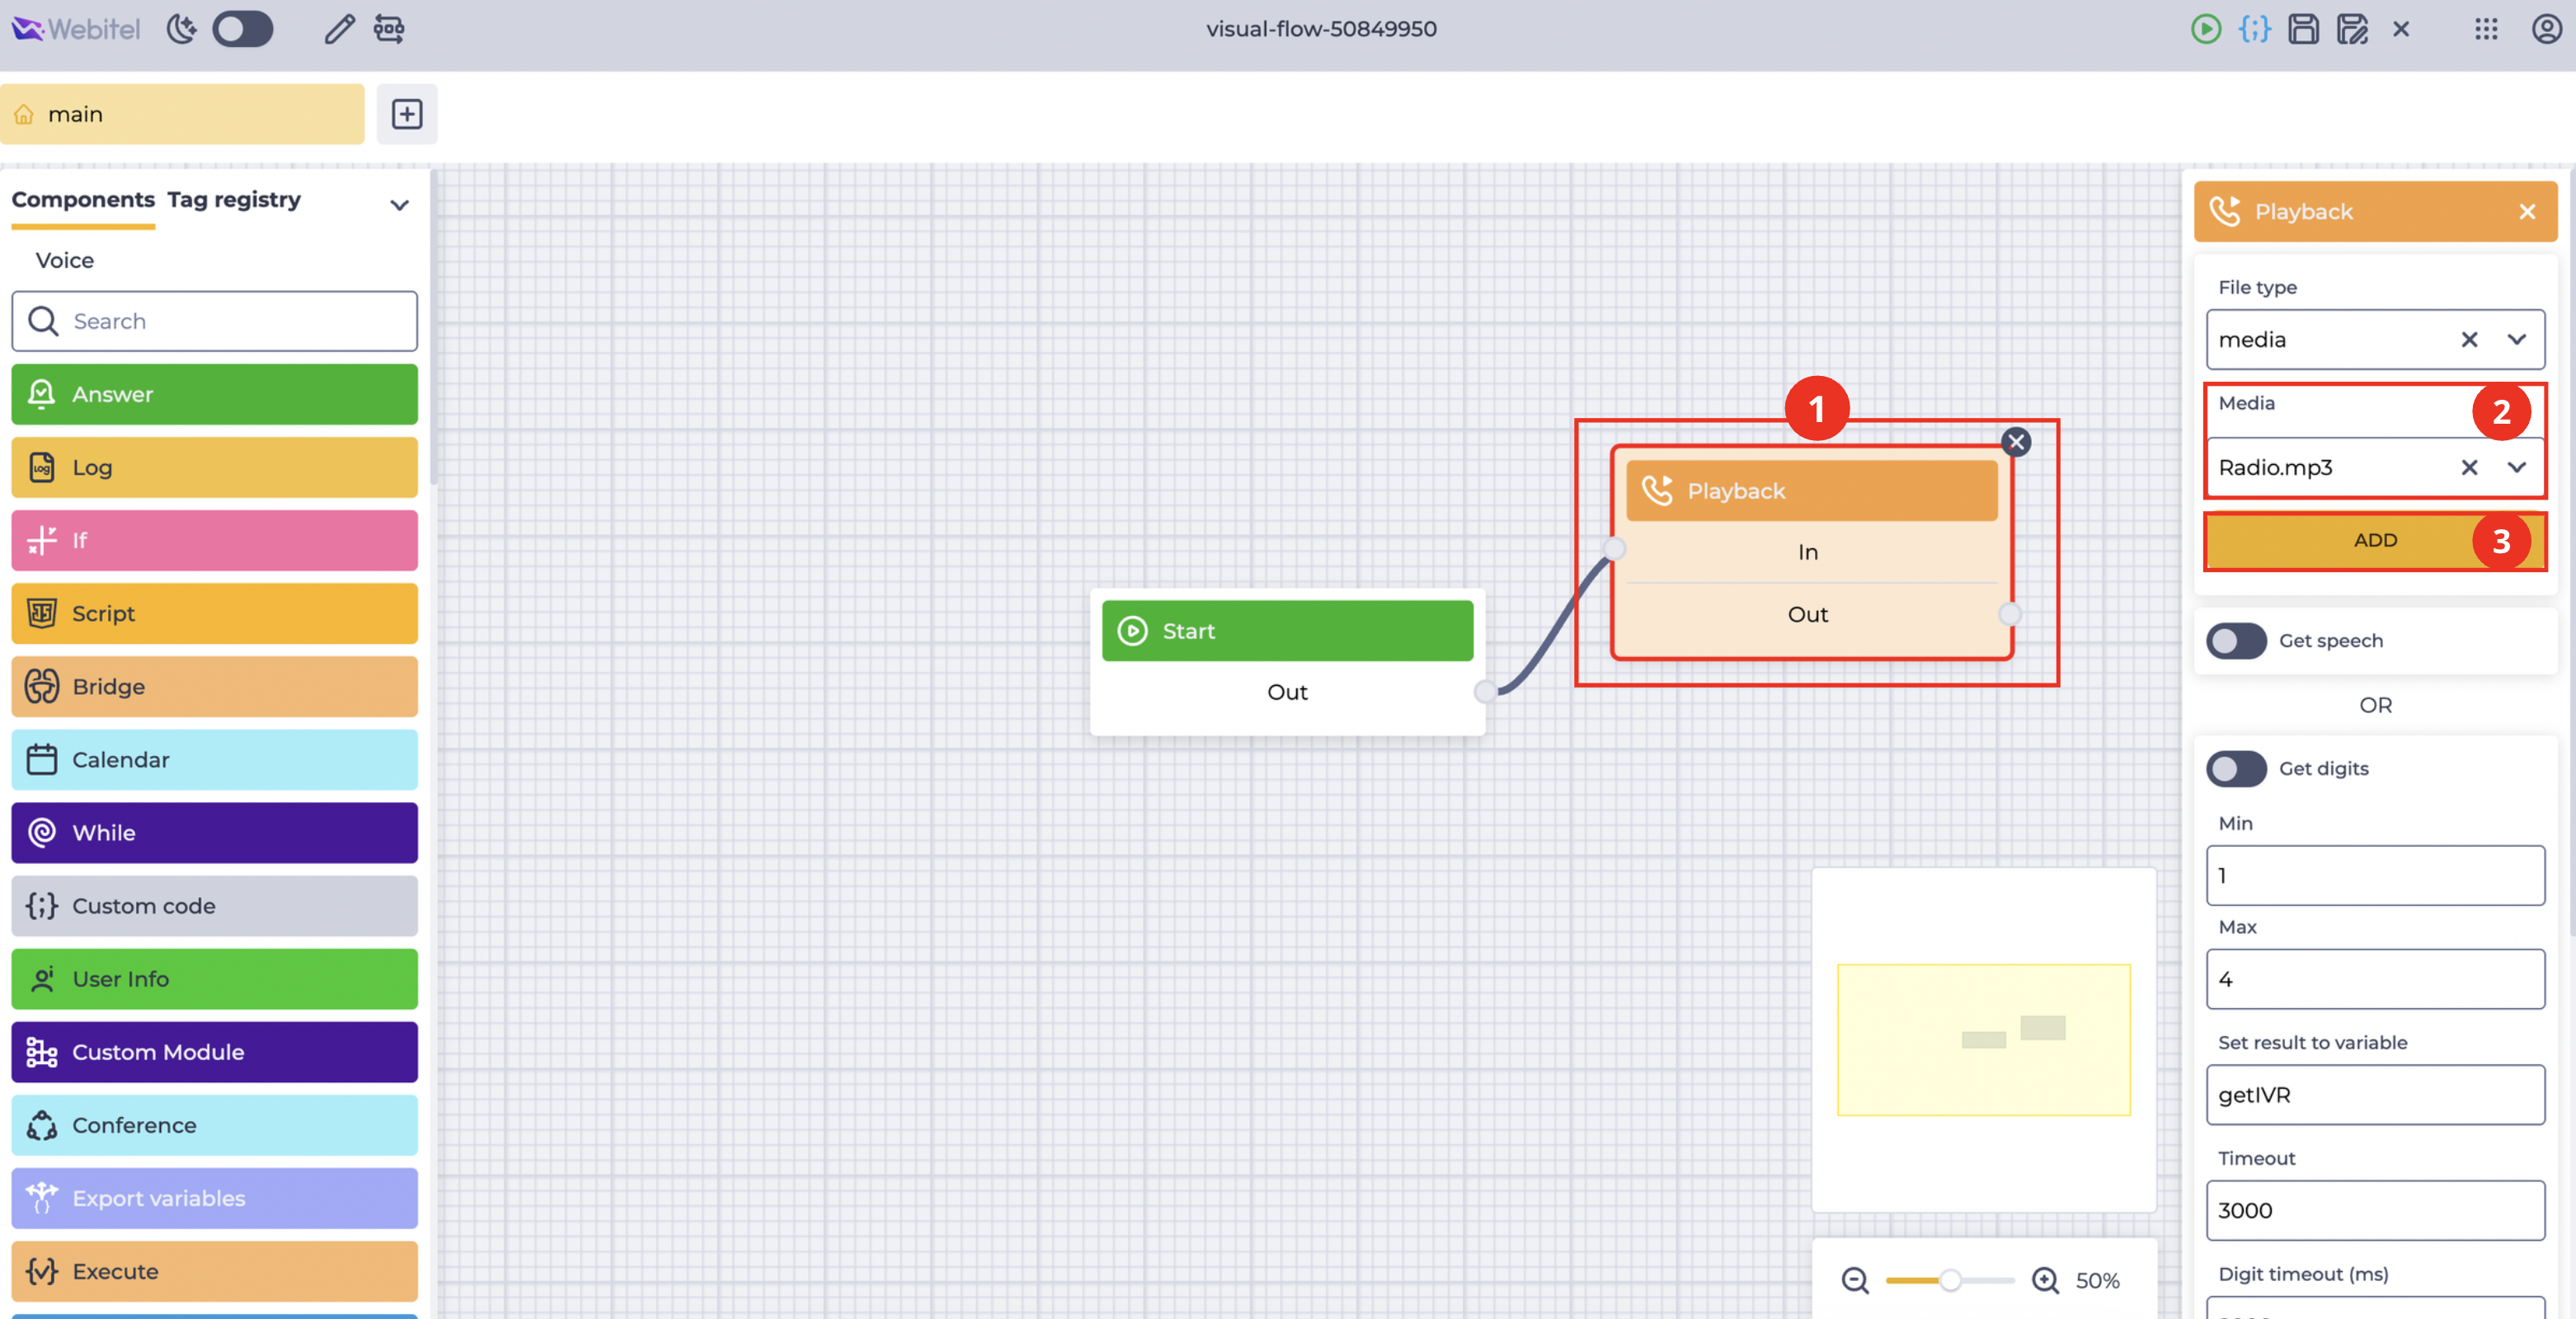
Next, click on the component (Fig. 14.(1)) — the settings panel will open.
-
In the Media field (Fig. 14.(2)), select the previously uploaded file.
-
Click the Add button (Fig. 14.(3)).
A detailed description of the parameters is provided in the documentation.
3.4. Adding the Hangup Element
The Hangup element is responsible for properly terminating the call.
To add the element:
-
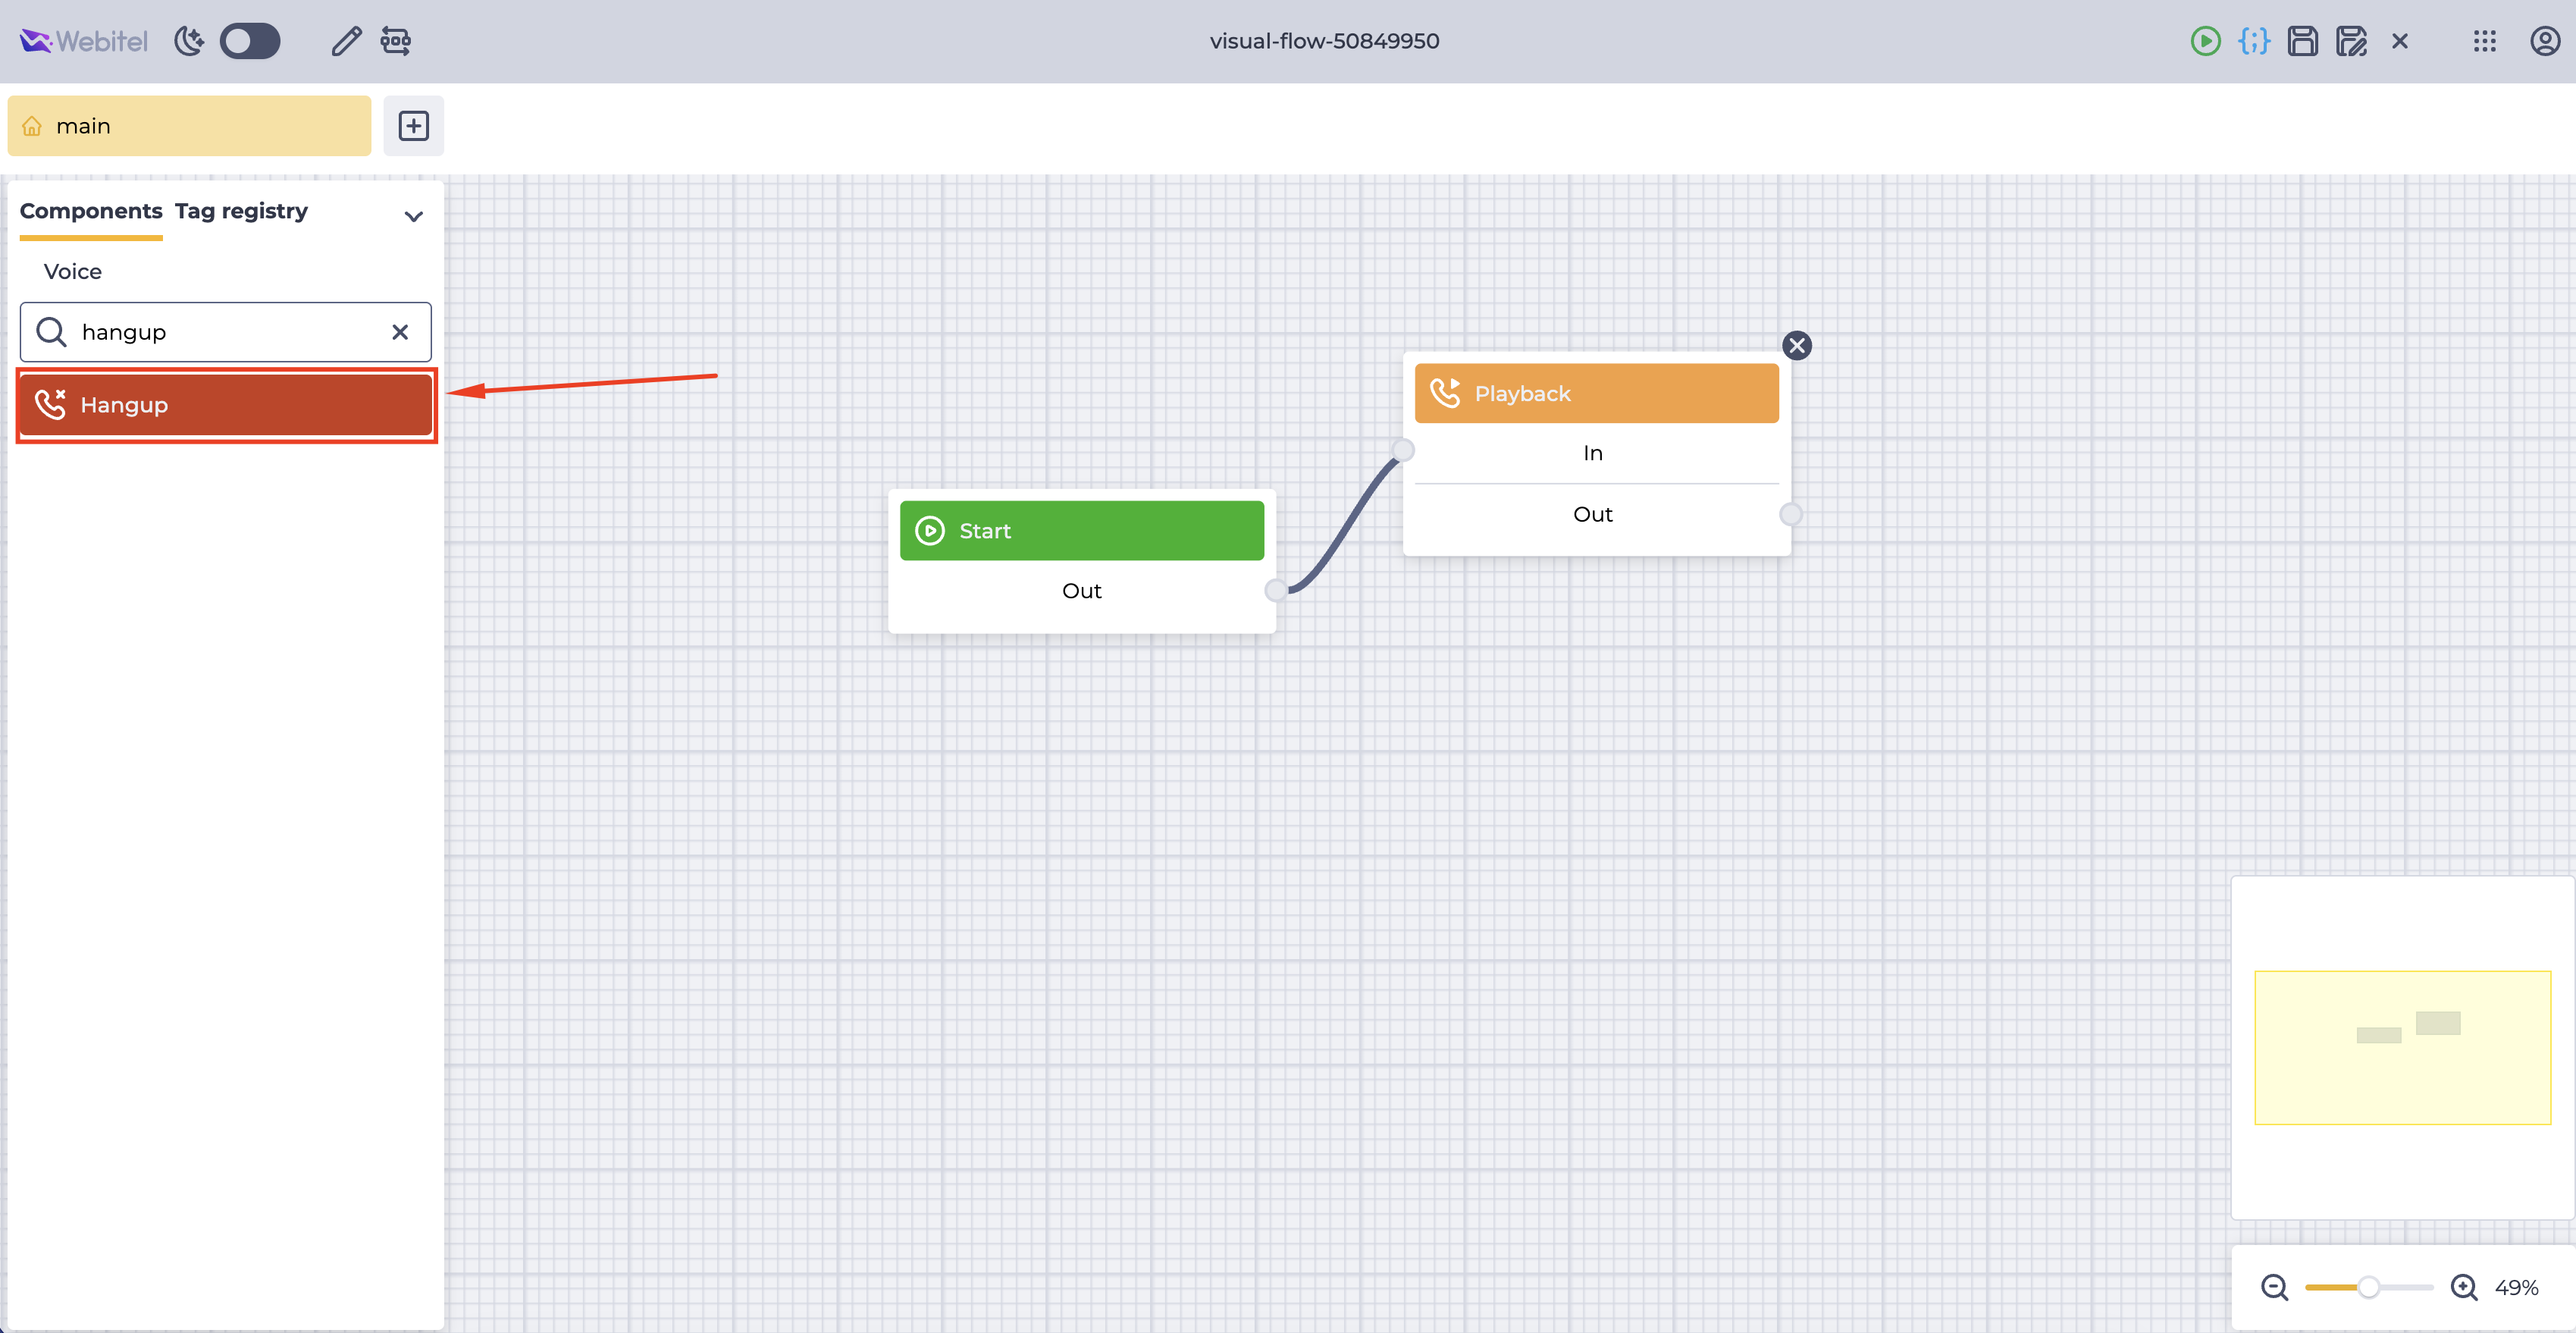
In the left panel, find the Hangup component (Fig. 15).
-
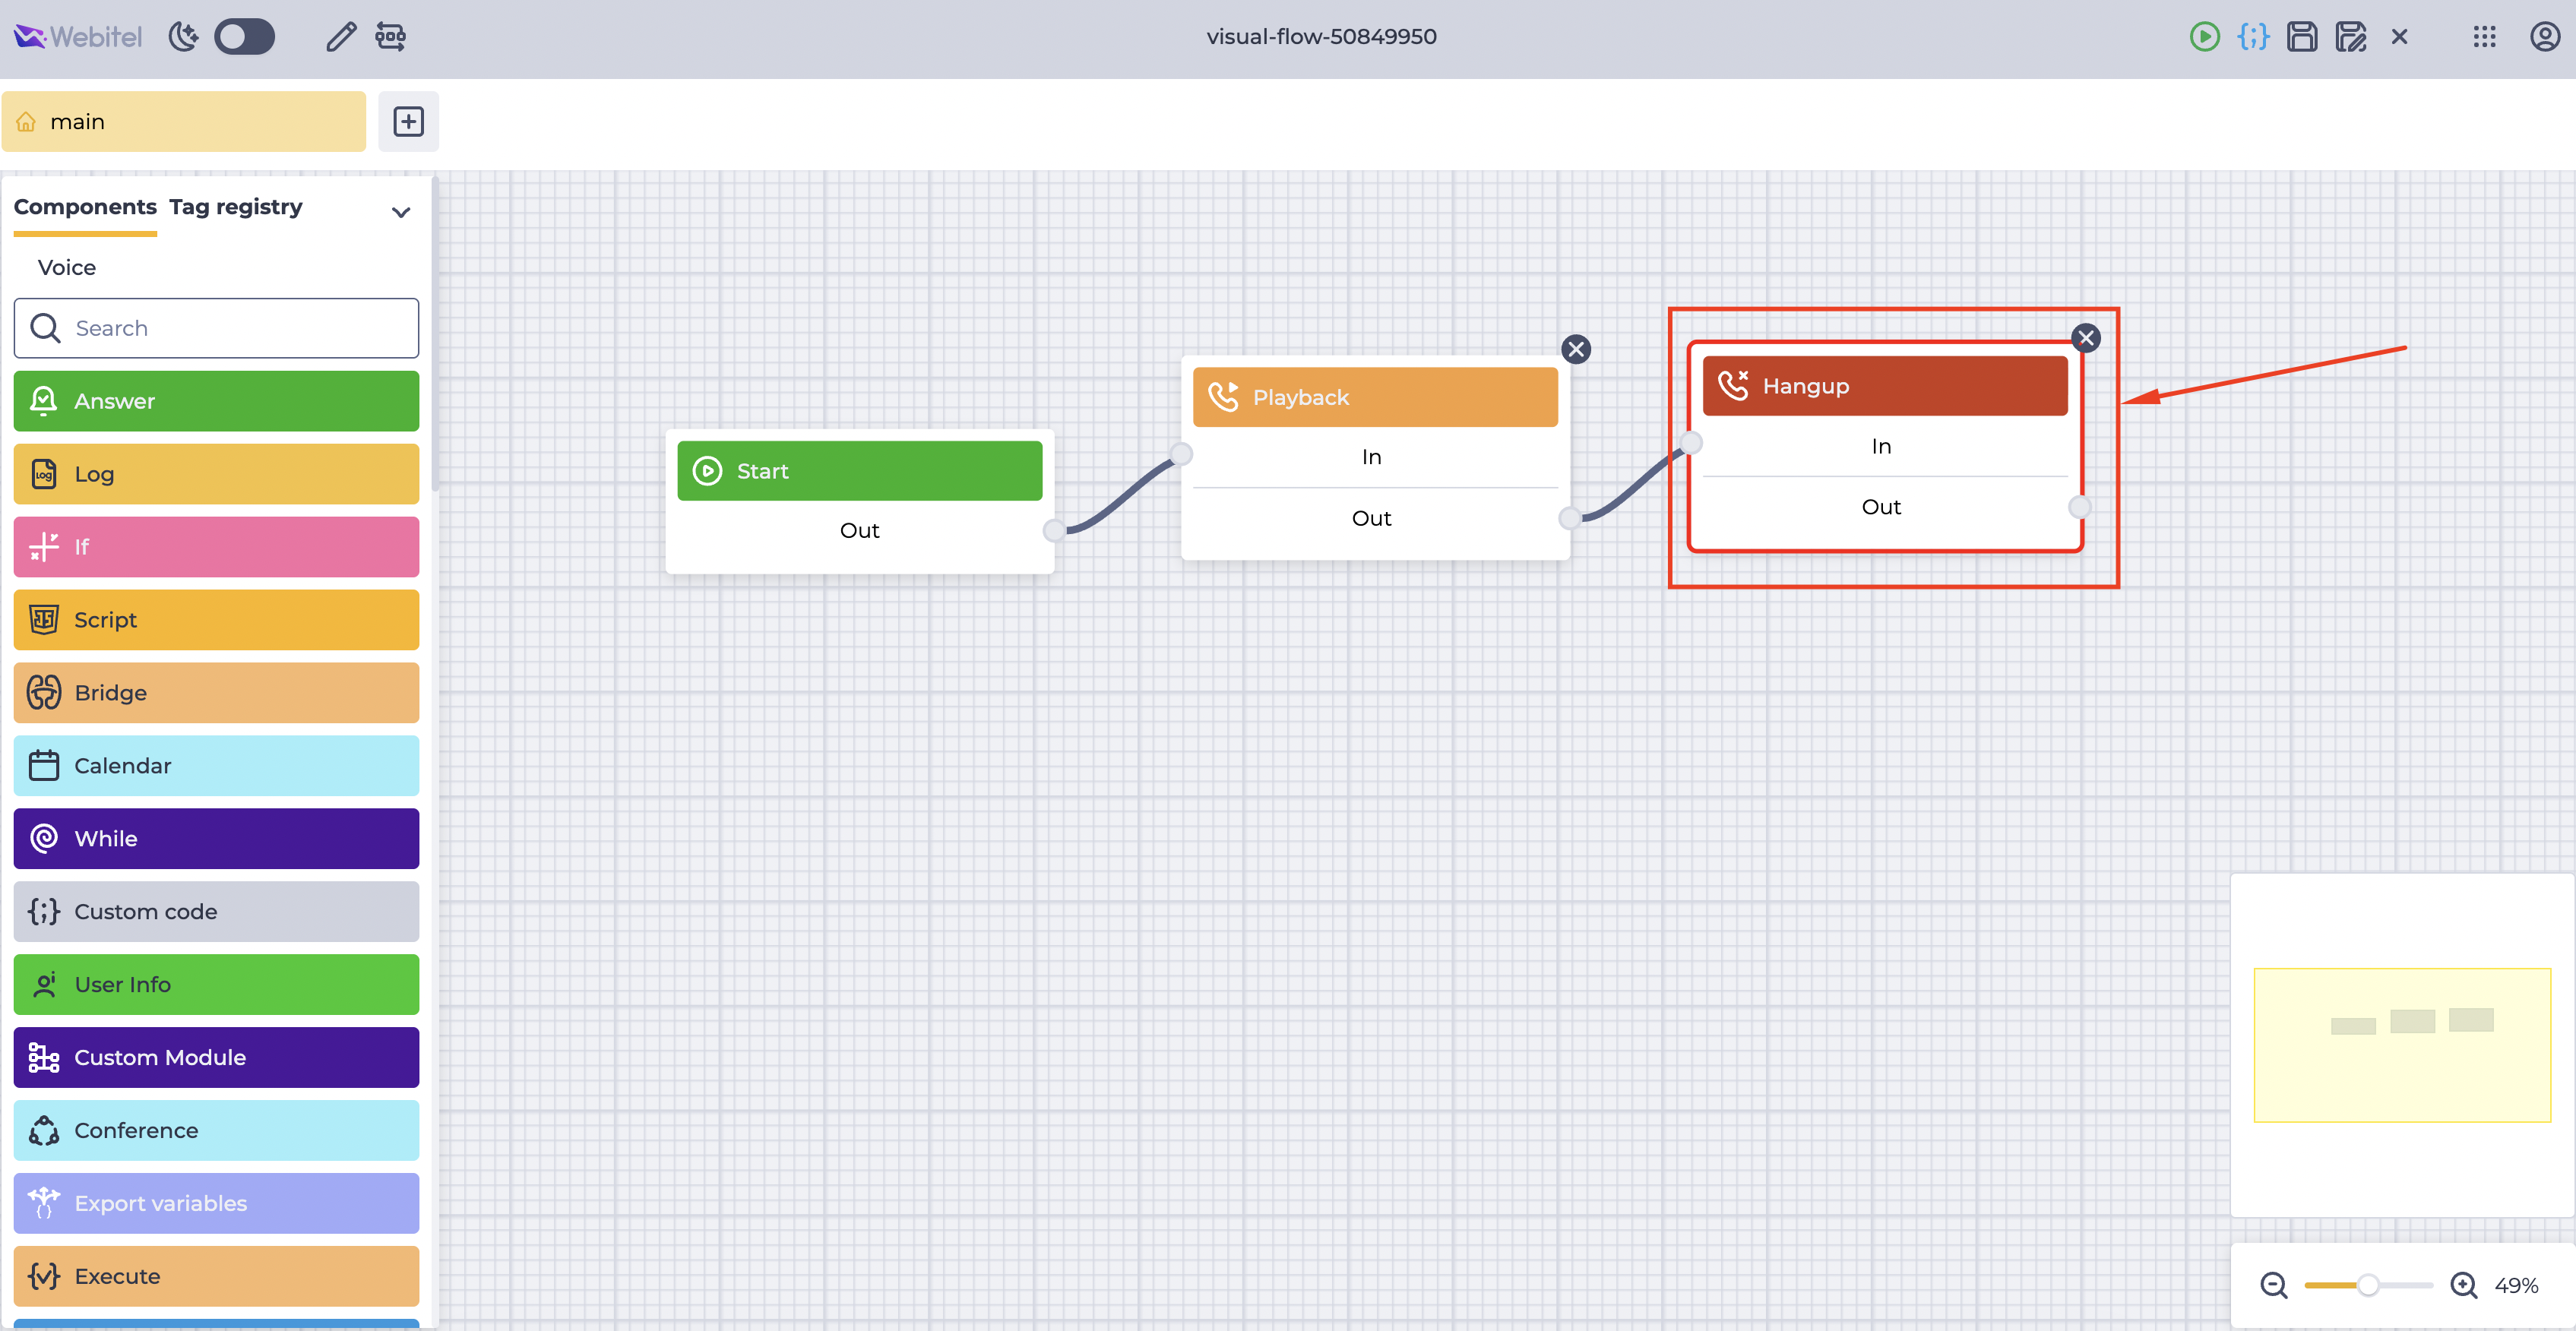
Drag it to the workspace (Fig. 16).
-
Connect the output of the Playback block to the input of the Hangup block. The Hangup block must be placed at the end of the scheme.
A detailed description of the block parameters is provided in the documentation.
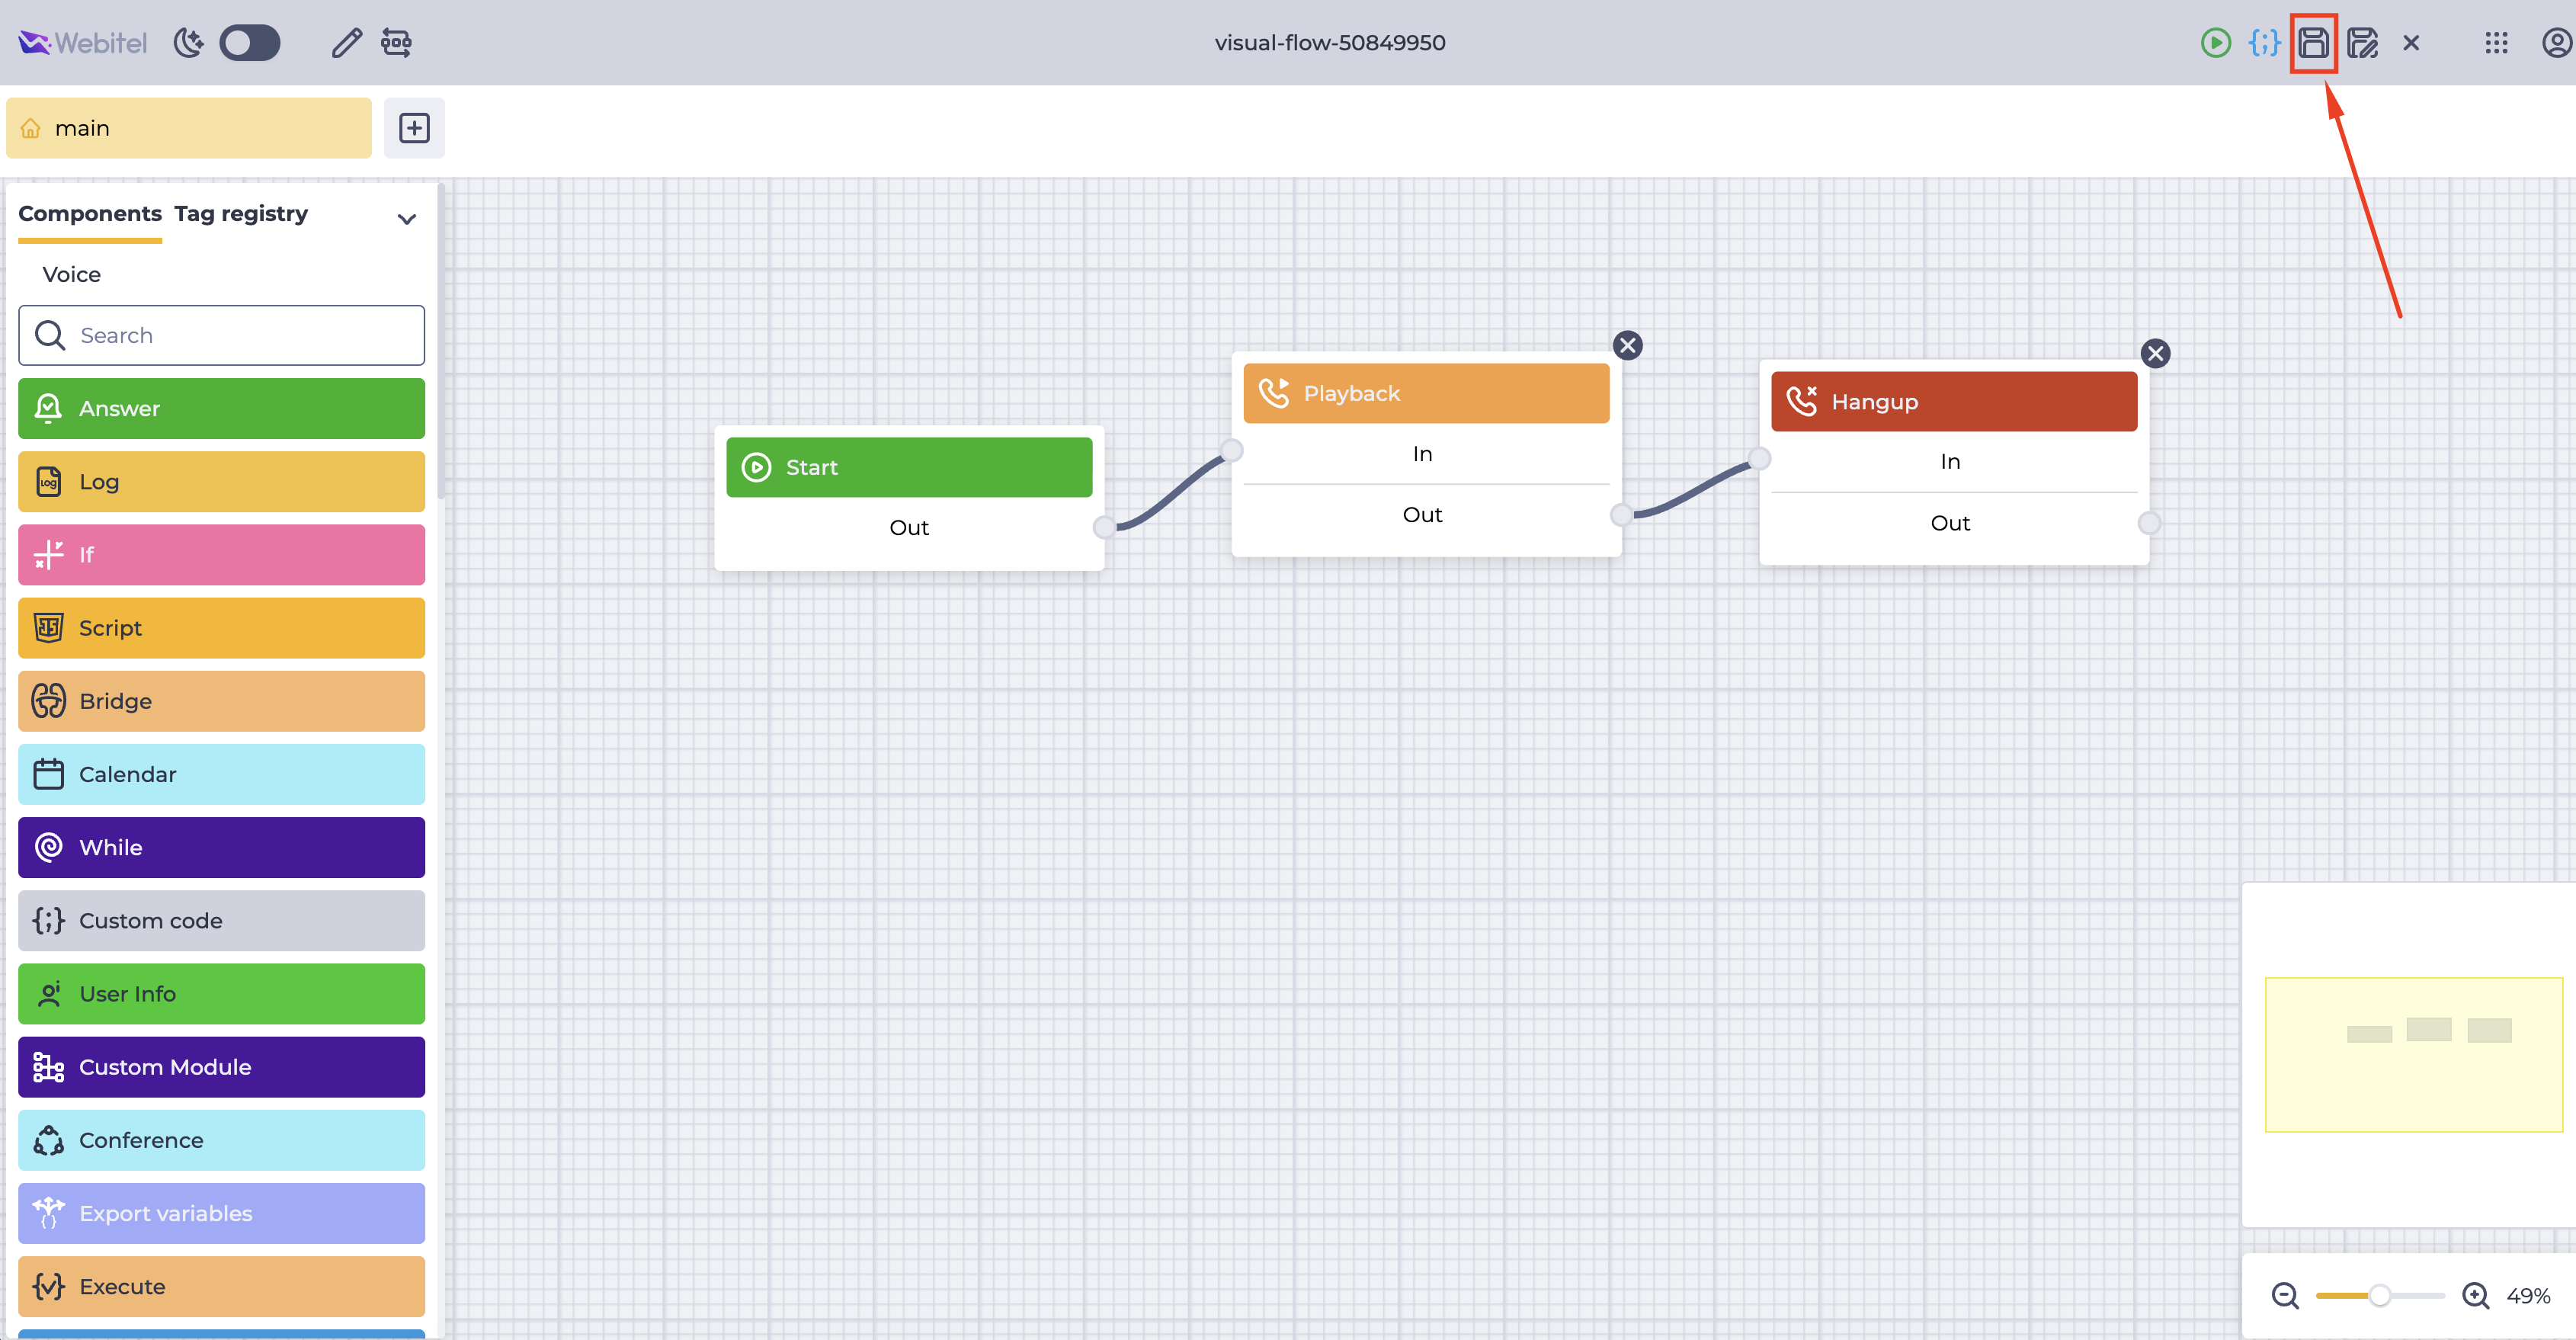
After completing the configuration, save the flow scheme (Fig. 17).
4. Creating a Resource for Outbound Calls
To make outbound calls in the IVR queue, a resource must be created in advance.
4.1. Navigation
To create a resource:
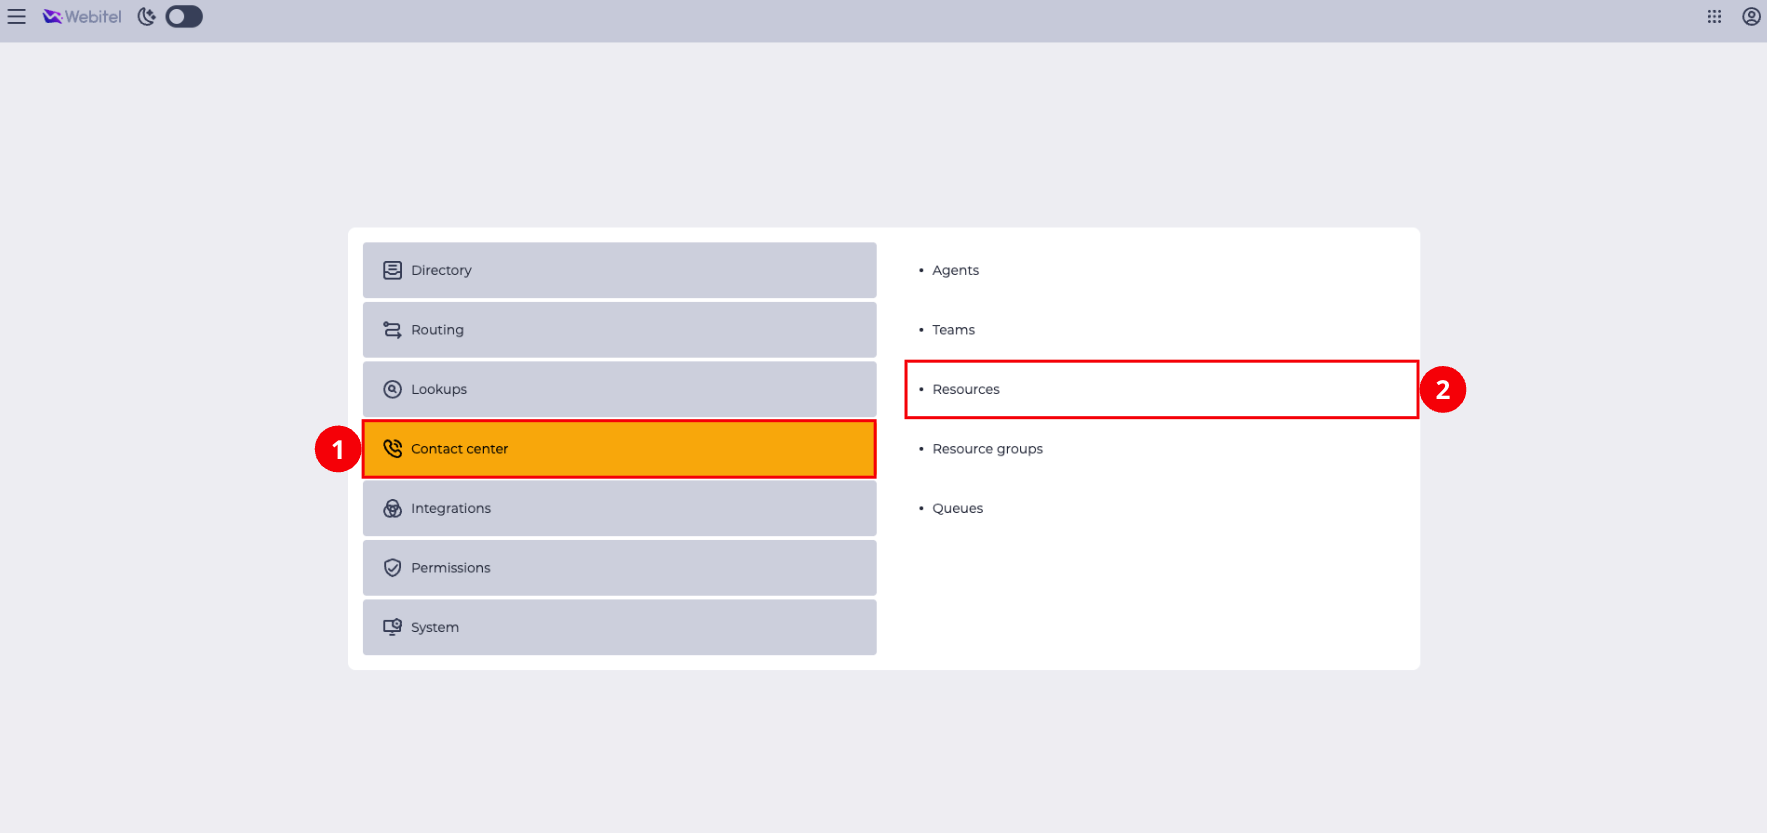
Go to Admin (Fig. 18) → Contact Center (Fig. 19.(1)) → Resources (Fig. 19.(2)).
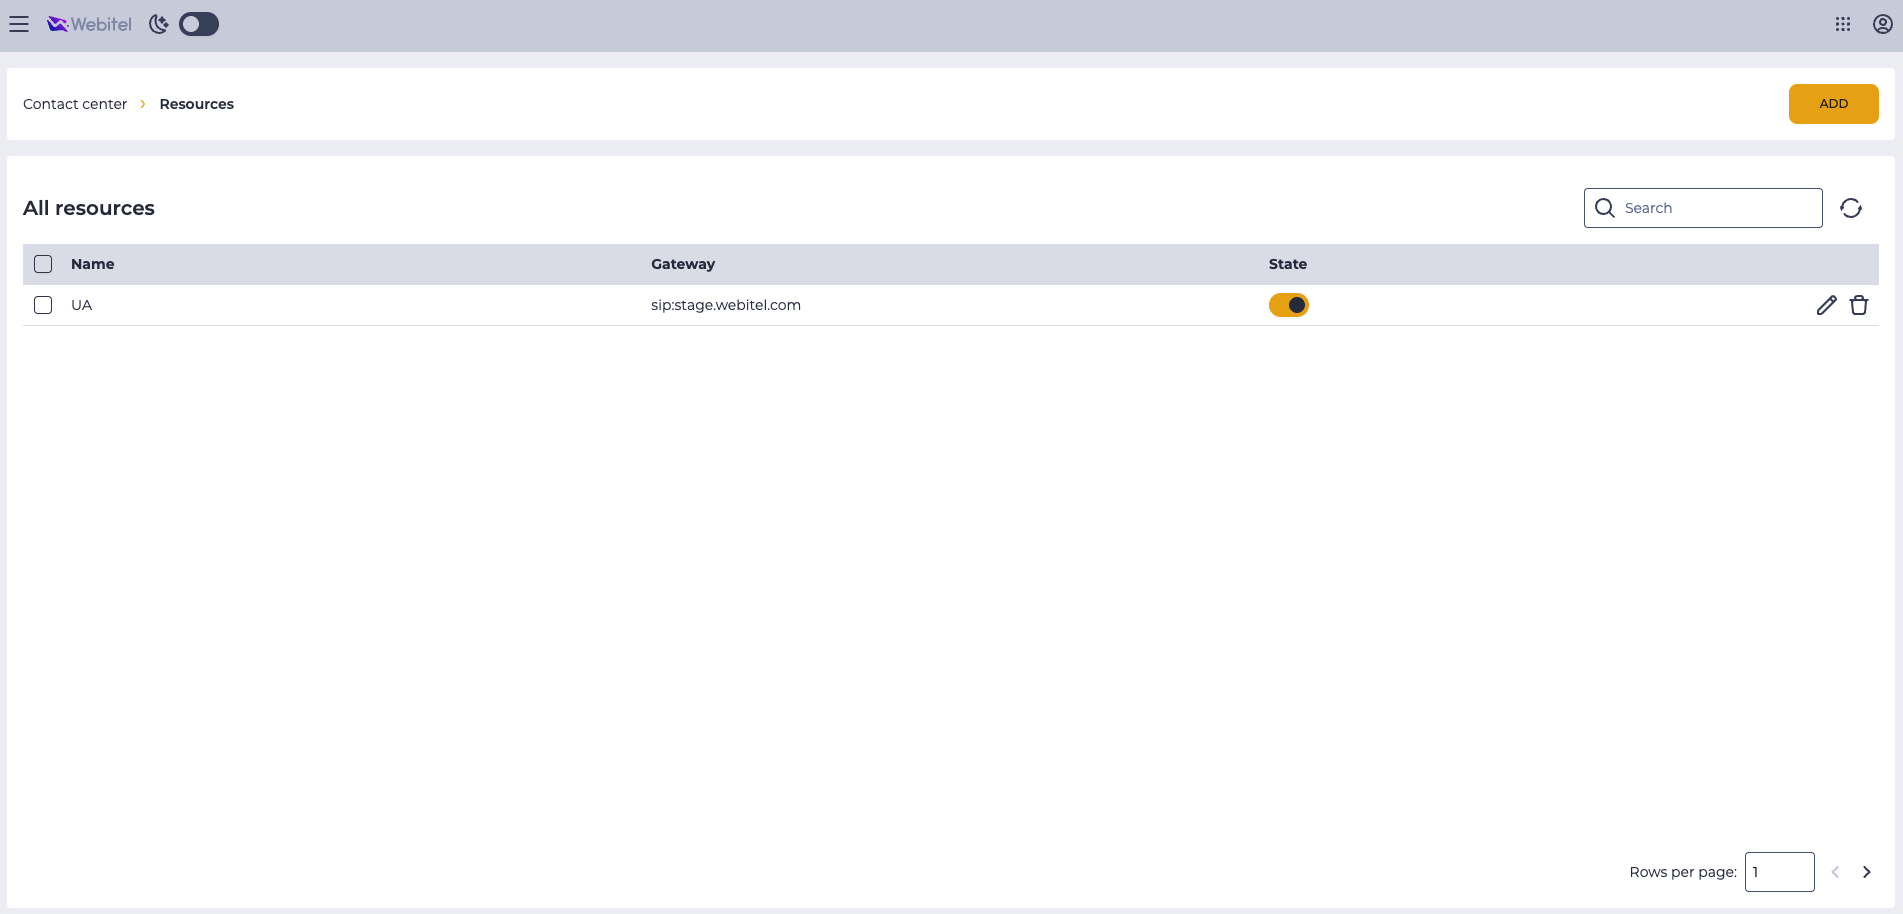
The page with the list of all created resources will open (Fig. 20).
4.2. Creating a New Resource
To create a new resource:
-
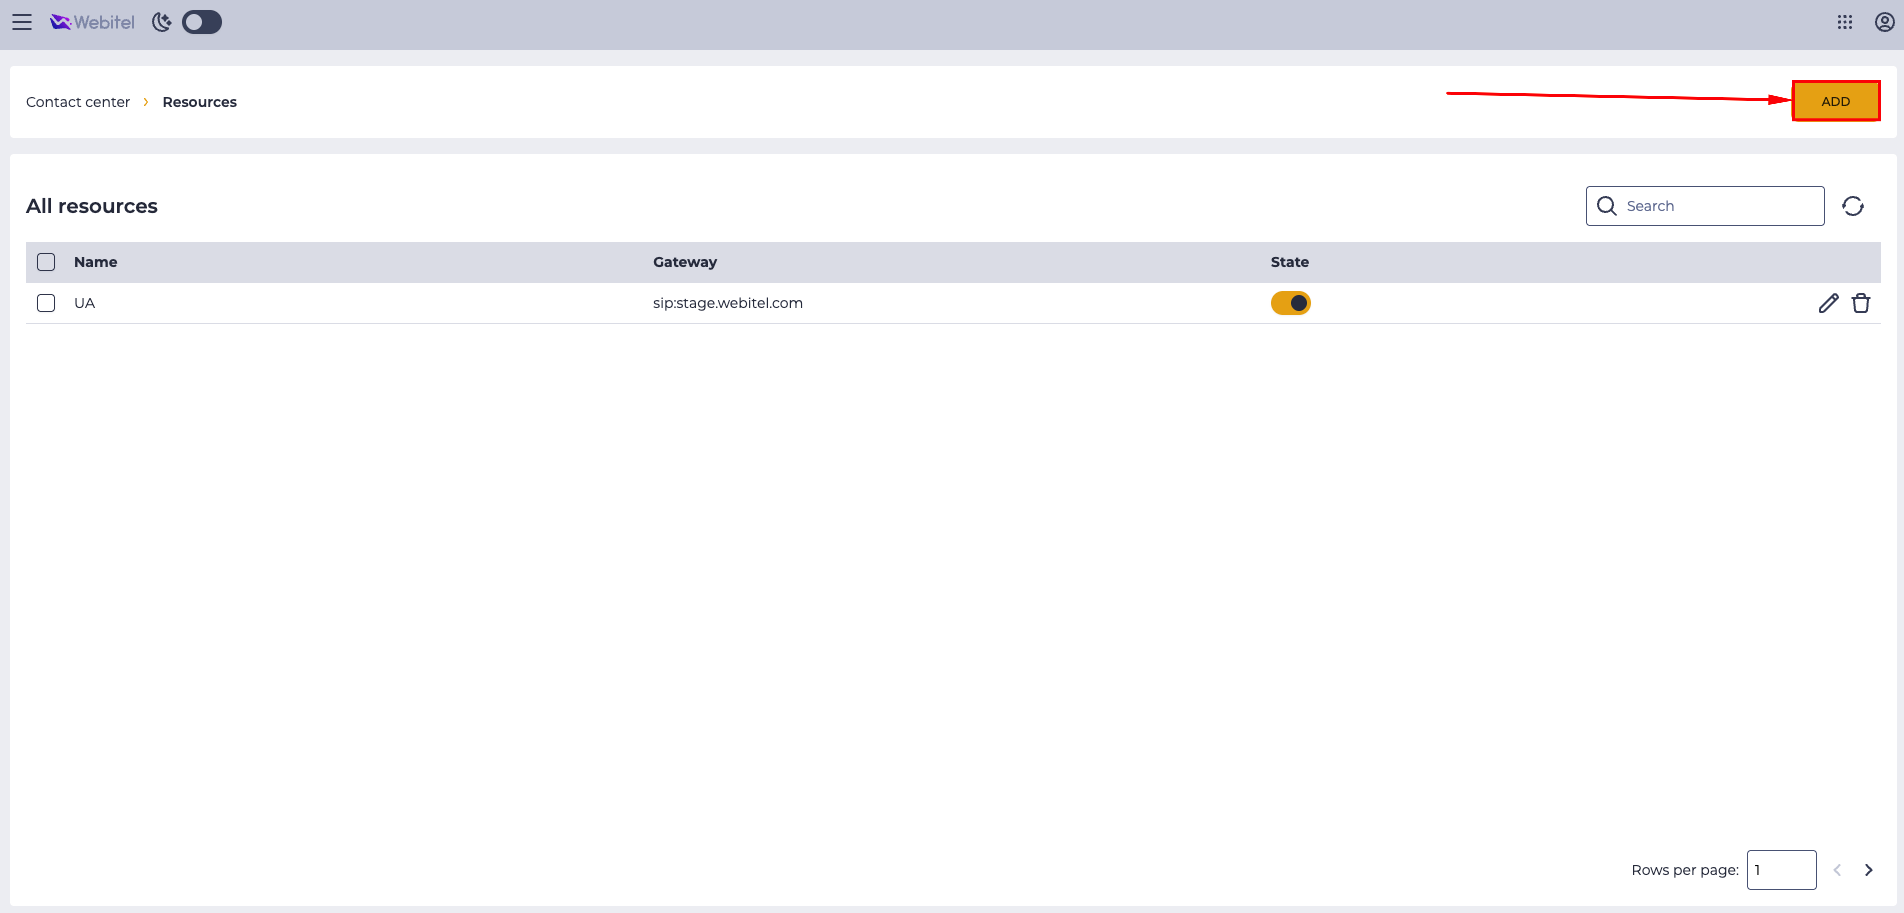
Click the Add button in the upper right corner (Fig. 21).
-
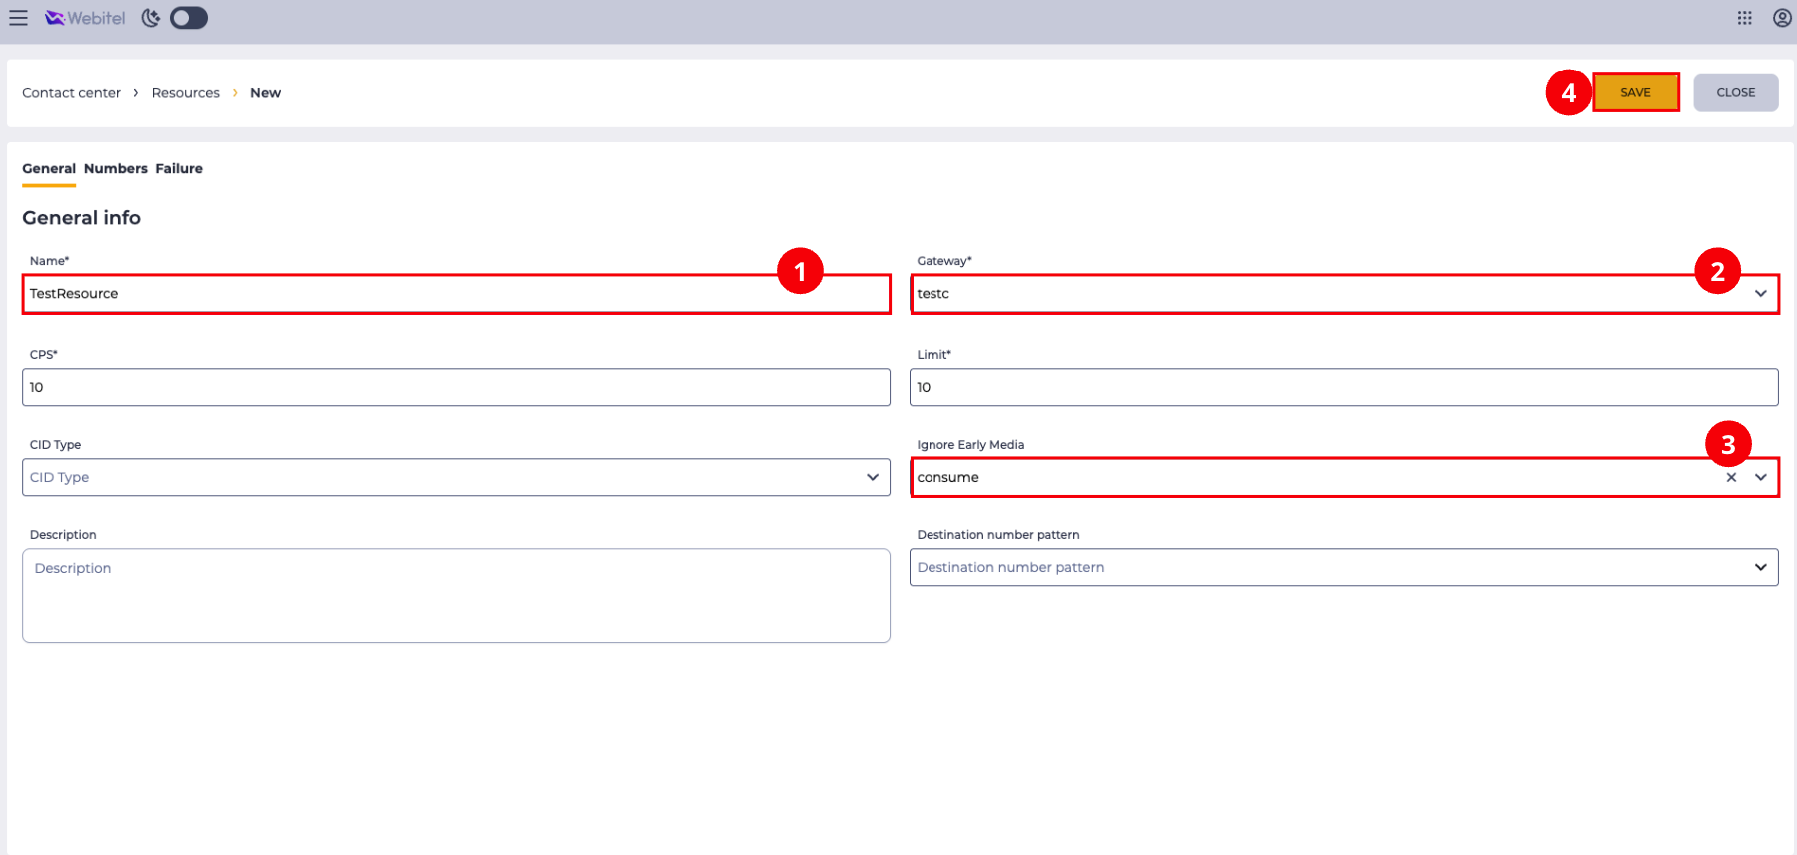
The new resource creation page will open. On the General tab, fill in the required fields (Fig. 22).
-
Name (Fig. 22.(1)) — specify the resource name.
-
Gateway (Fig. 22.(2)) — select the gateway through which outbound calls will be made.
-
Ignore Early Media (Fig. 22.(3)) — it is recommended to set the value to consume. This parameter allows the system to ignore early media (ringback tones, waiting music) and react specifically to the call being answered.
-
After filling in the data, click the Save button (Fig. 22.(4)).
4.3. Configuring Numbers (When Using a Direct Trunk)
If a direct trunk with a provider is used instead of a registration-based gateway, an additional number must be specified.
To do this:
-
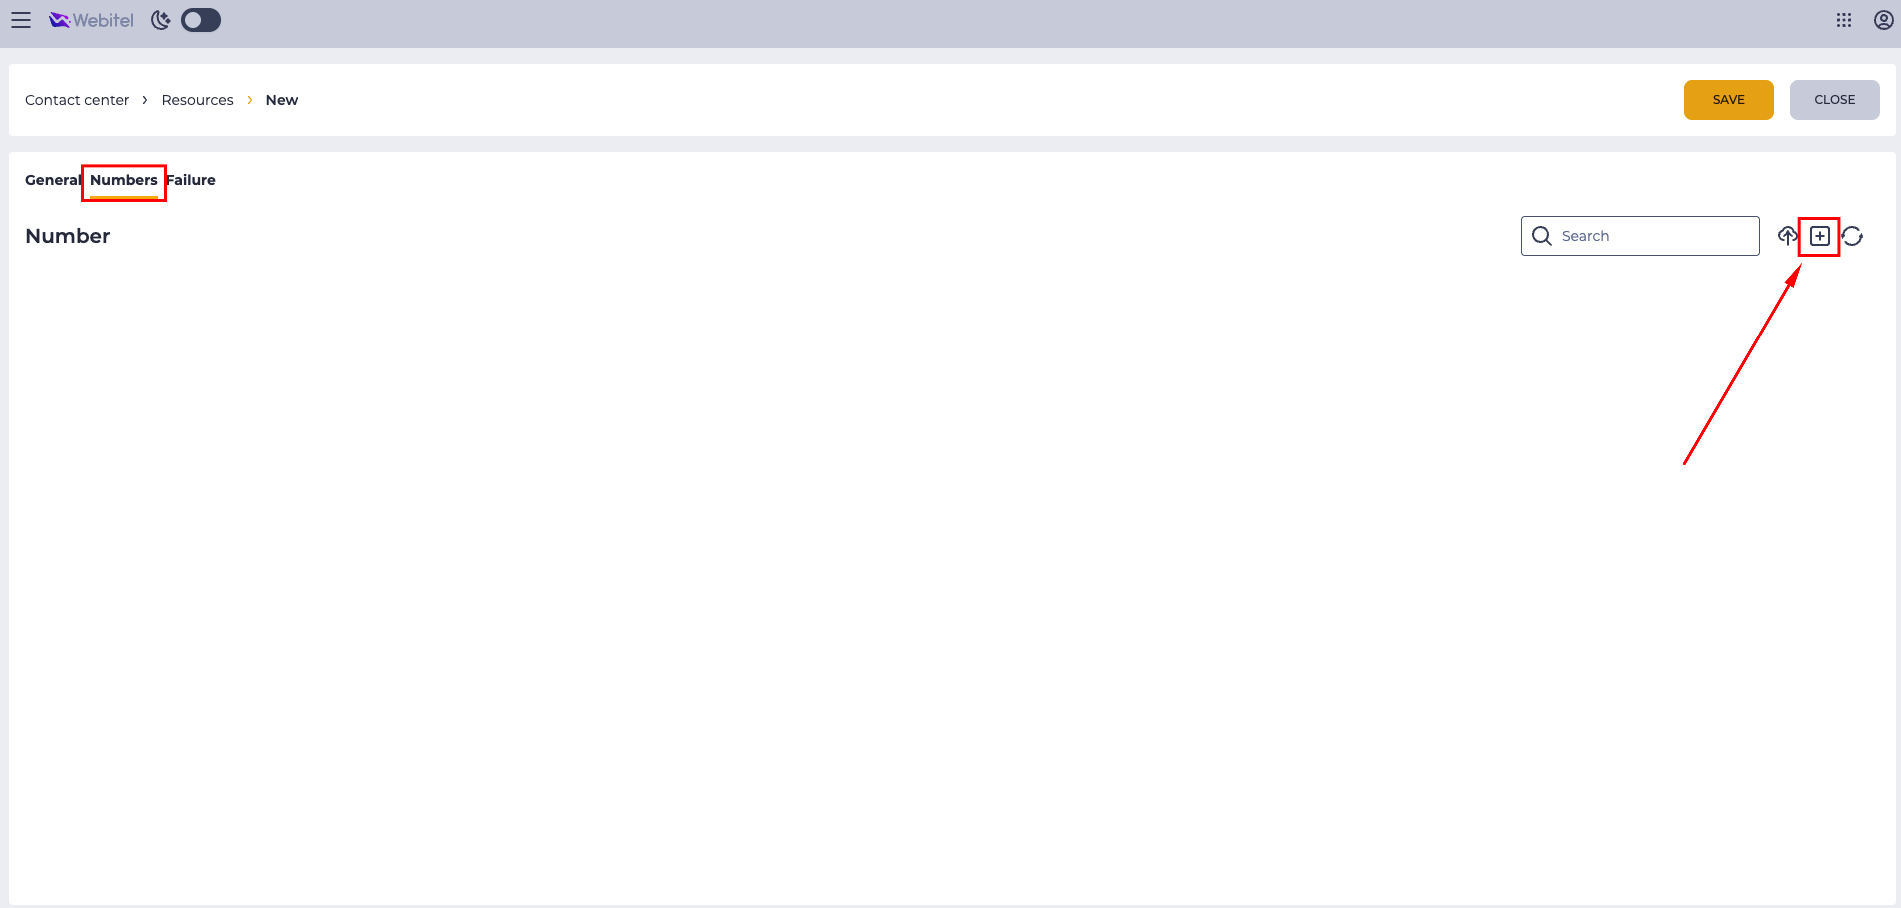
Go to the Numbers tab. Click the Add number button (Fig. 23).
-
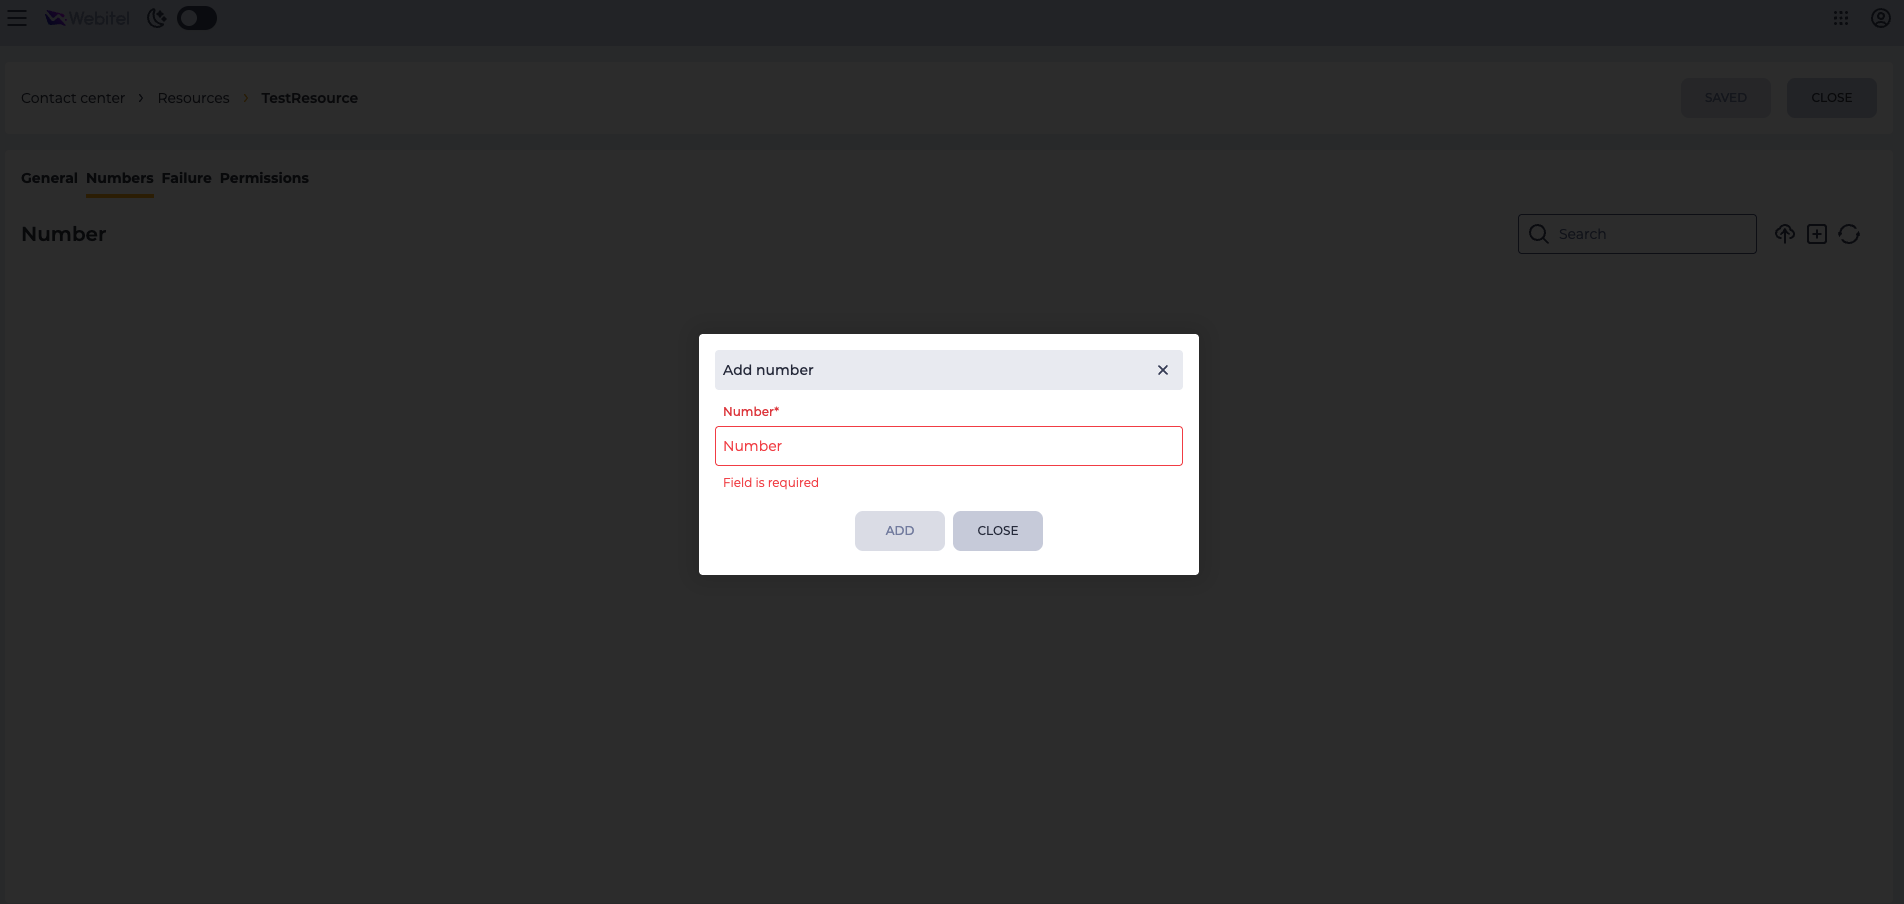
The Add number modal window will open (Fig. 24).
-
In the Number field, specify the number expected by the provider on their side. Click the Add button.
4.4. Enabling the Resource
After creating the resource, it must be activated.
Return to the resources registry. In the State column, enable the toggle for the created resource (Fig. 25).
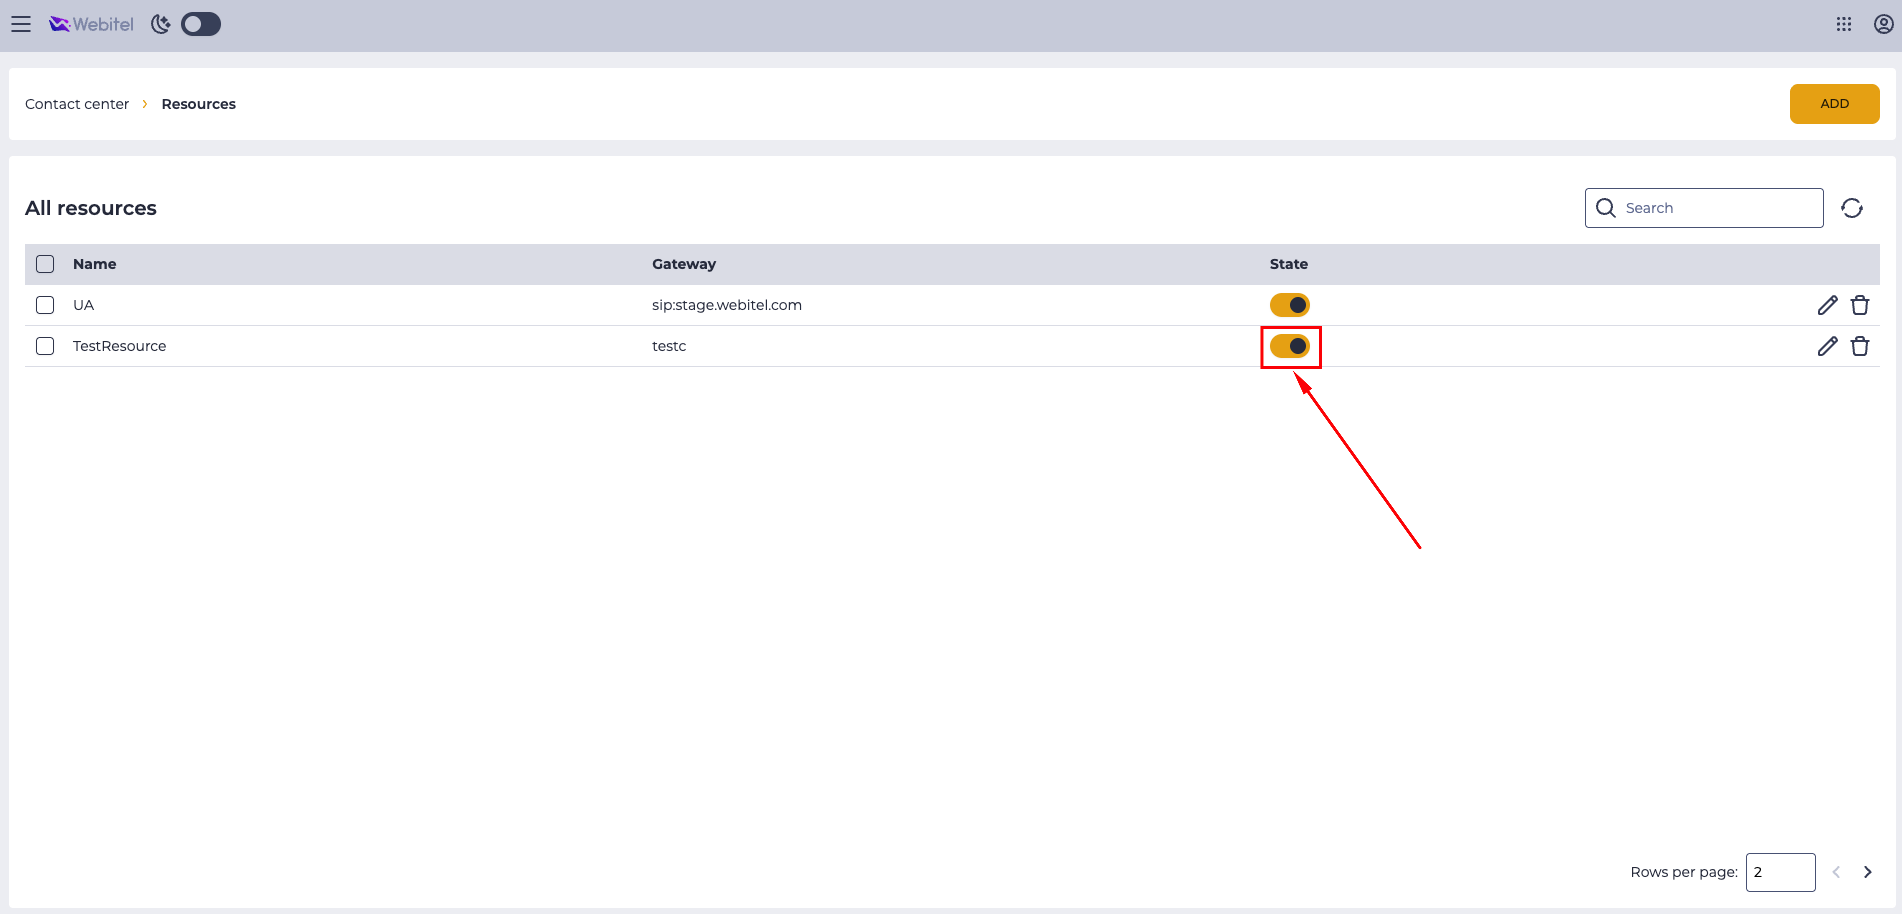
The resource must be in the active state – 
5. Creating a Resource Group
A resource group is used to combine one or more resources and assign them to an IVR queue.
5.1. Navigation
To create a resource group:
-
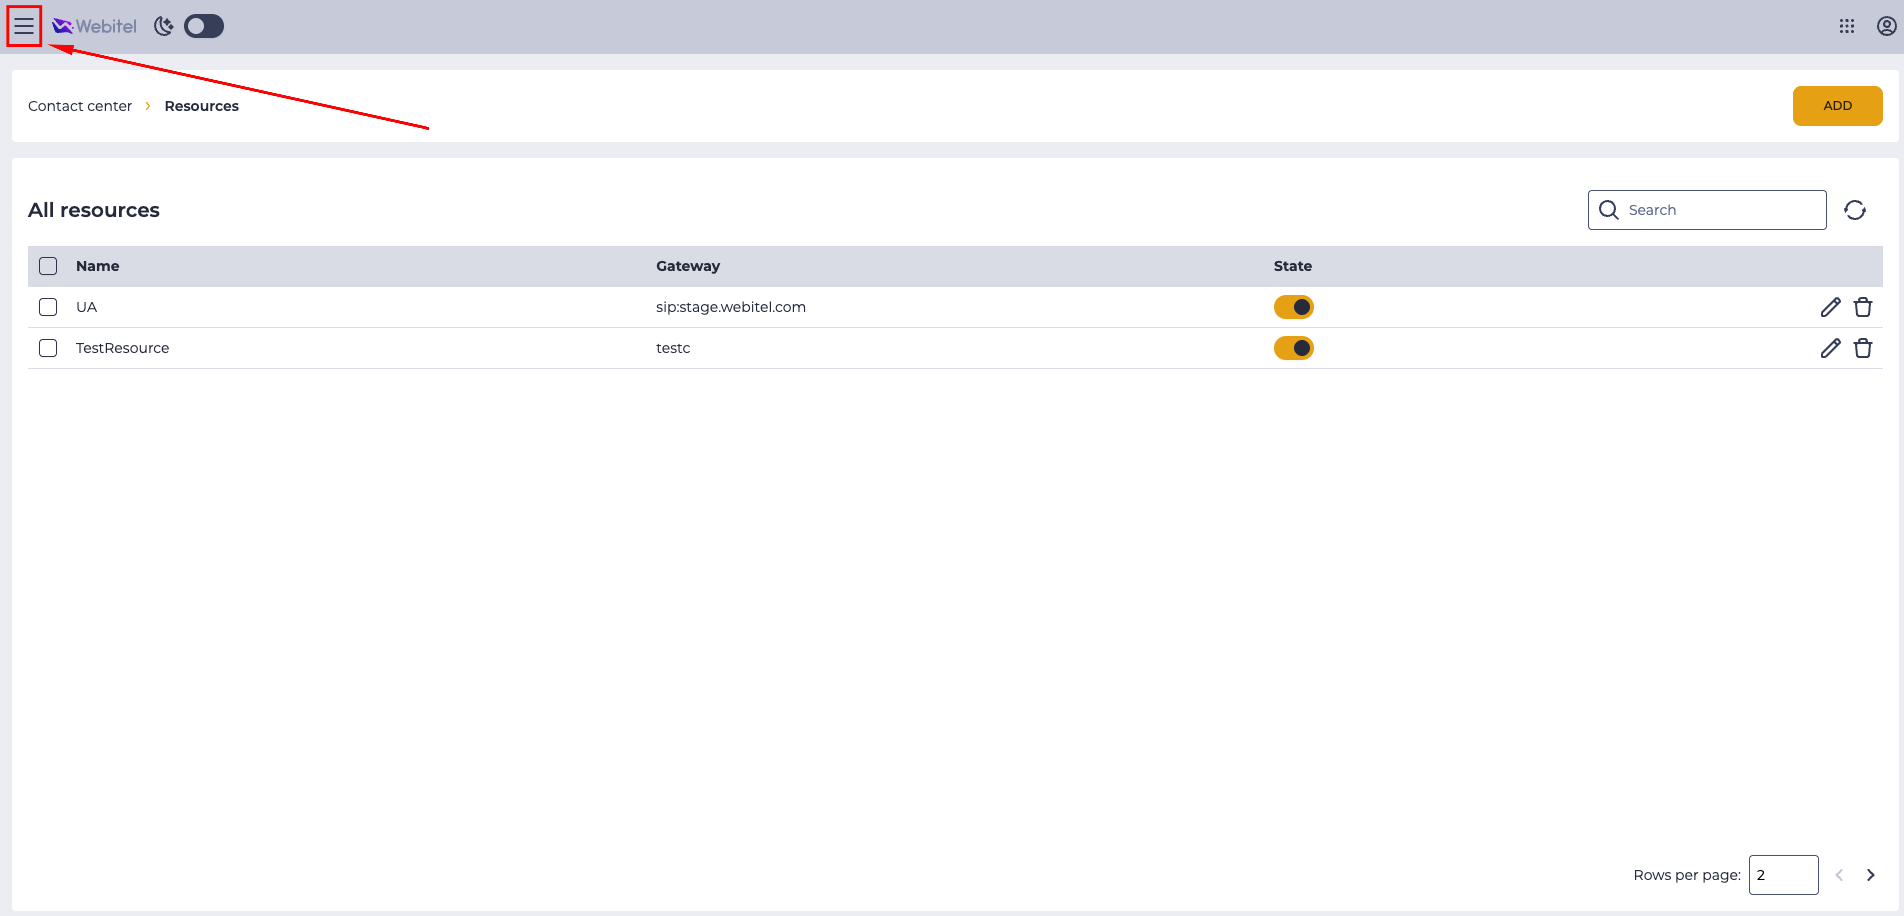
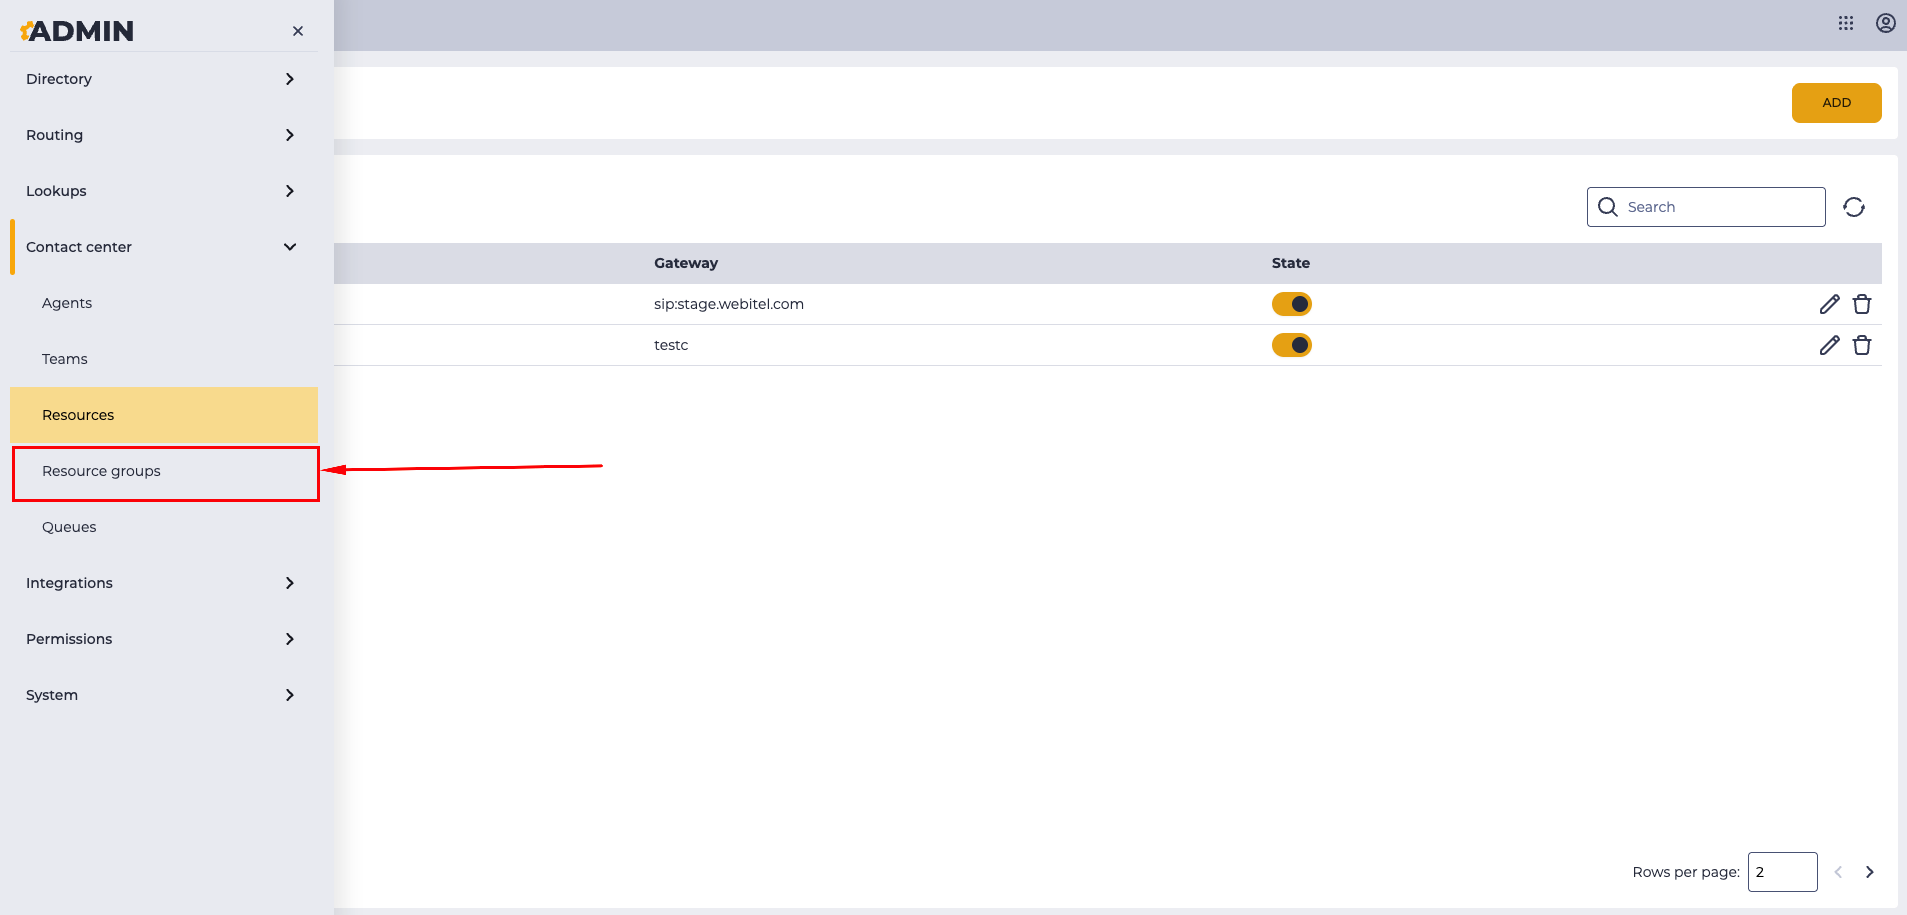
Click the menu icon in the upper left corner (Fig. 26).
-
In the opened menu, select: Admin → Contact Center → Resource Groups (Fig. 27).
-
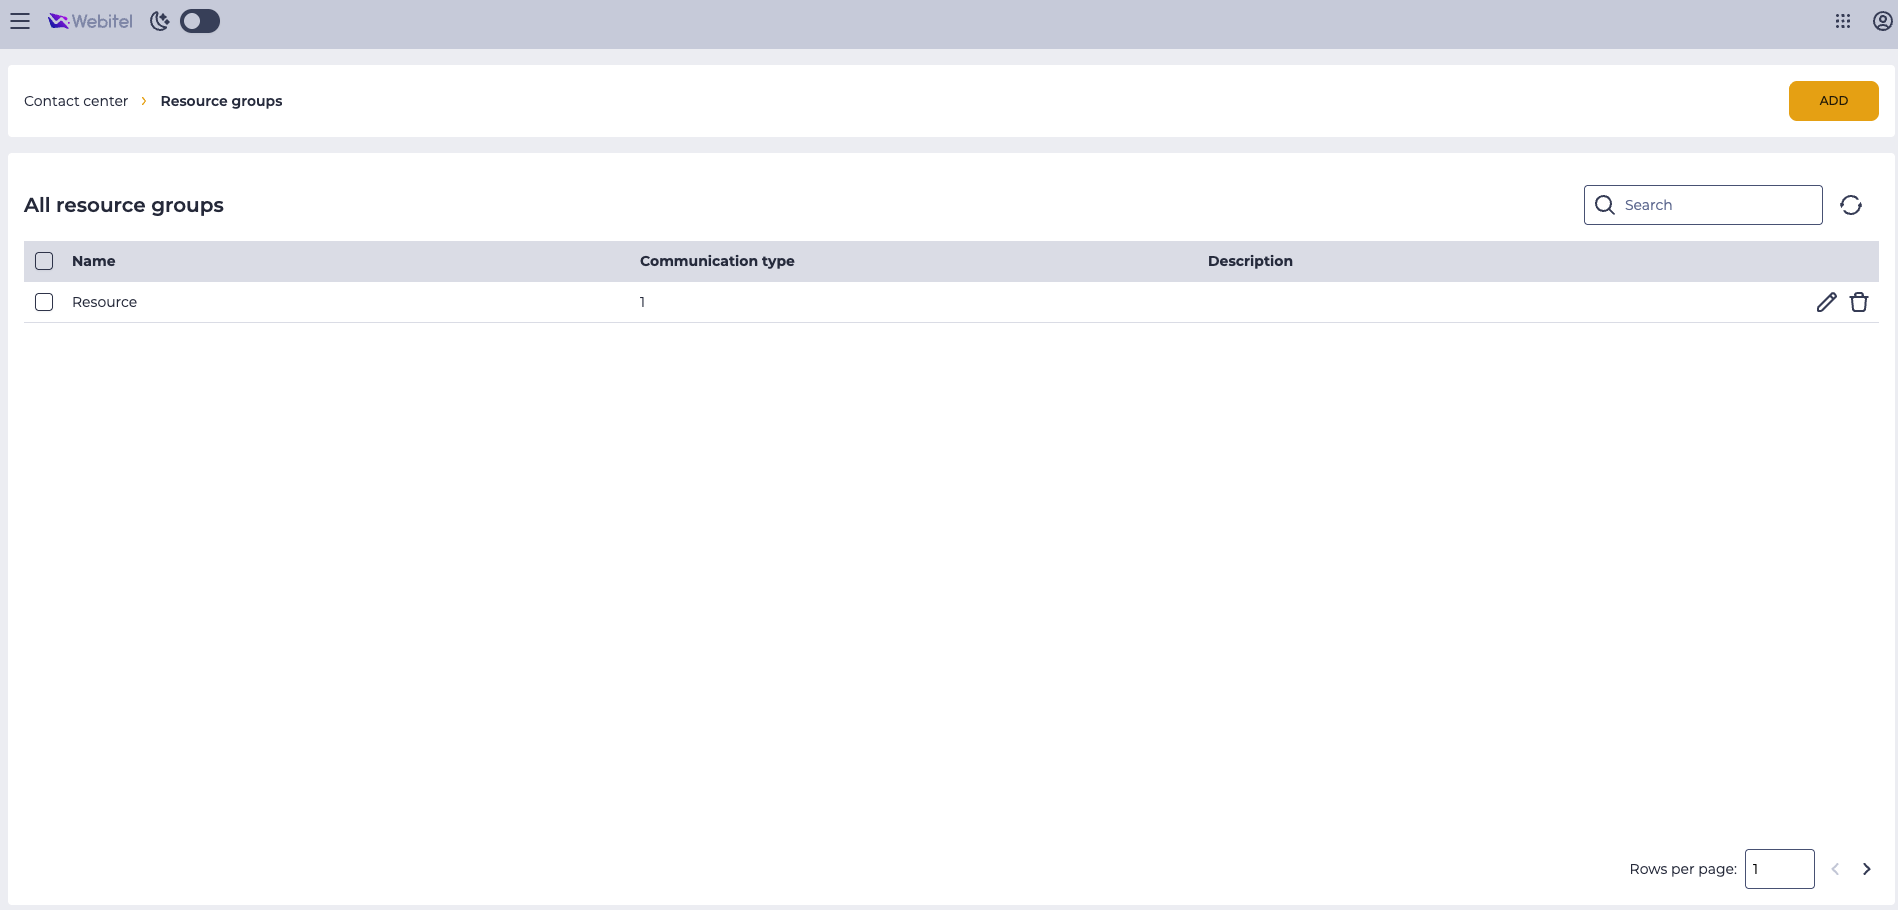
The page with the list of all created resource groups will open (Fig. 28).
5.2. Creating a New Resource Group
-
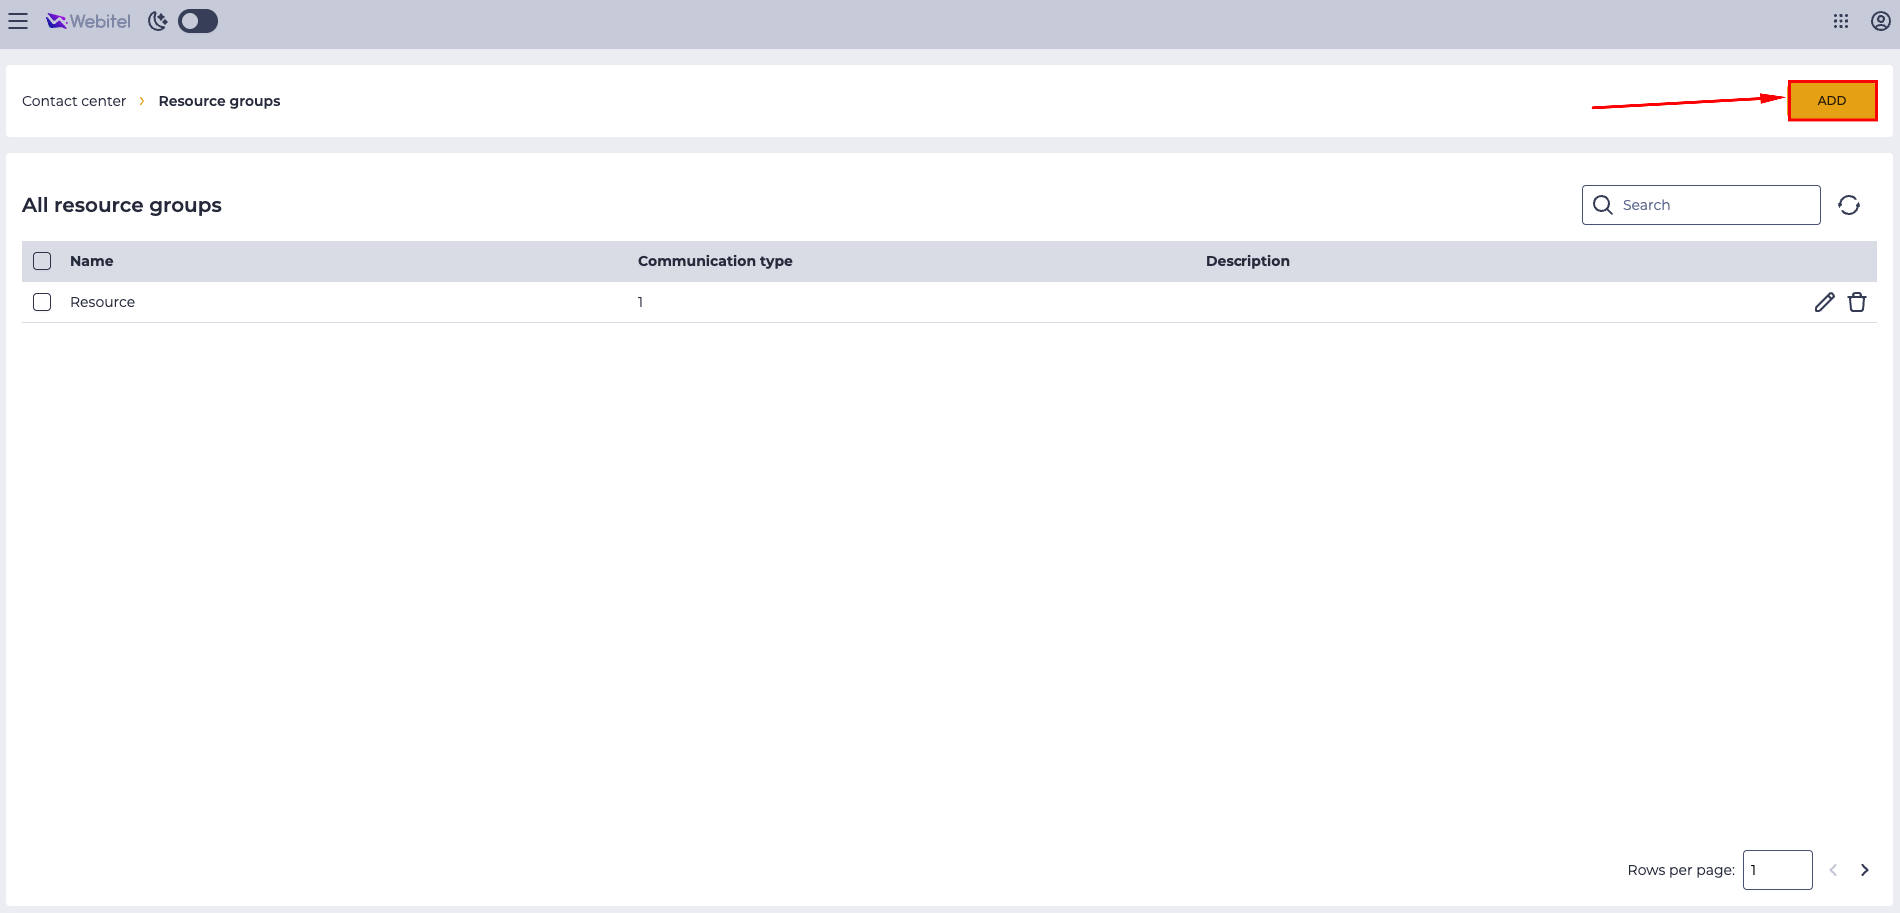
Click the Add button in the upper right corner of the page (Fig. 29).
-
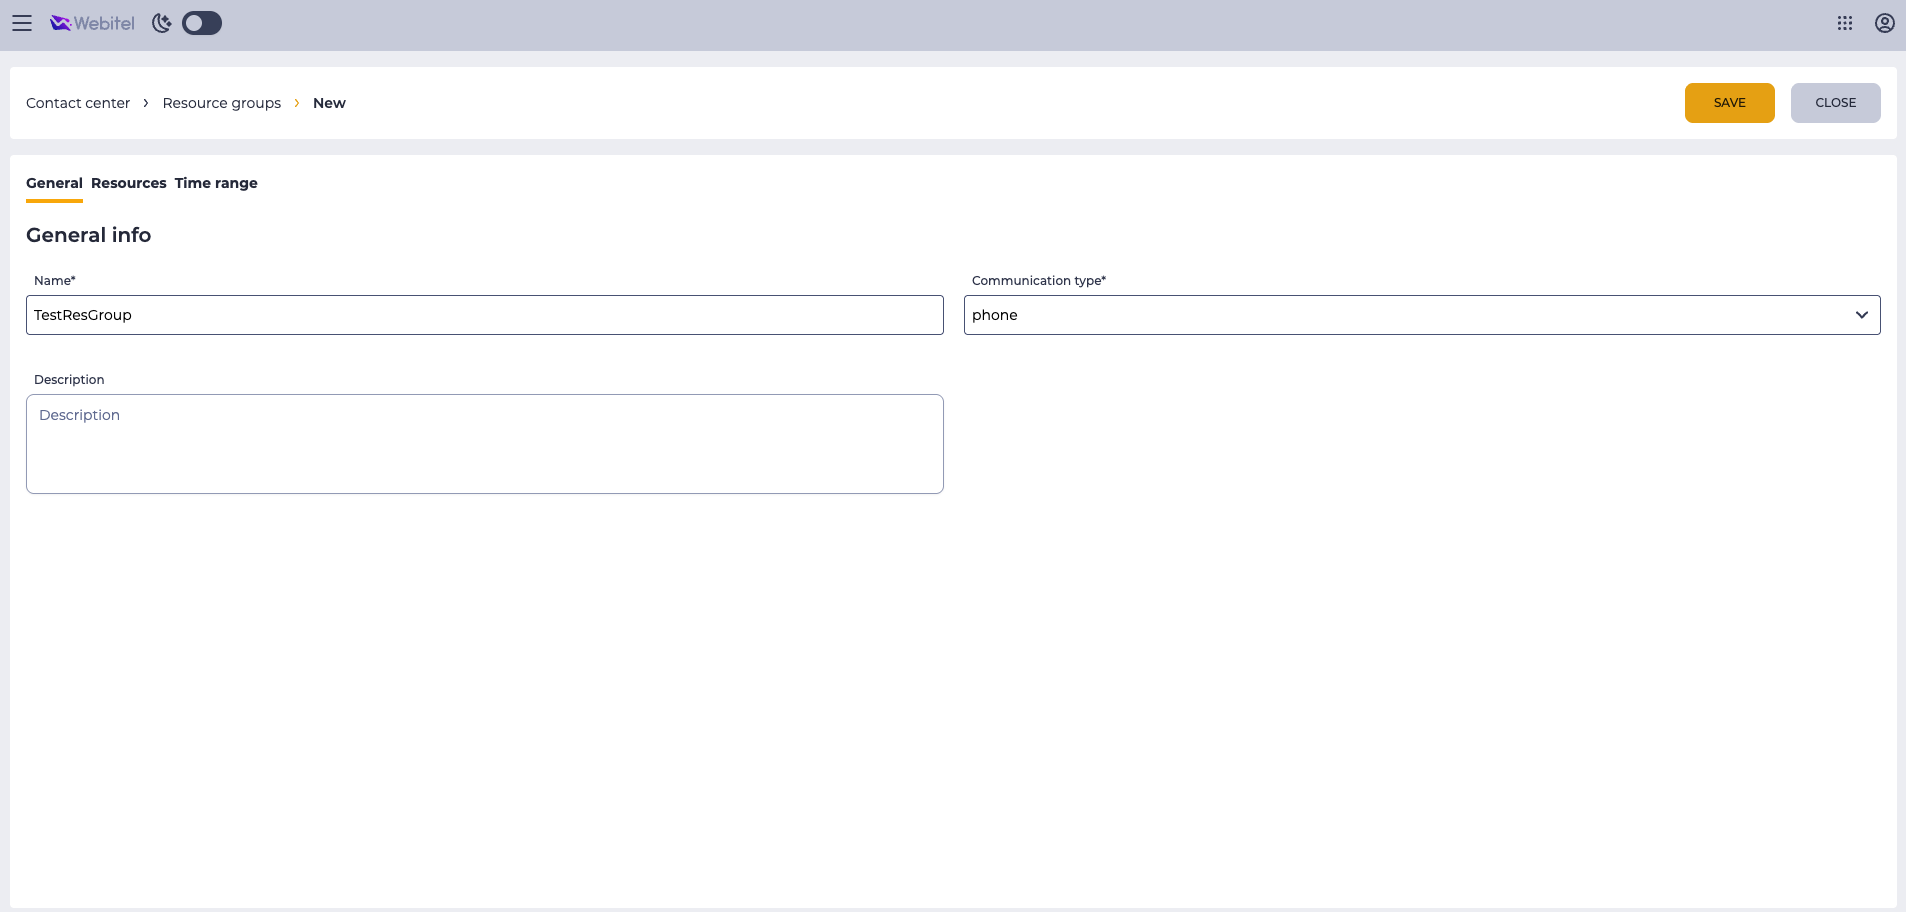
The new group creation page will open.
-
On the General tab, fill in the required fields (Fig. 30):
-
Name — specify the name of the resource group.
-
Communication type — select the connection type.
-
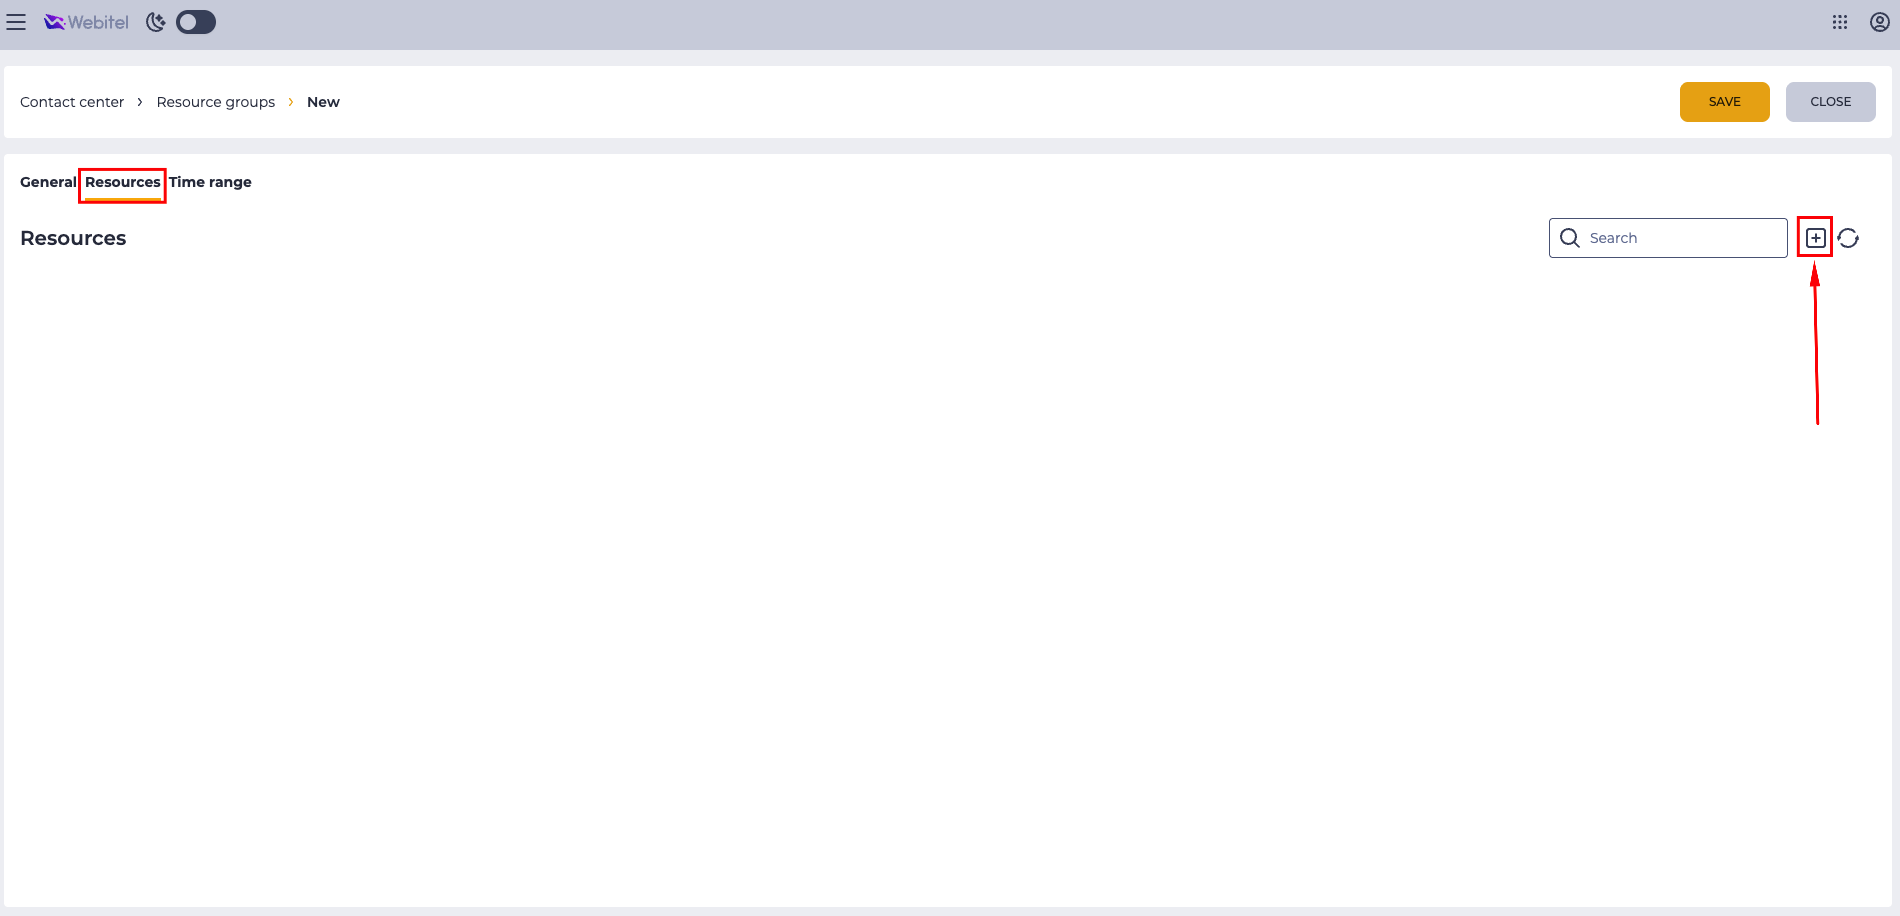
Go to the Resources tab. Click the Add resource button (Fig. 31).
-
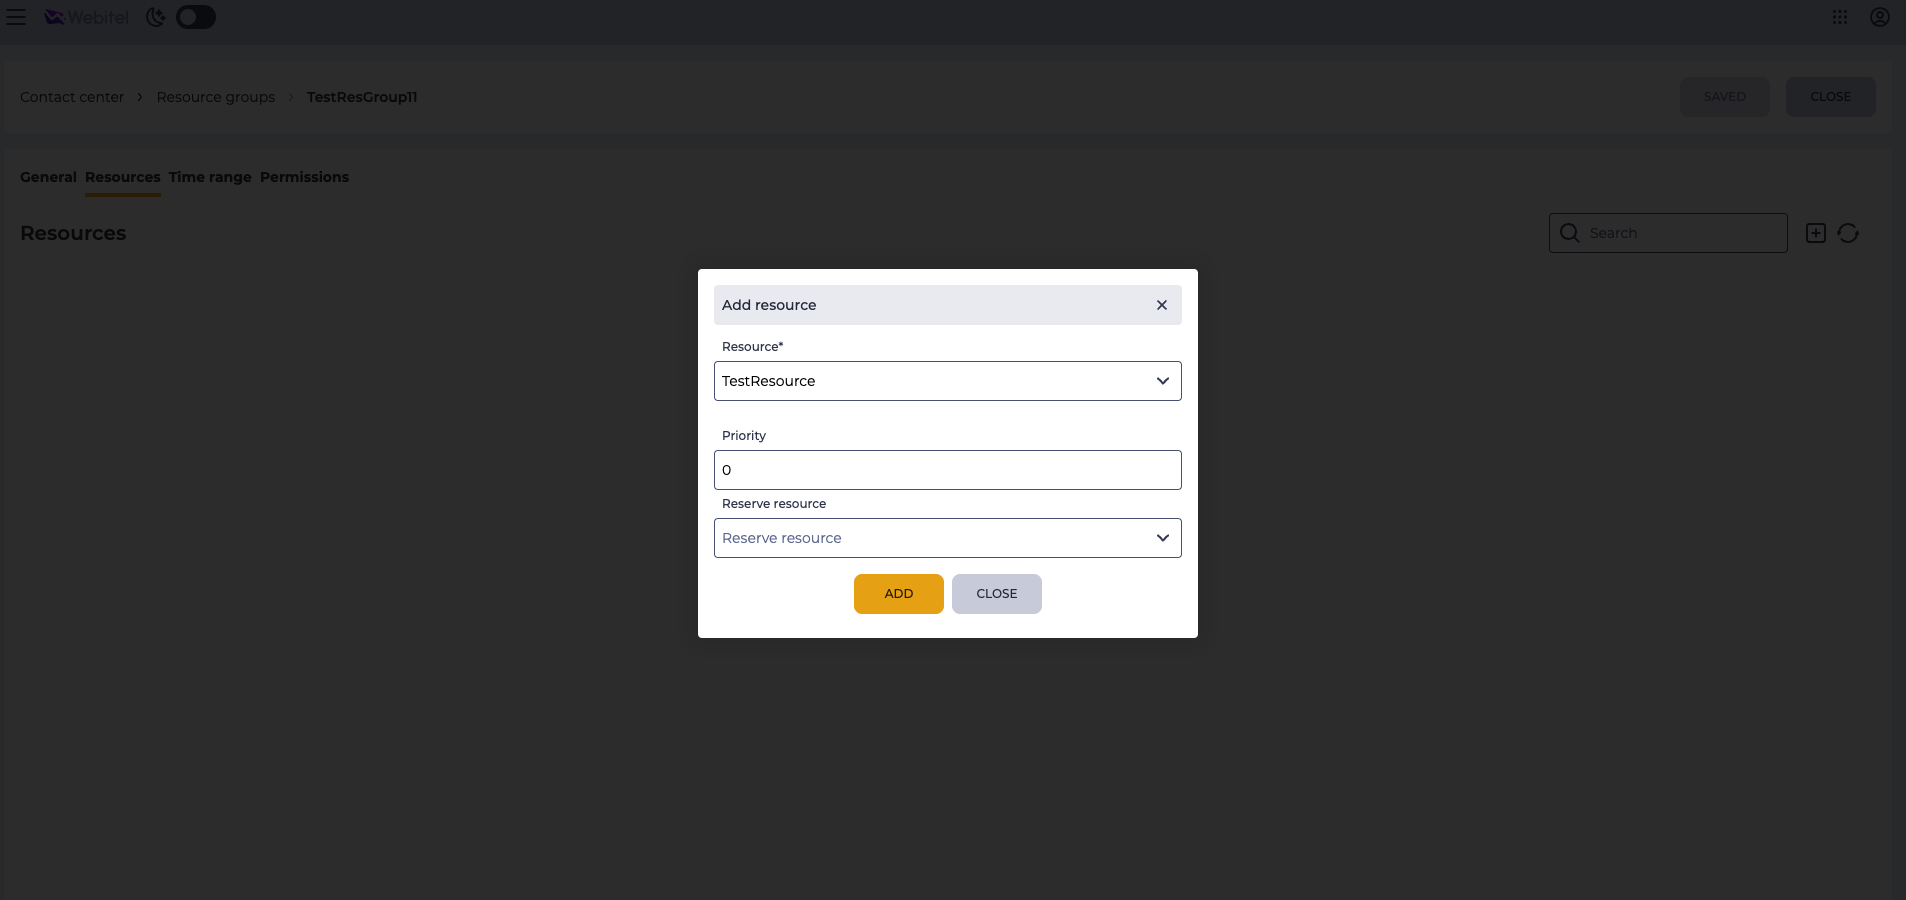
The Add resource modal window will open (Fig. 32). Fill in the fields:
-
Resource — select the previously created resource.
-
Priority — specify the resource usage priority (the lower the value, the higher the priority).
-
Reserve resource — specify a backup resource if needed.
-
Click the Add button.
-
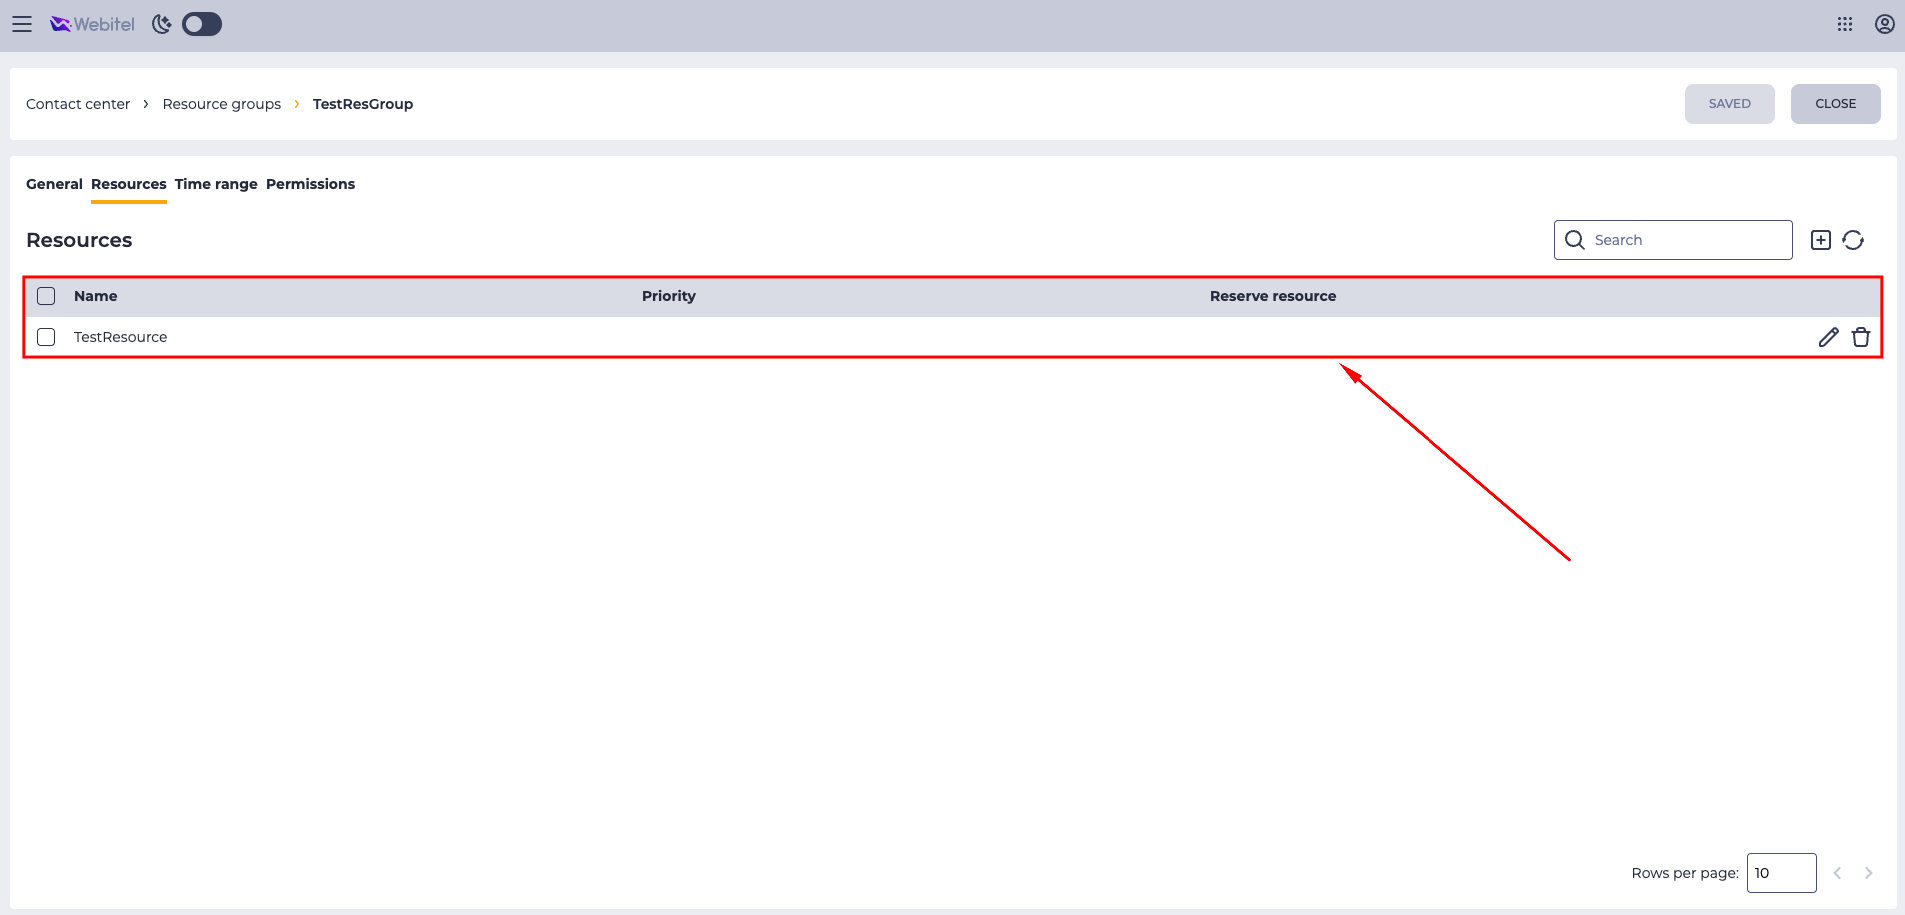
The added resource will appear in the list (Fig. 33).
-
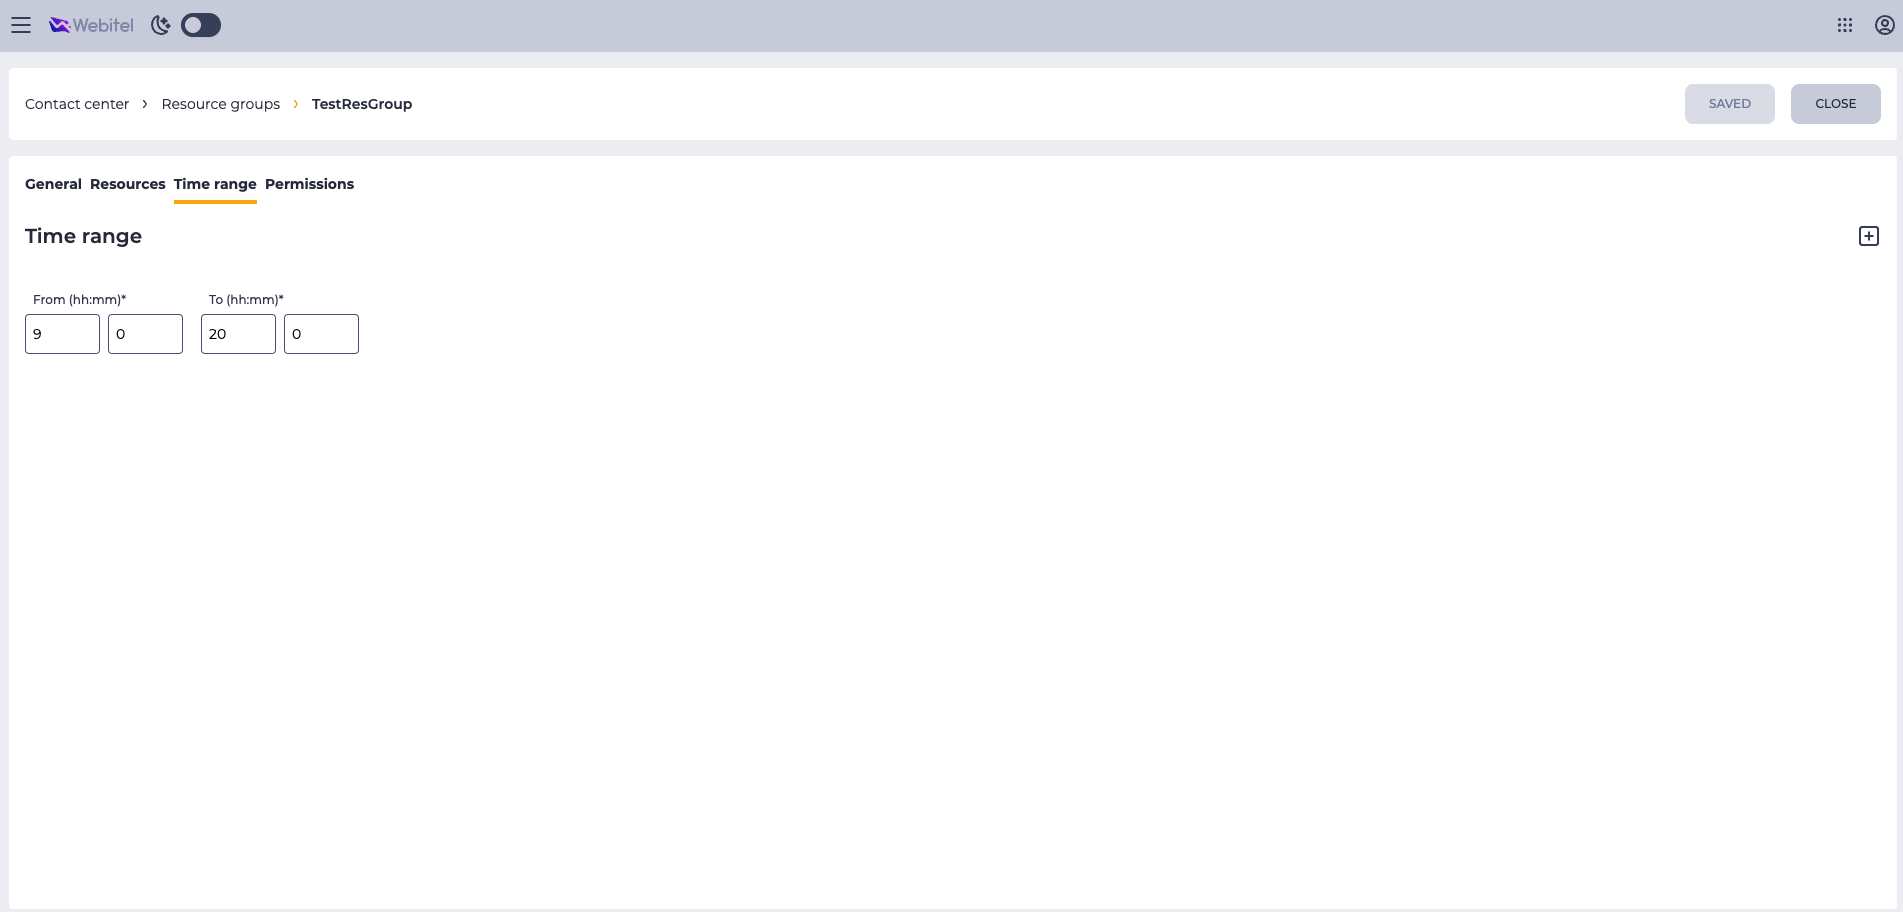
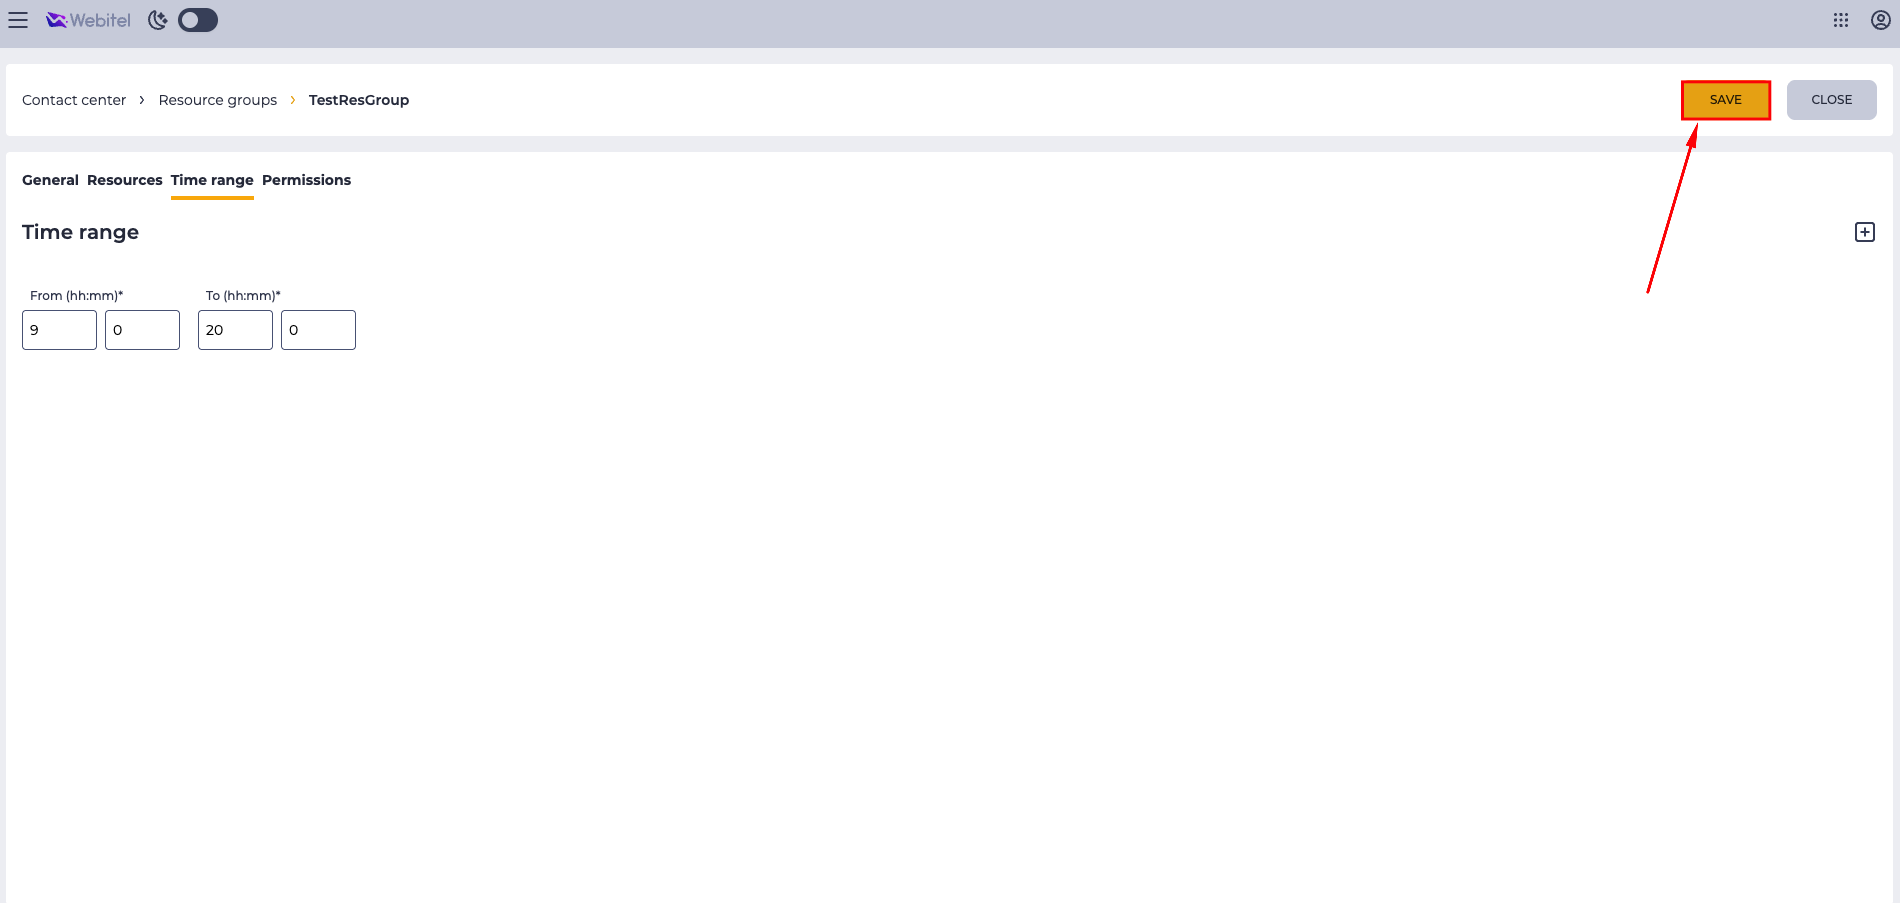
Go to the Time range tab (Fig. 34). Specify the working time interval for the resource group:
-
From (hh:mm) — start time.
-
To (hh:mm) — end time.
If necessary, multiple intervals can be added.
-
After completing all tabs, click the Save button in the upper right corner (Fig. 35).
-
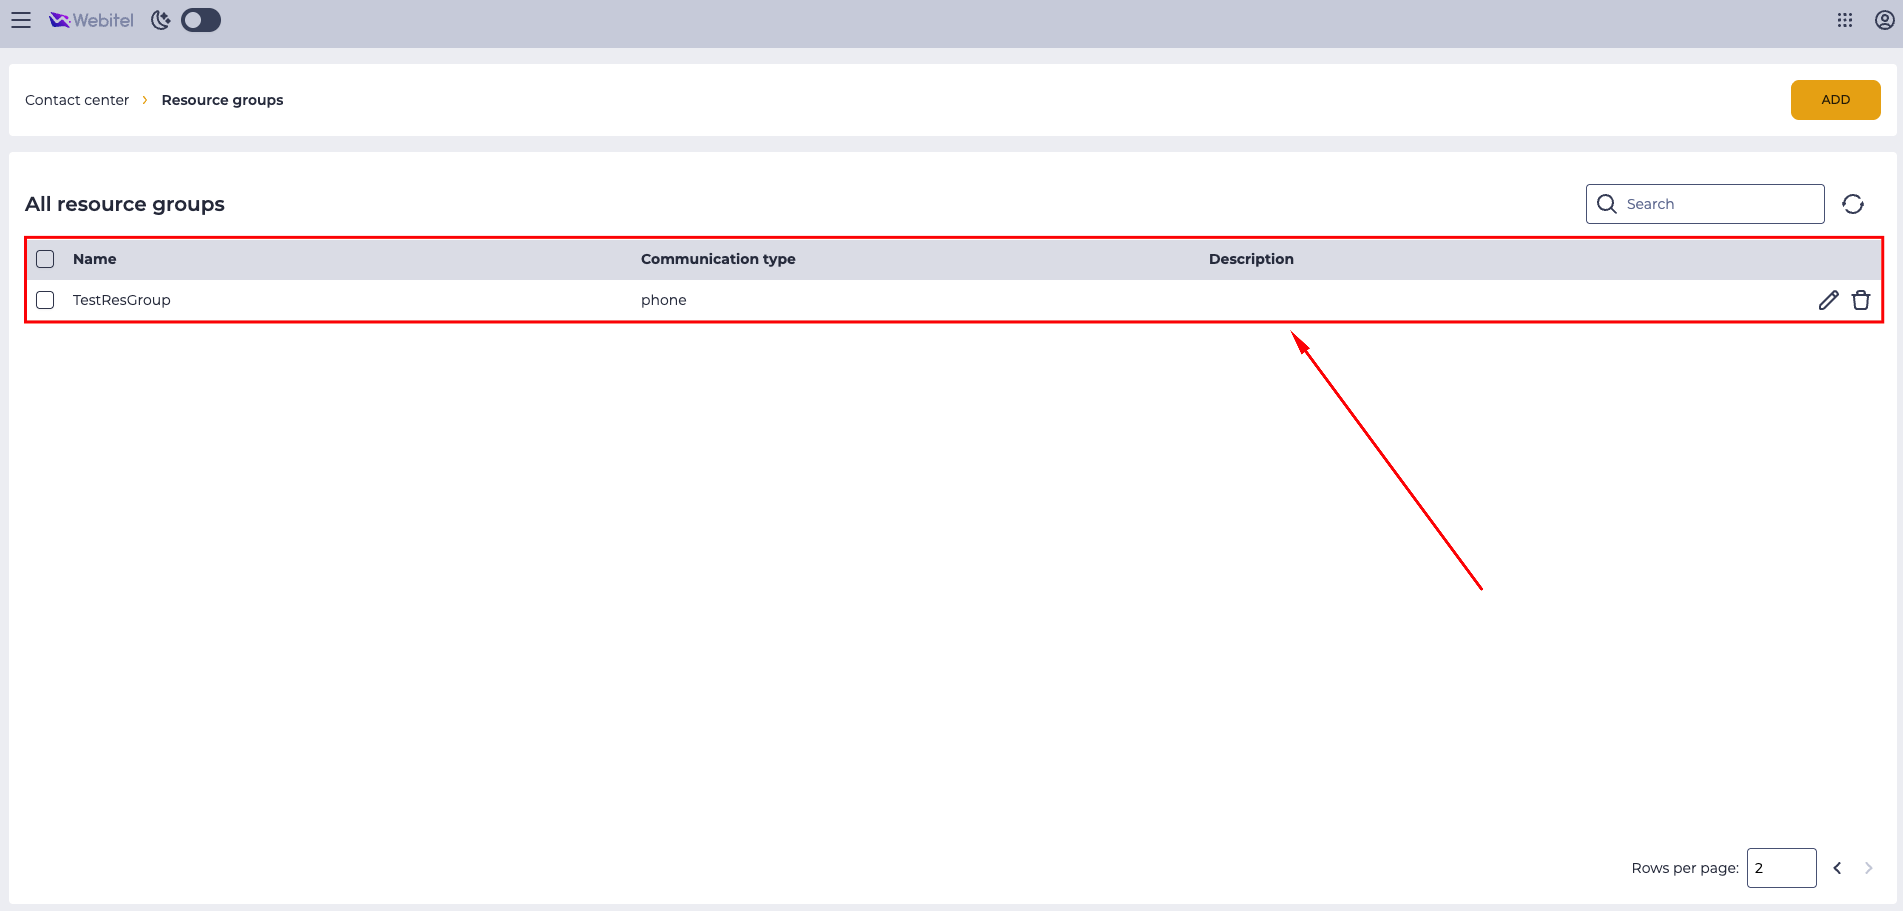
After saving, the group will appear in the general list (Fig. 36).
6. Creating an IVR Dialer (Outbound IVR Queue)
After creating the resource and the resource group, you need to create an IVR queue.
6.1. Navigation
-
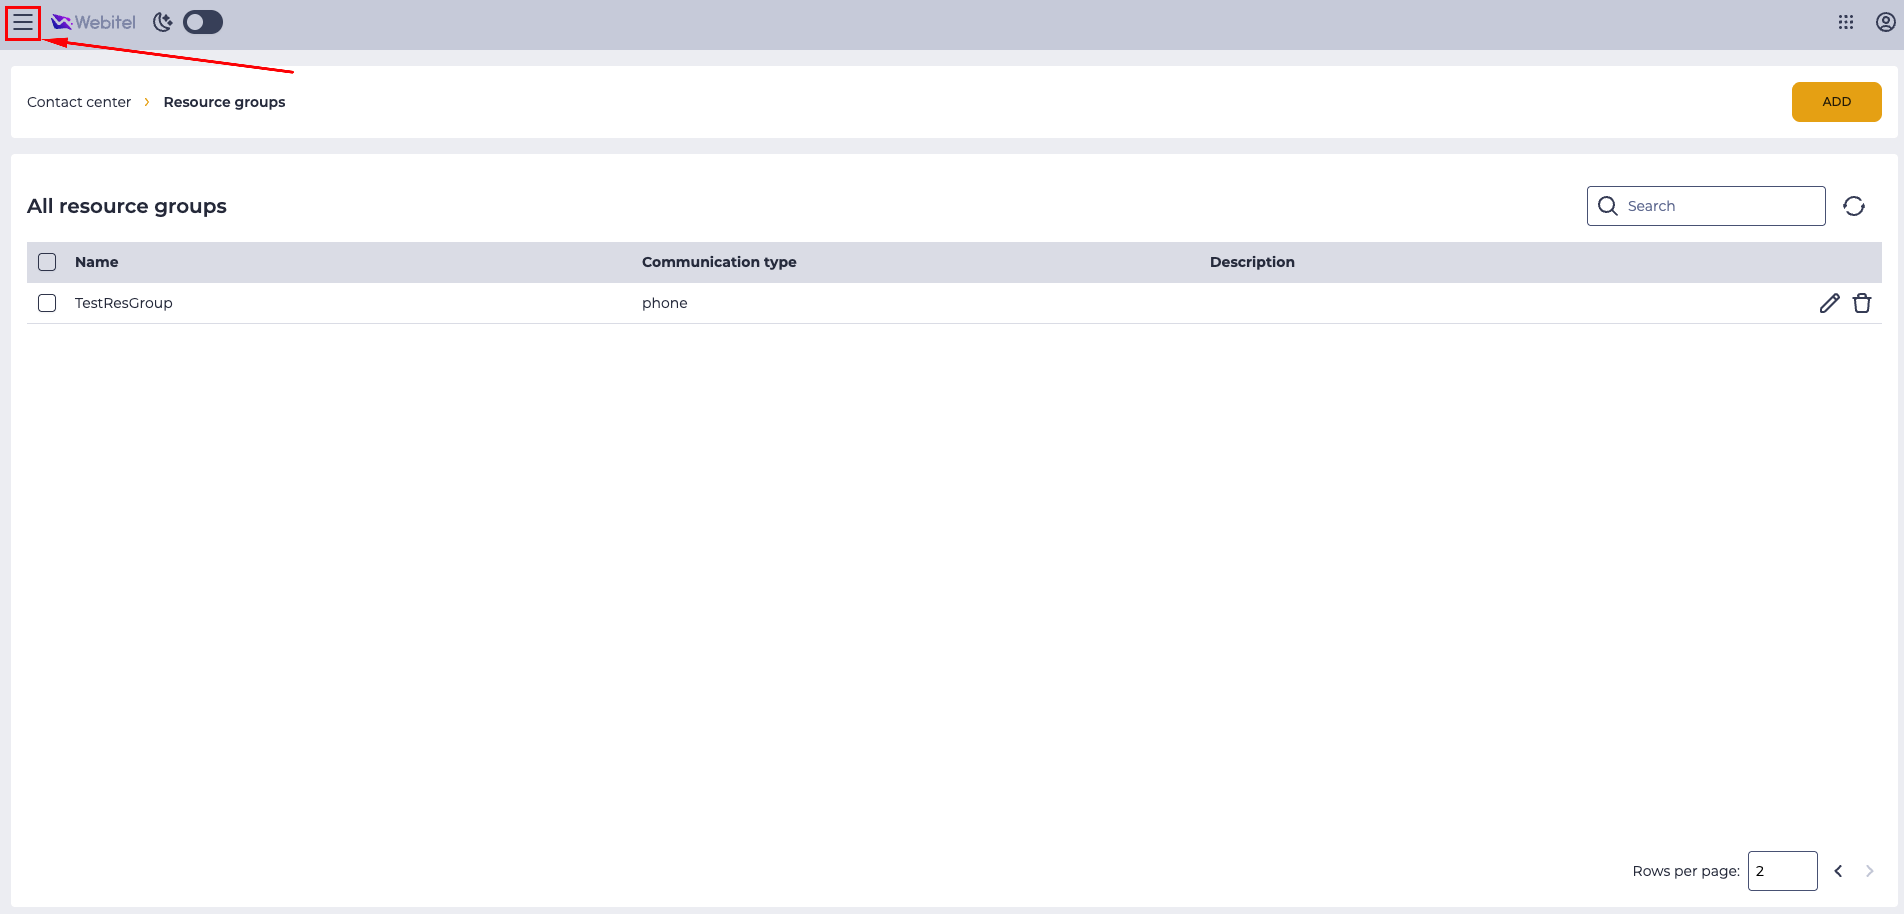
Open the menu in the upper left corner (Fig. 37).
-
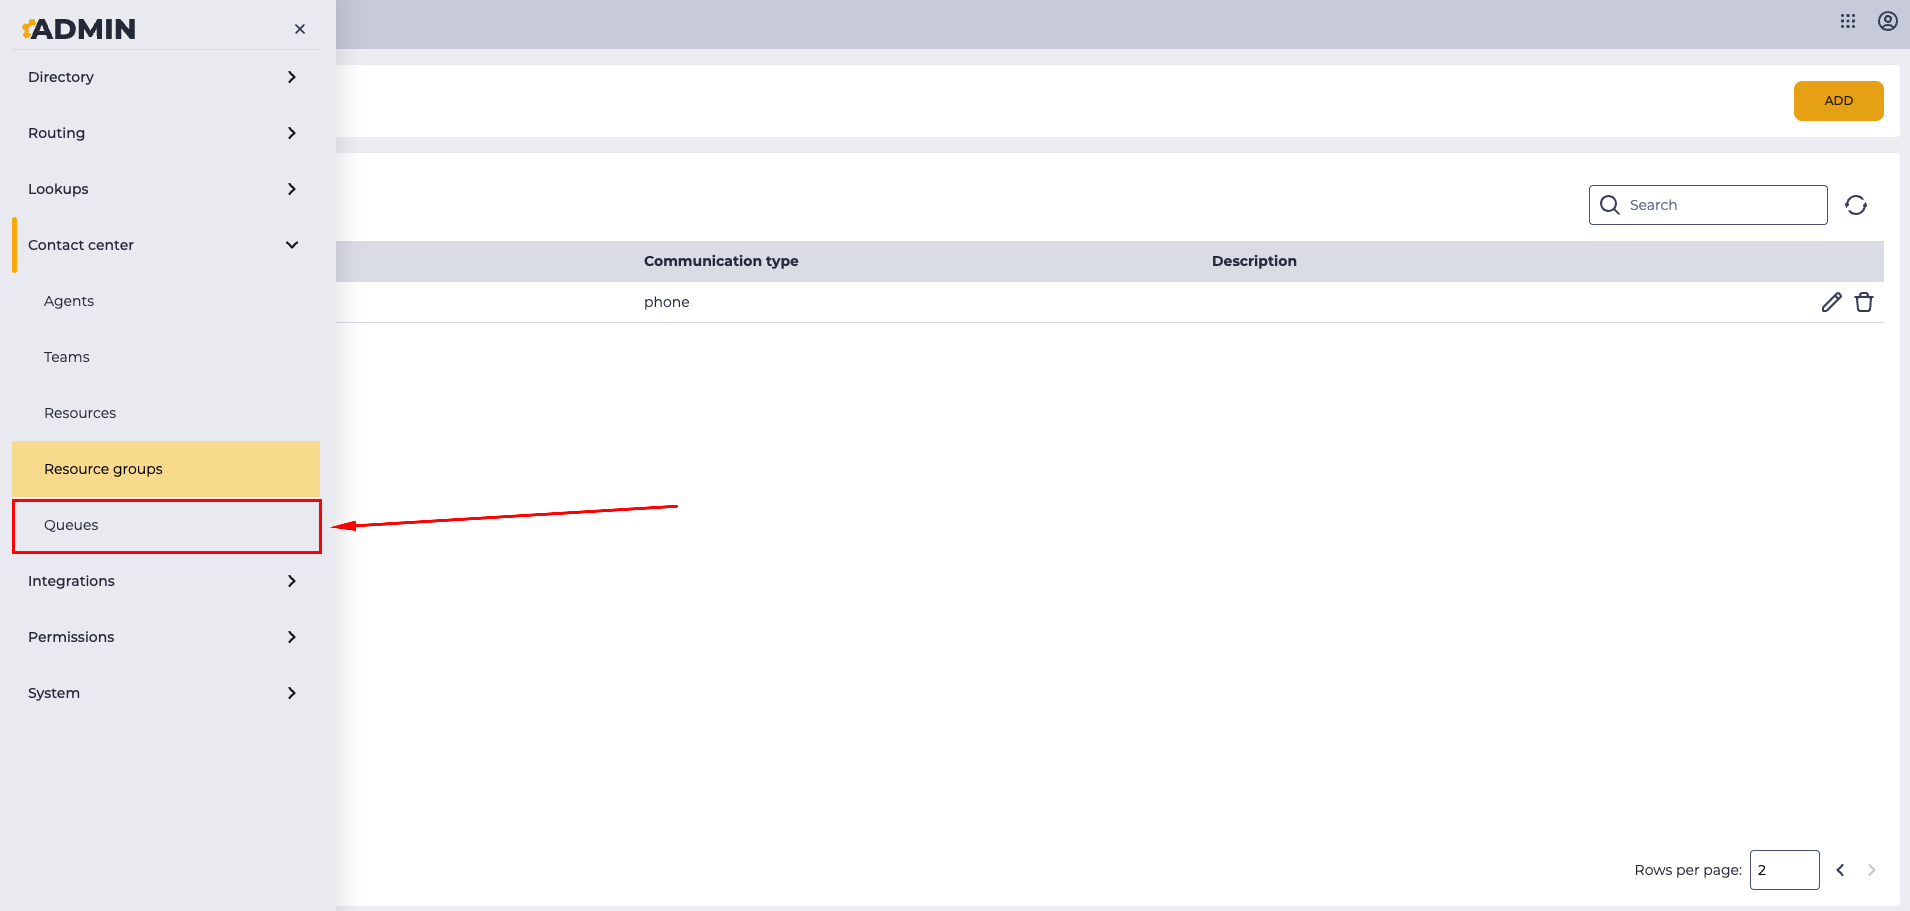
Go to: Admin → Contact Center → Queues (Fig. 38).
-
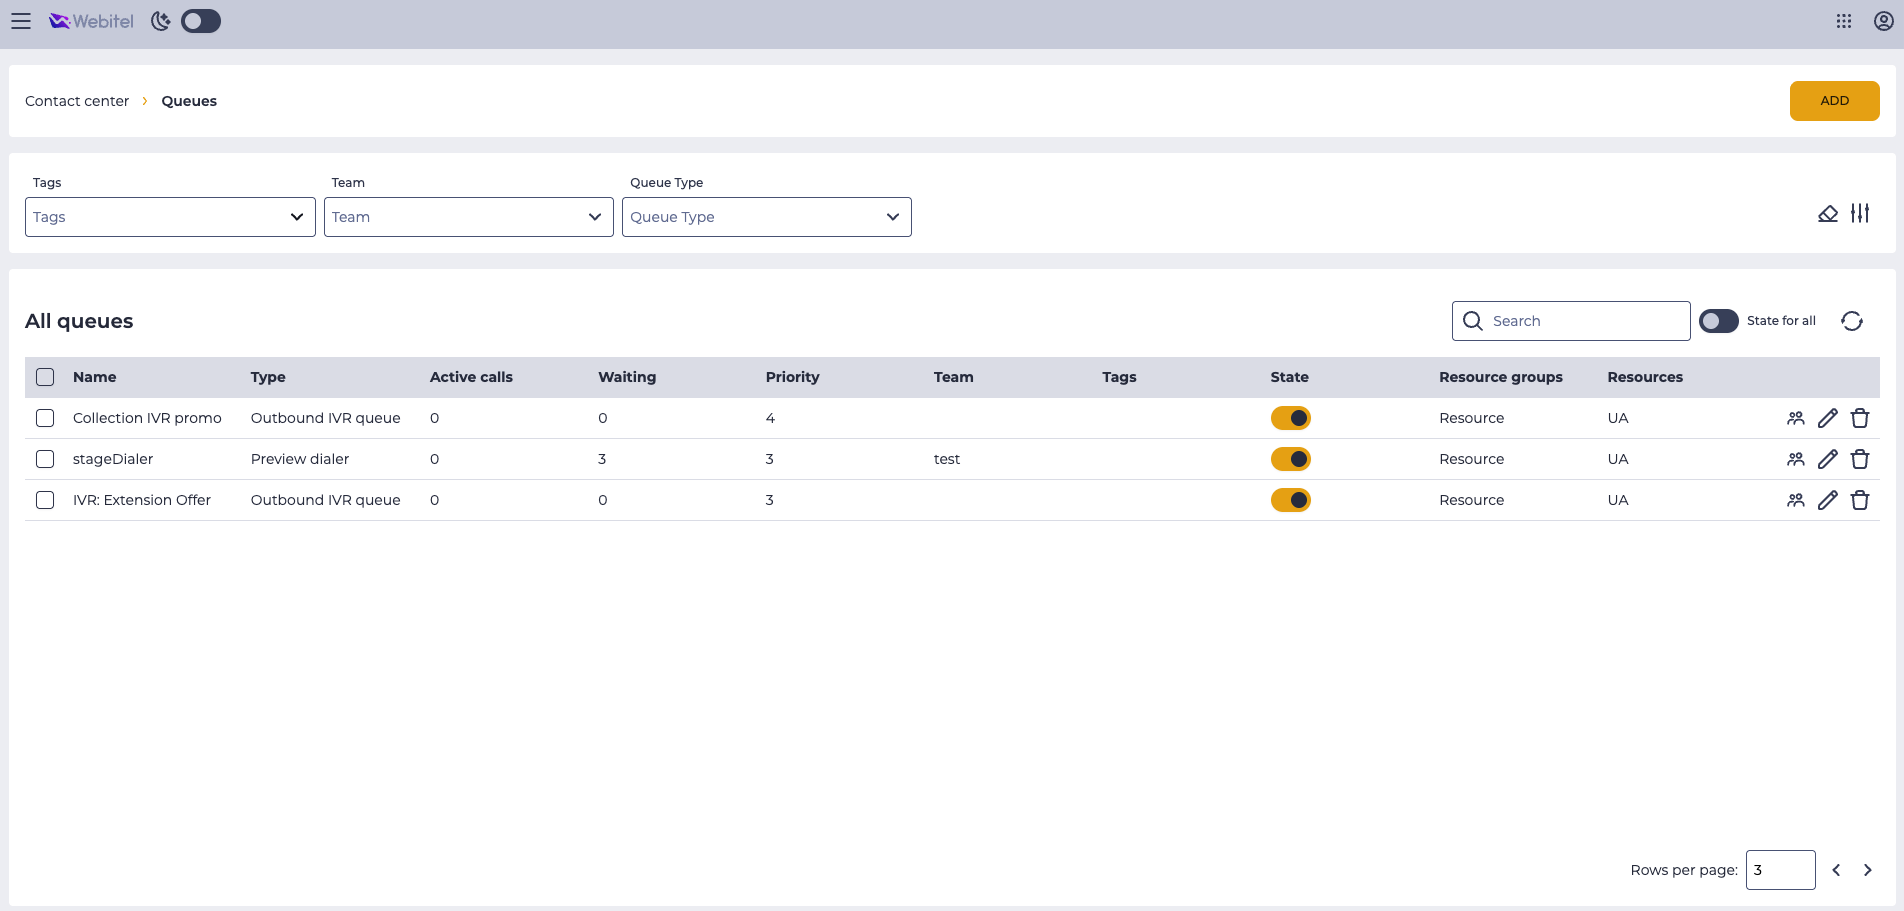
The page with the list of all queues will open (Fig. 39).
6.2. Creating a New Queue
-
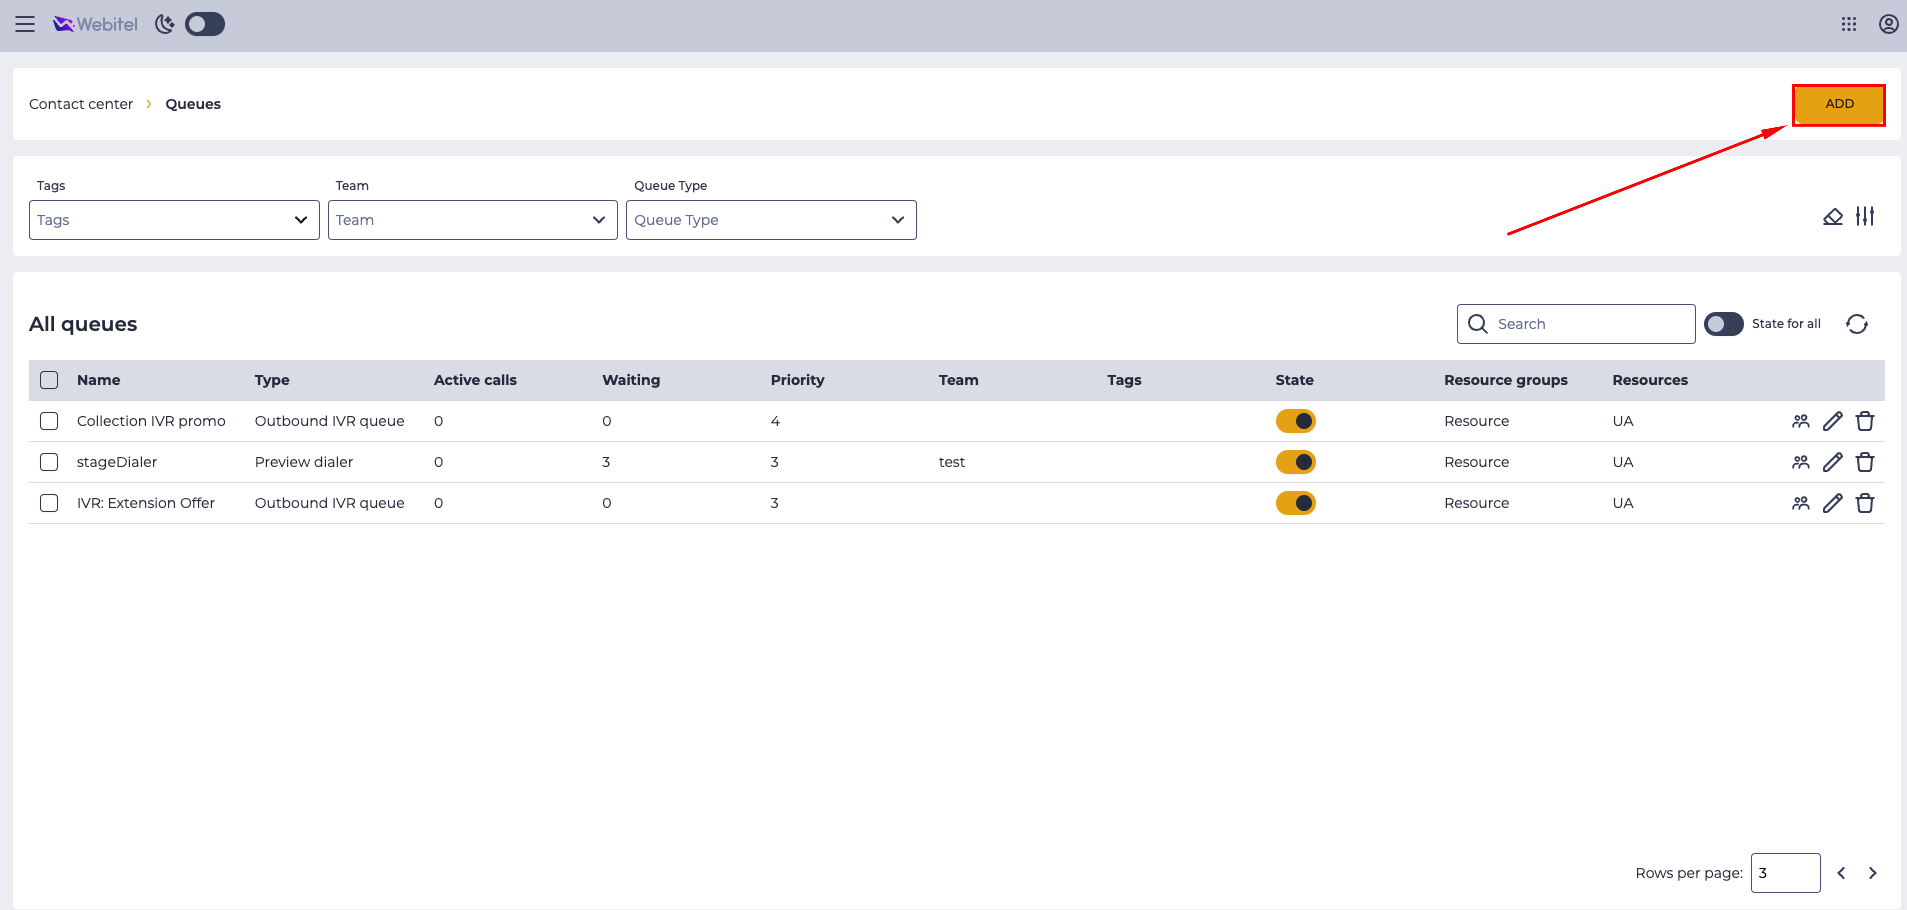
Click the Add button in the upper right corner (Fig. 40).
-
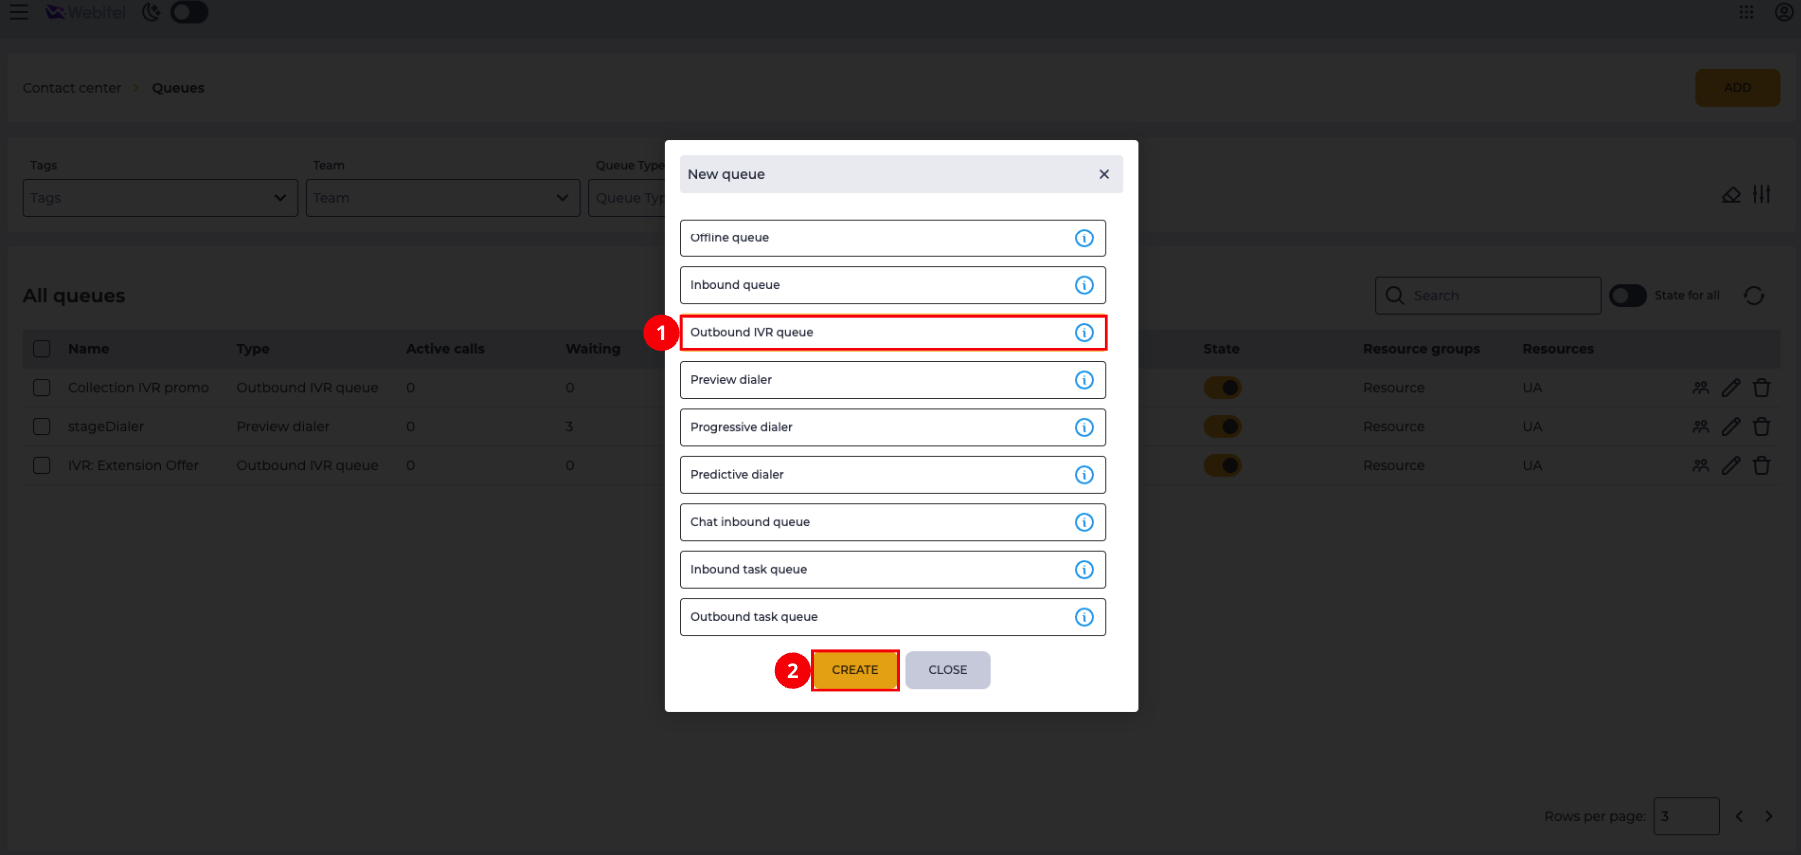
In the opened modal window (Fig. 41), select the type Outbound IVR queue (Fig. 41.(1)). Click the Create button (Fig. 41.(2)). The new queue configuration page will open.
-
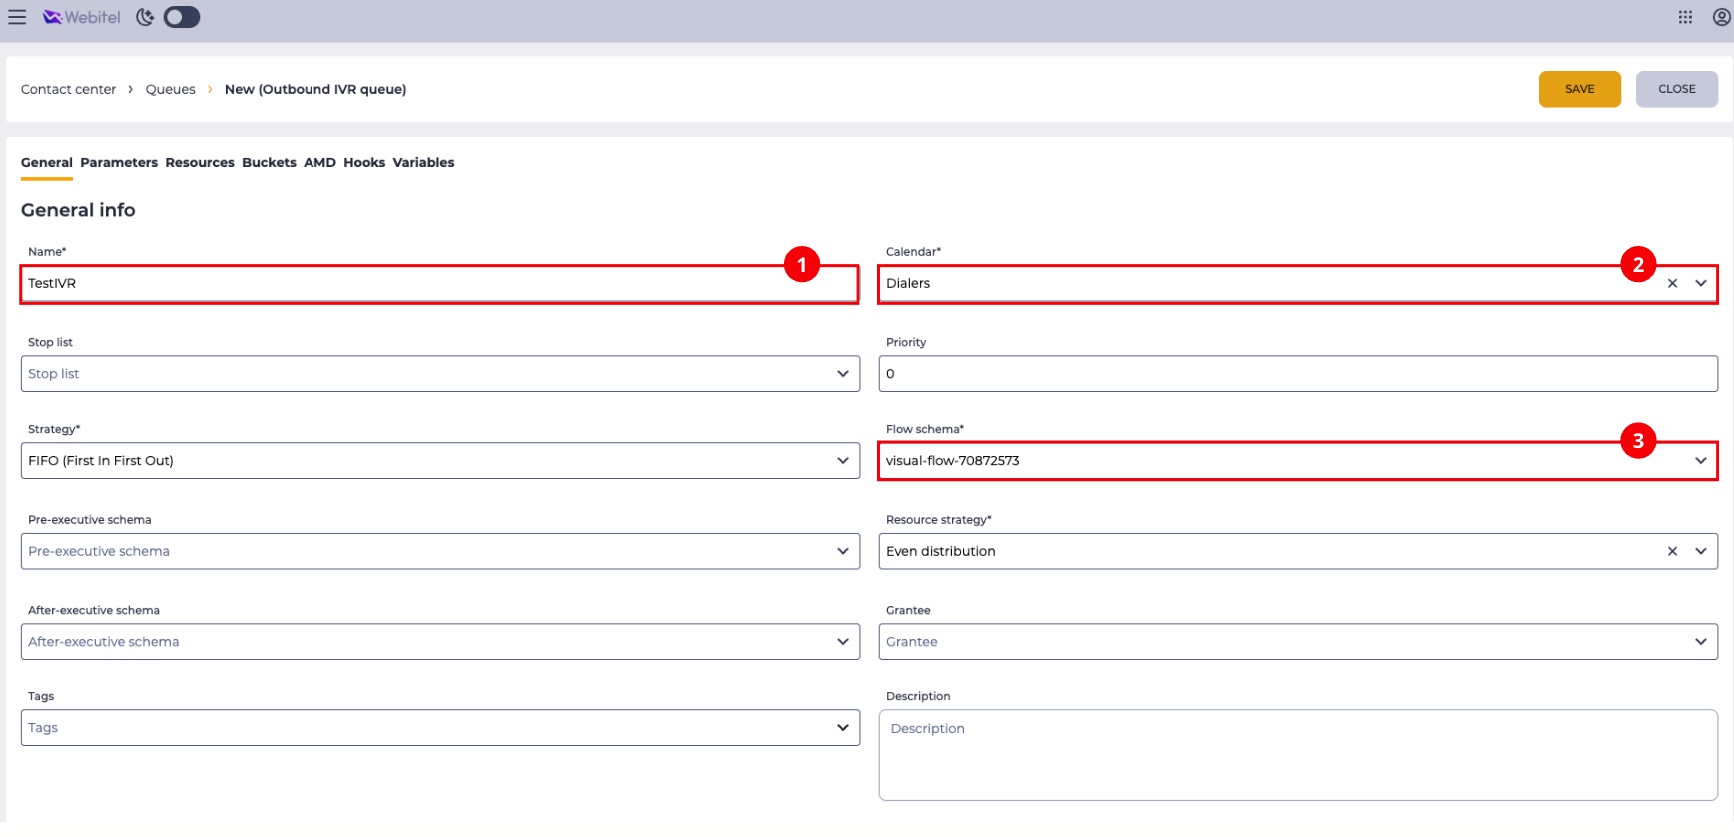
On the General tab (Fig. 42), fill in the main parameters:
-
Name (Fig. 42.(1)) — specify the dialer name.
-
Calendar (Fig. 42.(2)) — select a calendar. The calendar defines the dialer working hours (calling time windows).
-
Flow schema (Fig. 42.(3)) — select the previously created voice flow that will be played when the call is answered.
Other parameters can be left as default or configured according to the project requirements.
-
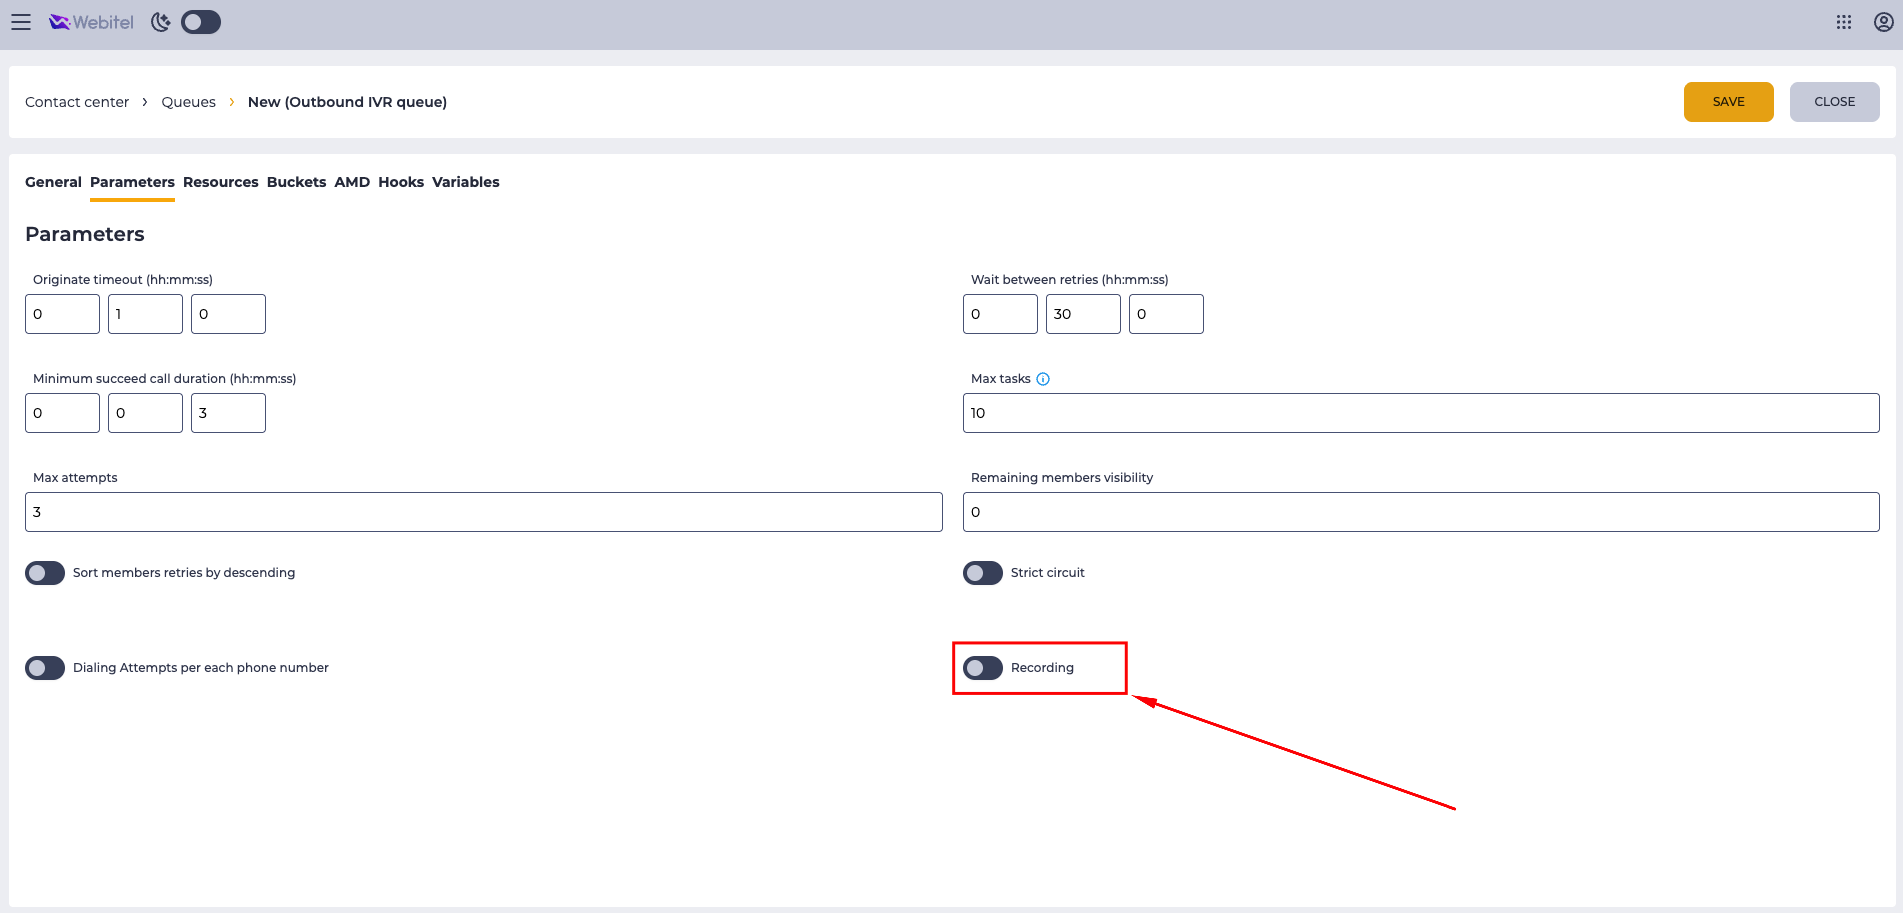
Go to the Parameters tab (Fig. 43). Configure the key parameters:
-
Wait between retries (hh:mm:ss) — interval between repeated call attempts.
-
Max attempts — number of call attempts per subscriber.
-
Max tasks — limit for the number of active tasks.
-
Enable the Recording parameter to activate call recording.
-
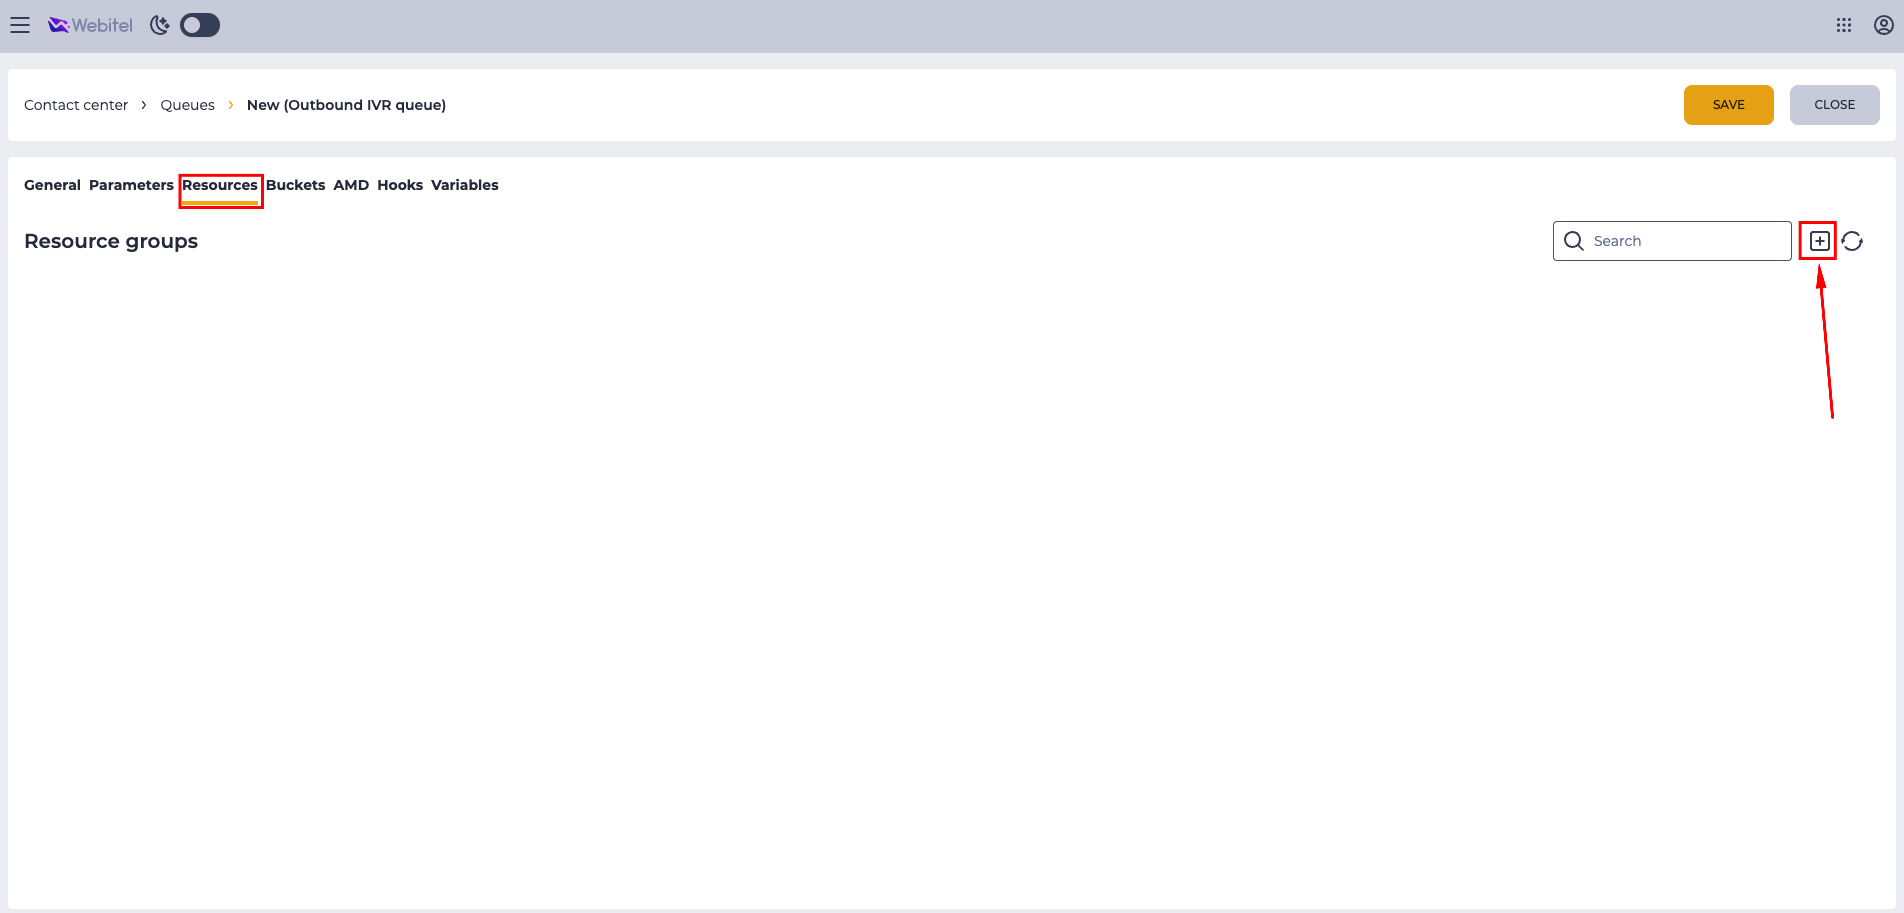
Go to the Resources tab. Click the Add button (Fig. 44).
-
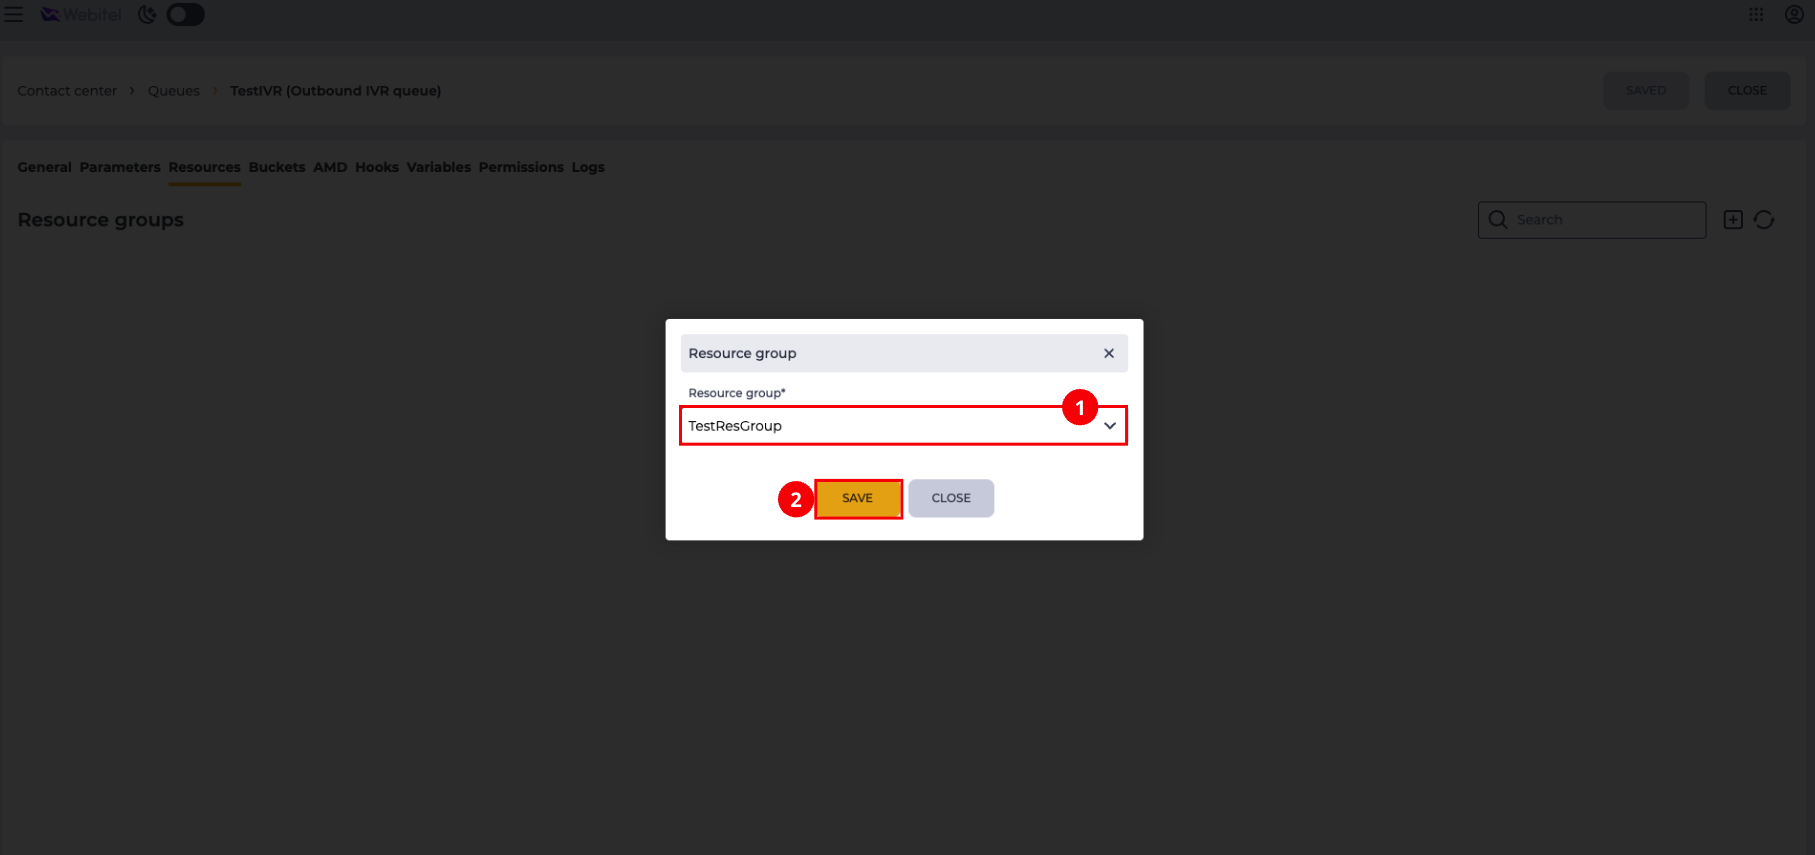
In the modal window (Fig. 45), select the previously created Resource group (Fig. 45.(1)). Click the Save button (Fig. 45.(2)).
-
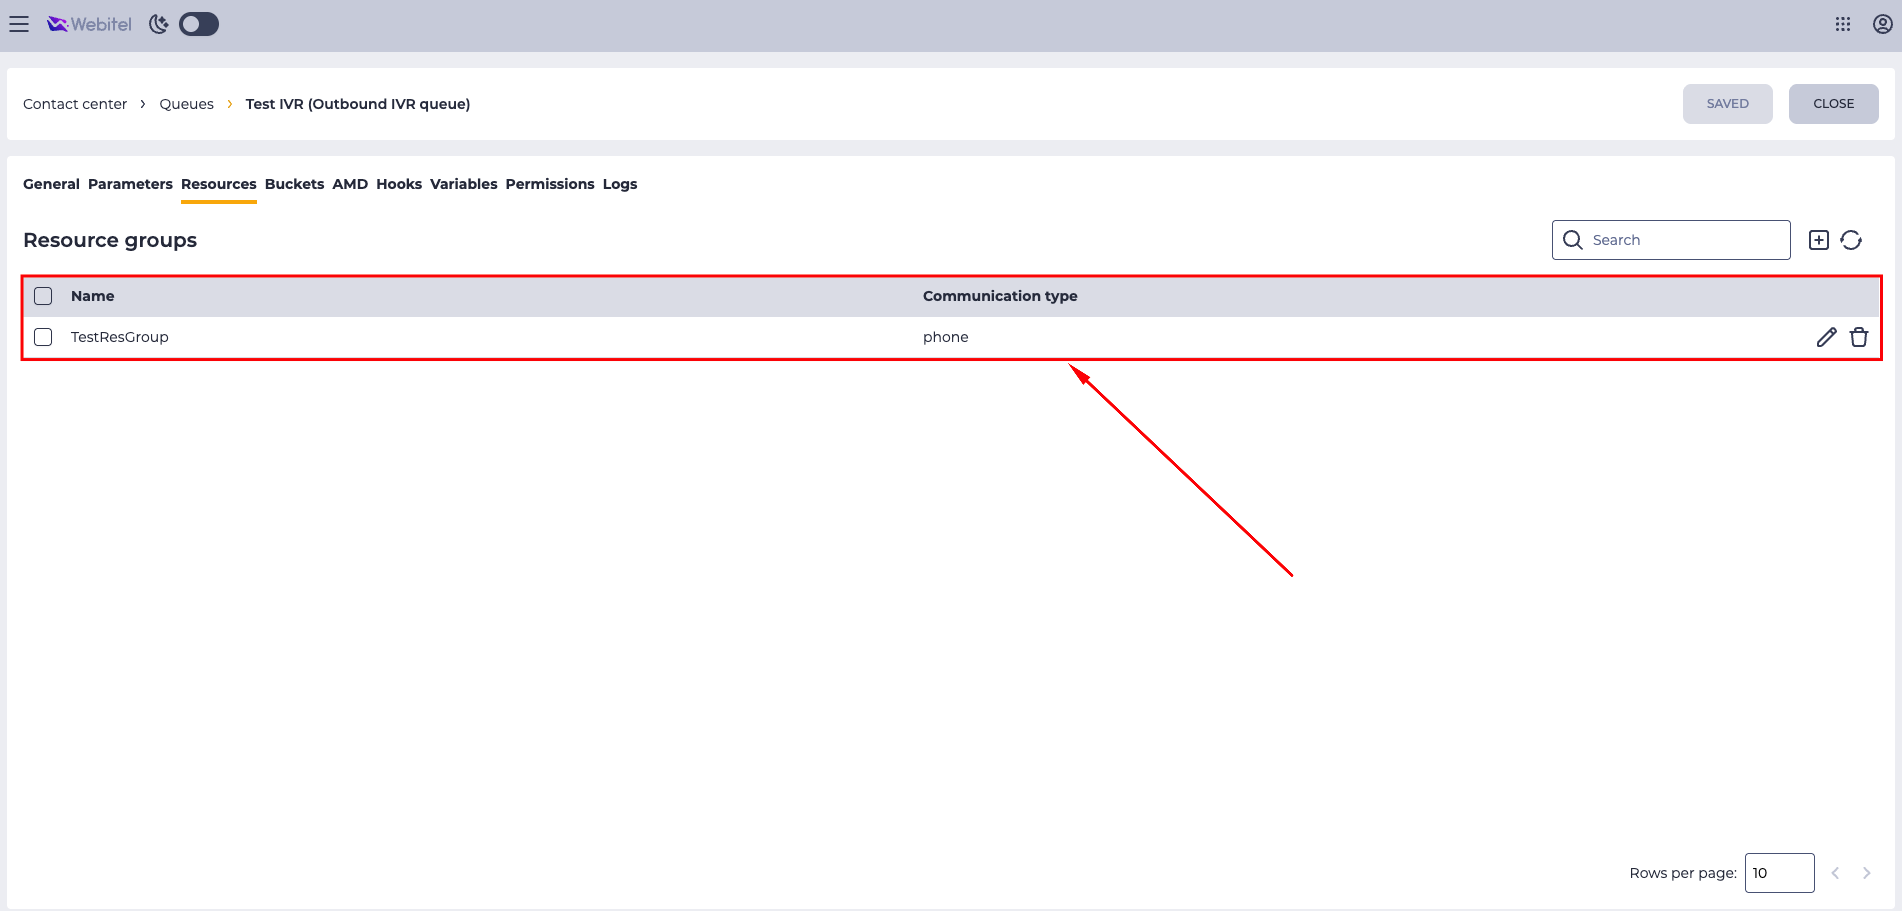
The added group will appear in the list (Fig. 46).
-
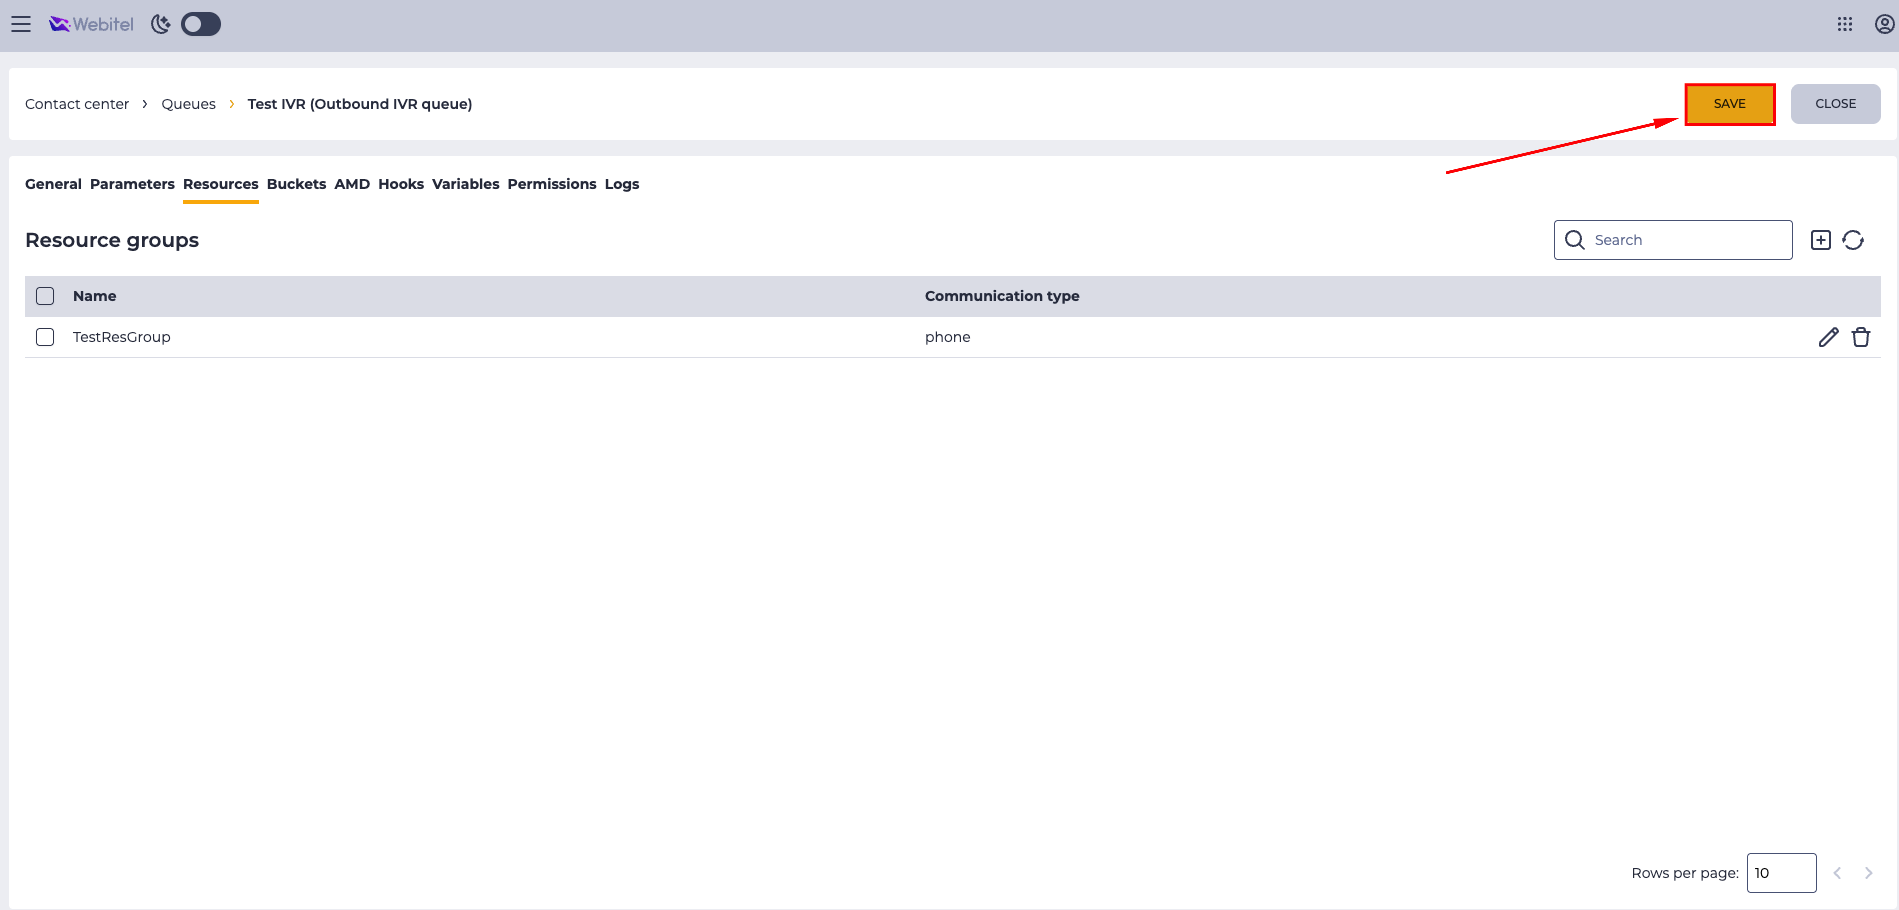
After configuring all parameters, click the Save button in the upper right corner (Fig. 47).
6.3. Enabling the IVR Queue
After creating the queue, it must be activated.
Return to the general list of queues. In the State column, enable the toggle next to the created IVR dialer (Fig. 48).
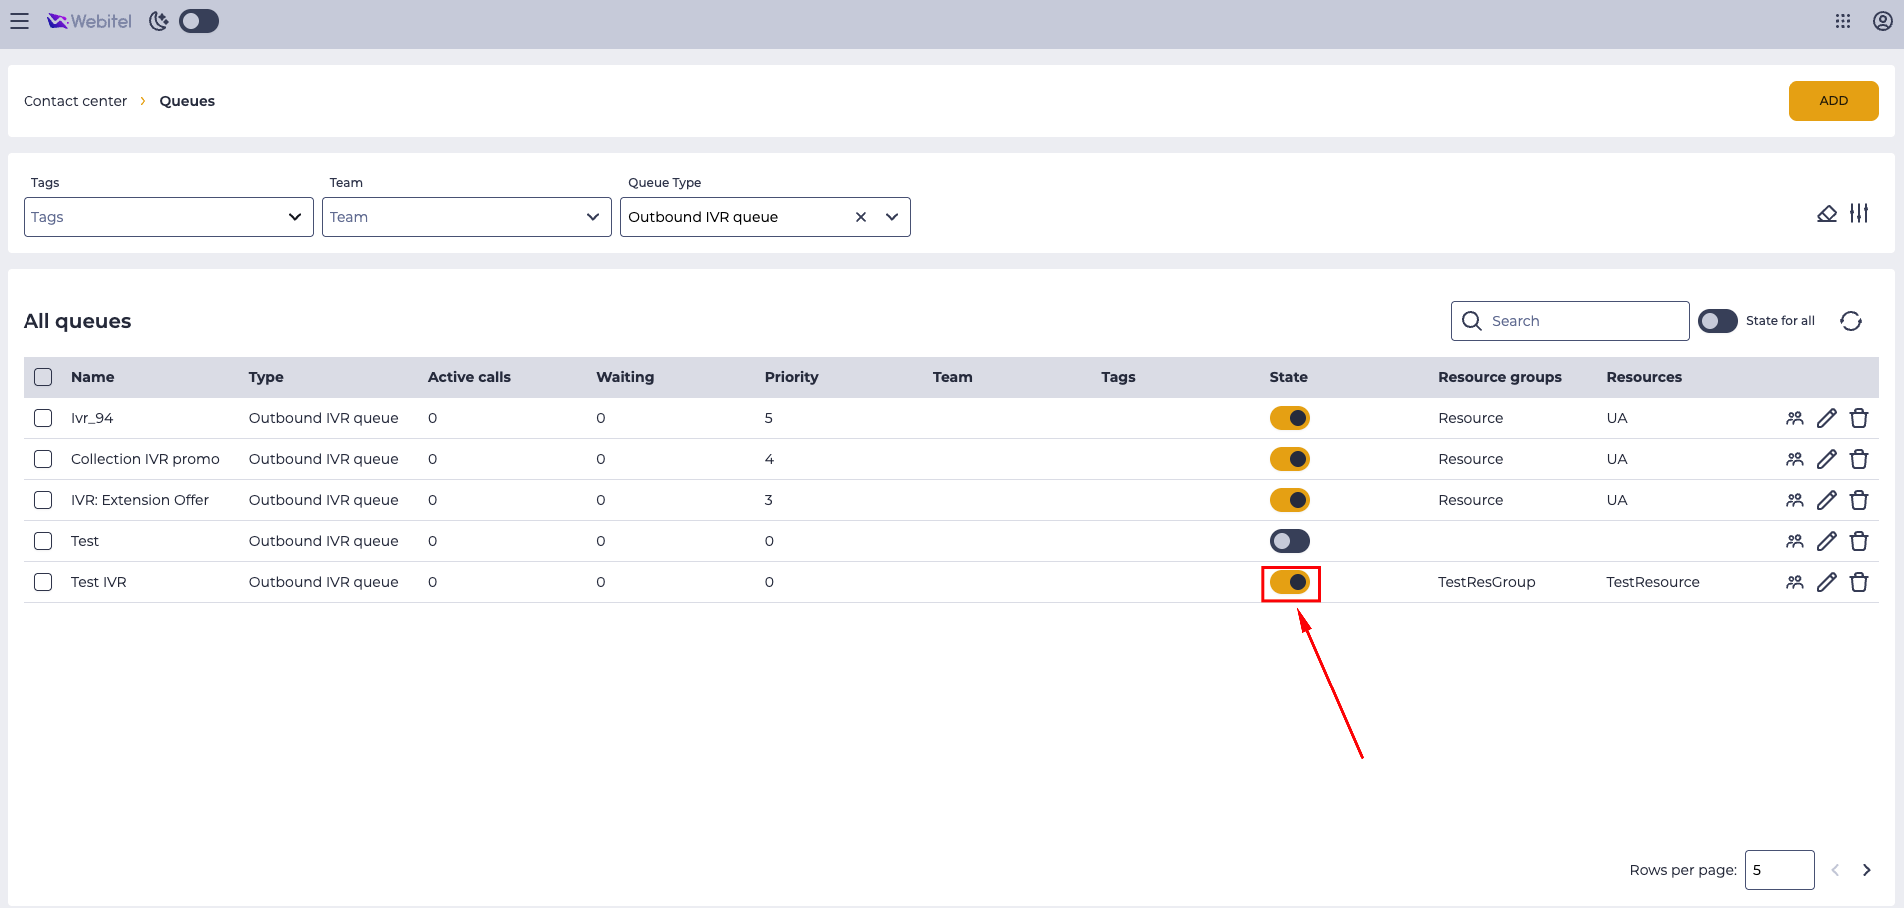
The queue must be in the active state –
7. Additional Capabilities: Flexible Retry Logic via After Flow
The standard IVR queue parameters allow you to set a single interval between repeated call attempts. This interval is applied equally to all calls.
If more flexible retry logic is required (for example, different intervals after each attempt or depending on the call result), an after flow is used. This flow is executed after the call is completed in the queue.
7.1. Example of After Flow Implementation
[
  {
    "if": {
      "expression": "${call_cause} == 'USER_BUSY' || ${call_cause} == 'CALL_REJECTED'",
      "then": [
        {
          "set": [
            {
              "status": "Busy"
            }
          ]
        },
        {
          "abandoned": {
            "export": [
              "status"
            ],
            "waitBetweenRetries": "3600"
          }
        }
      ]
    }
  },
  {
    "if": {
      "expression": "${cc_result} && +${call_voice_sec} <= 10",
      "then": [
        {
          "set": [
            {
              "status": "Not listened"
            }
          ]
        },
        {
          "abandoned": {
            "export": [
              "status"
            ]
          }
        }
      ]
    }
  }
]
7.2. Tasks Solved by the After Flow
The after flow allows you to:
-
analyze the call result;
-
take into account the call termination cause;
-
check the call duration;
-
set individual retry intervals;
-
determine whether another attempt is required.
This makes it possible to implement scenarios that cannot be configured using only the standard queue parameters.
7.3. Used Variables
The following variables are typically used in the after flow:
-
call_cause — call termination reason (e.g.,
USER_BUSY,CALL_REJECTED— subscriber is busy or the call was rejected); -
call_voice_sec — call duration in seconds;
-
set — creation of a variable, for example, setting the status variable (e.g., Busy, Not listened);
-
abandoned — finalizes call processing and determines whether a retry is required;
-
export — outputs the status variable to the call history;
-
waitBetweenRetries — sets a custom retry interval (in seconds).
7.4. Logic Example
The following logic can be implemented in the after flow:
-
if
call_cause = USER_BUSYorCALL_REJECTED, the status Busy is set and a retry is scheduled in 3600 seconds; -
if call_voice_sec ≤ 10 seconds, the status Not listened is set;
-
the final status is saved in the call history.
The after flow extends the standard queue capabilities and enables more flexible control over retry attempts.