
1. Description
Roles and their permissions related to this case are specified here.
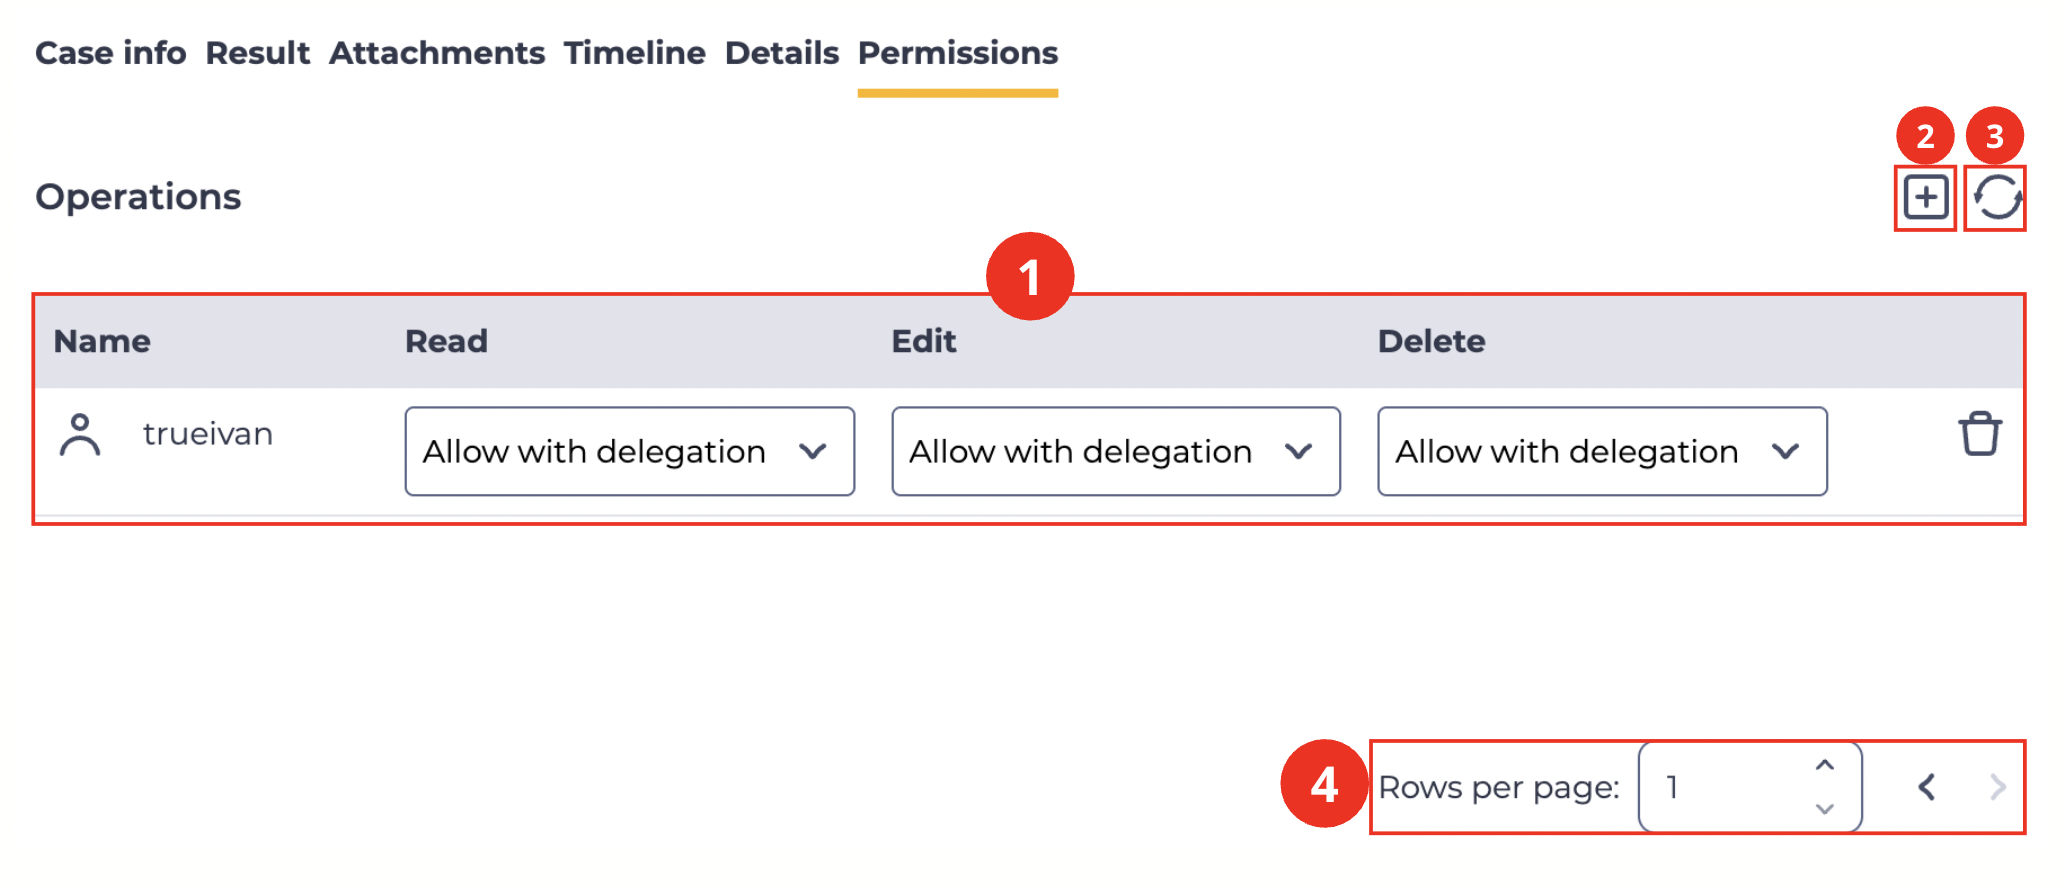
In edit mode, the tab consists of the following parts:
-
Records registry (Fig. 1.(1));
-
Creation tool (Fig. 1.(2));
-
Records registry refresh tool (Fig. 1.(3));
-
Pagination (Fig. 1.(4)).
When creating a case, the following users/roles are added to the records registry:
-
If there are no records on the detail page “Managed by records” in the Cases section: only the user who created the case is added.
-
If there are records on the detail page “Managed by records” in the Cases section:
-
the user who created the case;
-
Grantees specified on the detail page “Records management” in the Cases section whose Grantor is the case creator. All roles of the user who created the case, as well as the user themselves, are taken into account.
-
The specified roles and their permissions are used when “Managed by records” is enabled (the switch is turned on) for the Cases section on the “Objects” page.
The “Permissions” tab displays only those roles and users that the current user has permission to view. If the user does not have permission to view other users, then on the “Permissions” detail page they will see only themselves and their roles — provided that they are configured.
1.1. Records registry
The registry consists of the following columns:
-
Name — the role name;
-
Read — a drop-down list with read permissions;
-
Edit — a drop-down list with edit permissions;
-
Delete — a drop-down list with delete permissions.
Access options:
-
Allow — the action is permitted;
-
Manage — allowed with delegation (the user has permission and can grant it to others);
-
Forbidden — the action is not permitted.
1.2. Creation tool
To add a role, use the Add button —
To quickly find the required user or role, you can use the “Role” field as a search field: enter the user name or role name — only the items matching the entered text will appear in the list.
You can distinguish a user from a role by the icons:
-
-
Clicking a specific role or user selects it. The “Add” button adds the selected item to the records registry. The “Close” button closes the modal window without adding anything.
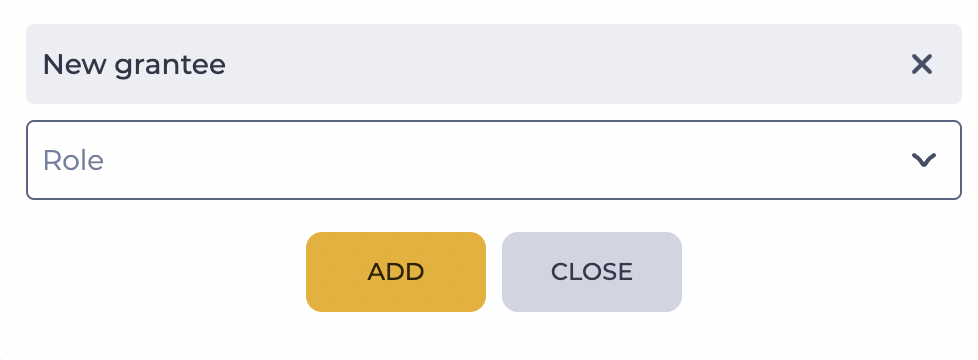
A newly added role or user has the following default parameters
-
Read — allowed;
-
Edit — forbidden;
-
Delete — forbidden.
These parameters can be changed by selecting the required value from the drop-down list in the corresponding column.
The user who created this case has the “Manage” access level for all actions.
1.3. Records registry refresh tool
The records registry table can be refreshed by clicking the Refresh button — 
1.4. Pagination
Consists of the “Records per page” field, where the number of records (from 1 to 1000) displayed on a single page can be specified, as well as the Next 
