
1. Description
Designed for viewing and editing a case.
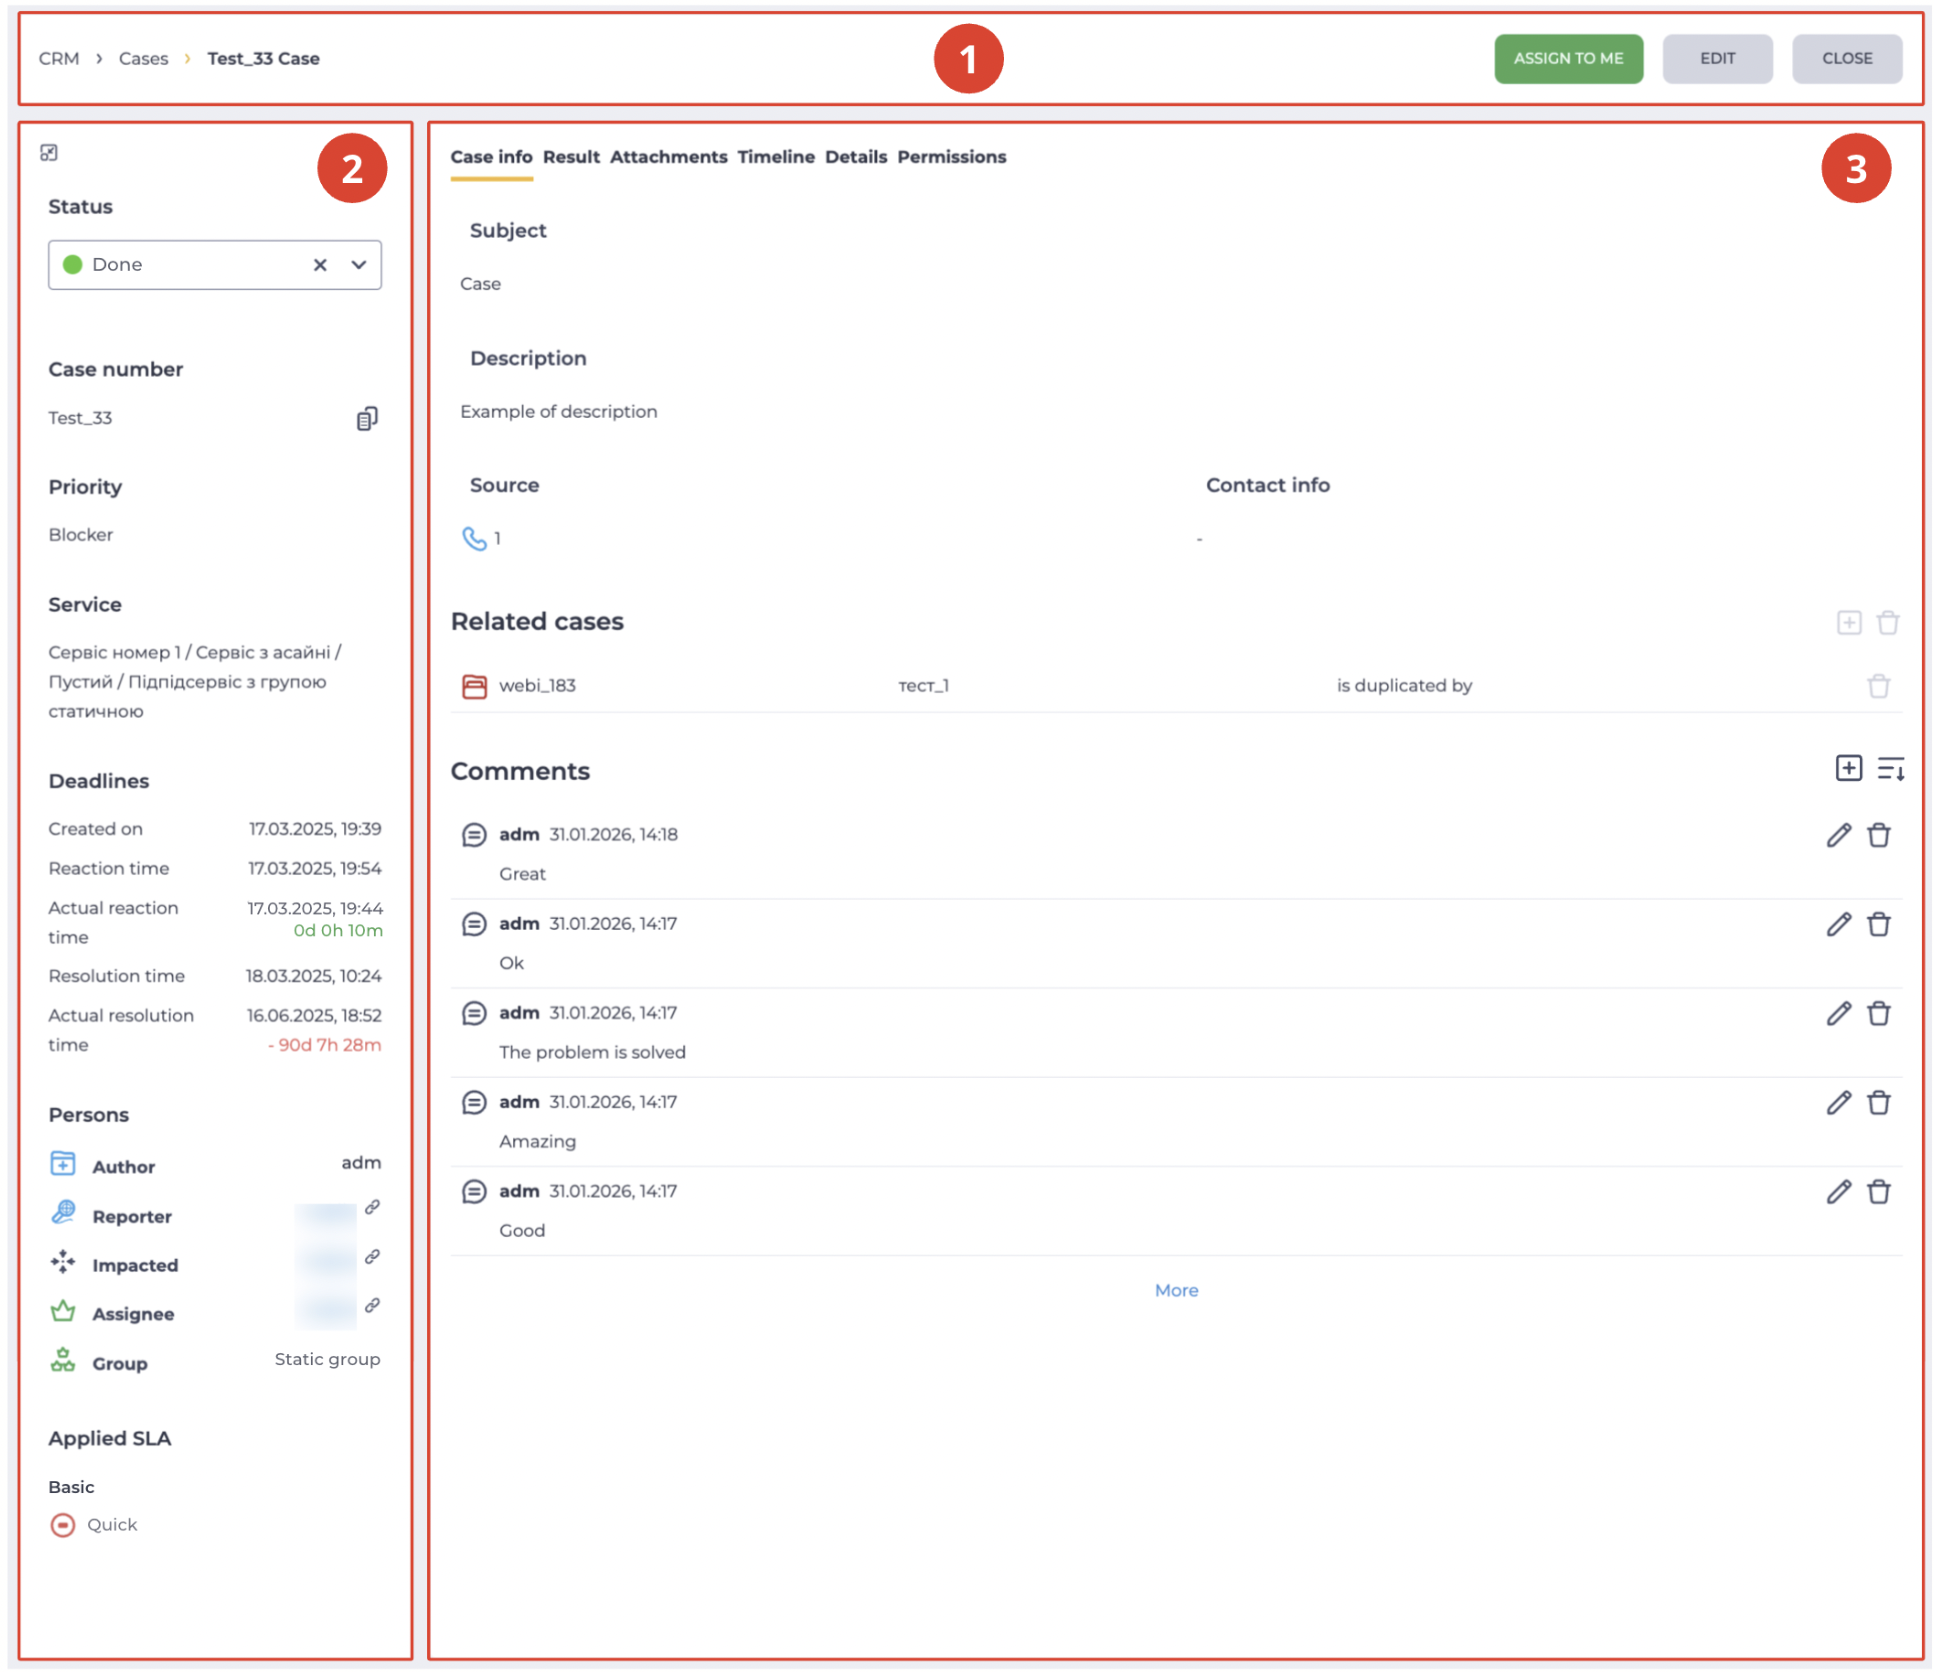
It consists of the following elements:
-
Top bar (Fig. 1.(1));
-
Side panel (Fig. 1.(2));
-
Tabs panel (Fig. 1.(3)).
1.1. Top bar
The top bar includes the page path (breadcrumb) and the following buttons:
-
Assign to me;
-
Edit;
-
Close.
1.1.1. Assign to me
Allows the user to take the case into work by assigning it to themselves.
1.1.2. Edit
Allows editing the case. Case editing includes changing certain fields.
1.1.3. Close
The Close button closes the current page and opens the Cases page.
1.2. Side panel
This panel displays general information about the case.
It consists of the following elements:
-
Status;
-
Priority;
-
Service;
-
Deadlines;
-
Persons;
-
Applied SLA.
1.2.1. Status
This field is available for editing only after the case has been created.
The status is selected from the list of statuses in the Statuses directory, which is linked to the service catalog used to classify the case. The initial status is set automatically when the case is created.
When a case is moved to a final status, the Case result modal window opens. It consists of the following fields:
-
Reason — the closure reason is selected from the Closure reasons directory;
-
Result — a free-text field where the result description is entered.
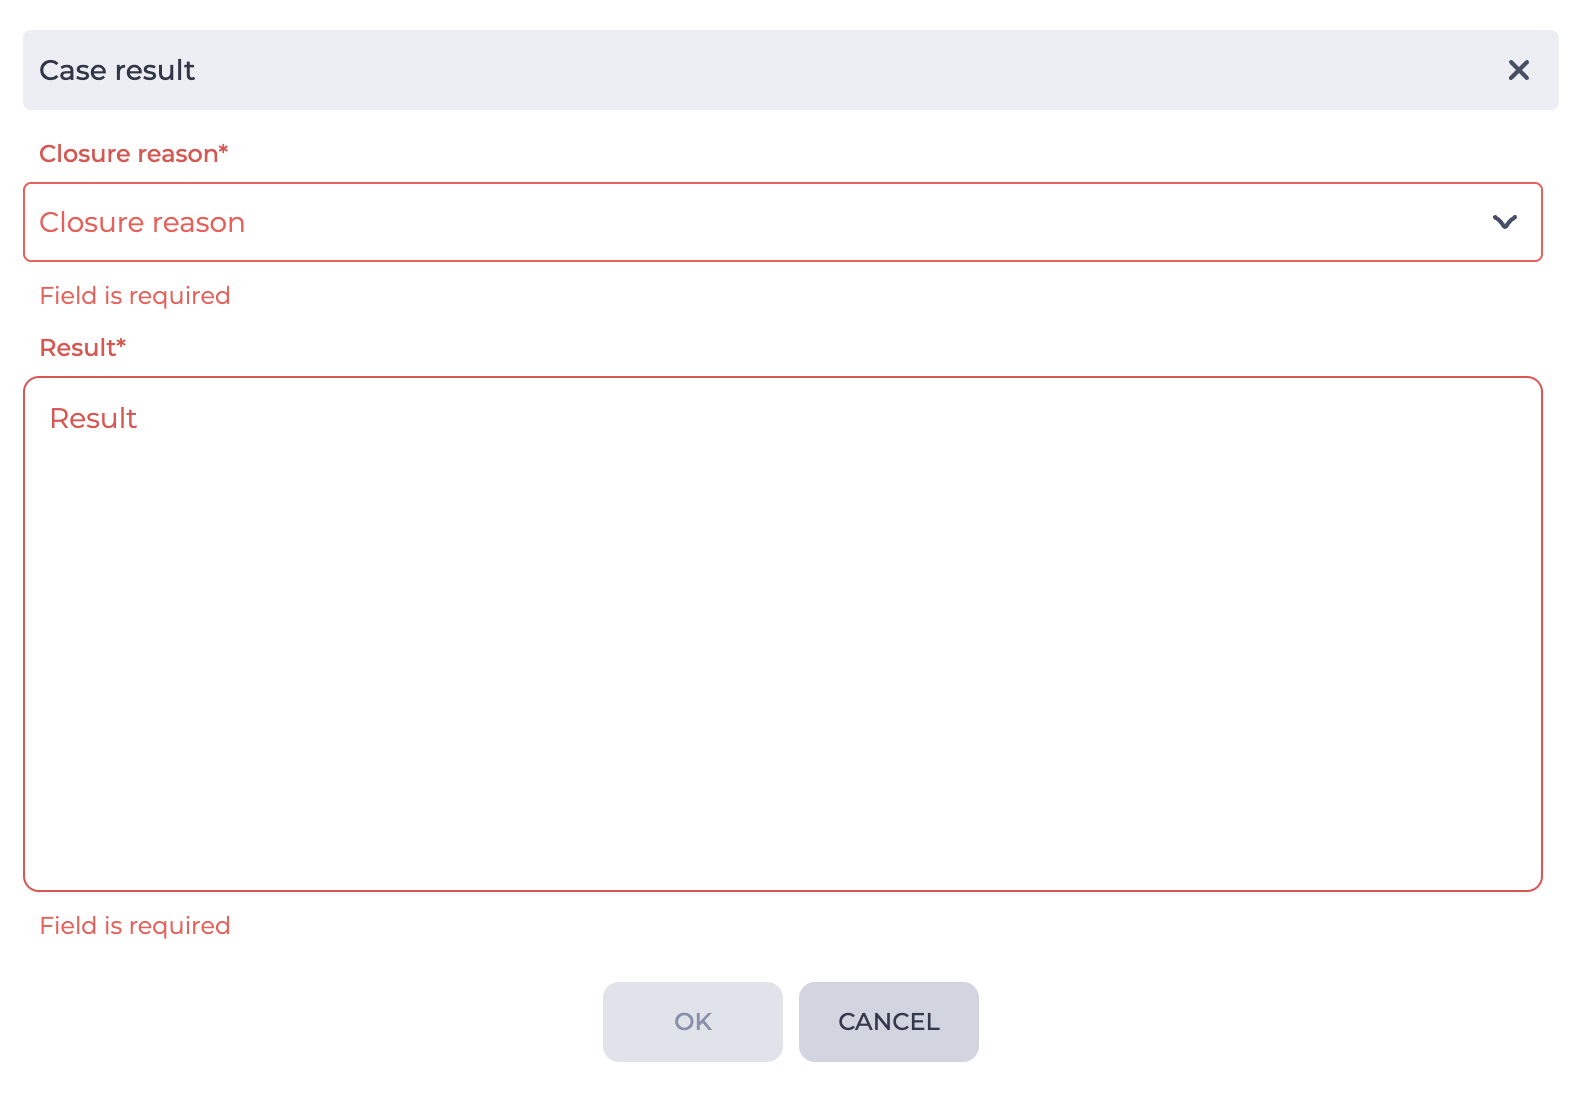
If the Reason and Result fields were already filled in earlier and the case is moved to a final status again, these fields are automatically populated in the modal window with the existing values. These values can be edited.
1.2.1.1. Case status behavior
Depending on the page mode (view or edit), changing the case status follows different logic.
1.2.1.1.1. View mode
In view mode, the status changes immediately after selection.
If the Final status is selected, the Case result modal window opens (Fig. 2).
-
Clicking the OK button saves the selected closure reason to the Result tab.
-
Clicking the Cancel button does not change the status — the case remains in its previous state.
If the status is changed from Final to any other status, the status is updated, and the Reason and Result fields in the Result tab are cleared.
1.2.1.1.2. Edit mode
In edit mode, the case status is changed only after clicking the OK button in the edit form.
If the case has a status other than Final, the Reason and Result fields on the Result tab are inactive.
If the Final status is selected, the Case result modal window opens (Fig. 2):
-
Clicking the OK button records the selected closure reason on the Result tab, but the changes take effect only after saving the case itself.
-
Clicking the Cancel button leaves the case unchanged — the status and fields are not updated.
If the case already has the Final status, the Reason and Result fields are active and required.
If the status is changed from Final to any other status, the Reason and Result fields are automatically cleared and become inactive.
1.2.2. Priority
The case priority.
Set manually by the user. The value is taken from the Priorities page or assigned automatically.
1.2.3. Service
Displays the full path to the service from the Service catalogs directory to which the case is assigned. The path includes all levels — from the main catalog to the selected service.
The field is filled in manually when creating or editing a case, or automatically, depending on the configuration.
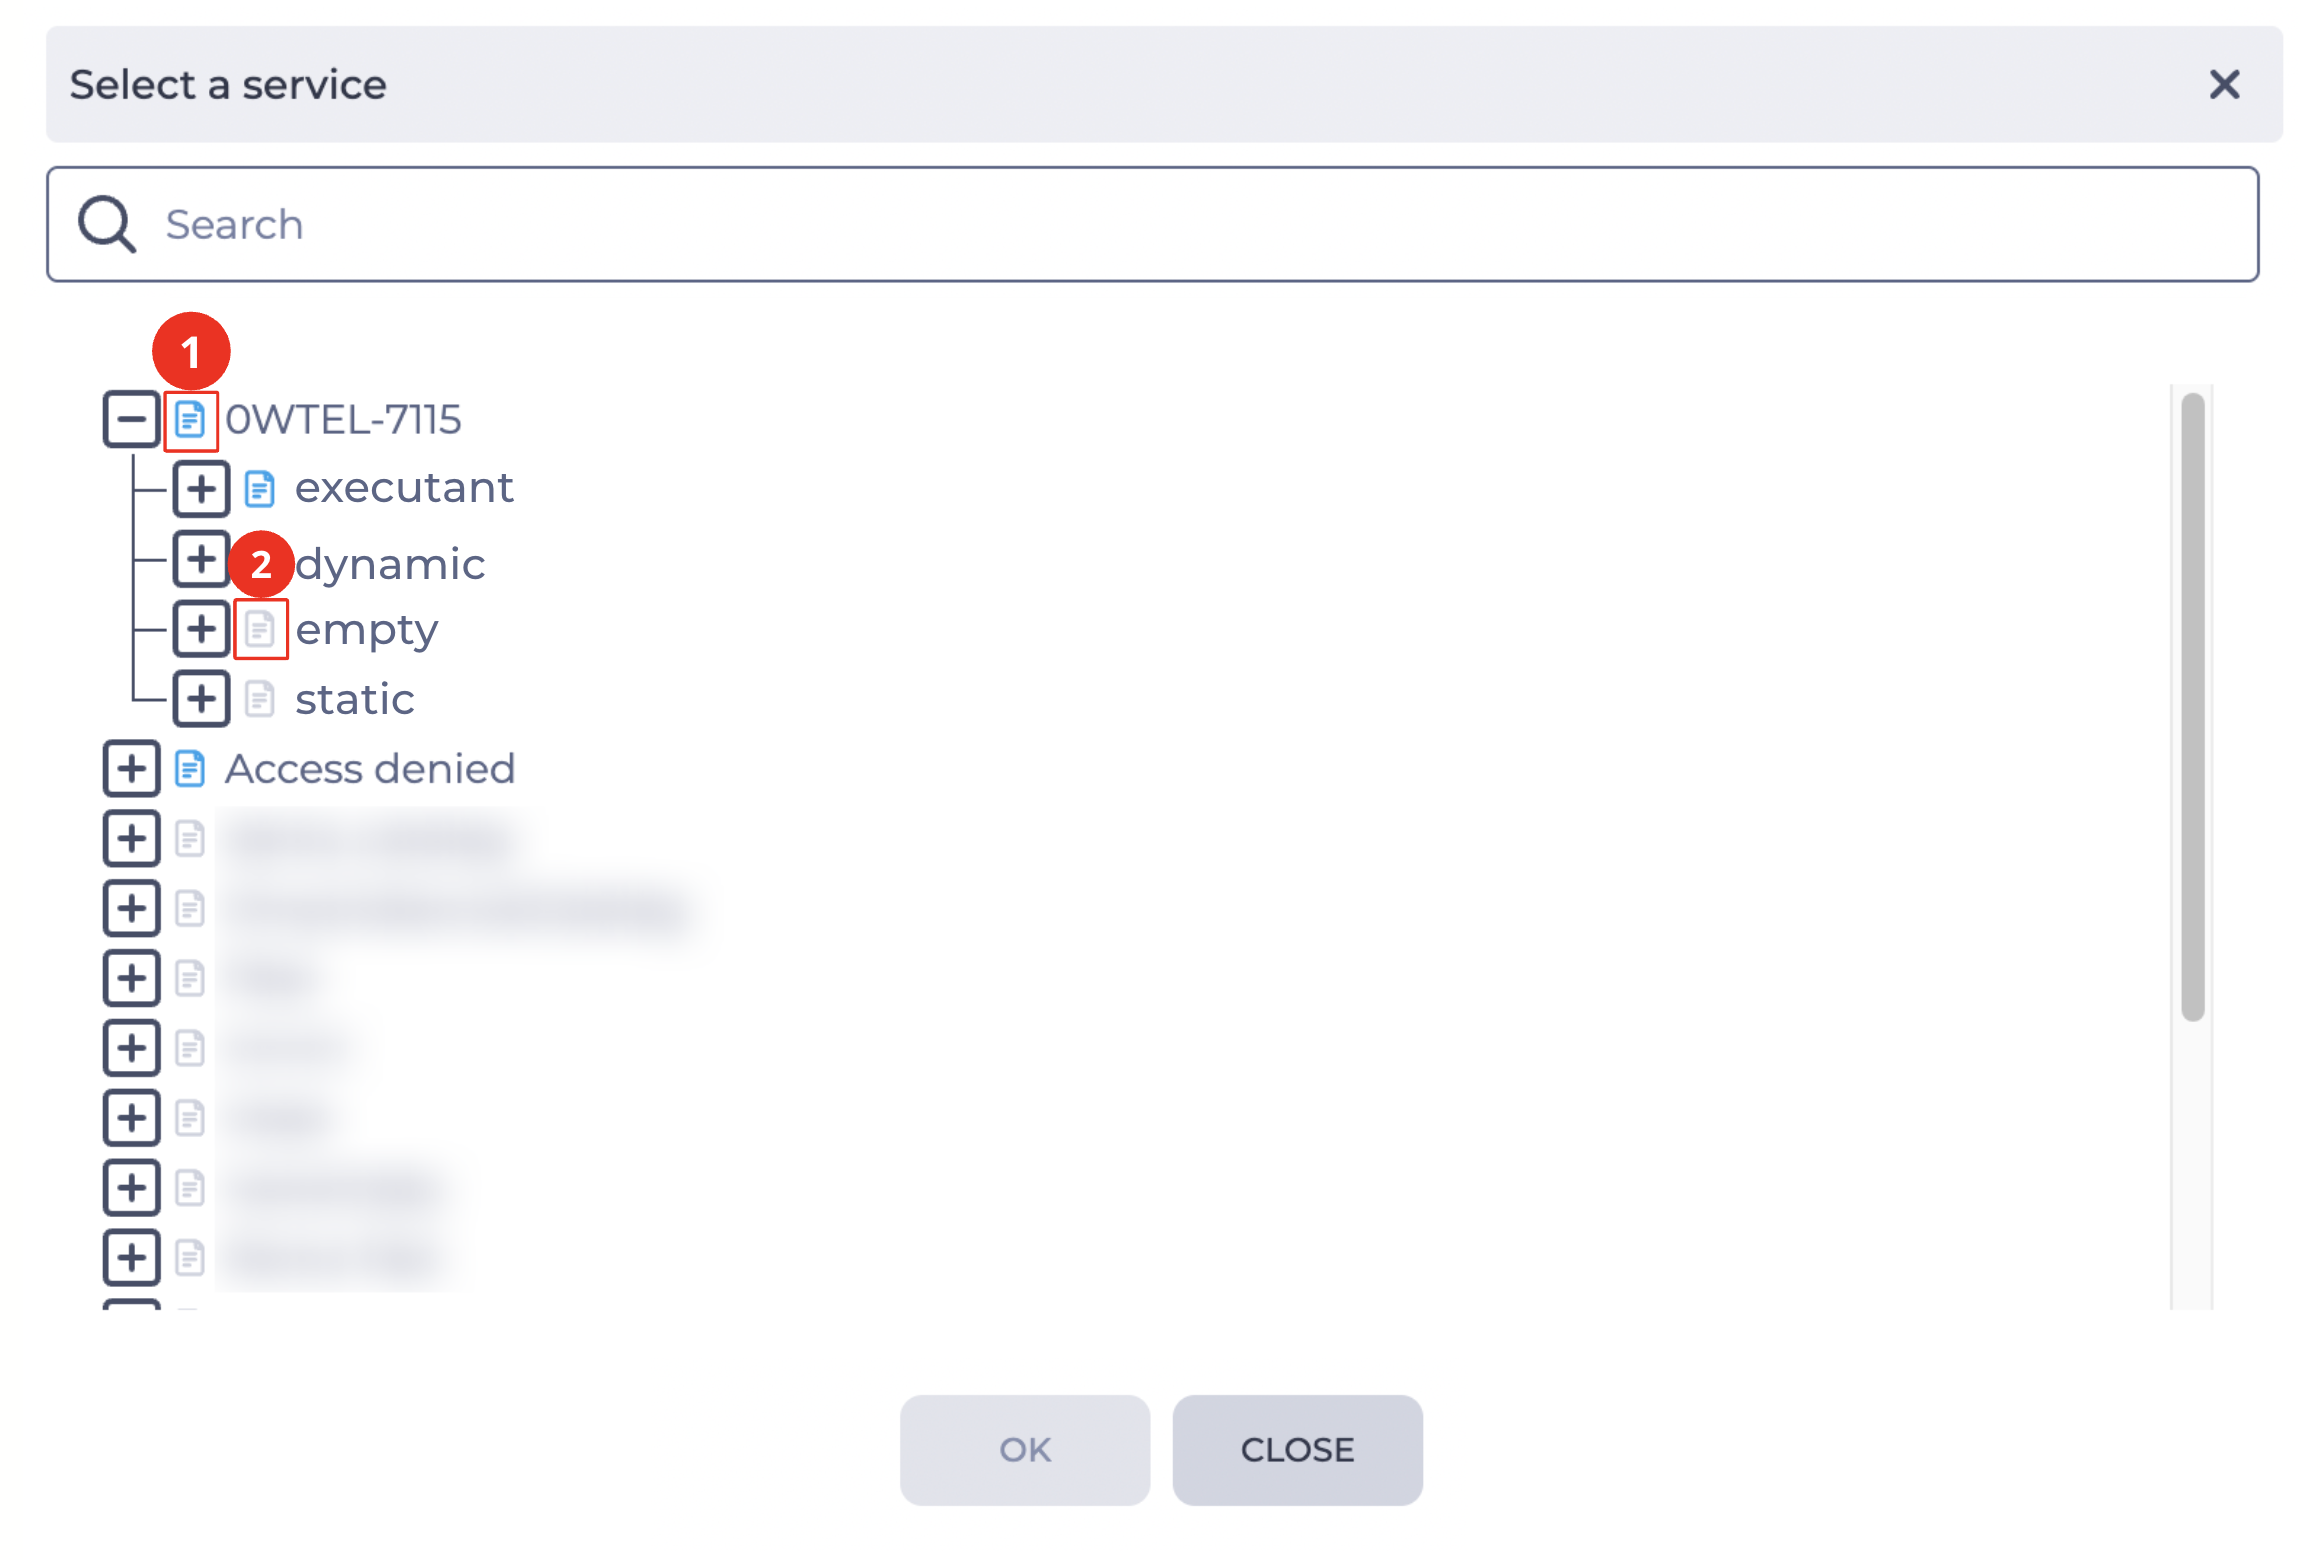
Next to each service name in the tree, a description status icon is displayed:
-
description filled icon

-
description empty icon

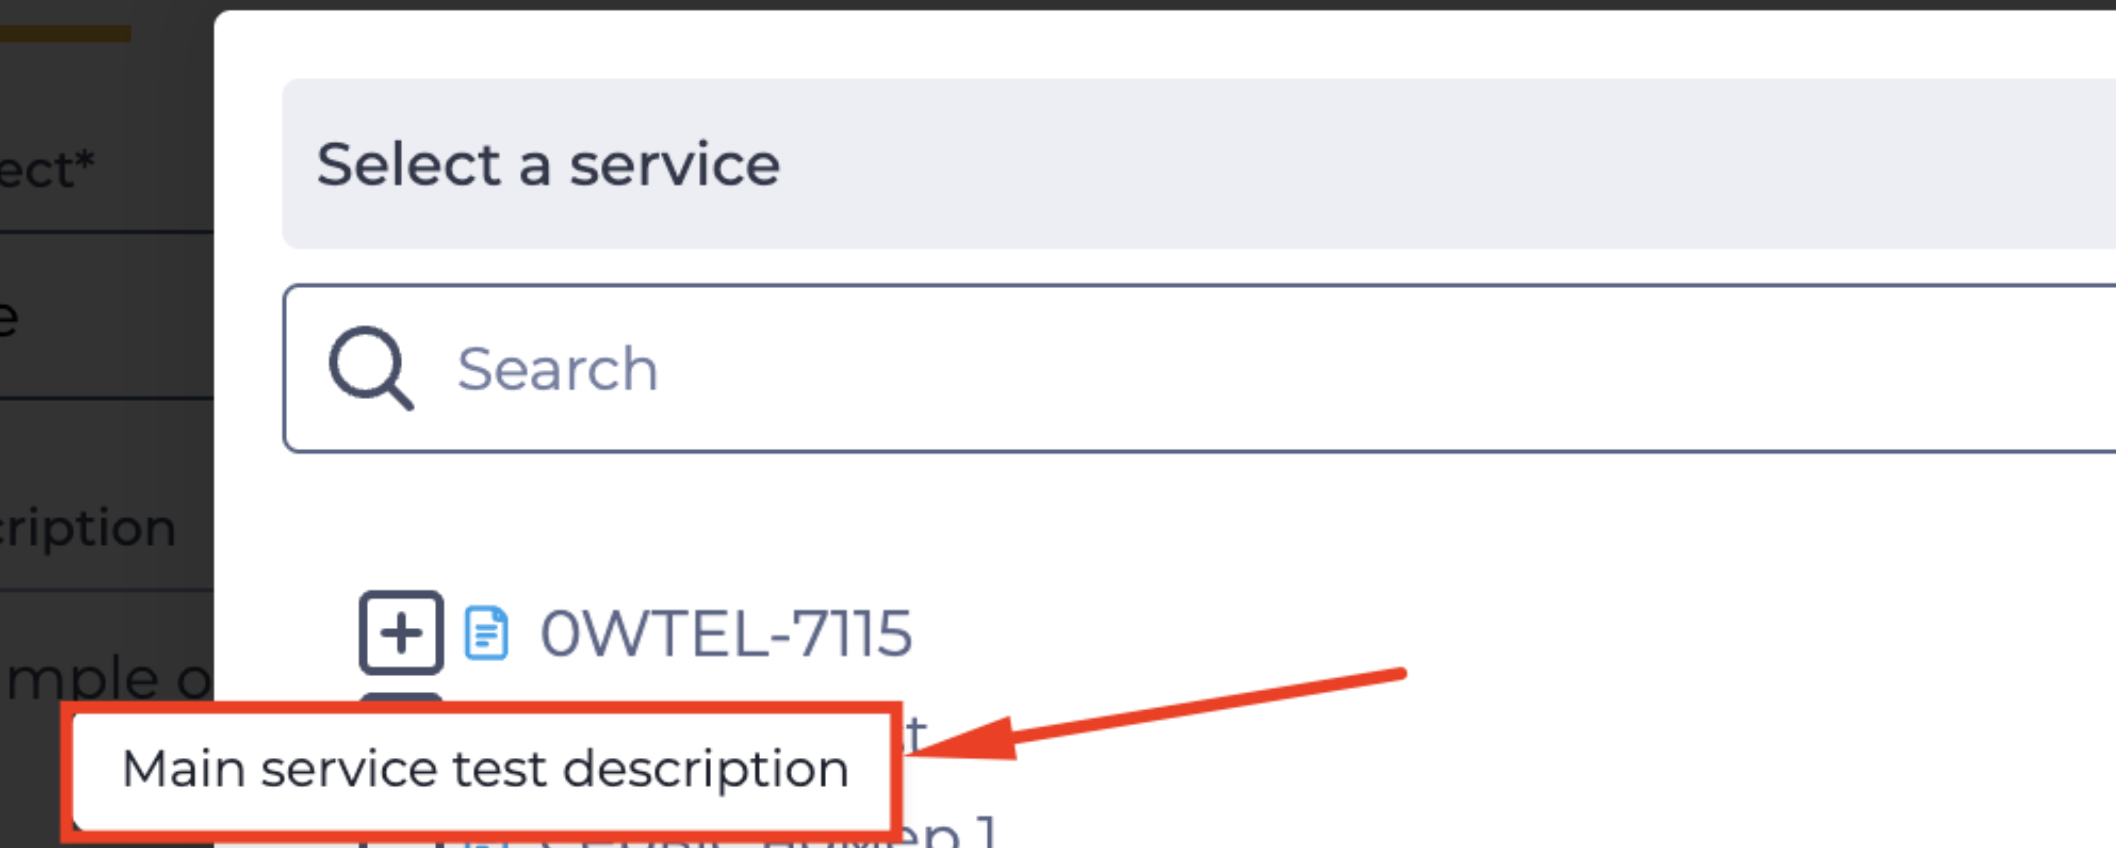
When hovering over the description filled icon
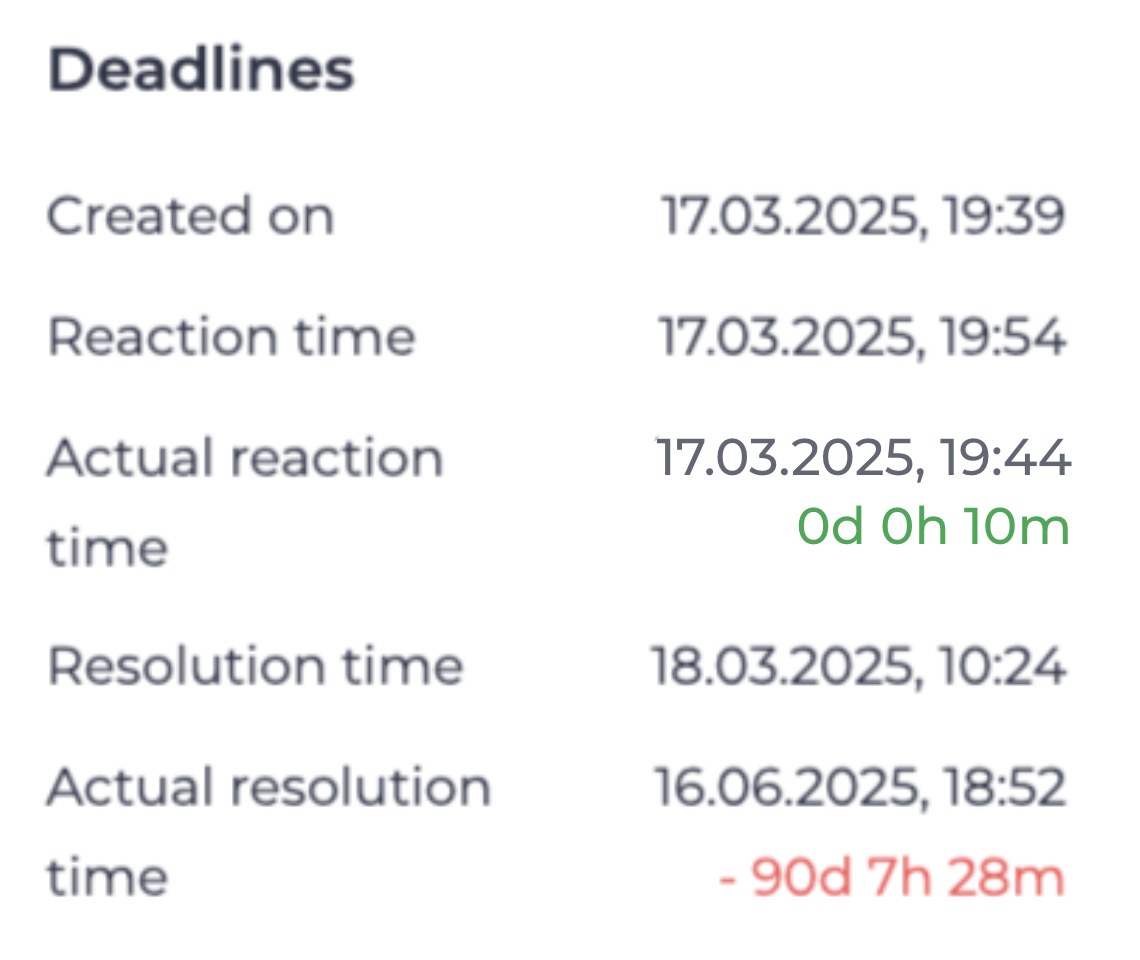
1.2.4. Deadlines
This section displays the deadlines related to the case, including:
-
Created on;
-
Reaction time;
-
Actual reaction time;
-
Resolution time;
-
Actual resolution time.
If the actual reaction or resolution time differs from the planned one, the difference is shown below the corresponding value (Fig. 5):
-
green — if the case was completed faster than planned;
-
red with a “–” sign — if the actual time exceeds the planned time (the case is overdue).
1.2.5. Persons
This section displays the users related to the case, including:
-
Author — the Webitel user who created the case, or a system user if the case was created automatically.
-
Initiator — the requesting client. A Webitel contact linked to the case.
-
Affects — a Webitel contact that may be affected by this case. Can be used to associate a contact that needs to be informed.
-
Assignee — the contact currently assigned to the case. Filled in automatically from the Assignee field on the service page.
-
Group — filled in automatically from the Contact groups field on the service page.
1.2.6. Applied SLA
The name of the SLA applied to this case.
Only one SLA can be applied to a single case.
1.3. Tabs panel
The tabs panel displays the tabs containing data related to the case.
The following tabs are available: