
1. Description
All Agents are displayed for which the User who entered this page (or someone on behalf of this User) is a Supervisor or Team Admin.
The Agent on this page can only see data about himself.
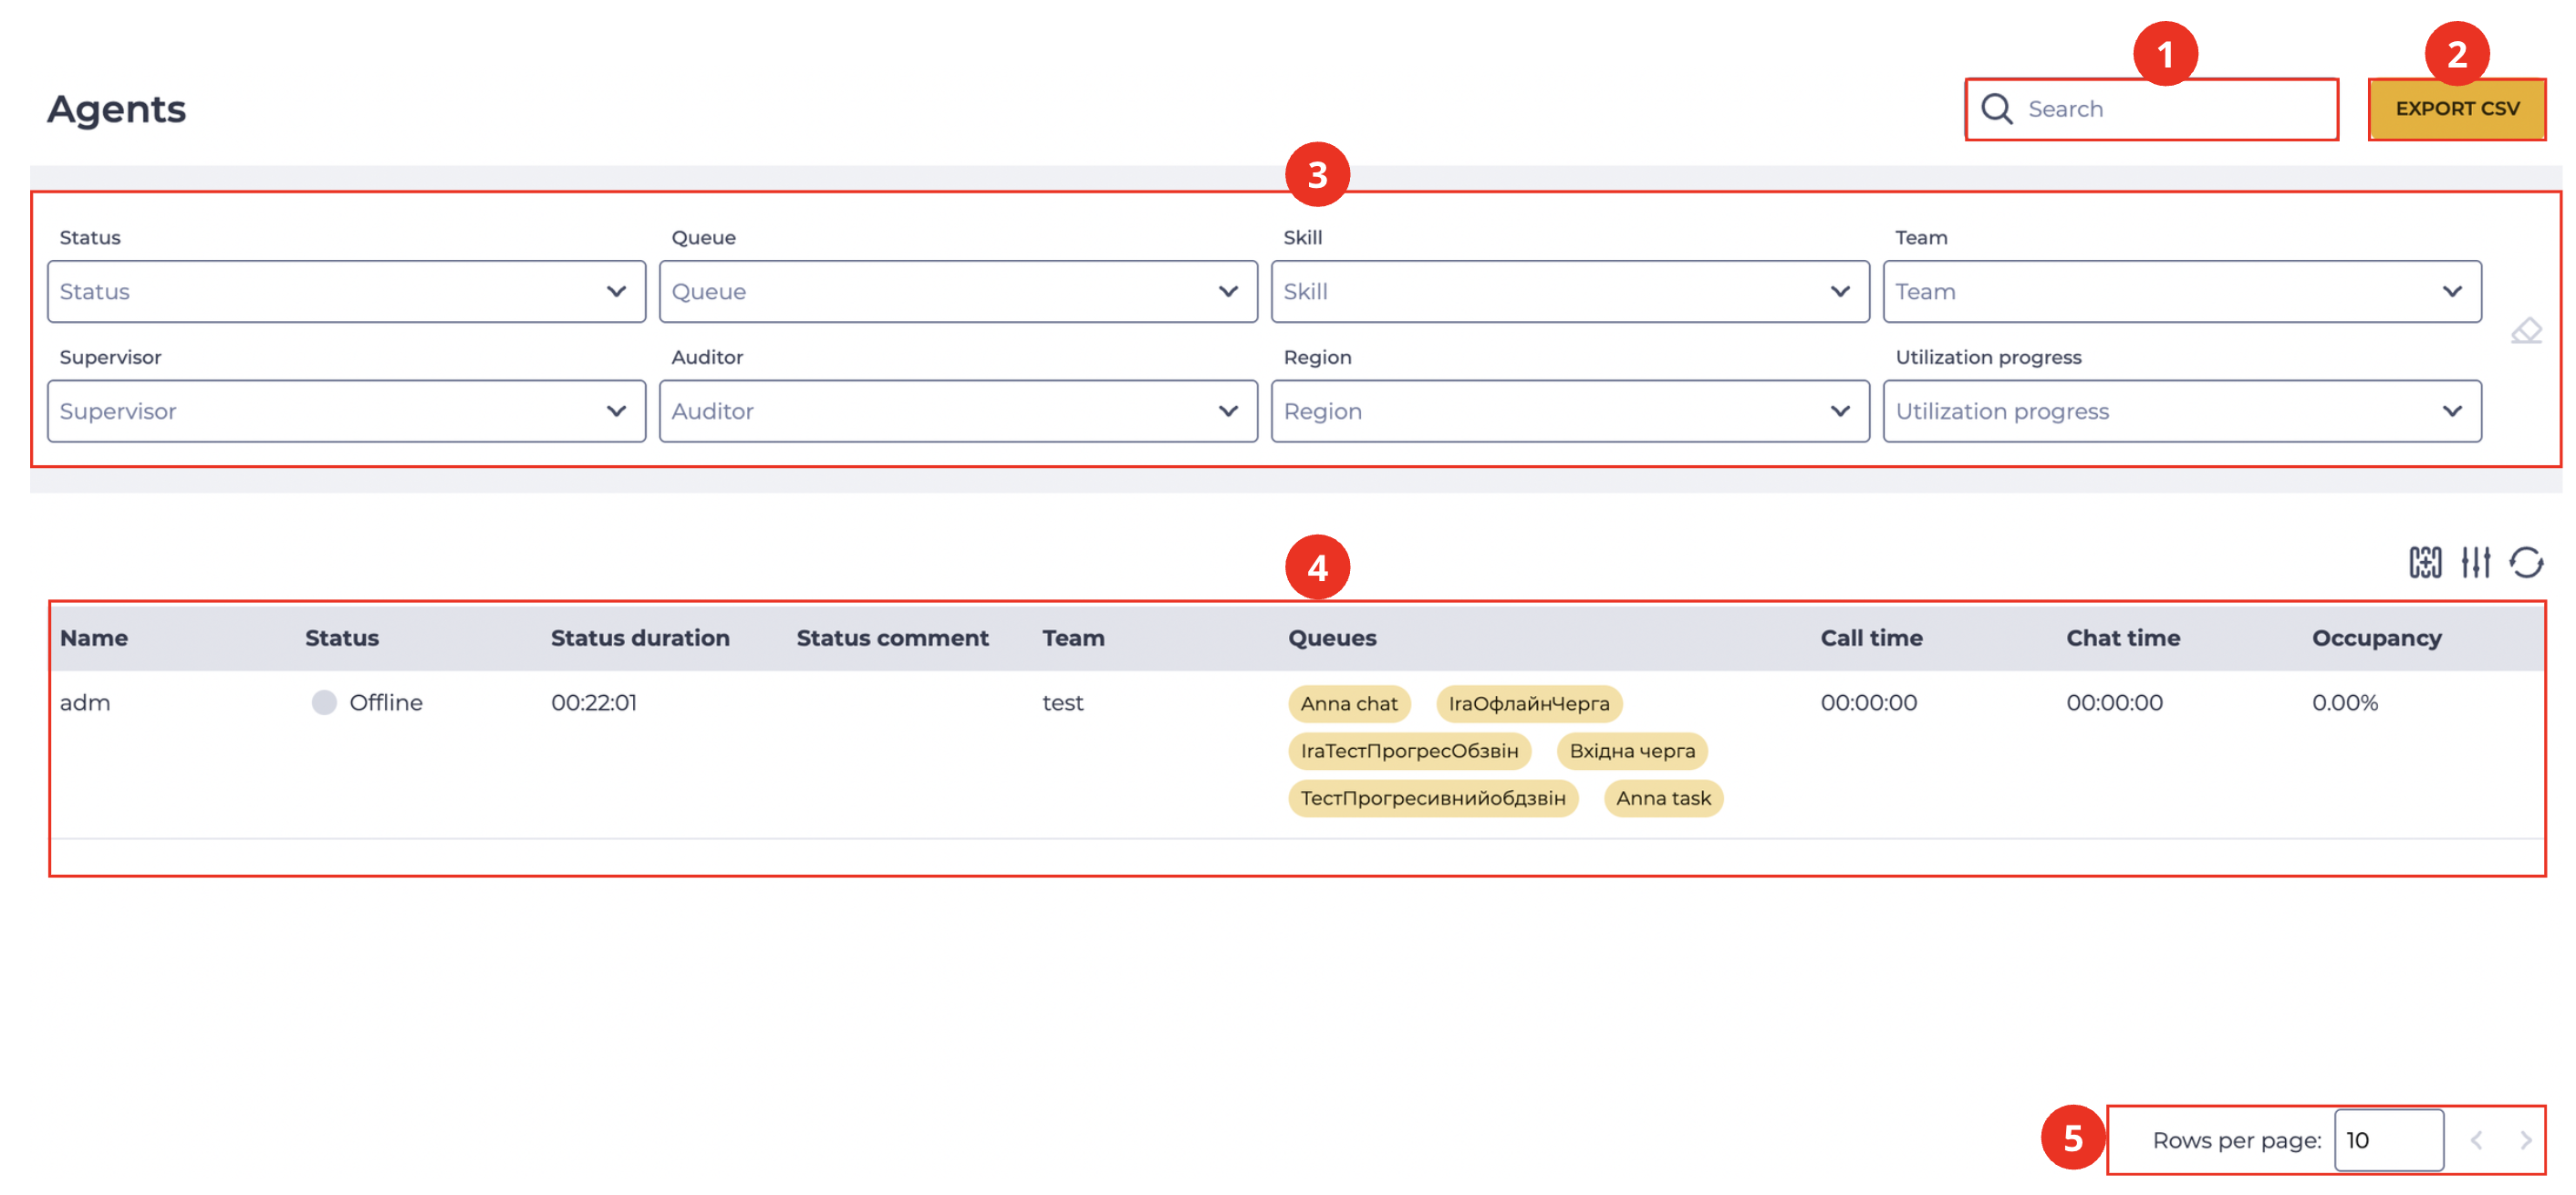
It consists of the following elements:
-
Search field (Fig. 1.(1));
-
Export CSV (Fig. 1.(2));
-
Filter block (Fig. 1.(3));
-
Registry (Fig. 1.(4));
-
Pagination (Fig. 1.(5)).
1.1. Search field
The search is performed on the Name column.
Consists of an input field and a close button ( 
You can create a search query in regex format, and the system will display the results that match it.
1.2. Export CSV
It is designed to export data from the registry. When you click on the Export CSV button, the agents.csv file is downloaded, which contains information about Agents.
1.3. Filter block
It is designed to filter the data that is displayed in the registry.
It consists of the following elements:
-
Filtering fields (Fig. 2.(1));
-
Reset filters button (Fig. 2.(2));
-
Expant filters button (Fig. 2.(3)).

1.3.1. Filtering fields
Available fields for filtering:
-
Status;
-
Queue;
-
Skill;
-
Team;
-
Supervisor;
-
Auditor;
-
Location;
-
Utilization progress.
Depending on the user's rights to view the page, the number of displayed fields may differ.
1.3.2. Reset filters button
Represented as a button 
1.3.3. Expant filters button
Represented as a 
Note
The number of fields displayed may vary depending on the browser window size. Use the
1.4. Registry
It is designed to display entries with data about Agents.
It consists of the following elements:
-
Select visible columns (Fig. 3.(1));
-
Refresh button (Fig. 3.(2));
-
Registry (Fig. 3.(3)).

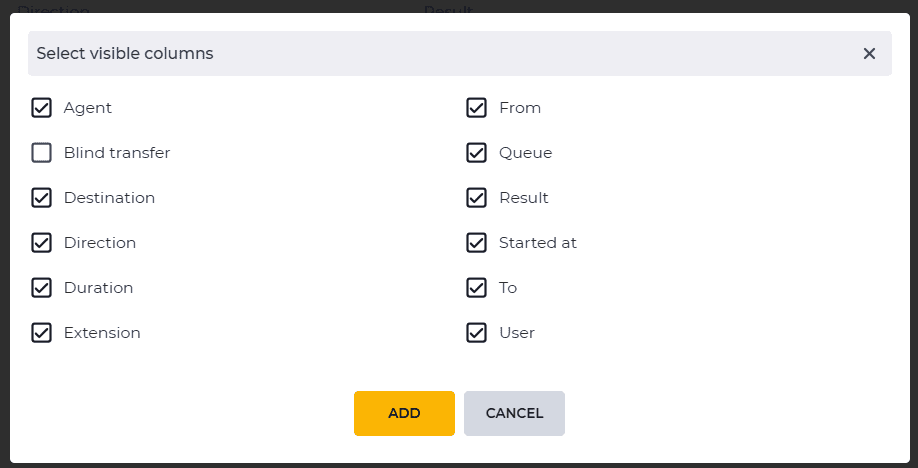
1.4.1. Select visible columns
It is designed to select the columns displayed in the registry.
The Select visible columns modal window opens (Fig.4) when you click the 
-
Select the checkbox - this column is displayed in the registry;
-
Clear the checkbox - this column is displayed in the registry.
1.4.2. Refresh button
Updating the register table is performed by clicking on the refresh button - 
1.4.3. Registry
The data in the registry is updated every 10 seconds.
The following columns are available in the registry:
-
Checkbox;
-
Name — the name of the Agent; Clicking on the Agent's name opens the Agent's tab;
-
Status — Status in which the Agent is now;
-
Status duration — the amount of time during which this Agent is in the status;
-
Status comment — if the operator filled in the comment field when switching to the Pause status, an icon
-
Team — the Team to which the Agent belongs;
-
Queues — Queues served by the Agent;
-
Utilization — displays the percentage of time in online status to time in the system;
-
Call time — the amount of time during which the Agent was in conversations;
-
Chat time — the amount of time during which the Agent was in chats;
-
Transferred — the number of calls that were transferred to other Agents;
-
Missed — the number of calls missed by the Agent;
-
Occupancy — conversation to online time ratio (in percents).
The tool for listening to the call appears in the Call time column. (Fig. 5) if the Agent is currently in a conversation.

Listening is only available to a User with Eavesdrop call permission. You can configure this permission on the Role Permissions tab for the Role assigned to the User.
The window for listening to an active call opens (Fig. 6) when you click on the button
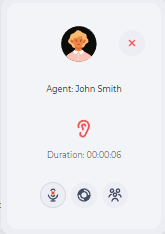
The window consists of displaying information:
-
agent's name;
-
subscriber's name;
-
the duration of the call.
There are also additional buttons, such as:


1.5. Pagination
It consists of the Rows per page field, which indicates the number of entries (it is possible to set from 1 to 1000) per page, and forward and backward buttons for switching pages.
2. Opportunities
2.1. Selection of displayed columns in the registry
|
Goal |
Select of displayed columns in the registry |
|---|---|
|
Preconditions |
|
|
Steps
|
|
|
Result |
The modal window closes. The selected columns are displayed in the registry. |

2.2. Export of Agent data
|
Goal |
Export of Agent data |
|---|---|
|
Preconditions |
|
|
Steps |
|
|
Result |
The agents.csv file is downloaded, which contains information about the Agents. |
2.3. Filter the displayed data in the Registry
|
Goal |
Select to display Agents with VIP Skill |
|---|---|
|
Preconditions |
|
|
Steps |
|
|
Result |
The data registry is reloaded, and the data for the selected filter is displayed. |