
1. Description
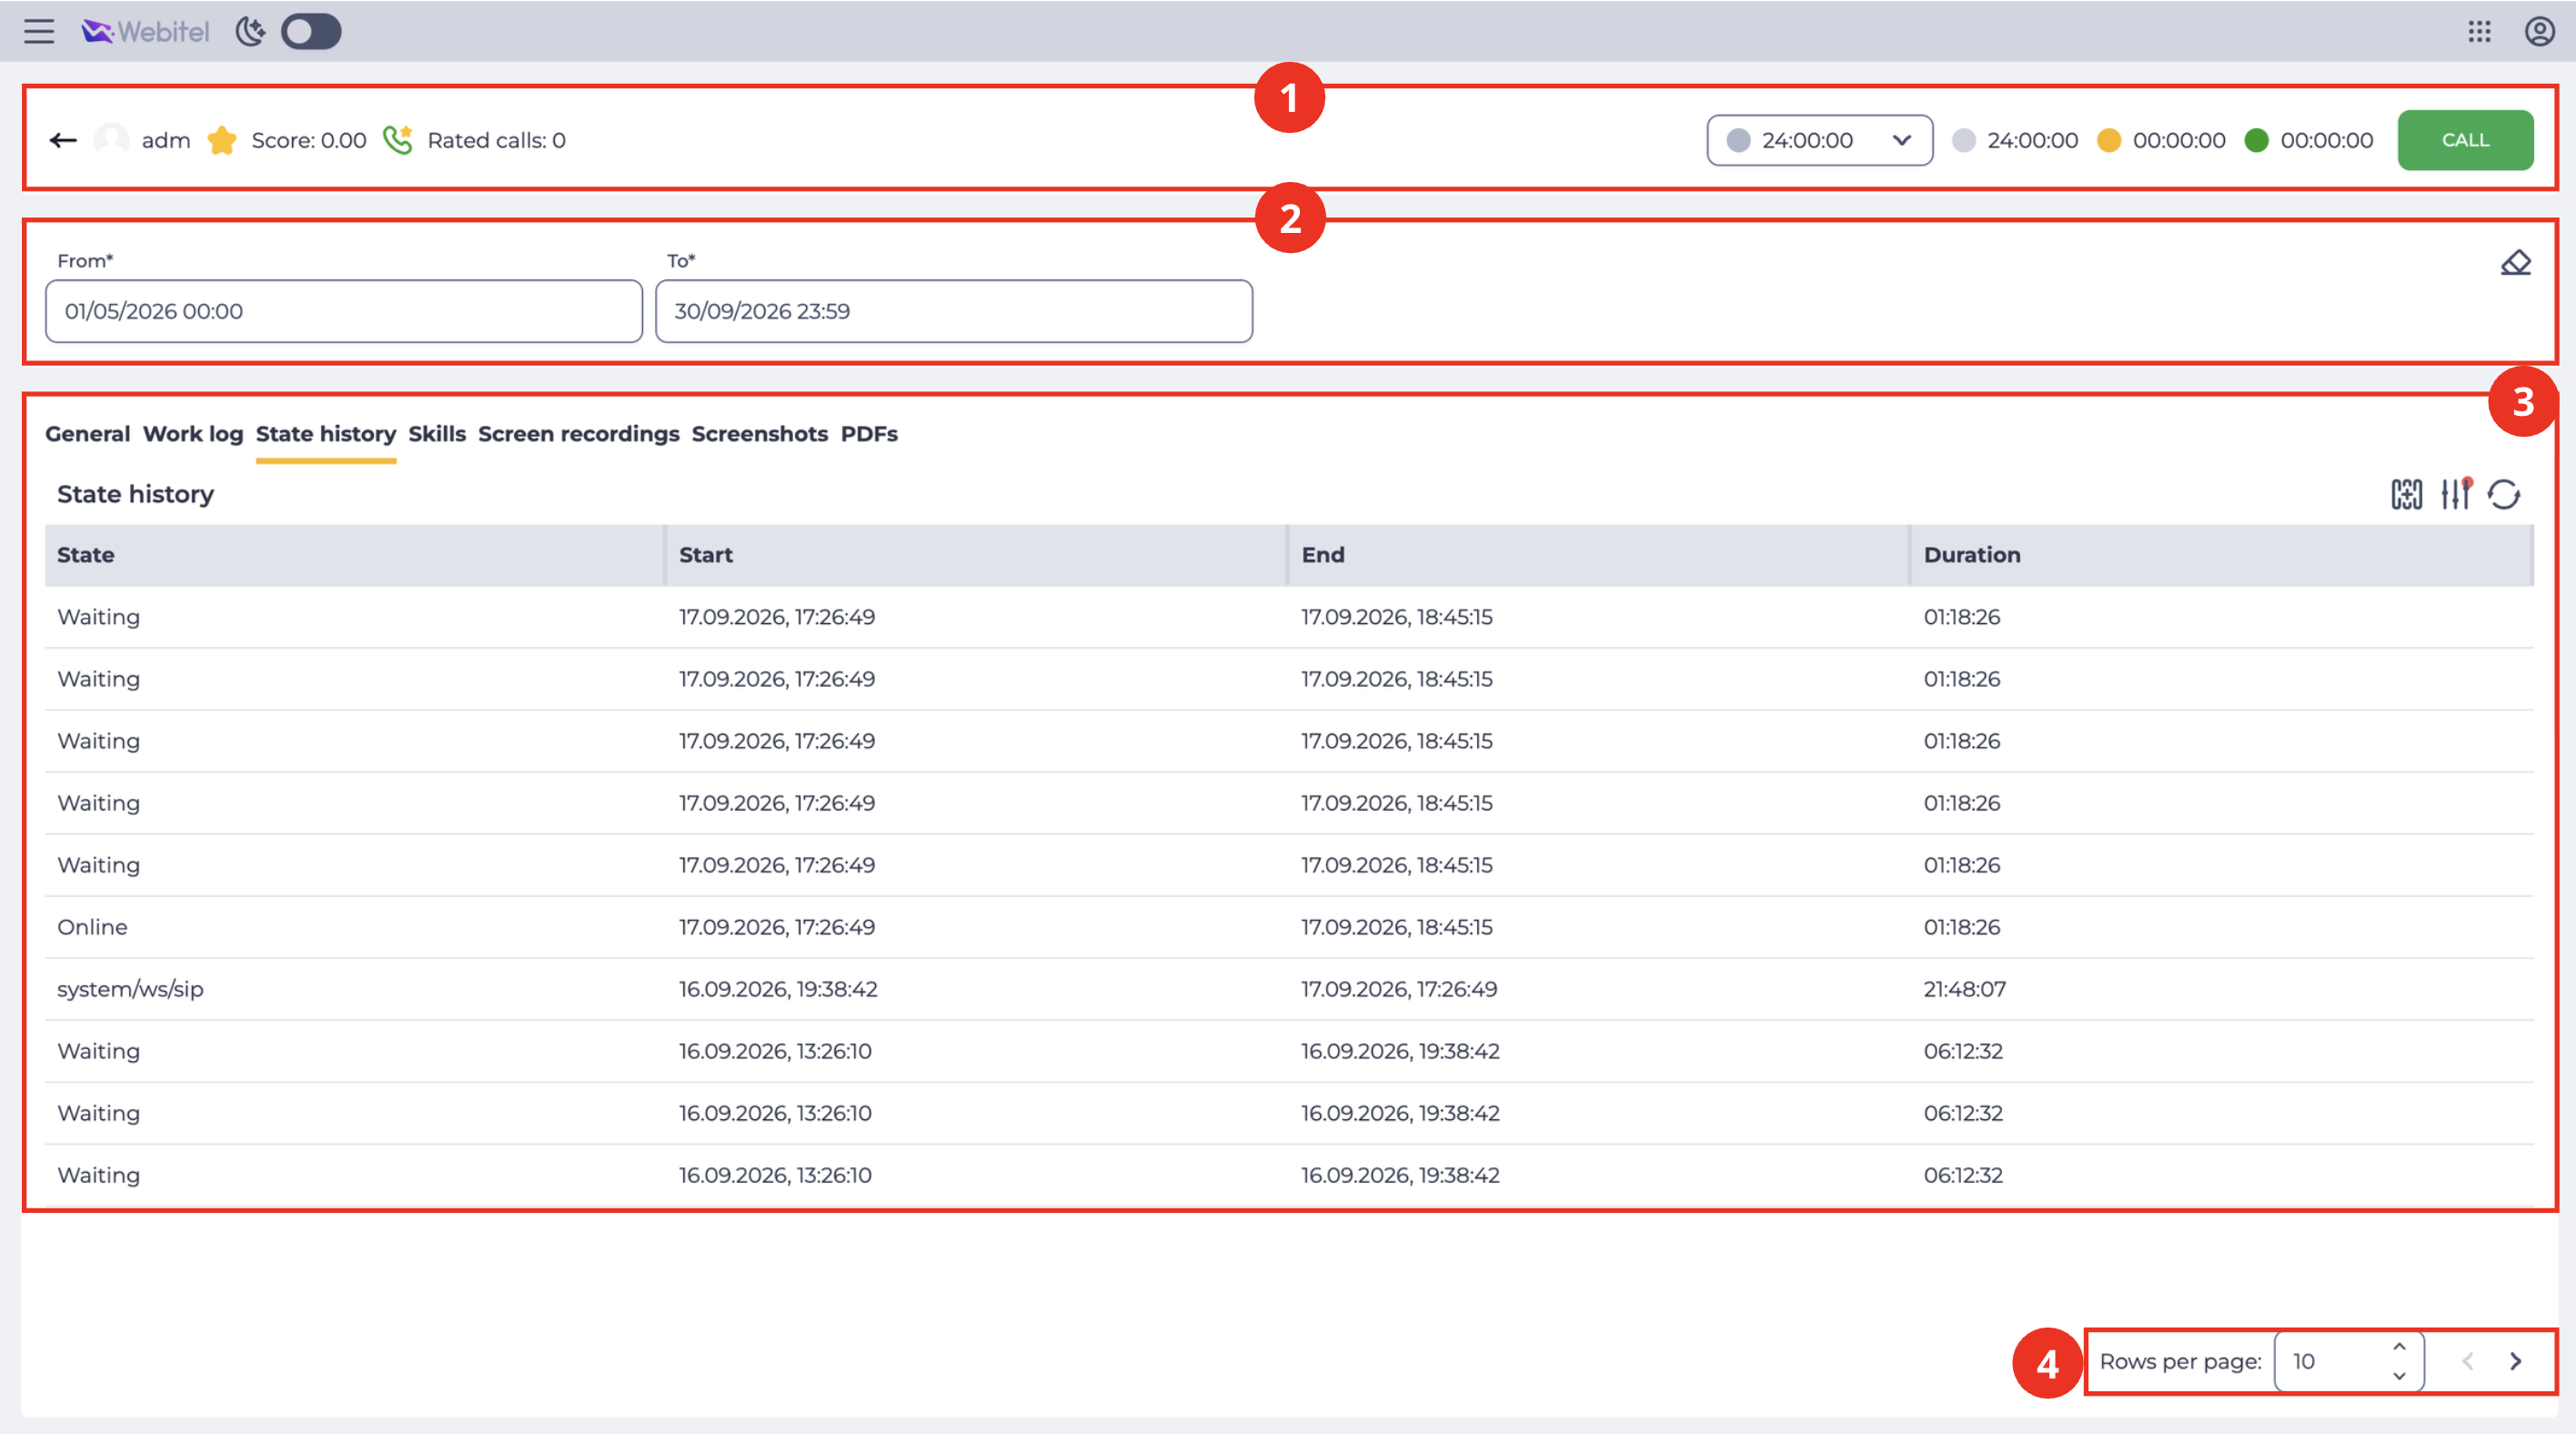
It is designed for viewing the history of the states in which the Agent was.
It consists of the following elements:
-
Top bar (Fig. 1.(1));
-
Filter block (Fig. 1.(2));
-
Registry (Fig. 1.(3));
-
Pagination (Fig. 1.(4)).
1.1. Top bar
The top bar contains the agent’s key indicators and control tools. For a detailed description of its elements and logic, refer to the dedicated documentation.
1.2. Filter block
It is designed to filter the data displayed in the registry.
It consists of the following elements:
-
Filtering fields (Fig. 2.(1));
-
Reset filters button (Fig. 2.(2));
-
Expand filters button (Fig. 2.(3)).
.png?cb=433a463780fc7d3e9c859a37b856c49b)
1.2.1. Filtering fields
Available fields for filtering:
-
From — sets the start time of the period for which you want to view data;
-
To — sets the end time of the period for which you want to view the data.
1.2.2. Reset filters button
Represented as a button 
1.2.3. Expand filters button
Represented as a 
Note
The number of fields displayed may vary depending on the browser window size. Use the
1.3. Registry
It is designed to display records with call data.
It consists of the following elements:
-
Select visible columns (Fig. 3.(1));
-
Refresh button (Fig. 3.(2));
-
Registry (Fig. 3.(3)).
.png?cb=5e09f48fef5f0353bbe420ad23b5eec3)
1.3.1. Select visible columns
It is designed to select the columns displayed in the registry.
The Select visible columns modal window opens (Fig. 4) when you click the 
.png?cb=9e17a1f2dc8af311f2afa9c26bdd76f3)
Select the checkbox — this column is displayed in the registry;
Clear the checkbox — this column is not displayed in the registry.
1.3.2. Refresh button
Updating the register table is performed by clicking on the refresh button - 
(Fig. 3.(2)).
1.3.3. Registry
The data in the registry is updated every 10 seconds.
The following columns are available in the registry:
-
State;
-
Start;
-
End;
-
Duration.
1.3.3.1. State
Displays the name of the state the Agent was in.
There are such states:
-
waiting — waiting for a connection with the Subscriber;
-
offering — connected to the Subscriber, connecting to the Agent;
-
answered — active call;
-
active — active chat;
-
bridged — the call is connected to the Agent and the Subscriber;
-
hold — the call is on hold;
-
processing — the Agent enters the data on the call;
-
chat — the Agent is in the chat;
-
wrap_time — a pause between calls. The duration of this state is entered in the Wrap up time field on the Timing tab of the Agent's Team;
-
missed — enters this state when the Agent misses the call. The duration of this state is entered in the No answer delay time field on the Timing tab of the Agent's Team;
-
pause — Agent on pause. The name of this state changes according to the name of the pause. You can see available pauses on the Agent statuses page;
-
break_out — force the Agent to go offline. Sets to this state when the Agent has missed the maximum number of calls allowed, which is entered in the Max no answer field on the Timing tab of the Agent's Team;
-
online — Agent is online;
-
offline — Agent is offline.
1.3.3.2. Start
Displays the time the state was entered.
1.3.3.3. End
Displays the time the Agent exited this state.
1.3.3.4. Duration
Displays the amount of time the Agent spent in this state.
1.4. Pagination
It consists of the Rows per page field, which indicates the number of entries (it is possible to set from 1 to 1000) per page, and forward and backward buttons for switching pages.
2. Opportunities
2.1. View information for a specific period
|
Goal |
View information for a specific period |
|---|---|
|
Preconditions |
|
|
Steps
|
|
|
Result |
The registry displays records for the selected period. |
2.2. Selection of displayed columns in the registry
|
Goal |
Select displayed columns in the registry |
|---|---|
|
Preconditions |
|
|
Steps
|
|
|
Result |
The modal window closes. The selected columns are displayed in the registry. |
