
1. Description
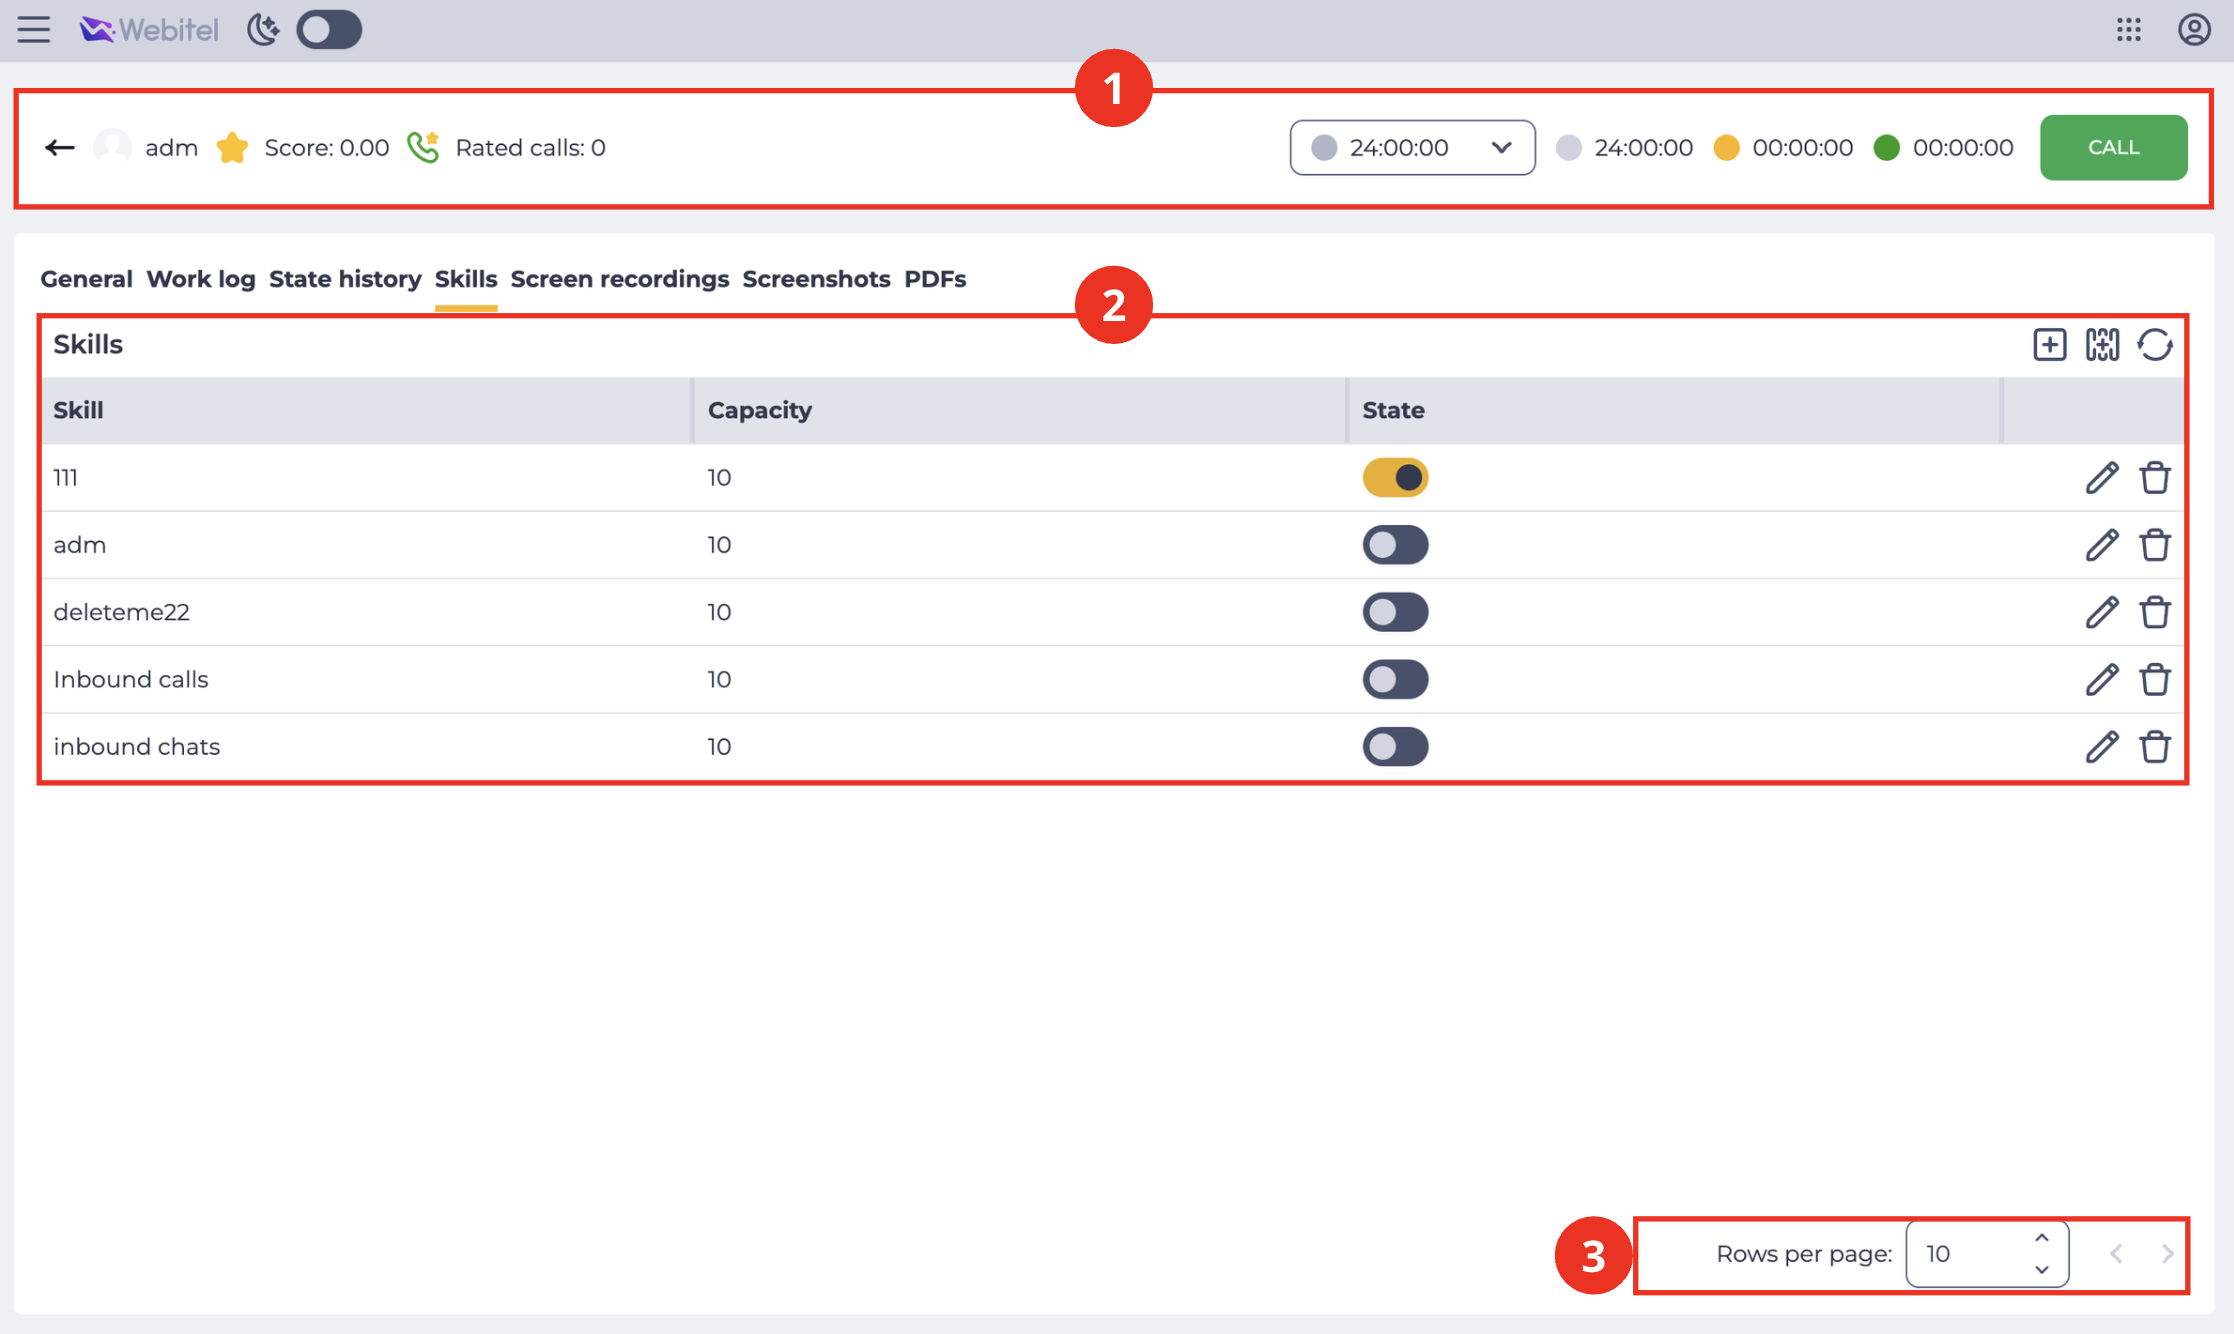
It is designed to customize the Agent's Skills.
It consists of the following elements:
-
Top bar (Fig. 1.(1));
-
Registry (Fig. 1.(2));
-
Pagination (Fig. 1.(3)).
1.1. Top bar
The top bar contains the agent’s key indicators and control tools. For a detailed description of its elements and logic, refer to the dedicated documentation.
1.2. Registry
It is designed to display records with call data.
It consists of the following elements:
-
Select visible columns (Fig. 2.(1));
-
Adding tool (Fig. 2.(2));
-
Refresh button (Fig. 2.(3));
-
Registry (Fig. 2.(4)).
.png?cb=8a8528ef4fa4994b483b4e4b4c1b3a53)
1.2.1. Select visible columns
It is designed to select the columns displayed in the registry.
The Select visible columns modal window opens (Fig. 3) when you click the 
.png?cb=e82872078d2389208fe26cc36ad57093)
-
Select the checkbox — this column is displayed in the registry;
-
Clear the checkbox — this column is not displayed in the registry.
1.2.2. Adding tool
To add a Skill, you must click the add button - 
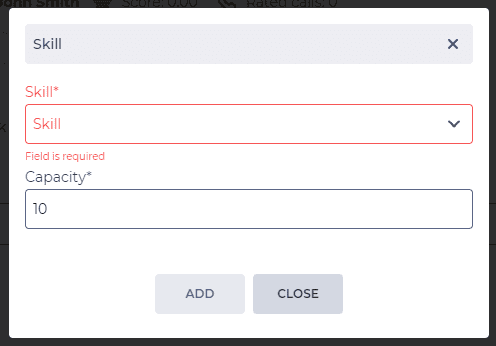
More information about Skills can be found here.
1.2.3. Refresh button
Updating the register table is performed by clicking on the refresh button - 
1.2.4. Registry
It is a record of the Agent's existing Skills.
The following columns are available in the registry:
-
Skills;
-
Capacity;
-
State;
-
Editing tool;
-
Removal tool.
1.2.4.1. Skills
Skill names are displayed here. How to create a new Skill can be found here.
1.2.4.2. Capacity
This shows the level of proficiency in this skill. You can set it from 0 to 100. The larger the number, the higher the level of ability.
1.2.4.3. State
You can enable/disable the Skill by using the switch in this column. The enabled Skills determine the Queues in which the Agent will work.
1.2.4.4. Editing tool
The Add Skill modal window opens (Fig. 11) after clicking the 
1.2.4.5. Removal tool
It is used to remove a Skill. After clicking the delete 
1.3. Pagination
It consists of the Rows per page field, which indicates the number of entries (it is possible to set from 1 to 1000) per page, and forward and backward buttons for switching pages.
2. Opportunities
2.1. Add a Skill
|
Goal |
Add a Skill |
|---|---|
|
Preconditions |
|
|
Steps
|
|
|
Result |
Data saved. Skill added |

2.2. Delete a Skill
|
Goal |
Delete a Skill |
|---|---|
|
Preconditions |
|
|
Steps
|
|
|
Result |
The modal window closes. Skill removed. |
2.3. Edit a Skill
|
Goal |
Edit a Skill |
|---|---|
|
Preconditions |
|
|
Steps
|
|
|
Result |
The modal window closes. Data saved. |
2.5. Enable/disable Skill
|
Goal |
Enable a Skill |
|---|---|
|
Preconditions |
|
|
Steps
|
|
|
Result |
The Skill is enabled |