
1. Description
If the current user’s role does not have the “Control agent screen” permission, this page is not displayed.
It is designed to view screenshots of the agent screen.
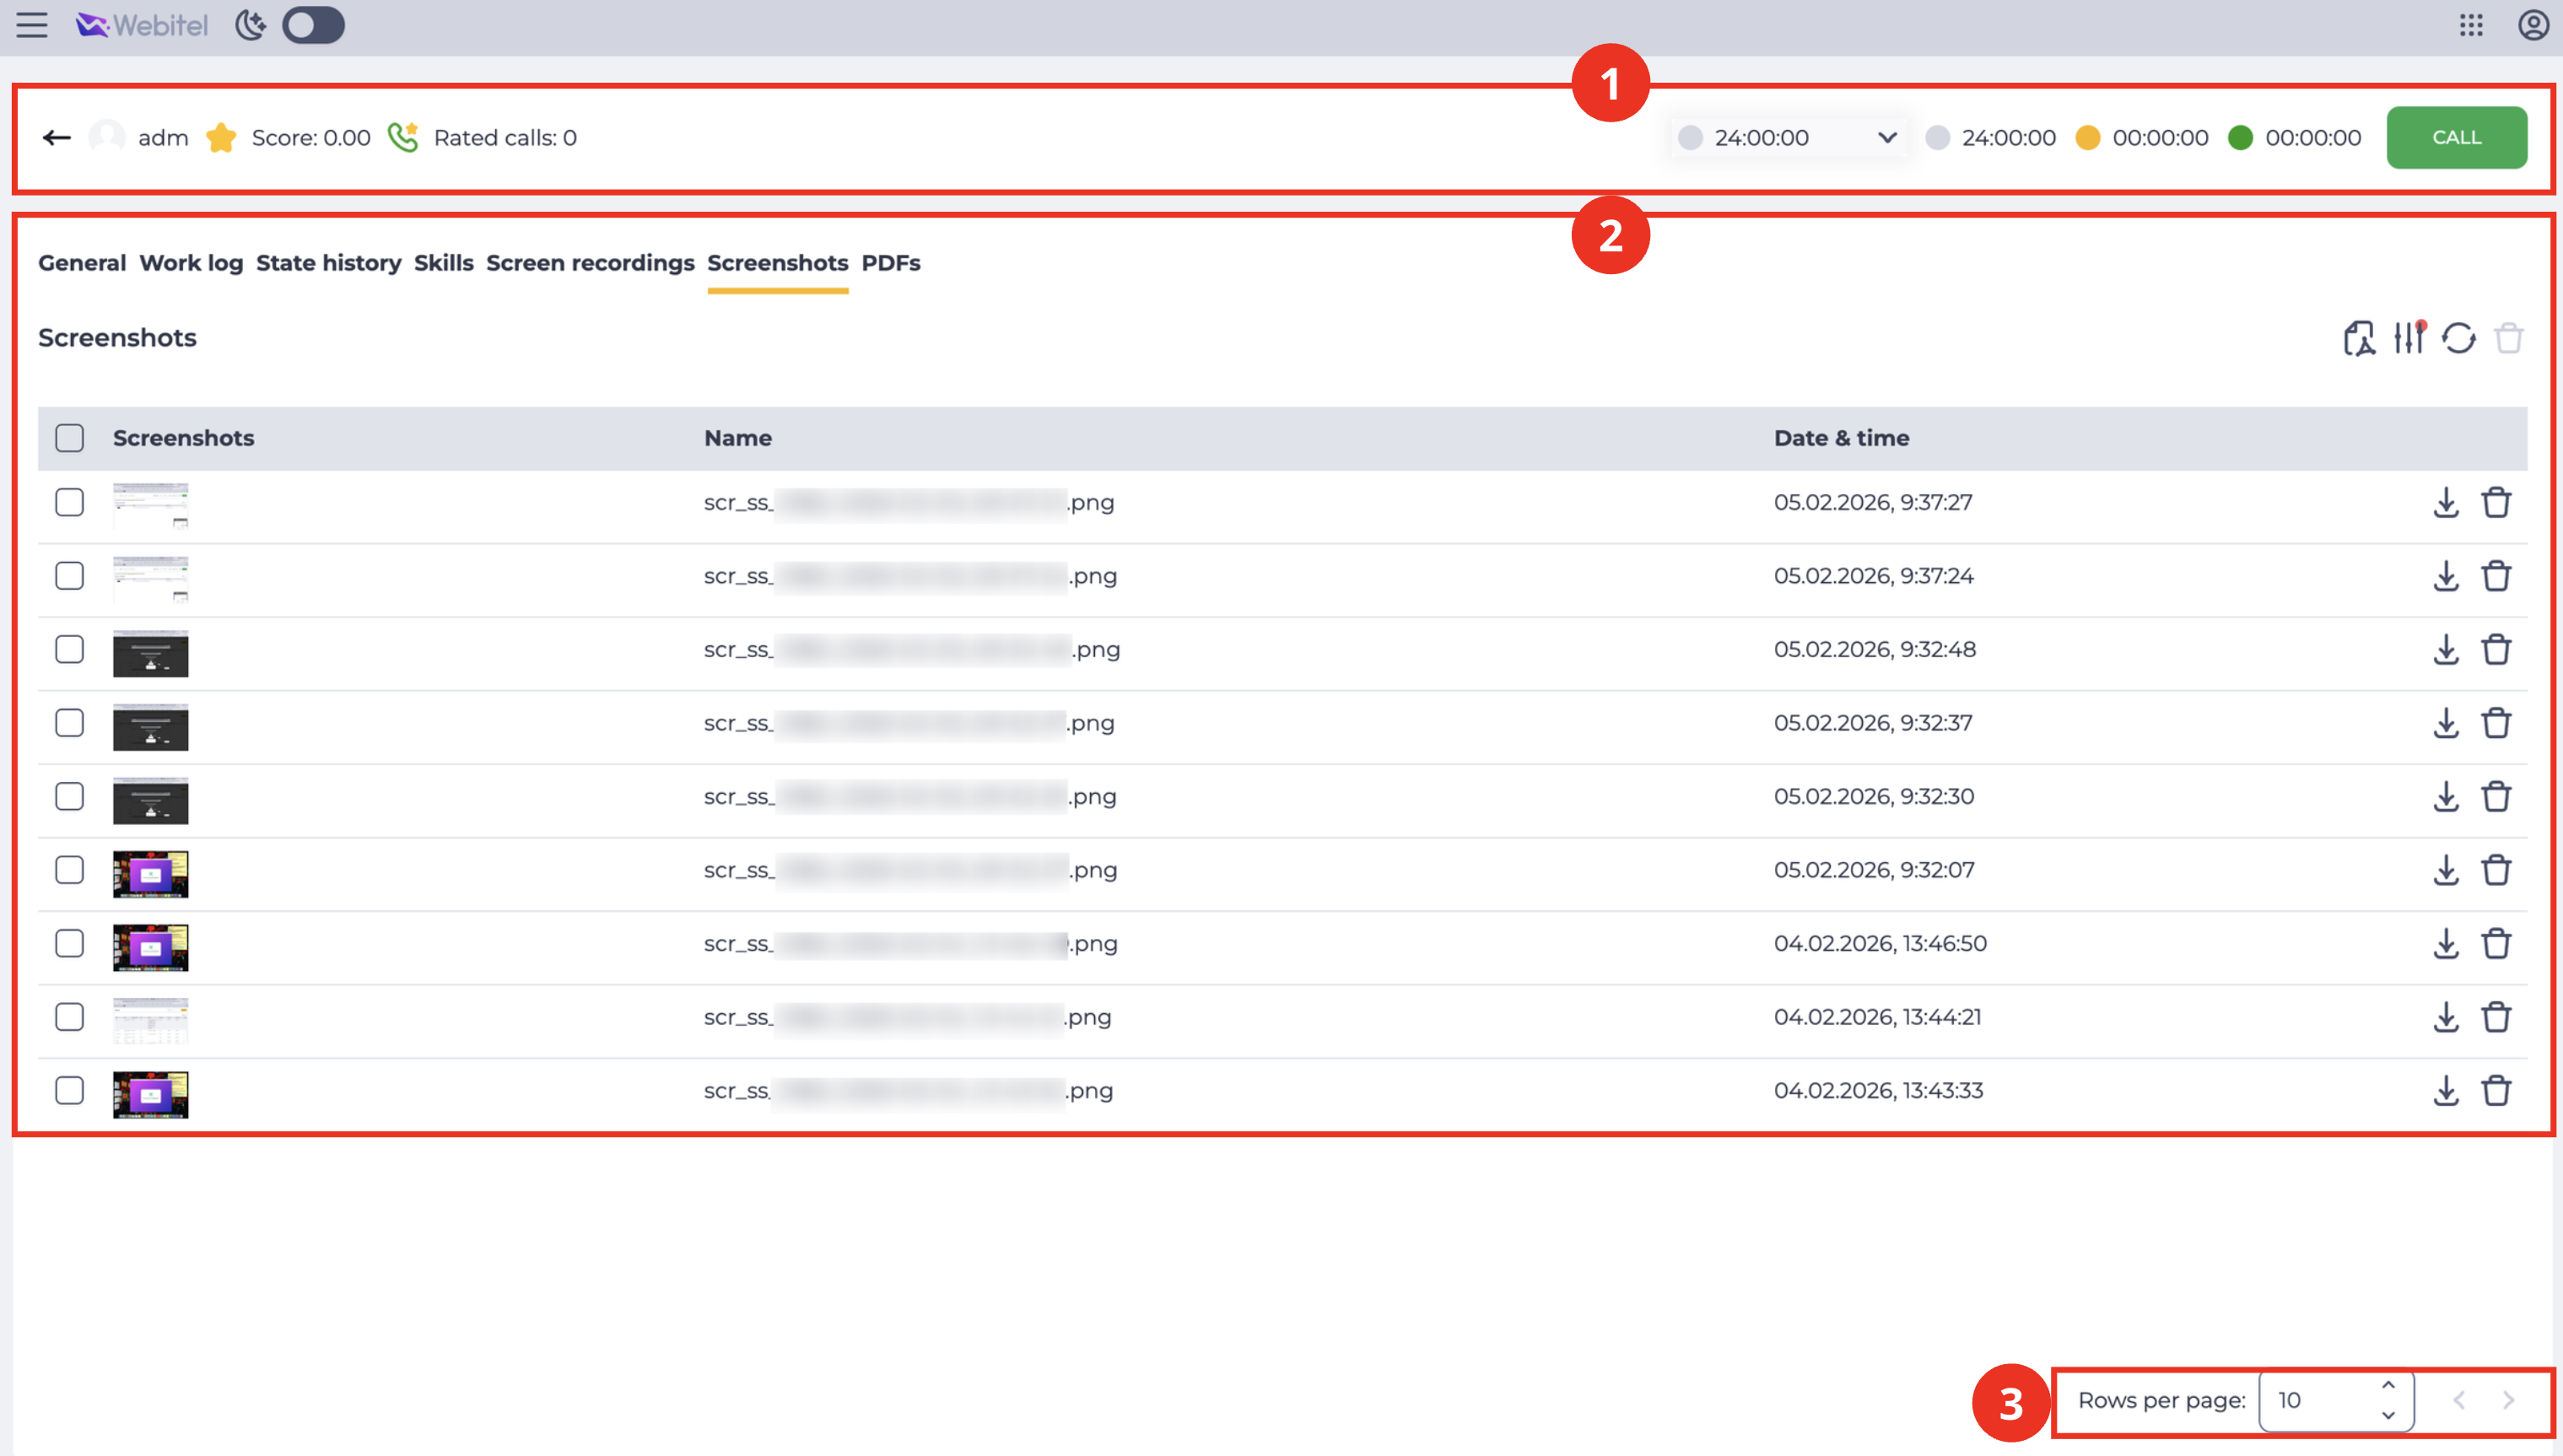
The page consists of the following parts:
-
Top bar (Fig. 1.(1));
-
Records registry (Fig. 1.(2));
-
Pagination (Fig. 1.(3)).
1.1. Top bar
The top bar contains the agent’s key indicators and control tools. For a detailed description of its elements and logic, refer to the dedicated documentation.
1.2. Records registry
The registry displays all screen captures created by the agent for the selected time period. By default, the records created on the current day are displayed.
It contains data management tools and a table with the list of captures.
The list includes screenshots taken:
-
automatically — according to the value of the “screenshot_interval” variable, which defines how frequently they are created;
-
manually — when the Supervisor captures a screenshot while viewing the agent’s screen.
For the system to automatically create screenshots, the “Agent screen control” toggle must be enabled in the operator’s or their team’s settings.
The operator’s computer must also have the “Webitel DeskTrack” application installed and running.
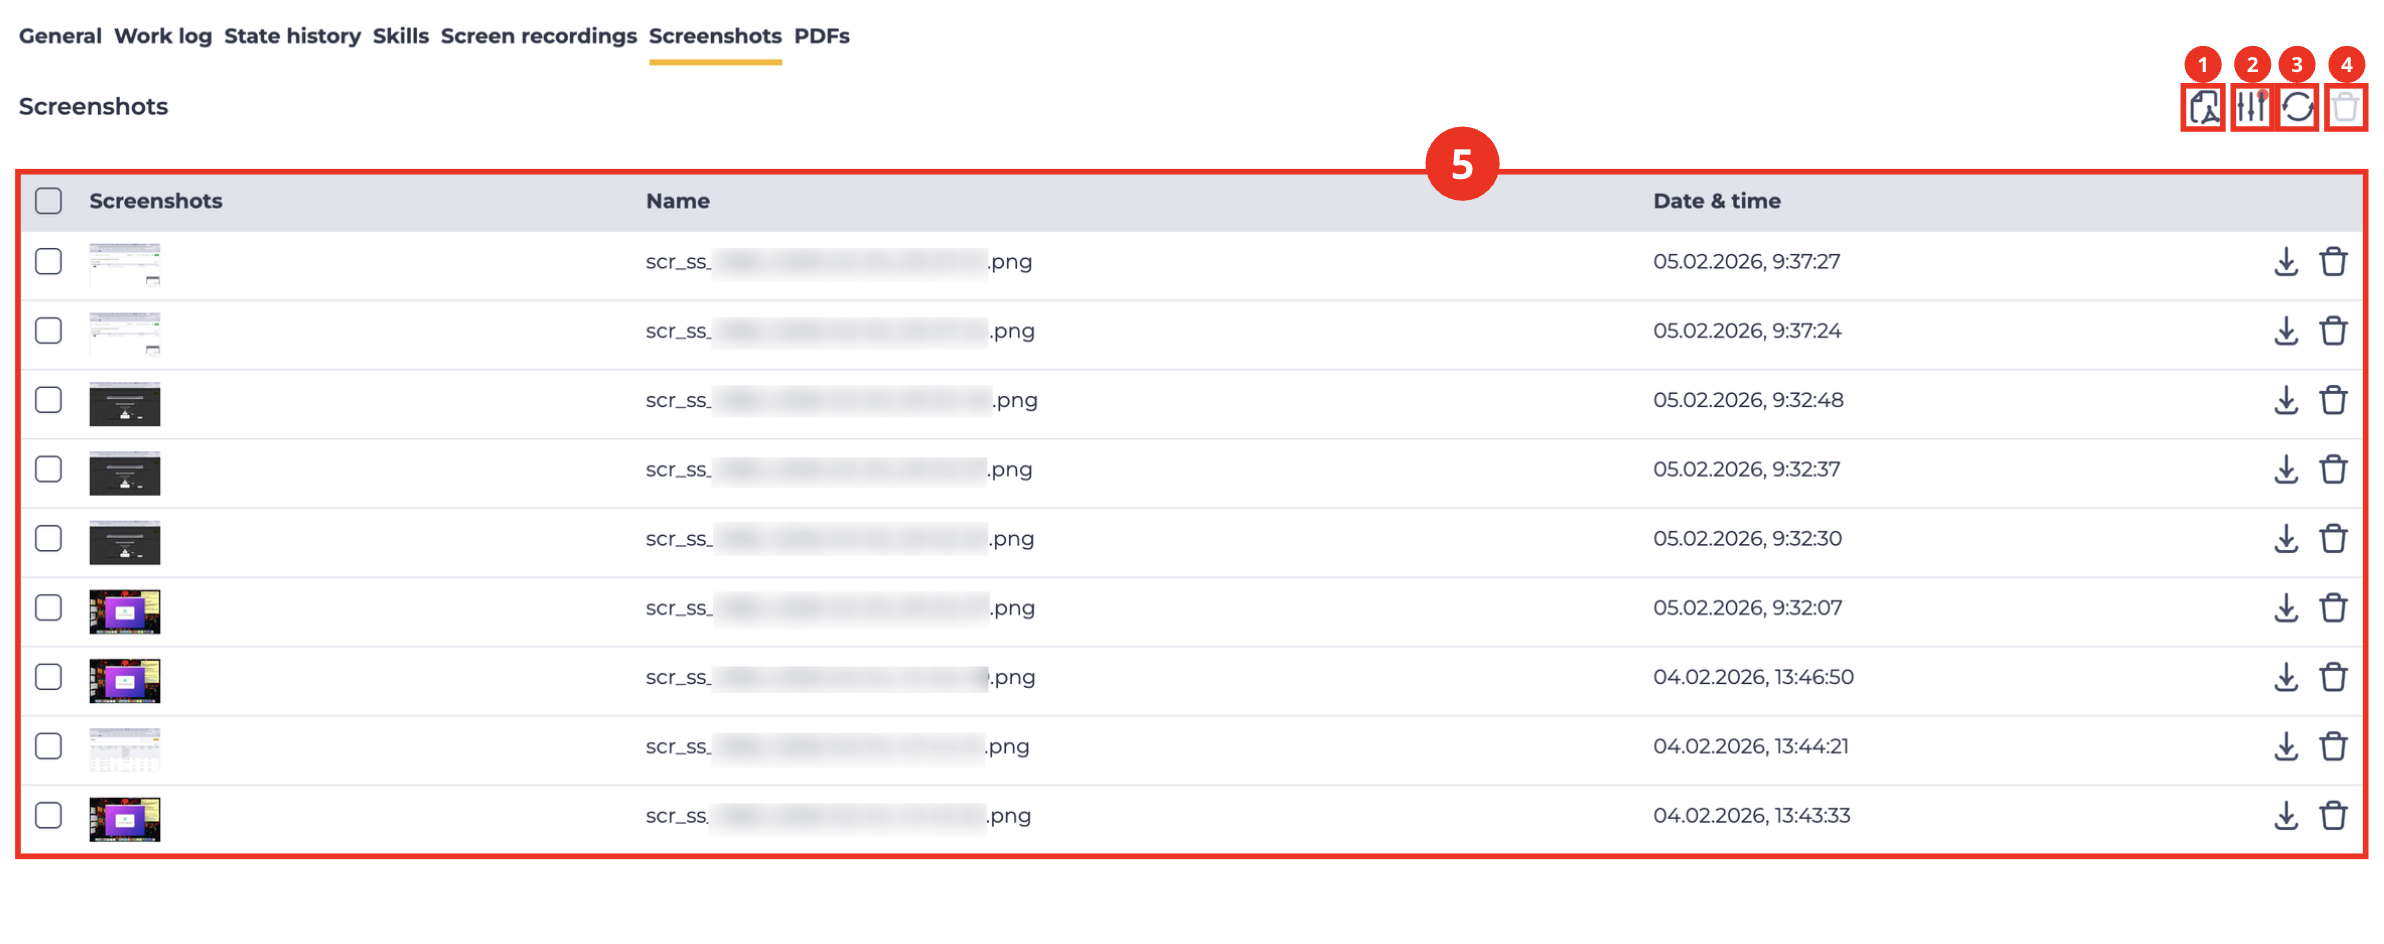
It consists of the following parts:
-
PDF Generation Tool (Fig. 2.(1));
-
Expand/collapse filter panel tool (Fig. 2.(2));
-
Refresh button (Fig. 2.(3));
-
Records removal tool (Fig. 2.(4));
-
Records registry table (Fig. 2.(5)).
1.2.1. PDF Generation Tool
Used to generate a PDF file from the agent's screenshots. Clicking the icon starts the generation process. Once complete, the generated file appears in the PDFs tab.
The behavior depends on the current state of the registry:
-
if no records are selected and no filters are applied — all screenshots are included in the file;
-
if filters are applied — only the filtered screenshots are included in the file;
-
if one or more records are selected using checkboxes — only the selected screenshots are included in the file.
Screenshots in the generated file are arranged in sorted order.
1.2.2. Expand/collapse filter panel tool
Designed to expand and collapse the filter panel (Fig. 3).
1.2.2.1. Filter panel
Designed to filter the data displayed in the records registry.
It consists of the following parts:
-
Filter fields (Fig. 3.(1));
-
Reset filters button (Fig. 3.(2)).

1.2.2.1.1. Filter fields
Available fields:
-
From — sets the start time of the period for which screen captures should be displayed;
-
To — sets the end time of the period for which screen captures should be displayed.
1.2.2.1.2. Reset filters button
Represented as a button 
1.2.3. Refresh button
Updating the register table is performed by clicking on the refresh button - 
1.2.4. Delete tool
Used to remove an object with confirmation through a modal window. When hovering over the delete button ( 
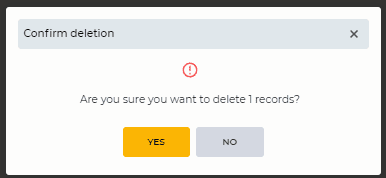
Fig. 4. “Confirm deletion” modal window
1.2.5. Records registry table
The registry displays the list of all screen captures taken during the agent’s work for the selected period.
Each row of the registry contains the following columns:
-
Checkbox;
-
Screenshots;
-
Name;
-
Date & time of creation;
-
Download tool;
-
Deleting tool.
If no screen captures are available, the following text is displayed: "Unfortunately, no record matches your criteria".
1.2.5.1. Checkbox column
Used to select one or more entries. An additional removal tool appears next to the search field after selecting one or more entries. Information about the number of entries chosen for deletion appears when you hover over this tool. When you click on it, a modal confirmation window appears.
It contains the Yes, No, and close ( 
-
Clicking the Yes button deletes the entries.
-
Clicking the No button closes the modal window, and the entries are not deleted.
All records on the page will be selected if you select the checkbox in the header.
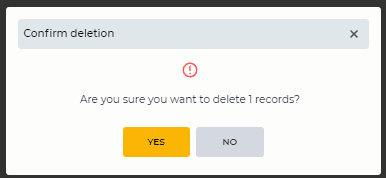
Fig. 5. “Confirm deletion” modal window
1.2.5.2. Screen captures
This column displays a thumbnail (preview) of the screen capture.
When hovering over the preview, the image view icon is displayed (Fig. 6).
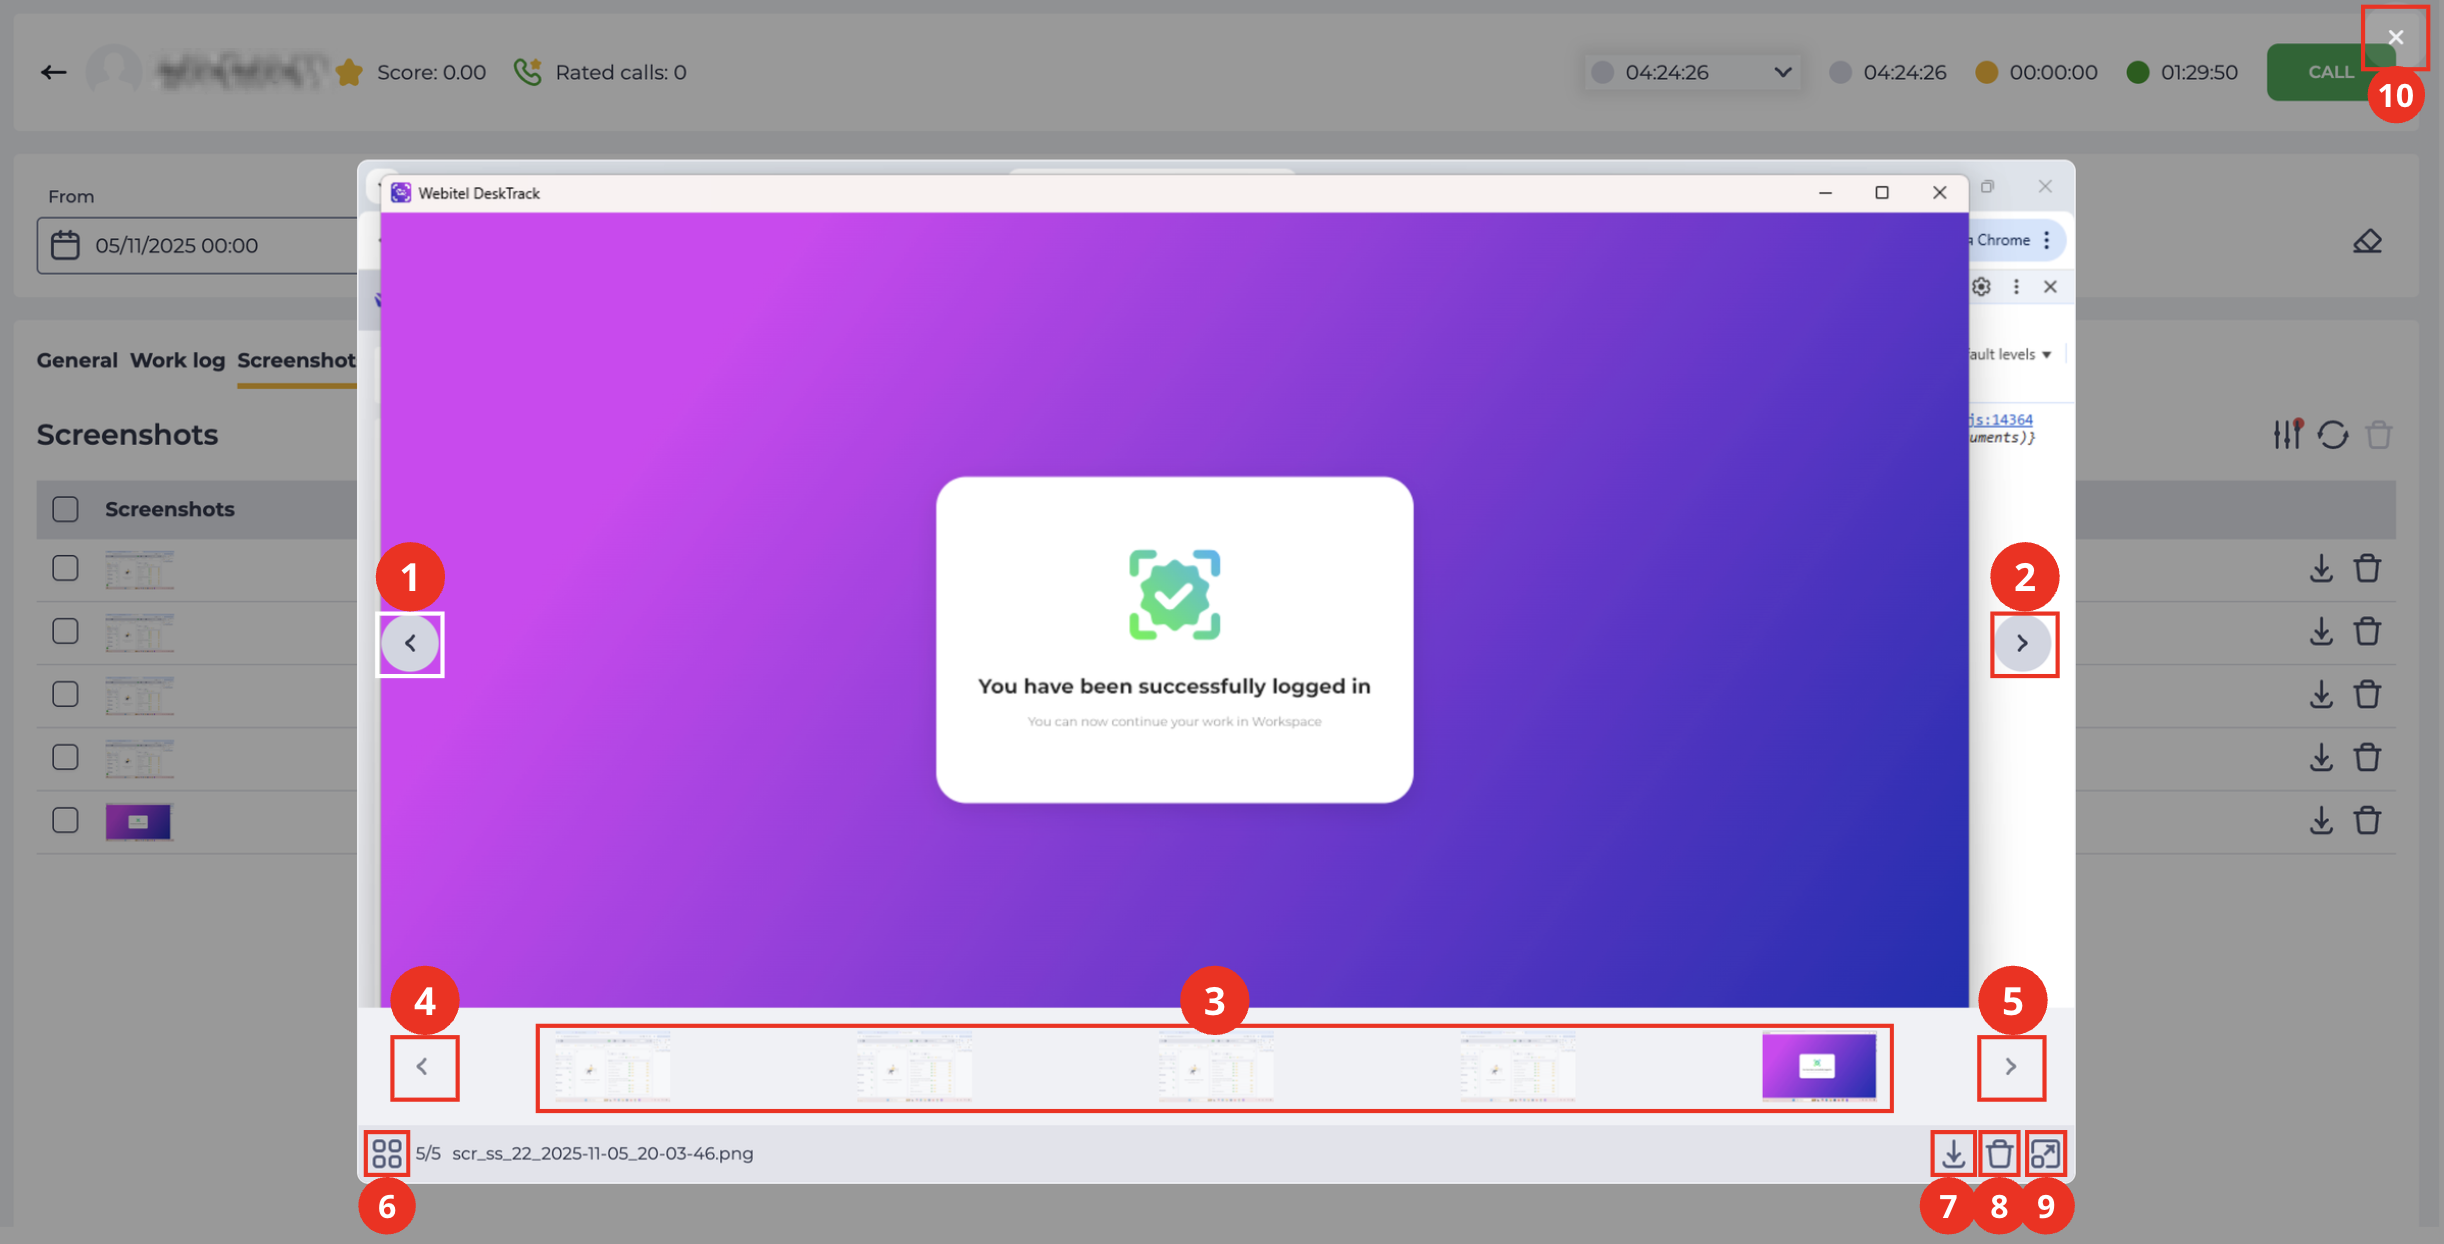
By clicking it, a viewing window opens (Fig. 7), which contains the following control tools:
-
“Back” button (Fig. 7.(1));
-
“Forward” button (Fig. 7.(2));
-
Screen captures thumbnail panel (Fig. 7.(3));
-
Left scroll tool (Fig. 7.(4));
-
Right scroll tool (Fig. 7.(5));
-
Thumbnail panel expand/collapse tool (Fig. 7.(6));
-
Download tool (Fig. 7.(7));
-
Delete tool (Fig. 7.(8));
-
Image expand tool (Fig. 7.(9));
-
Close tool (Fig. 7.(10)).
1.2.5.2.1. “Back” button
Switches the view to the previous screen capture.
1.2.5.2.2. “Forward” button
Switches the view to the next screen capture.
1.2.5.2.3. Screen captures thumbnail panel
Displays a series of thumbnails of all screenshots that match the applied filters and pagination.
1.2.5.2.4. Left thumbnail scroll tool
Scrolls the thumbnail strip to the left.
1.2.5.2.5. Right thumbnail scroll tool
Scrolls the thumbnail strip to the right.
1.2.5.2.6. Thumbnail panel expand/collapse tool
Collapses the thumbnail panel to increase the image viewing area. After collapsing, the icon changes to the expand tool, which returns the thumbnail panel to its previous state.
1.2.5.2.7. Download tool
Downloads the current screen capture to the device in .png format.
1.2.5.2.8. Delete tool
When the icon is clicked, a deletion confirmation modal window opens (Fig. 5). After confirmation, the image is permanently deleted from the registry.
1.2.5.2.9. Image expand tool
Expands the image to full screen. After expanding, the icon changes to the collapse tool
1.2.5.2.10. Close tool
Closes the viewing window and returns the user to the table.
1.2.5.3. Name
Displays the file name of the screen capture.
1.2.5.4. Date and time
Displays the date and exact time when the capture was created.
Format: DD.MM.YYYY, hh:mm:ss.
1.2.5.5. Download tool
When the icon 
1.2.5.6. Delete tool
When the icon 
1.3. Pagination
It consists of the Rows per page field, which indicates the number of entries (it is possible to set from 1 to 1000) per page, and forward and backward buttons for switching pages.