1. Description
A skill is an Agent’s competence used for distributing Agents between Queues. An Agent can be assigned multiple skills, which allows them to handle activities from several Queues.
The Skills tab is designed to view and configure the Agent’s skills. Here you can add, edit, delete, or disable skills, as well as change the Agent’s status and make a call to them.
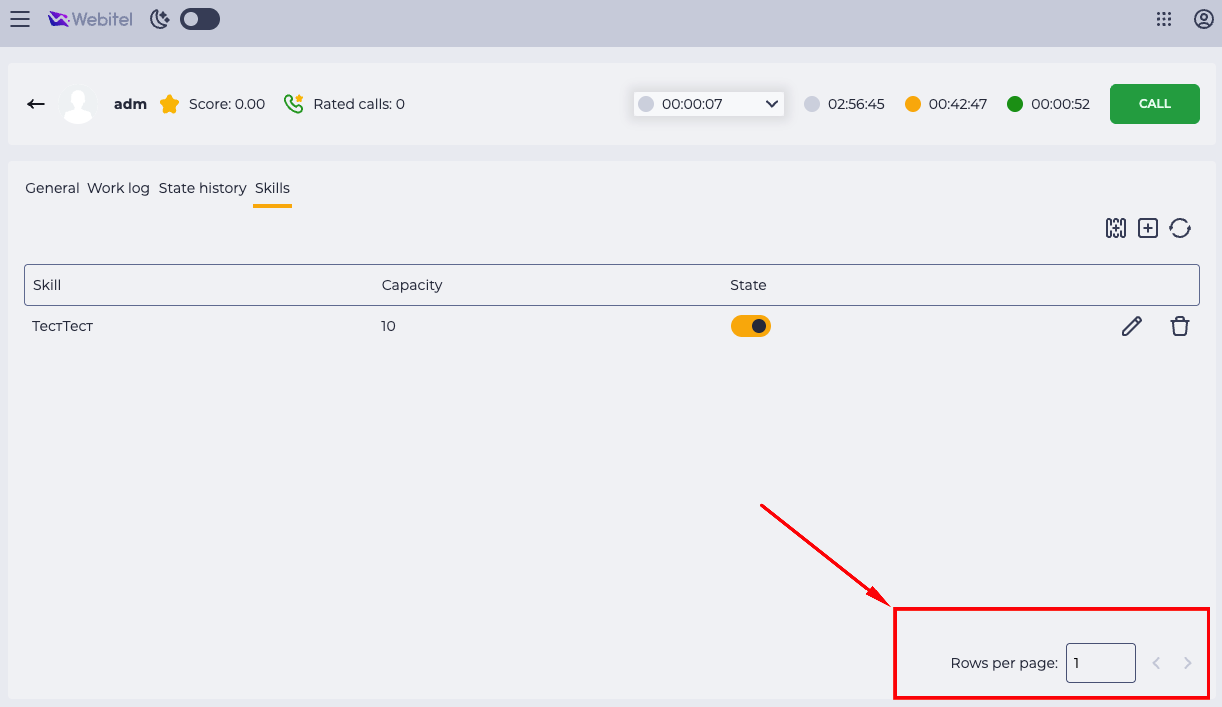
The page consists of the following elements (Fig. 1):
-
Top bar (Fig. 1.(1));
-
Registry (Fig. 1.(2));
-
Pagination (Fig. 1.(3)).
.png?cb=9f5155988fd45cb0572a63b738ae74b9)
1.2. How to change the Agent status
To change the current status of an Agent, make sure you have the appropriate permissions.
-
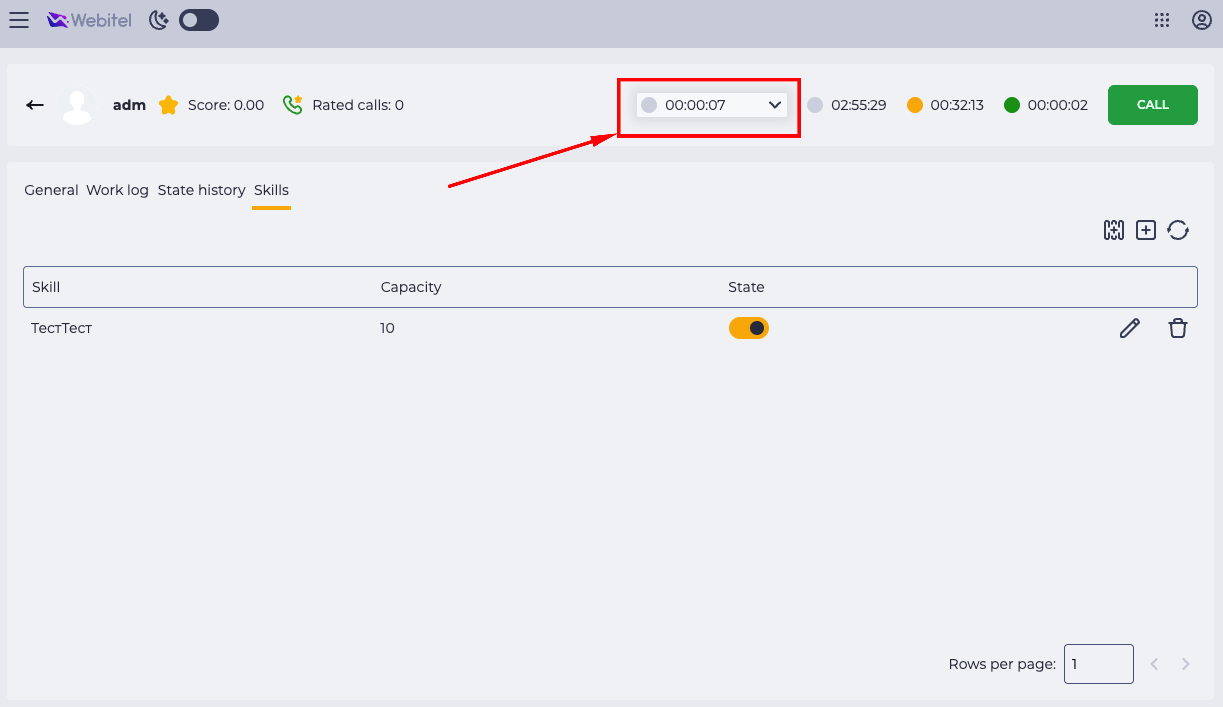
On the top bar, find the block displaying the current status of the Agent and the timer showing the duration of this status (Fig. 2).
-
Click on the timer field. A drop-down list of all available statuses will appear:
-

-

-

-
Select the required status by clicking on it.
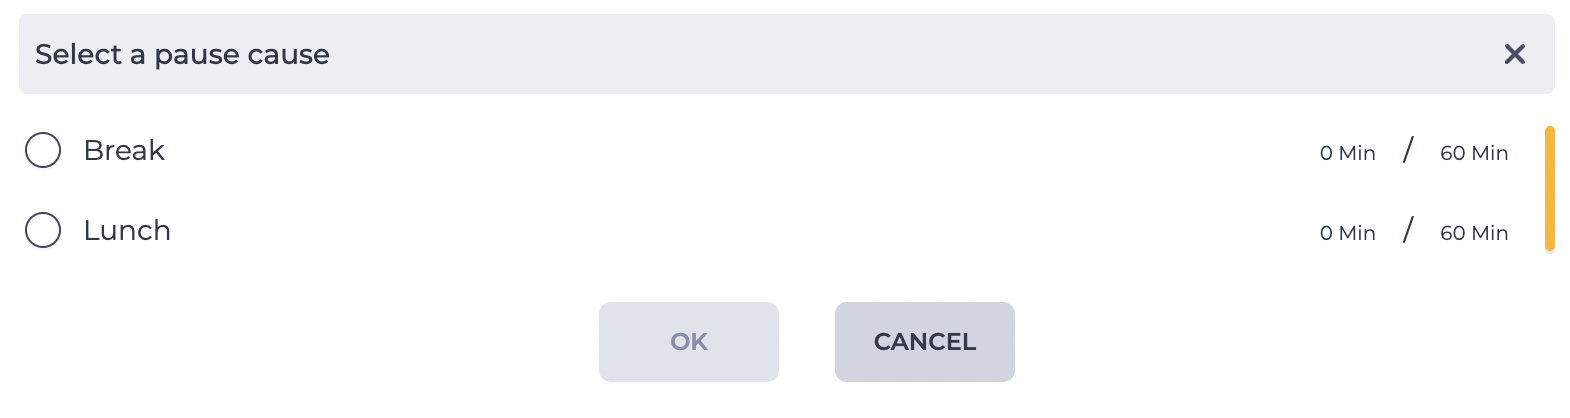
If you select the Pause status:
-
the Select a pause cause modal window opens automatically (Fig. 3);
-
choose the required reason from the list;
-
after selecting, click the OK button.
Important: A Supervisor can only transfer an Agent to those pauses for which the “Supervisor can change this status” option is enabled in Admin → Agent Statuses.
If this option is disabled, the status will not appear for the Supervisor in the drop-down list.
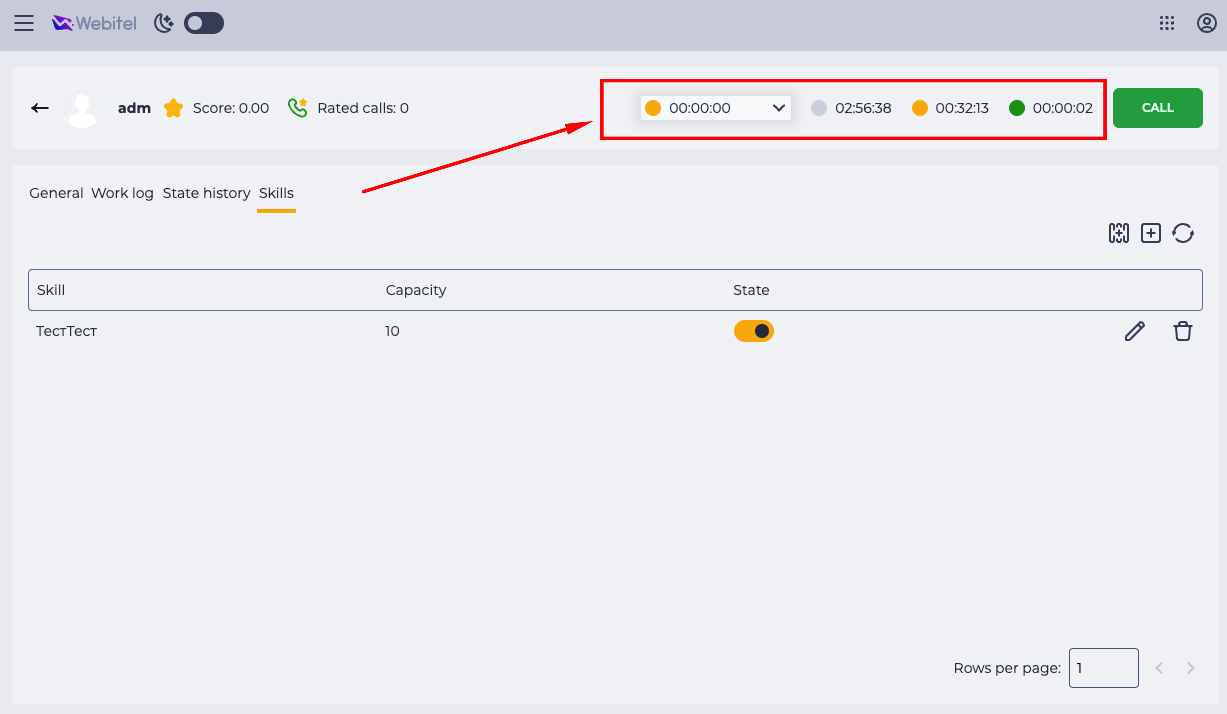
After the status is changed:
-
the Agent status is updated on the panel;
-
the timer resets and starts counting from the new status.
1.3. How to call an Agent
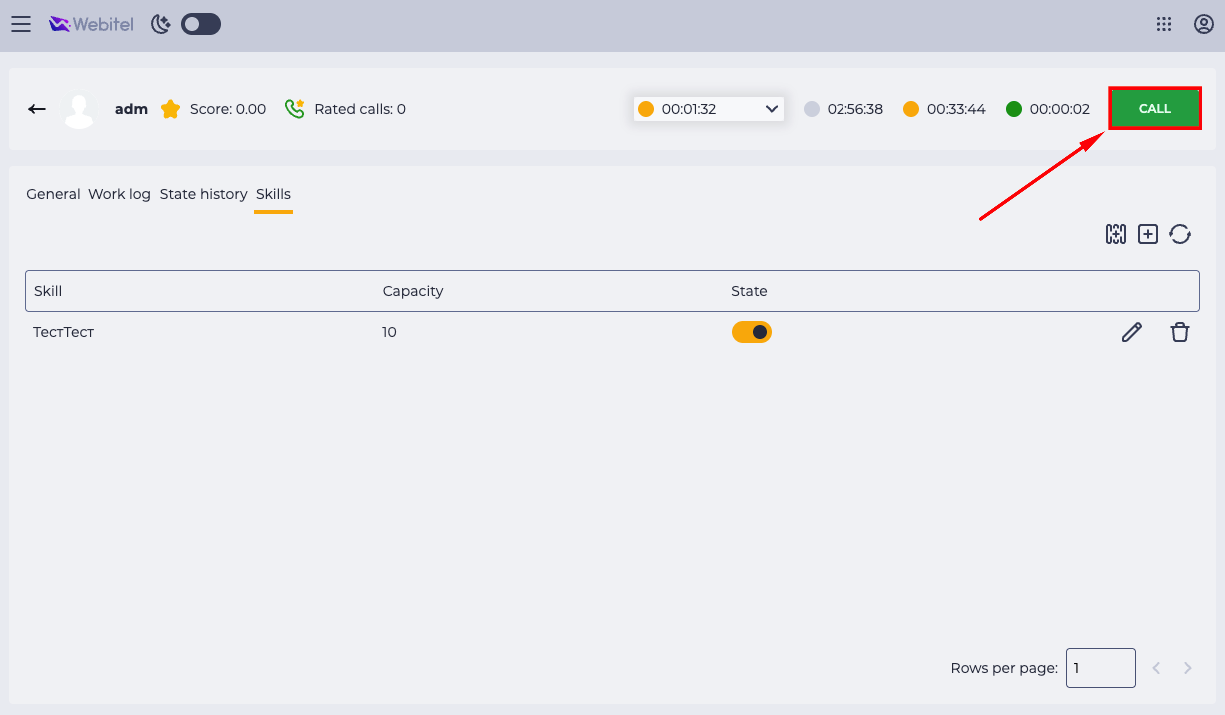
On the Skills tab, you can directly initiate a call to the Agent if you have the appropriate permissions.
If the Agent has Do Not Disturb mode enabled, the internal call will not be delivered.
To make a call:
-
Click the Call button on the top bar (Fig. 5).
-
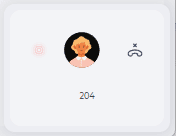
A minimized call window appears in the lower-right corner (Fig. 6). Dialing begins.
-
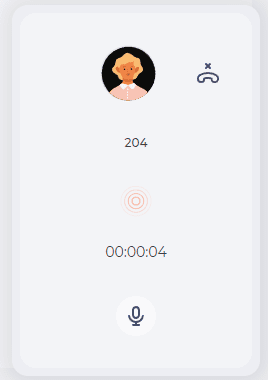
When hovering over the window, it expands (Fig. 7), showing control elements:
-

-

-

-

-
To end the call, click the End Call icon

After completion:
-
the call window closes automatically;
-
you return to the current Agent card view.
1.4. How to work with the registry of records
The registry displays the full list of skills assigned to the Agent and provides tools for managing them. Here you can add a new skill, change the parameters of an existing one, delete it, or temporarily disable it.
The registry consists of the following elements (Fig. 8):
-
Select visible columns (Fig. 8.(1)) — allows configuring which fields are displayed in the table.
-
Add skill button (Fig. 8.(2)) — opens a modal window for entering data of a new skill.
-
Refresh button (Fig. 8.(3)) — performs a manual data refresh without waiting for the automatic update.
-
Records table (Fig. 8.(4)) — the main list of skills with key information for each:
-
Skill — the name of the assigned skill.
-
Capacity — a numeric value from 0 to 100 showing the proficiency level.
-
State — a toggle switch to enable or disable the skill.
-
Editing and removal tools — allow modifying or deleting the entry.
-
The table is updated automatically every 10 seconds.
.png?cb=8a8528ef4fa4994b483b4e4b4c1b3a53)
1.4.1. How to select visible columns
To configure which columns are displayed in the table:
-
Click the Select visible columns icon

-
Check the boxes for the columns you want to display.
-
Clear the boxes for the columns you don’t want to display.
-
Close the window — the table updates according to your selection.
.png?cb=e82872078d2389208fe26cc36ad57093)
1.4.2. How to add a skill
To assign a new skill to an Agent:
-
Click the Add button on the registry panel (Fig. 8.(2)).
-
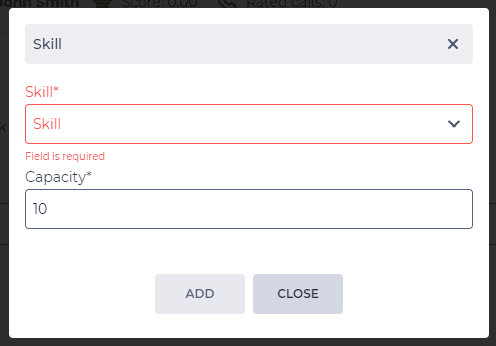
The Skill modal window opens (Fig. 11).
-
In the Skill field, click to expand the list of available skills and select the required one.
-
In the Capacity field, enter a proficiency level — a number from 0 to 100.
-
The higher the value, the higher the Agent’s qualification for this skill.
-
Capacity is processed only within the By skill level strategy.
-
Click the Add button.
After saving, the new skill appears in the registry table.
1.4.3. How to refresh the table
To refresh the data manually, click the Refresh icon 
1.5. How to edit a skill
To change the parameters of an existing skill:
-
In the registry table, find the required skill.
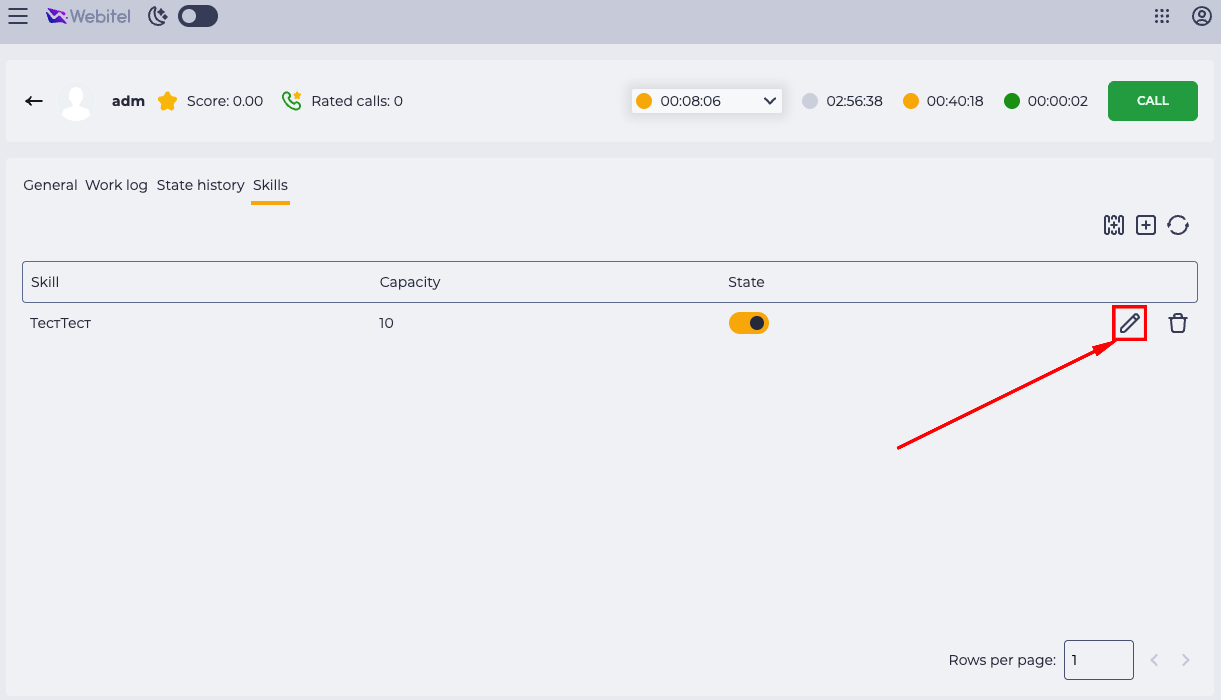
-
Click the Edit icon (Fig. 12).
-
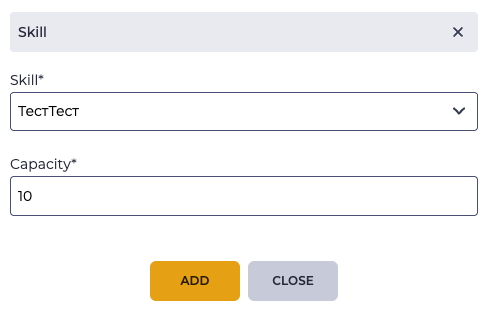
In the opened Skill modal window (Fig. 13), update the value in the Capacity field.
-
Click the Add button to save the changes.
The updated data will be immediately displayed in the registry table.
1.6. How to delete a skill
To remove an unnecessary skill:
-
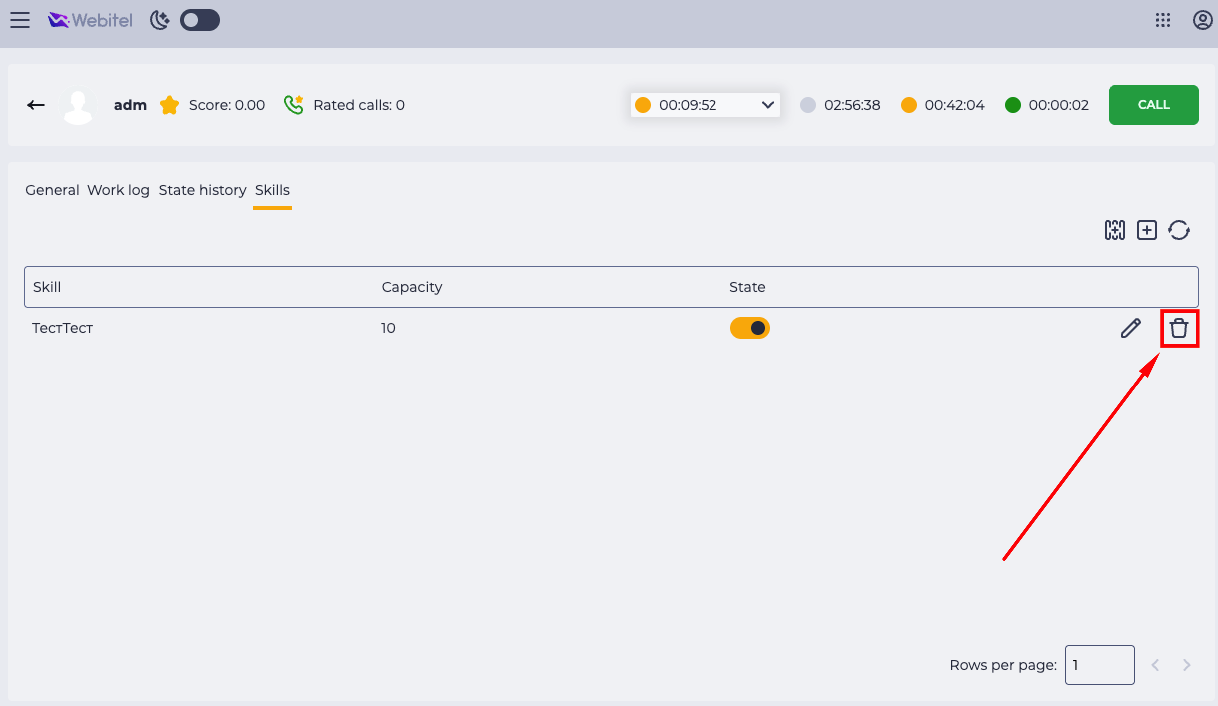
Find it in the registry table.
-
Click the Delete icon (Fig. 14).
-
Confirm the action in the opened dialog window.
After confirmation, the skill will be deleted from the list, and the Agent will lose access to the related queues.
1.7. How to enable or disable a skill
To temporarily disable or re-activate a skill:
-
Find it in the registry table.
-
In the State column, switch the toggle to the required position:
-
On

-
Off

-
The changes are applied automatically and displayed in the registry without additional saving.
Important! Disabling a skill affects the distribution of all activity types (calls, chats, tasks) in the queues!
1.8. How to view table pages
Pagination elements are available below the registry table:
-
Buttons to navigate to the previous or next page;
-
Rows per page selector: 10, 25, 50, etc.