
1. Description
This instruction describes how to create, from scratch, a Webitel User who can work as a contact center Agent.
The settings are configured in the "Admin" application. An Agent in Webitel combines three objects:
-
a User;
-
a Skill;
-
a Team.
First create them (steps 1–3), and then select them when creating the Agent (step 4). If the required Skill or Team already exists in the domain, you can skip the corresponding step.
2. Prerequisites
-
Access to the "Admin" application with permissions to create Users, Skills, Teams and Agents (for example, the
sysadminrole, which has all permissions). -
A free license is available in the domain.
3. Steps
Step 1. Create a User
-
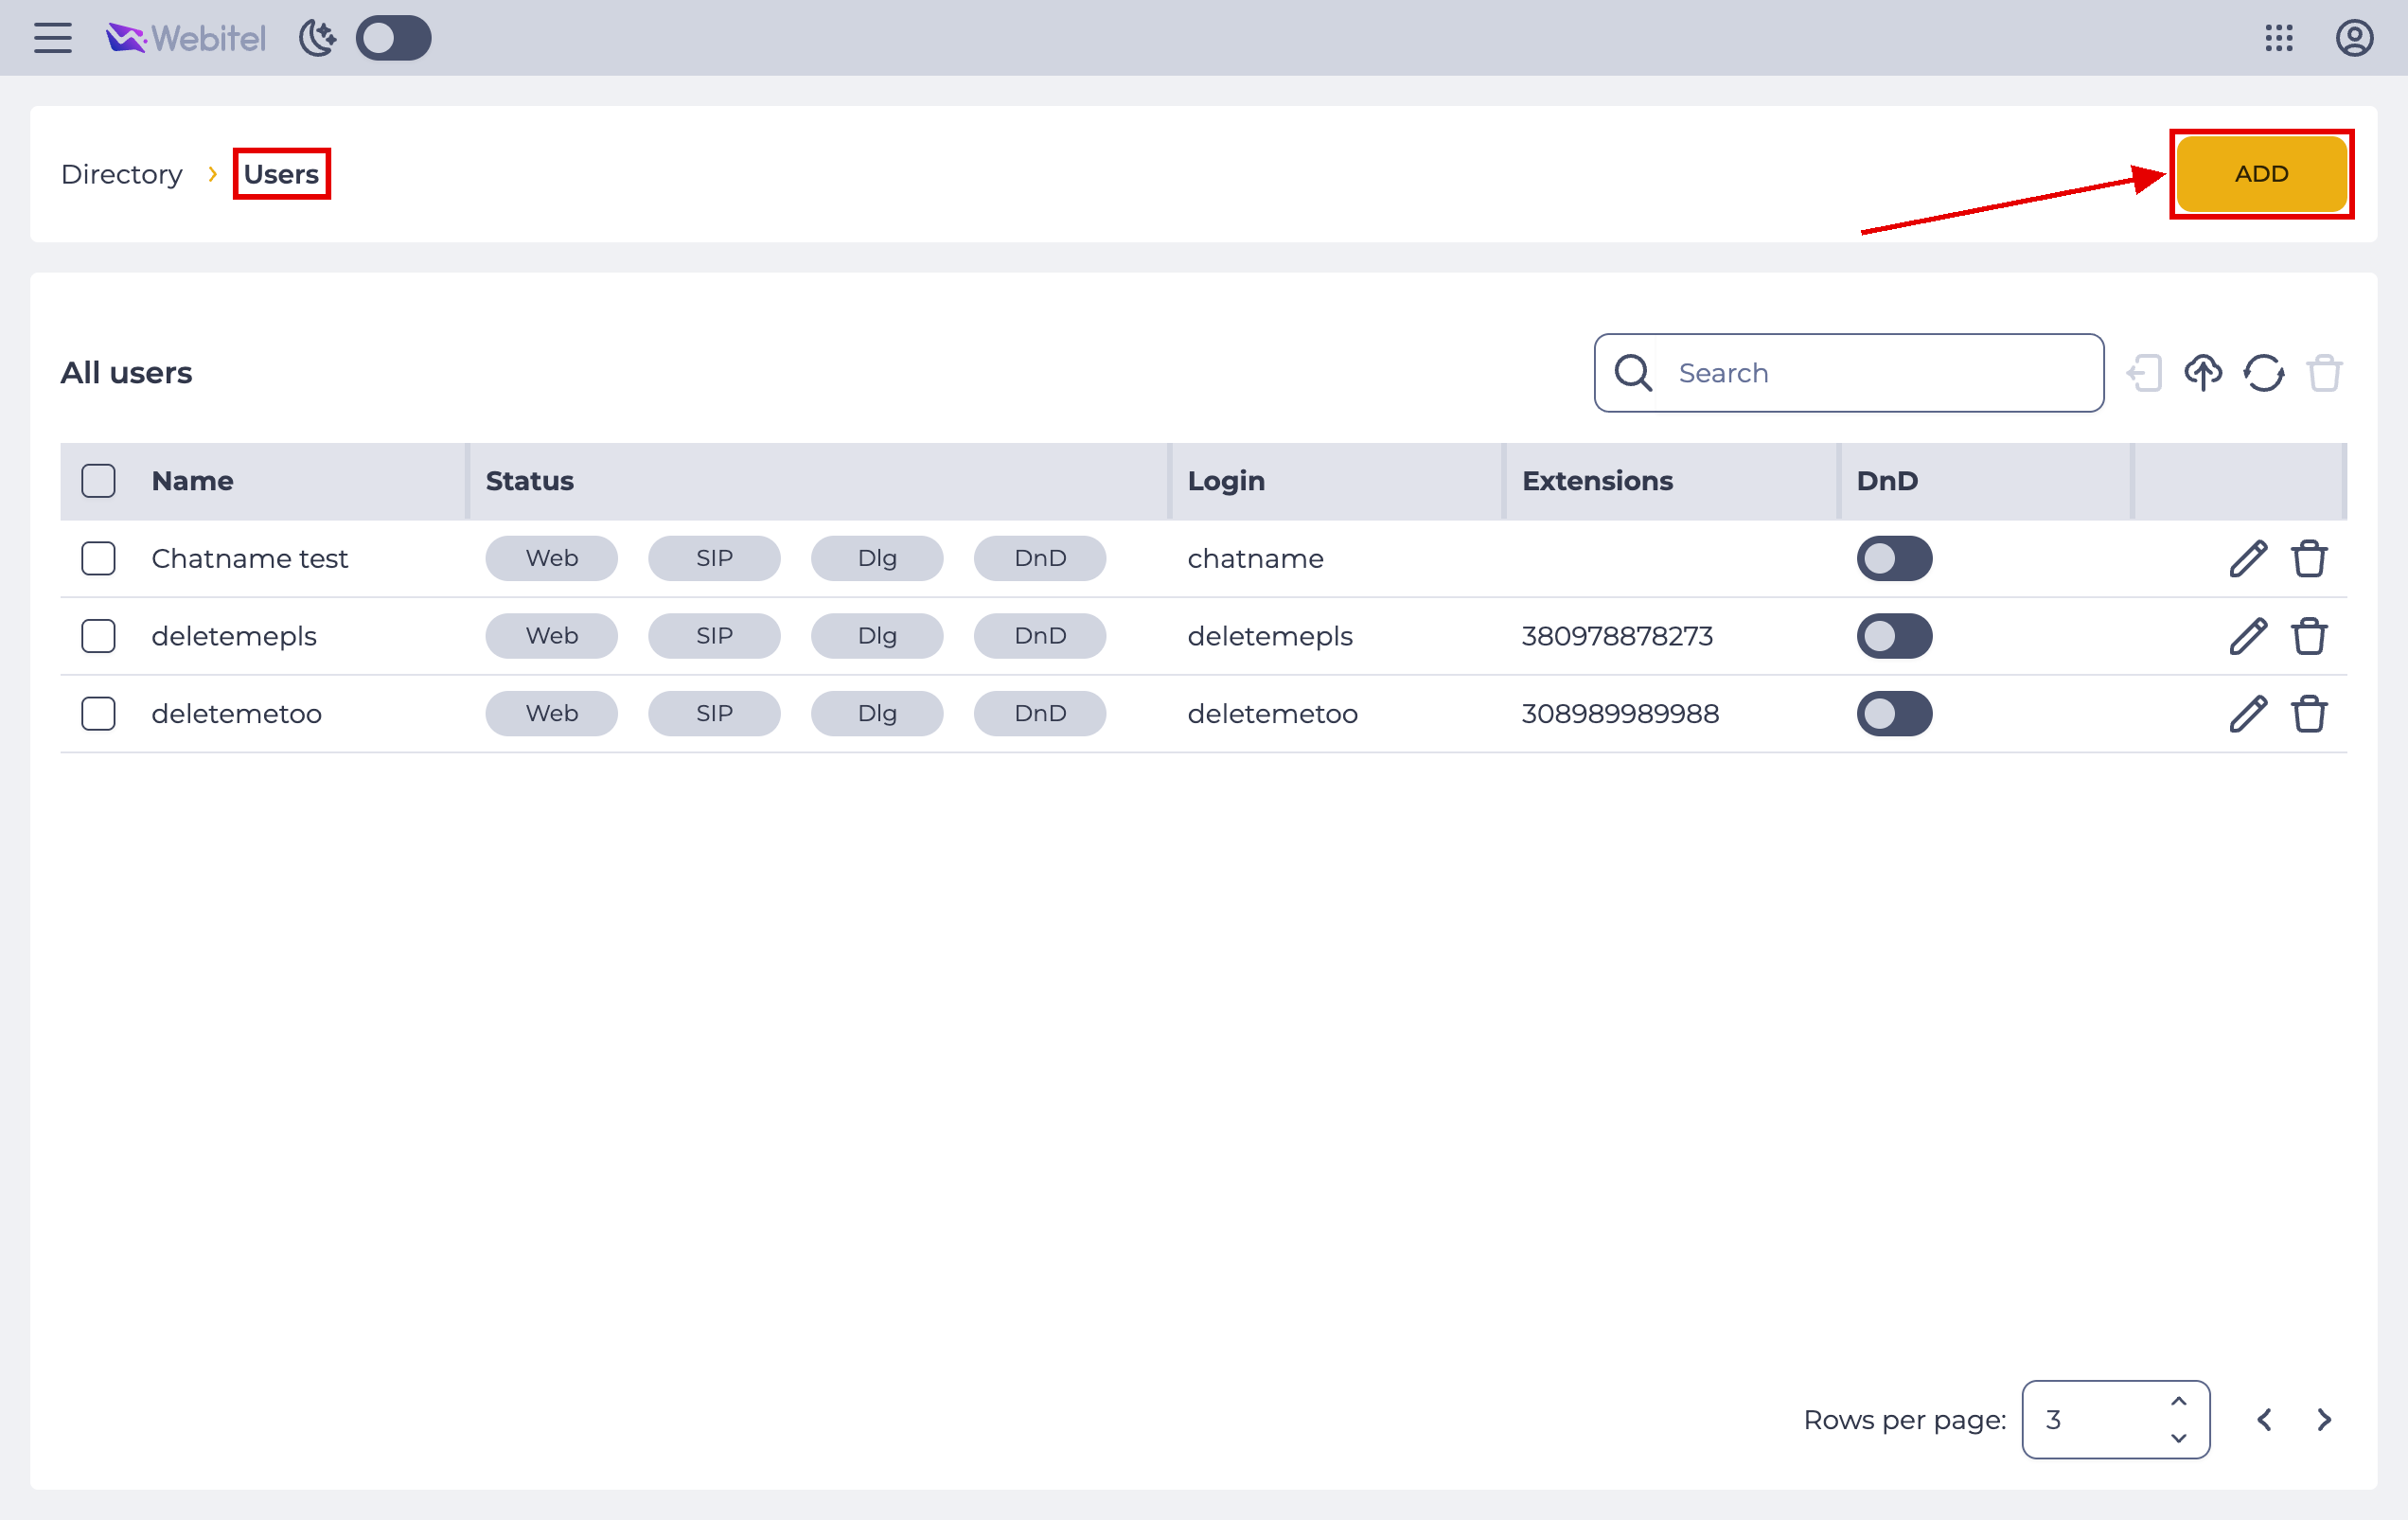
In the "Admin" application, go to "Directory" → "Users" and click "Add" (Fig. 1).
-
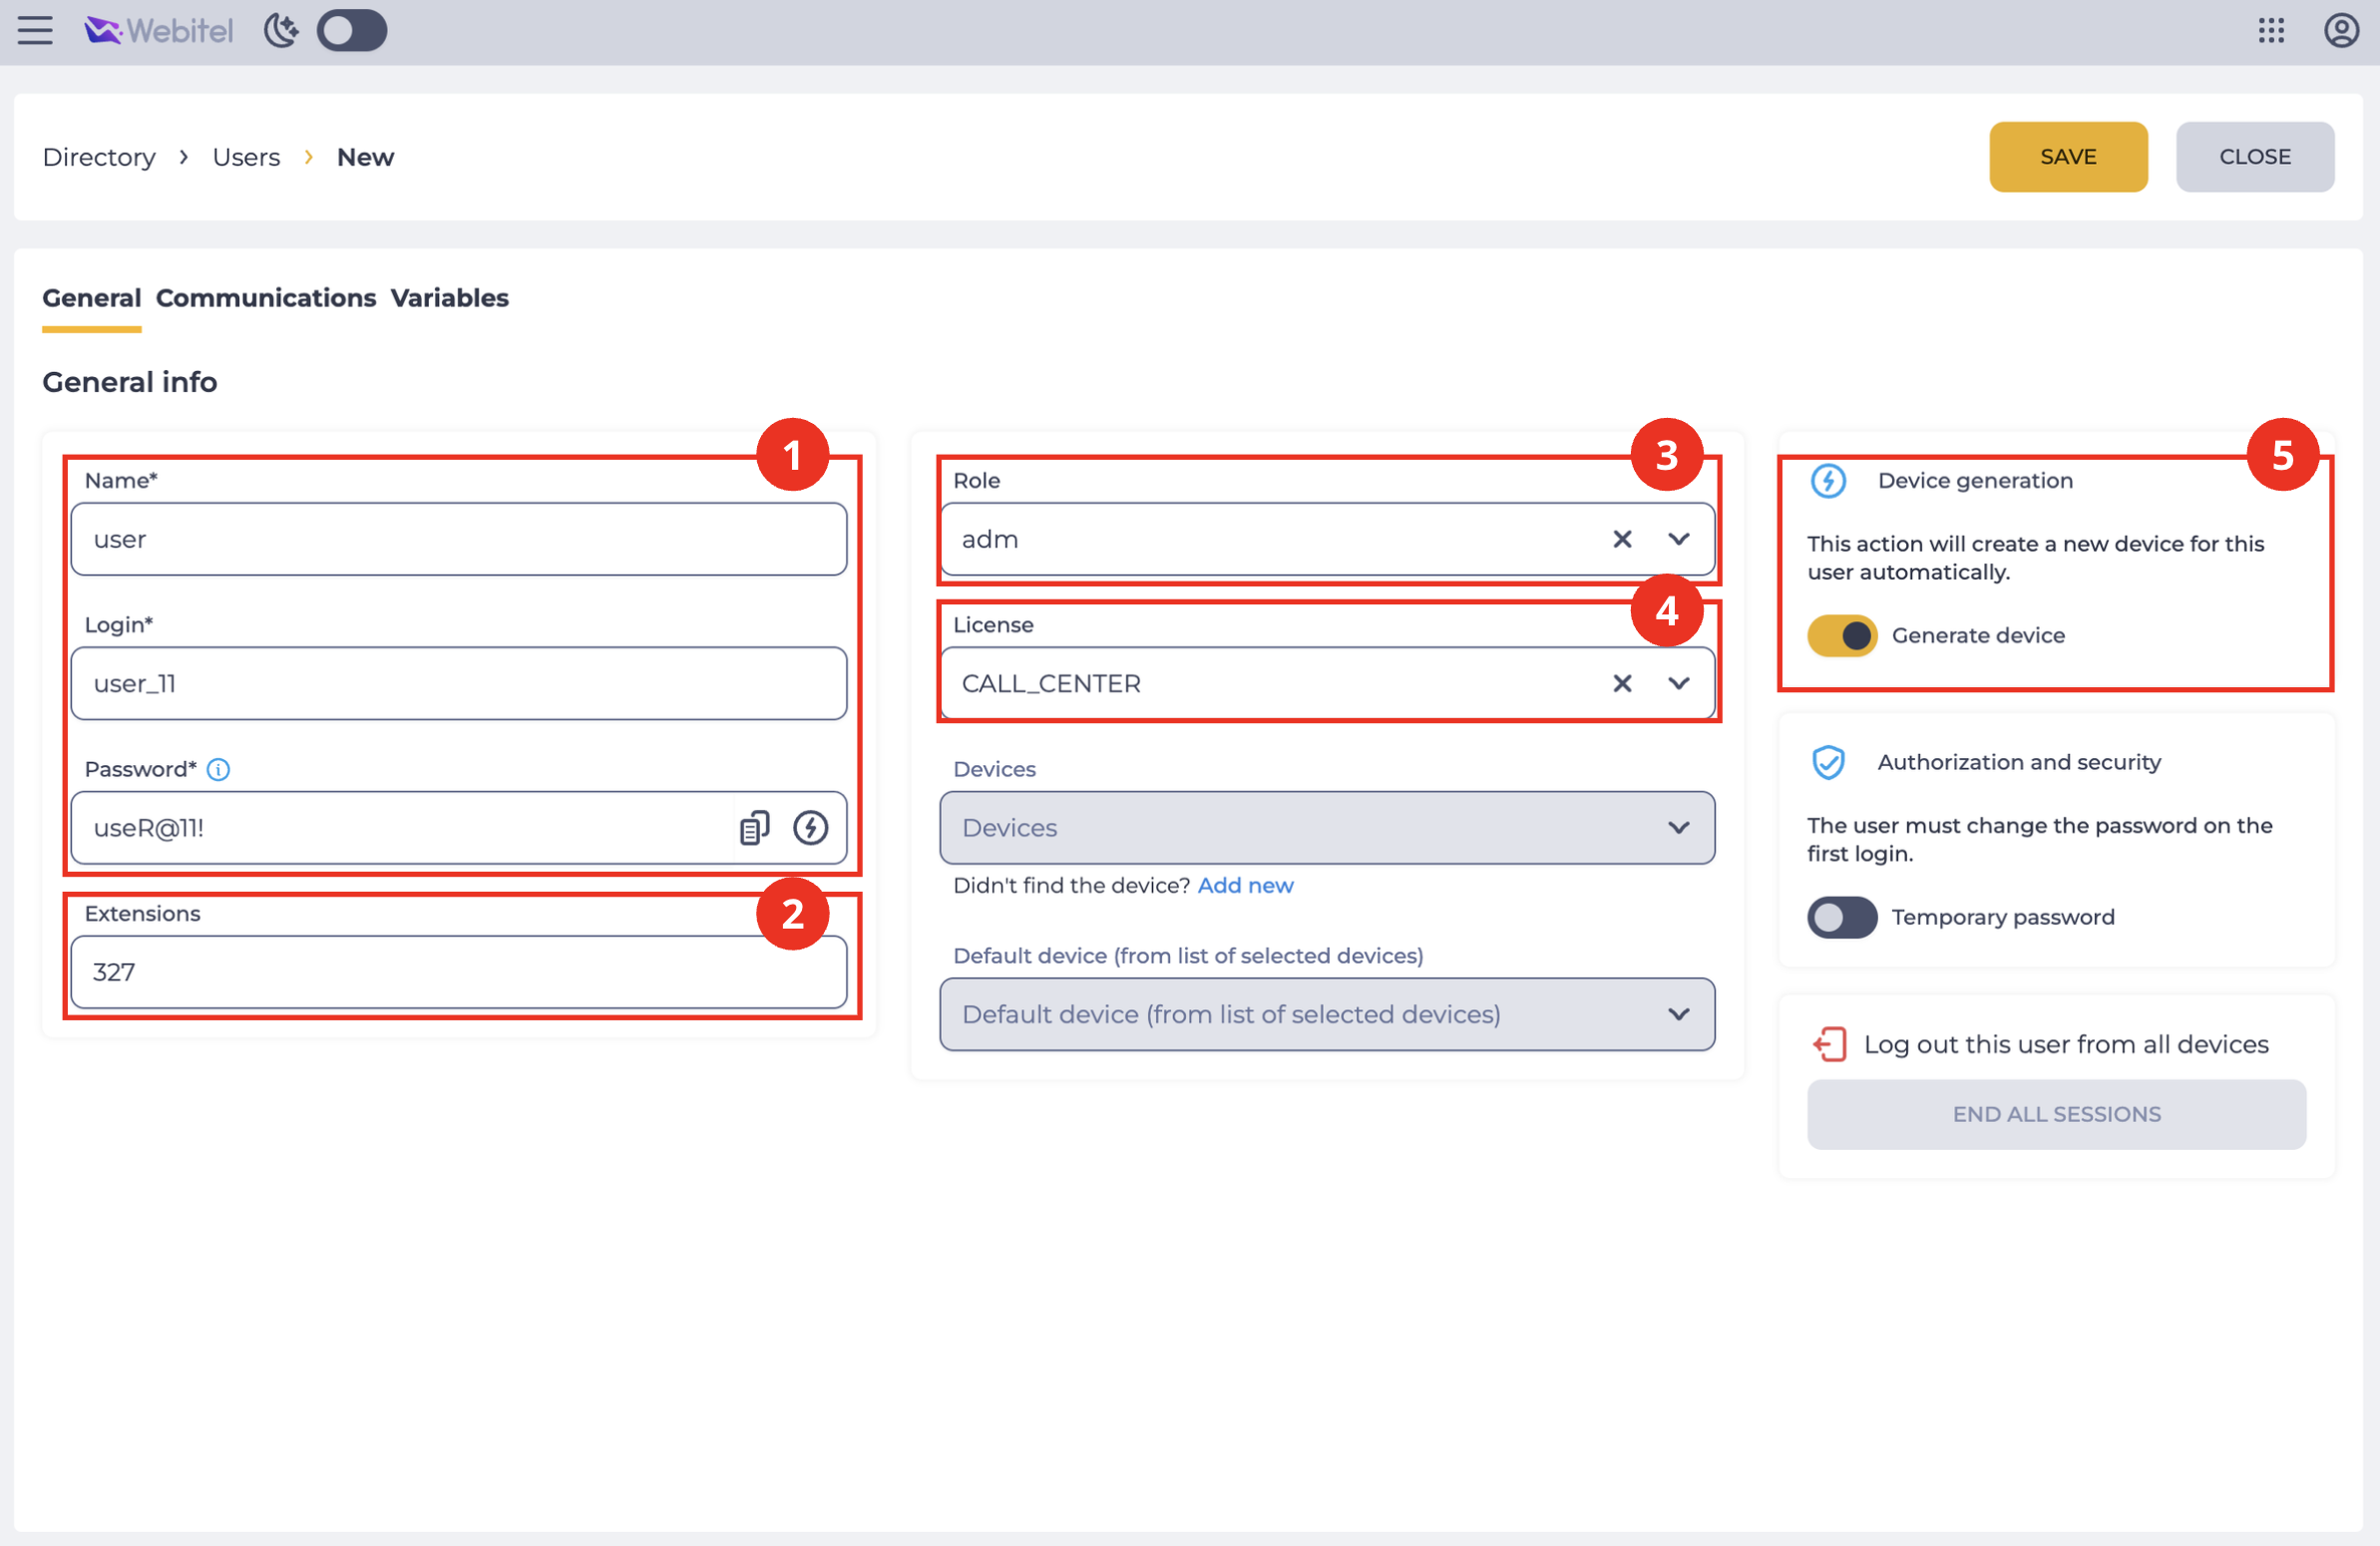
Fill in the required fields "Name", "Login" and "Password" (Fig. 2.(1)).
-
Fill in the "Extension" field (Fig. 2.(2)). It is used for the Agent's internal calls.
-
In the "Role" field (Fig. 2.(3)), select the User's role.
-
In the "License" field (Fig. 2.(4)), select a license. Without it, the Agent cannot log in to the system. Add licenses as needed, depending on the sections the Agent will work in.
-
Add a device to the User in the "Devices" field. Without a device, the Agent cannot make or receive calls, but can work with chats and email. You can add a device in one of two ways:
-
turn on the "Generate device" switch in the "Device generation" block (Fig. 2.(5)) – the system will automatically create a new device for this User (recommended, this is the fastest way);
-
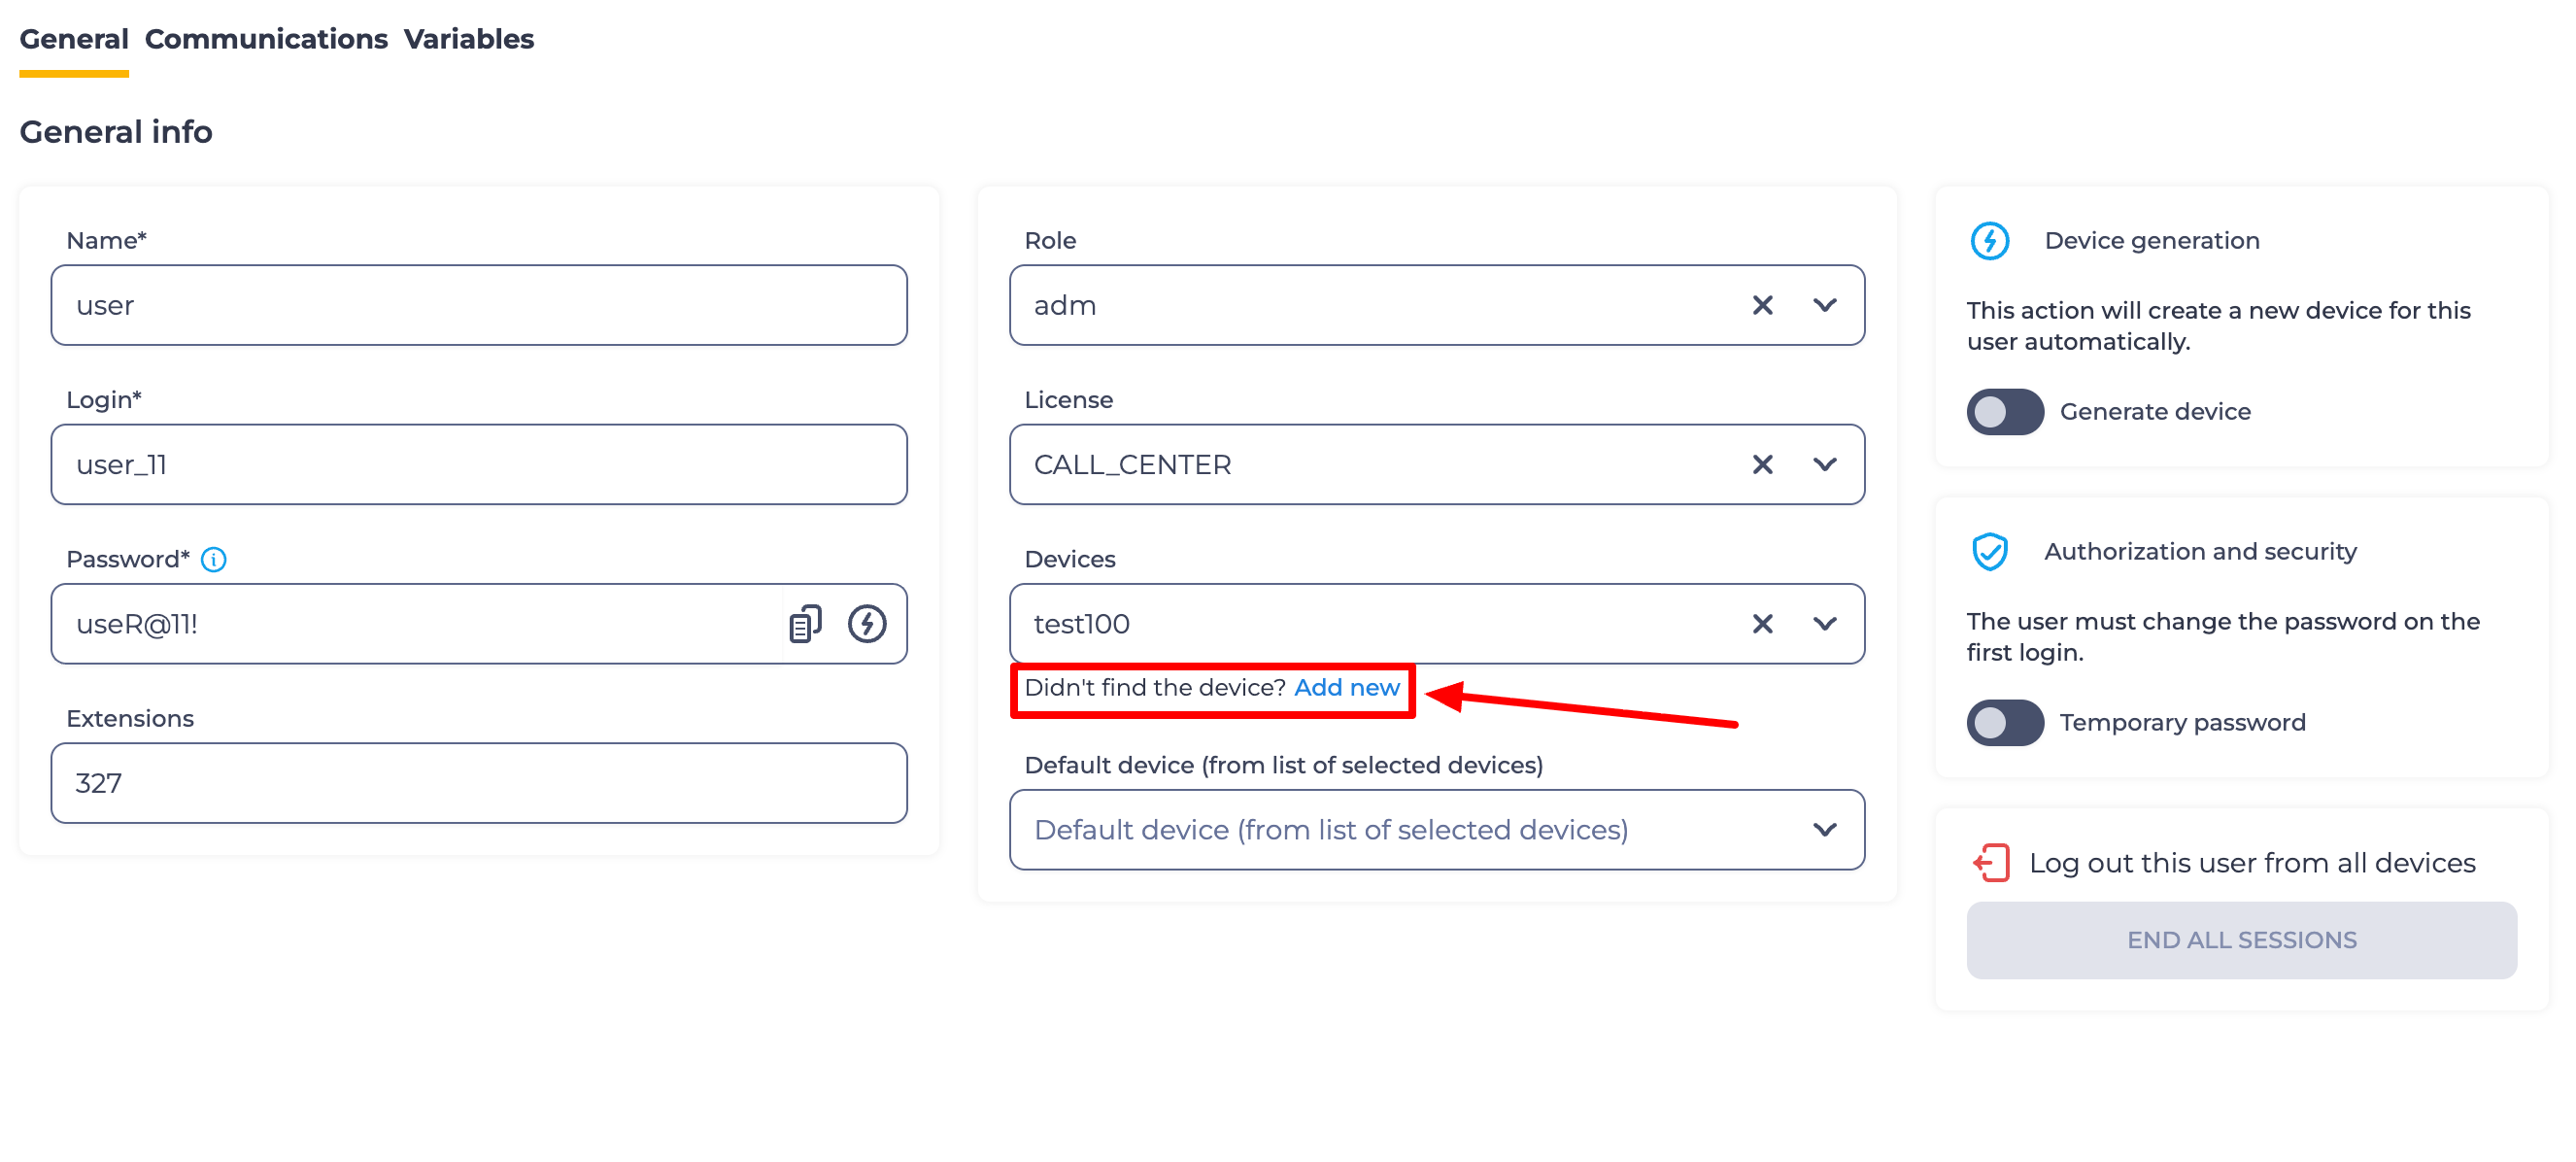
click the "Add new" link under the "Devices" field (Fig. 3) – the device creation form opens in "Directory" → "Devices". Create the device, return to the User card and select it in the "Devices" field.
-
-
Click "Save".
Other fields and tabs of the User card (for example, email) are not required to create an Agent. Fill them in as needed.
For more details, see "Users", "Roles", "Licenses" and "Devices".
Step 2. Create a Skill
If the required Skill already exists in the domain, you can skip this step.
-
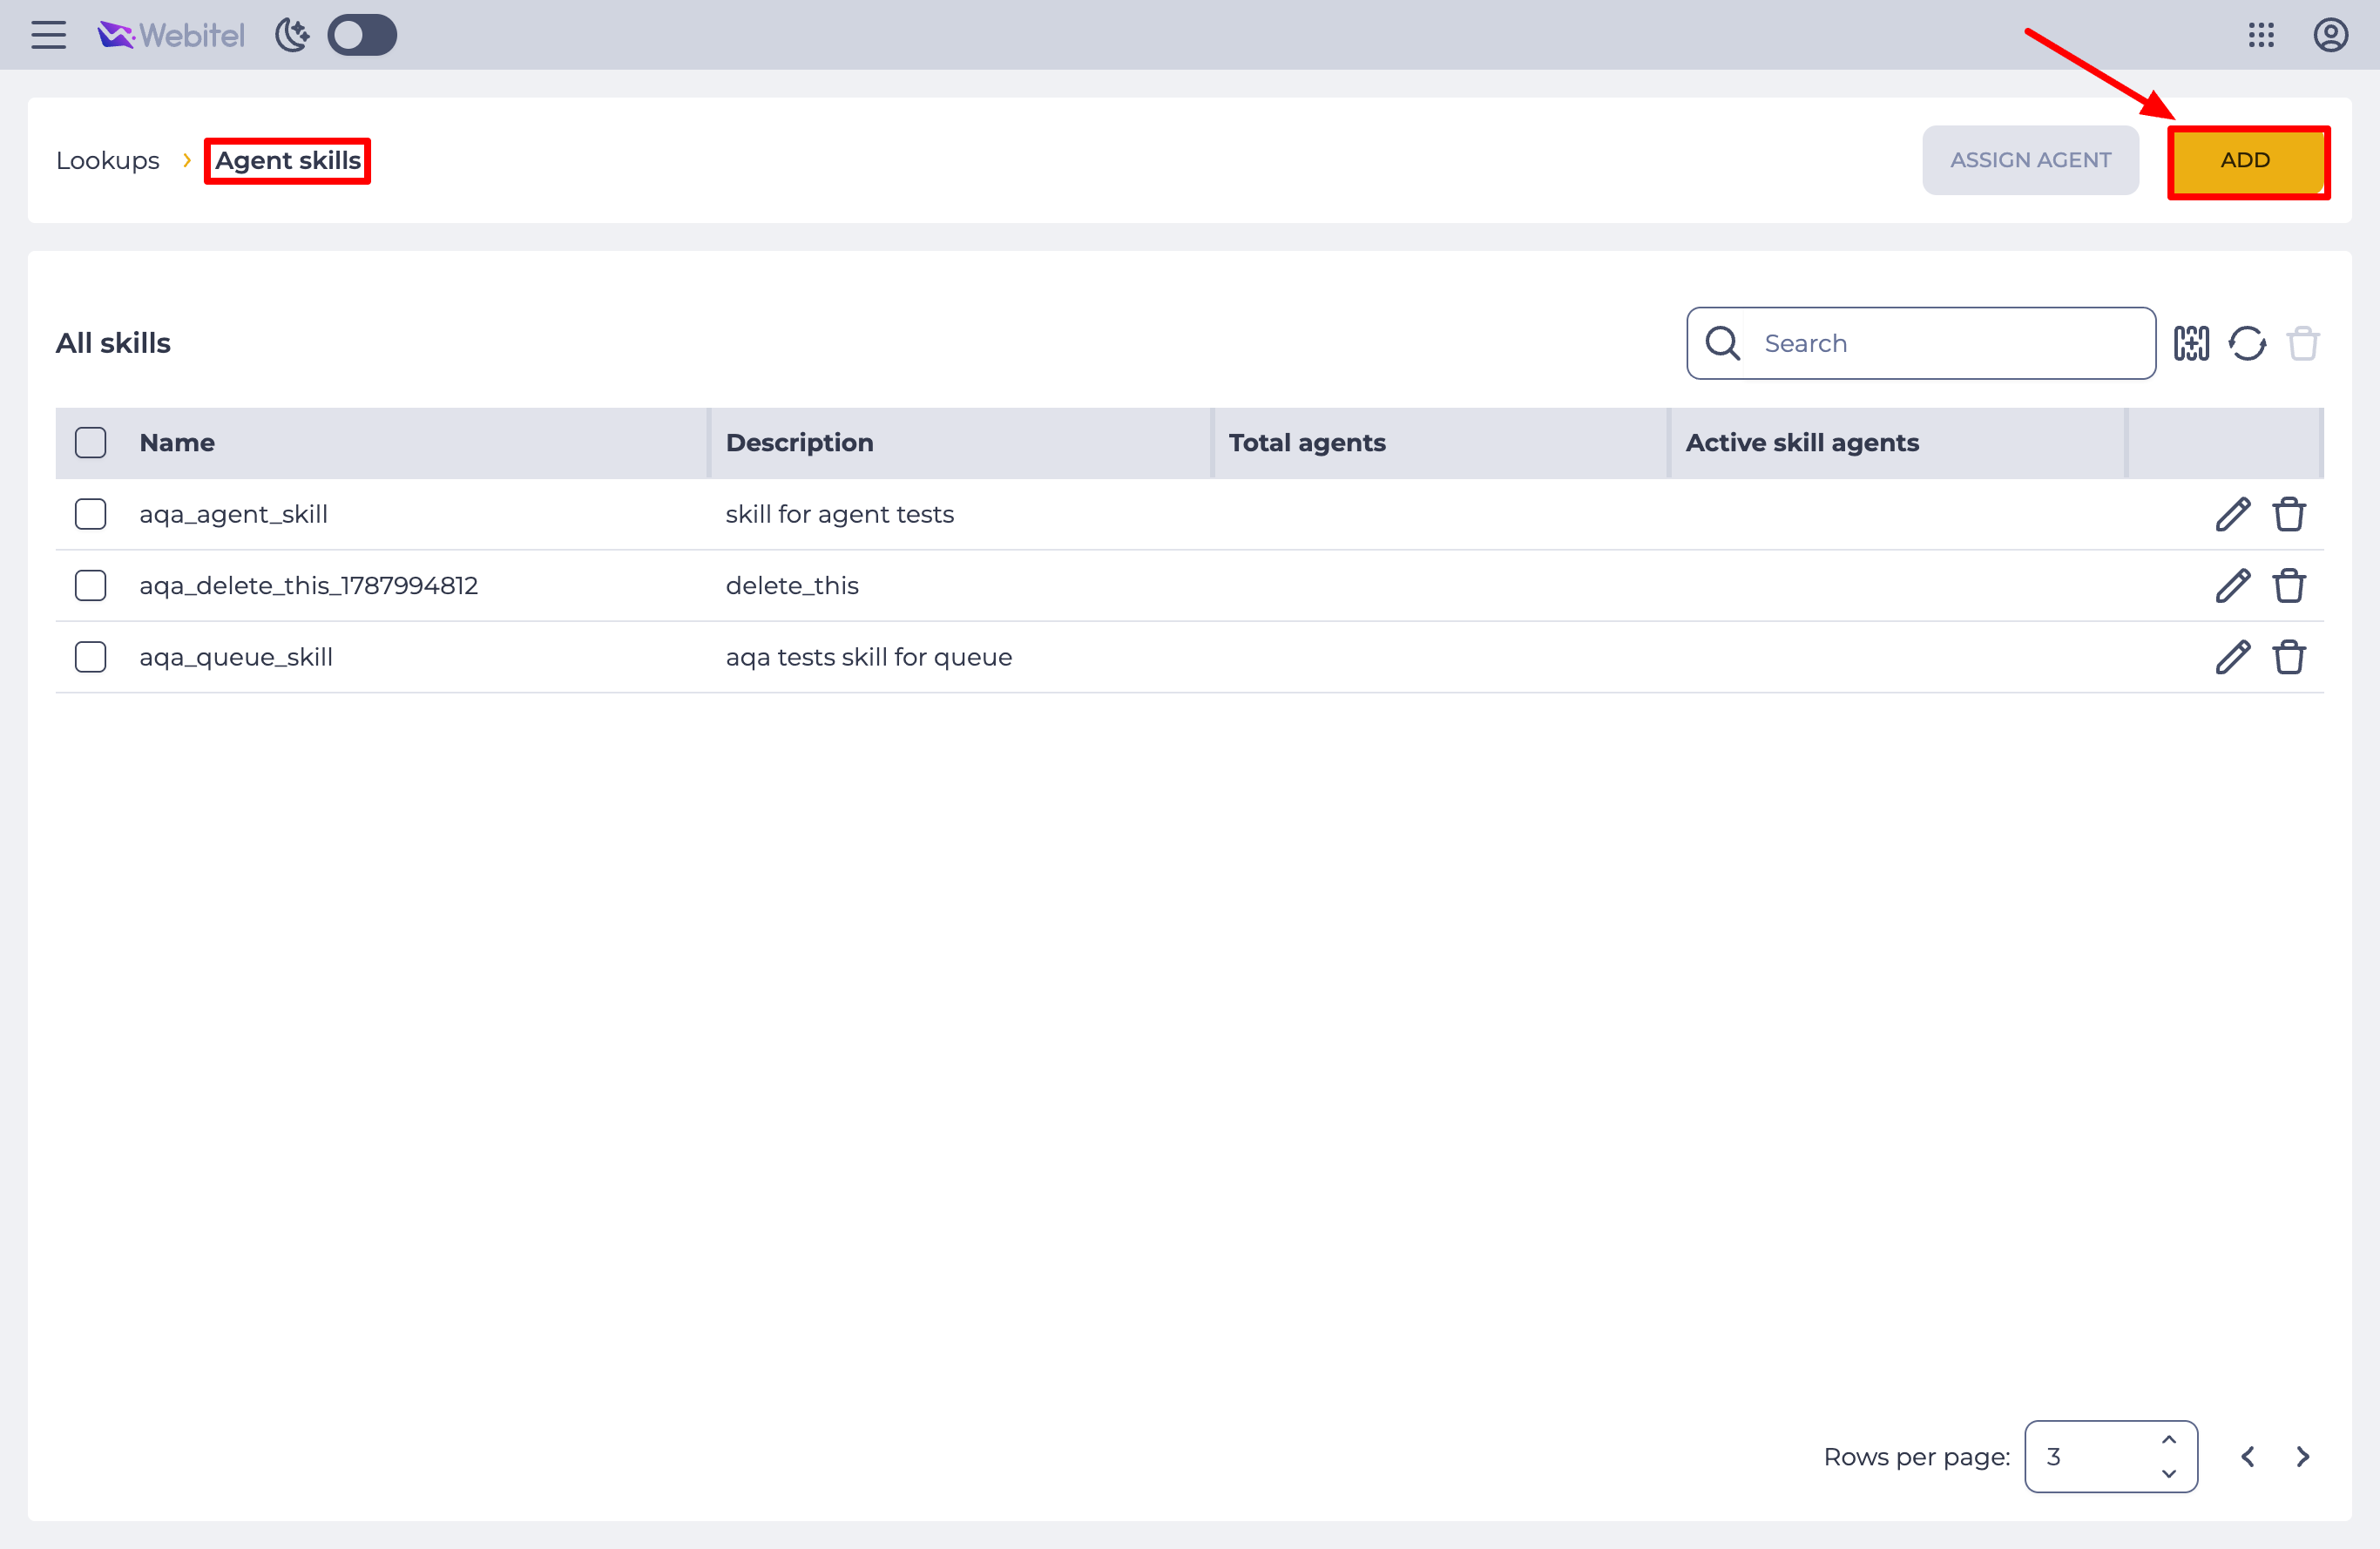
Go to "Lookups" → "Agent Skills" and click "Add" (Fig. 4).
-
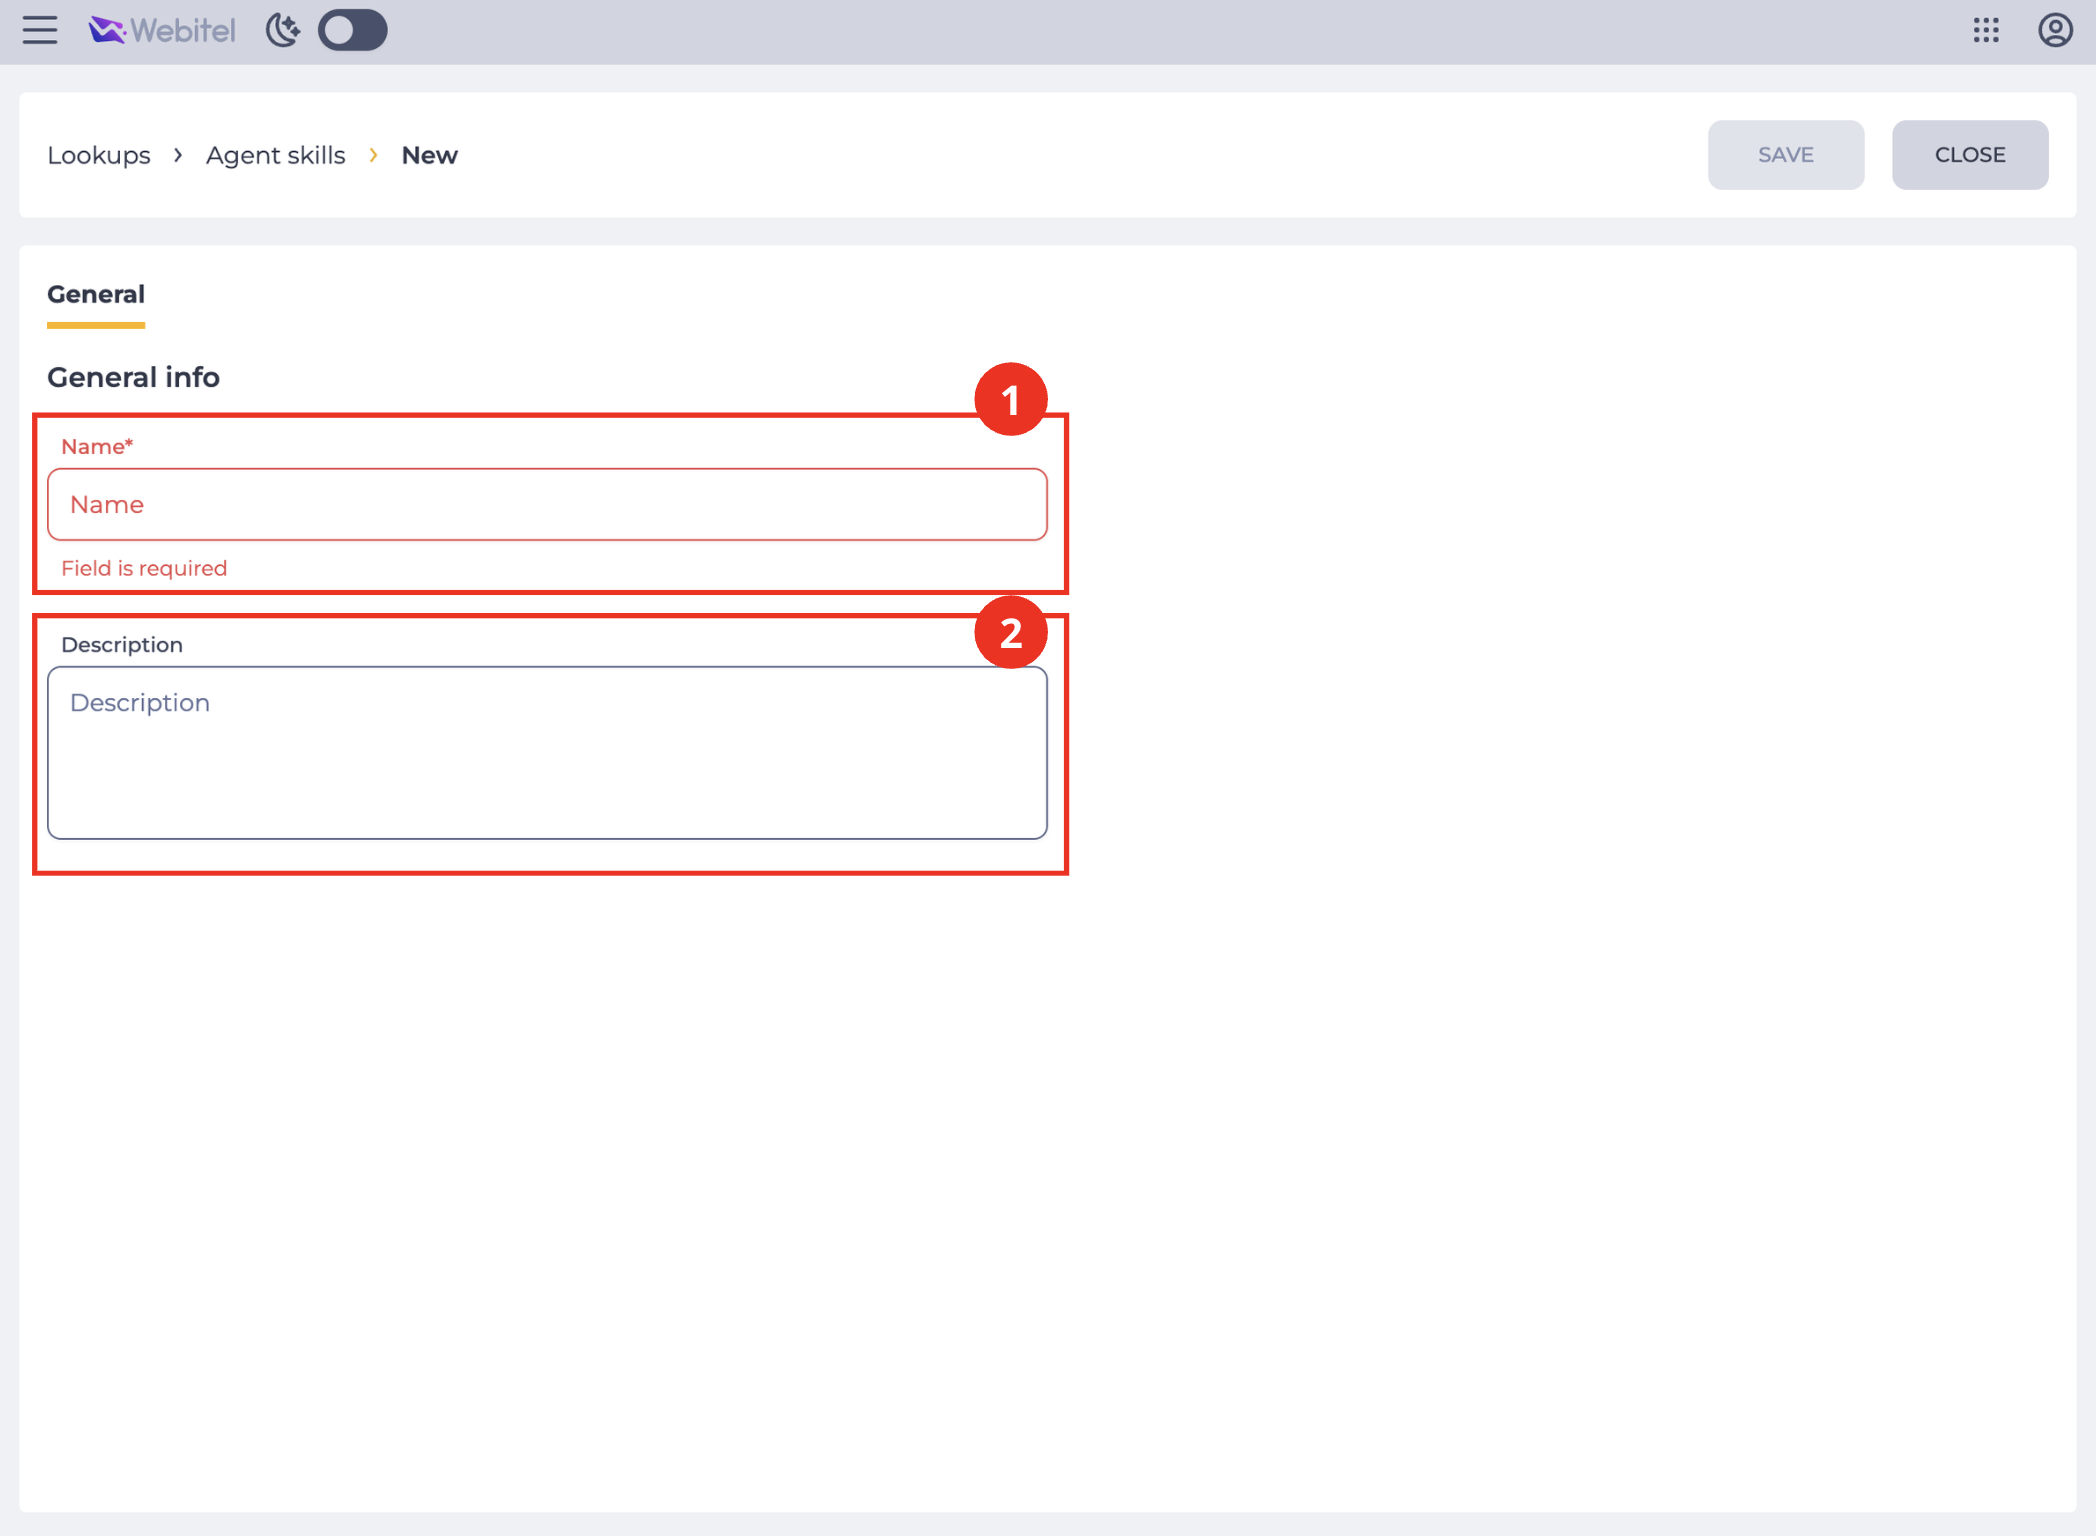
Fill in the "Name" field (Fig. 5.(1)) and, if needed, the "Description" field (Fig. 5.(2)).
-
Click "Save". You will need the Skill in step 4.
For more details, see "Agent Skills".
Step 3. Create a Team
If the required Team already exists in the domain, you can skip this step.
-
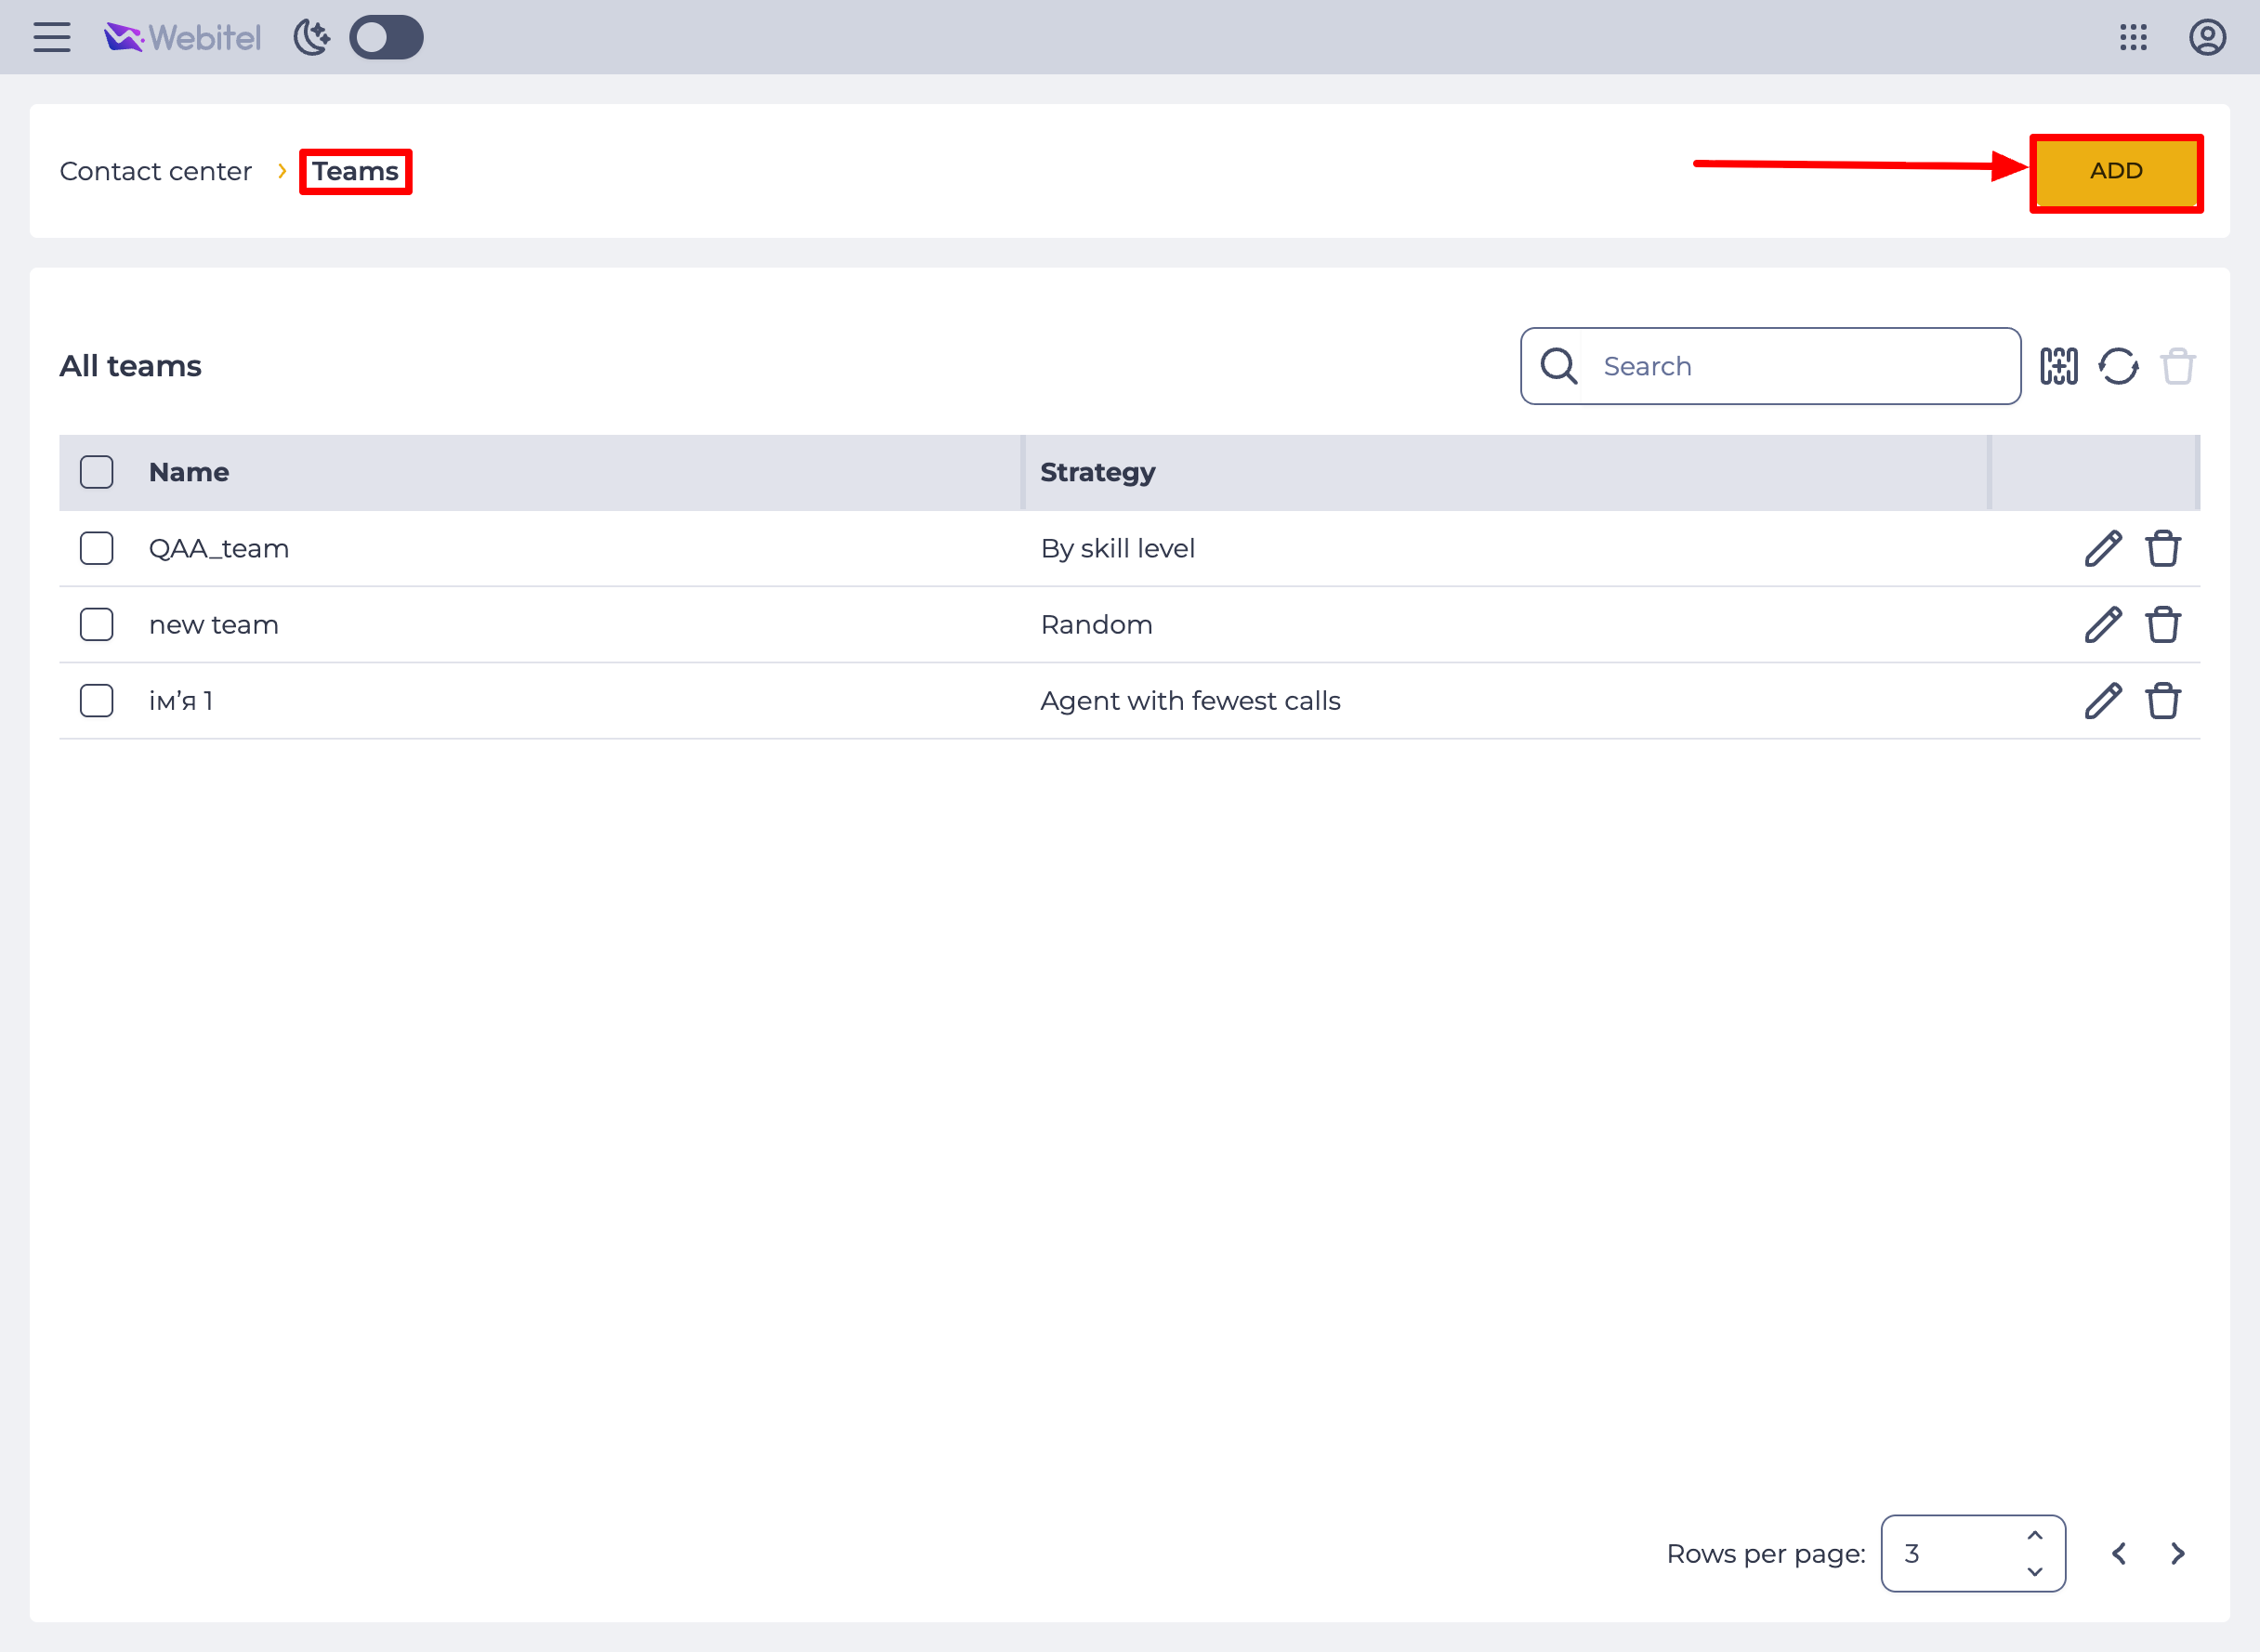
Go to "Contact center" → "Teams" and click "Add" (Fig. 6).
-
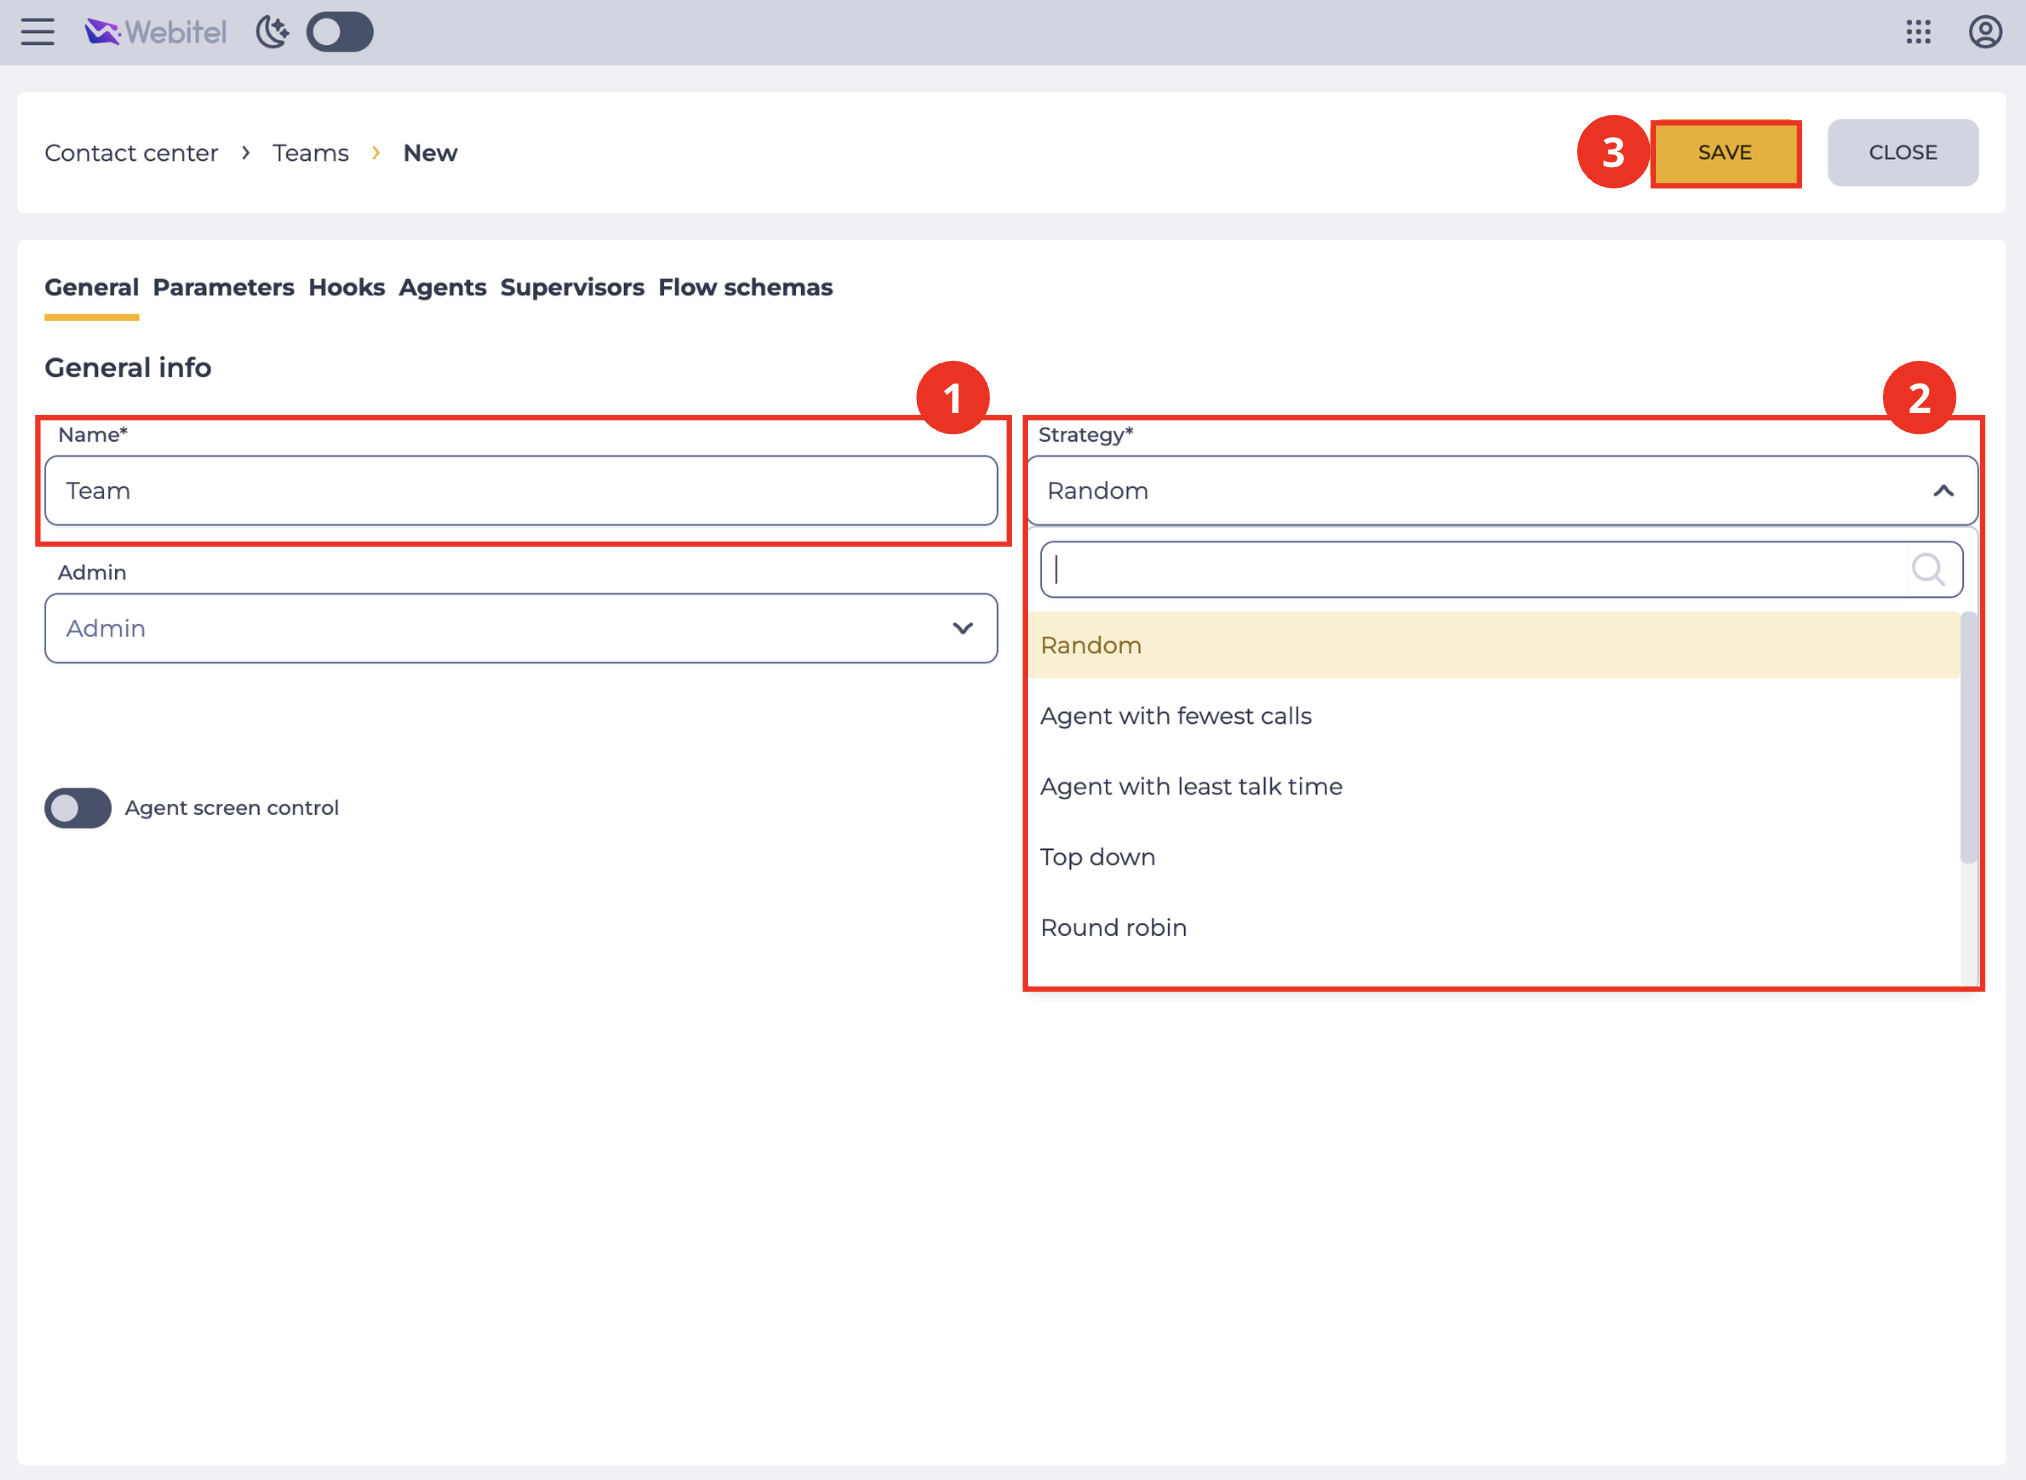
Fill in the required "Name" field (Fig. 7.(1)) and select a distribution strategy in the "Strategy" field (Fig. 7.(2)).
-
Click "Save" (Fig. 7.(3)). The other parameters have correct default values. Change them as needed.
For more details, see "Teams".
Step 4. Create an Agent
-
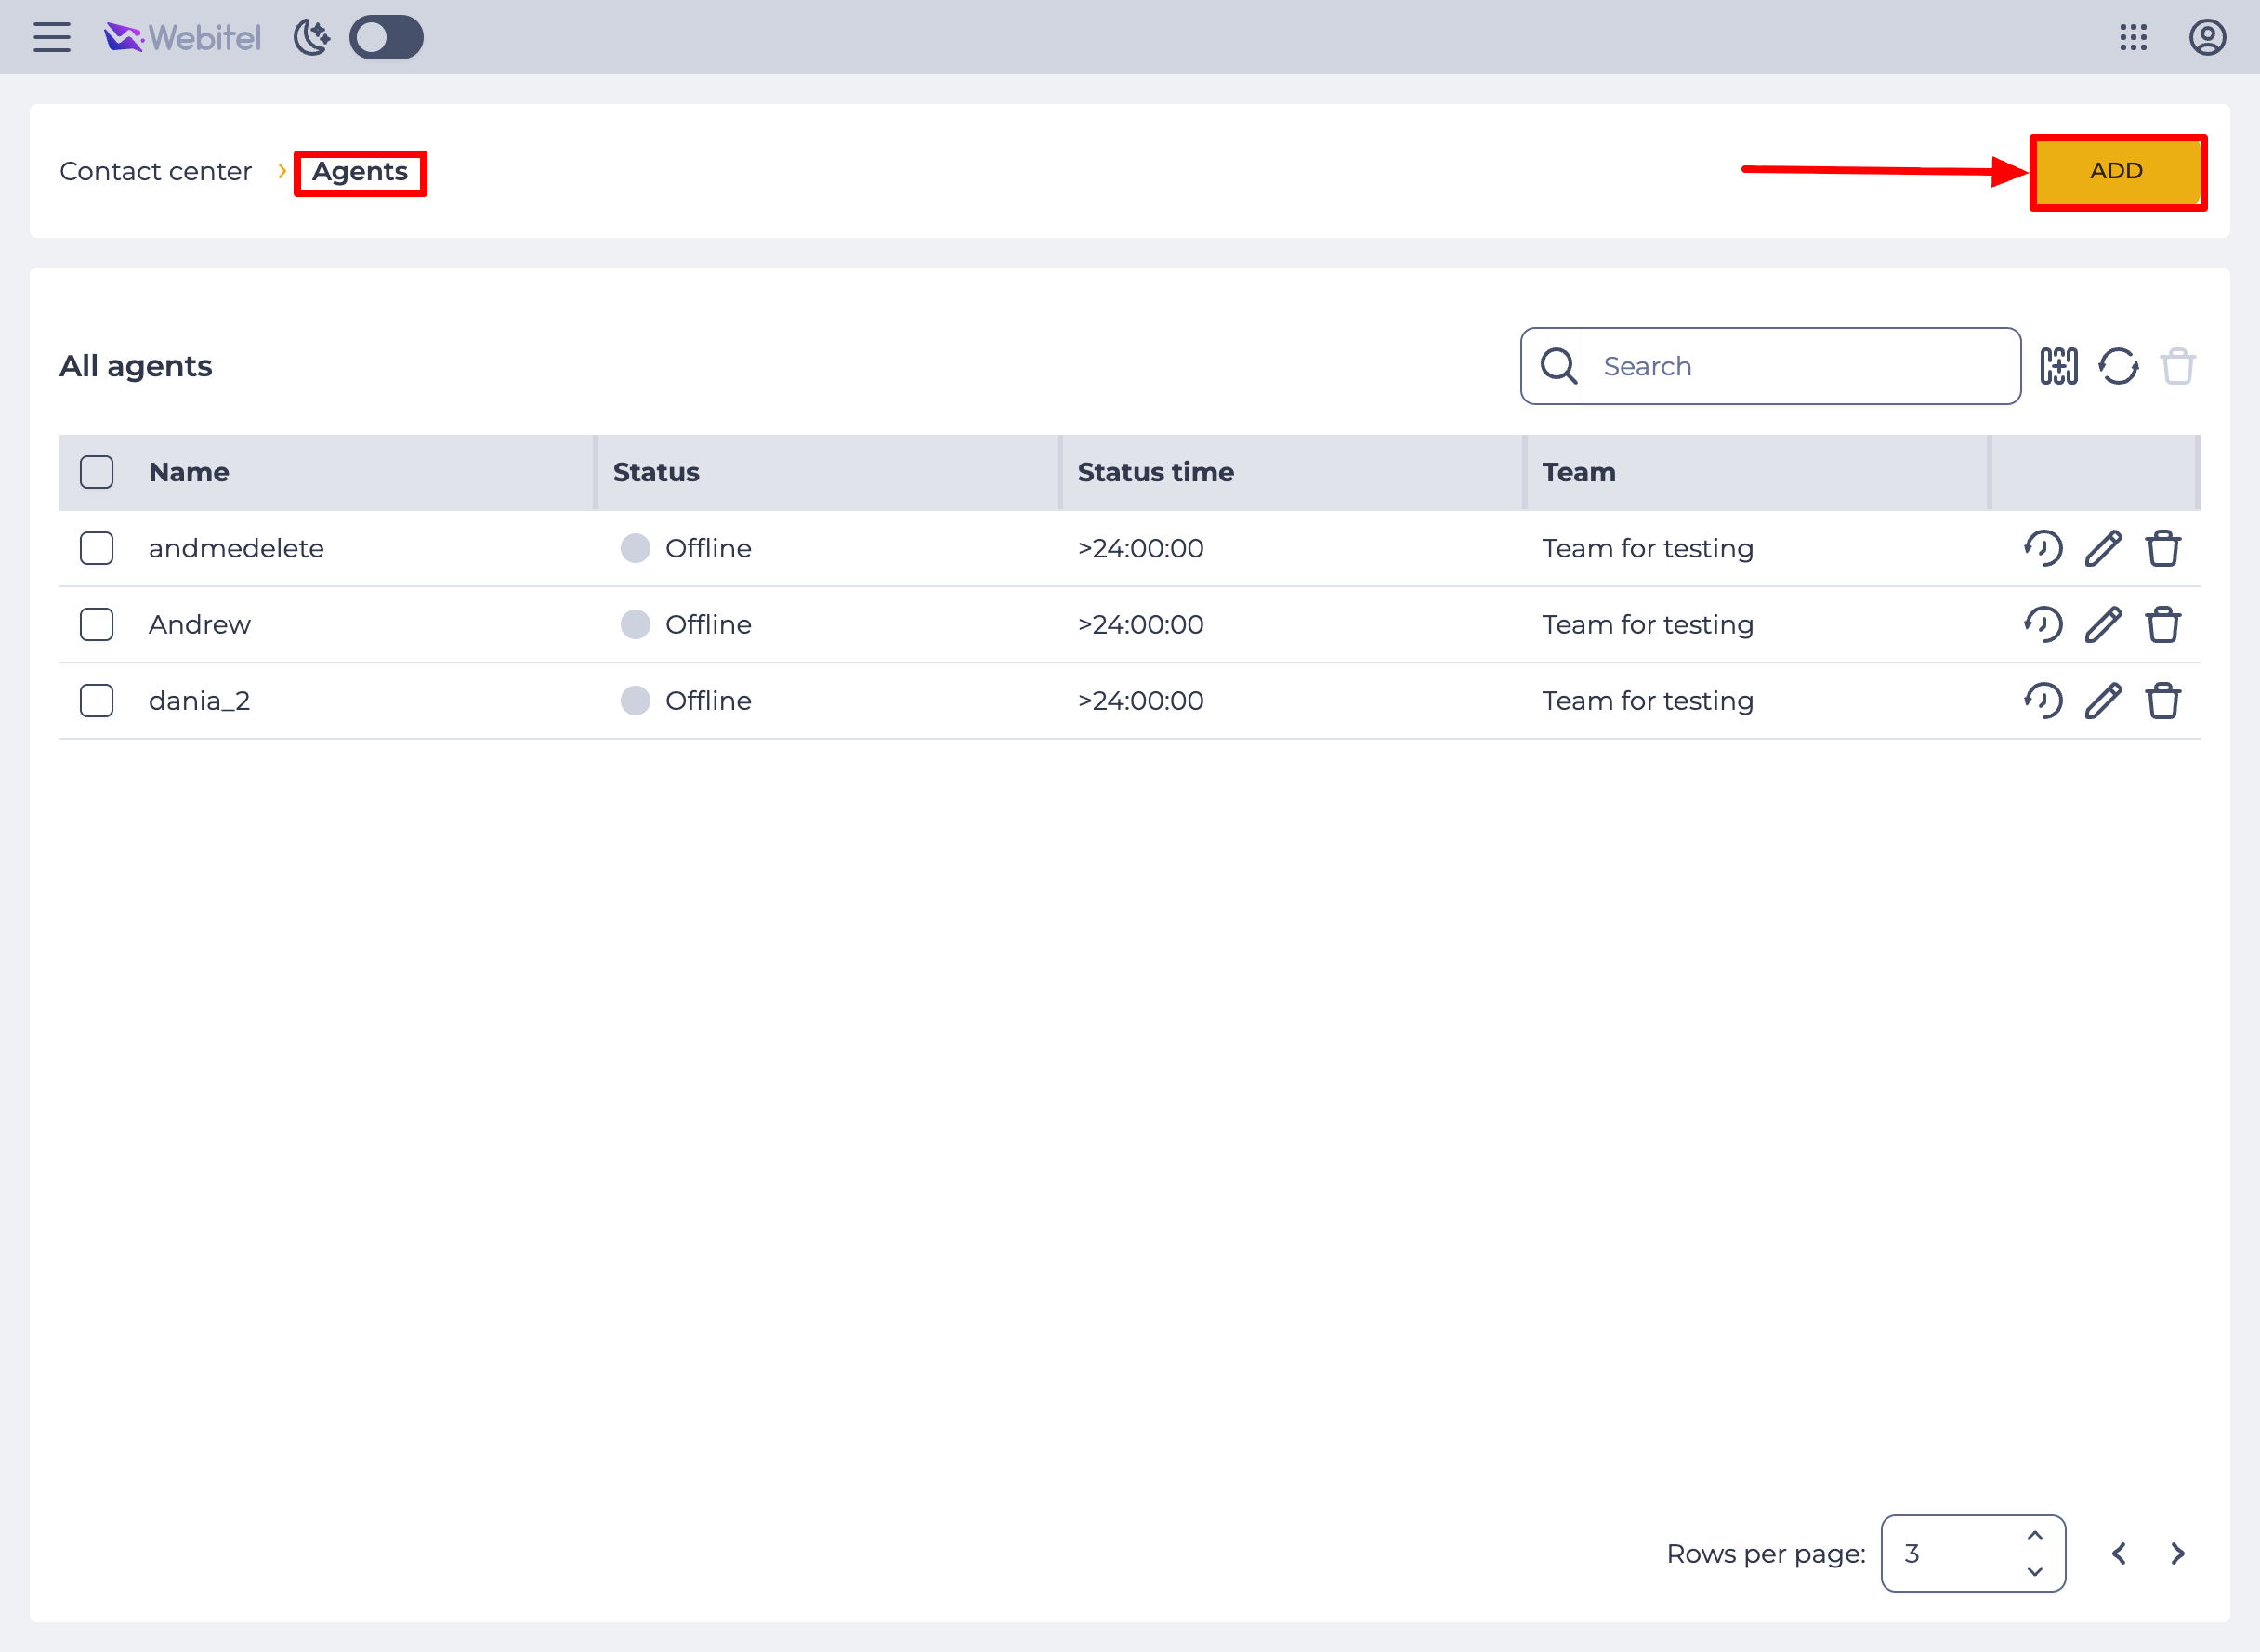
Go to "Contact center" → "Agents" and click "Add" (Fig. 8).
-
In the "User" field (Fig. 9.(1)), select the User created in step 1.
-
In the "Team" field (Fig. 9.(2)), select the Team from step 3.
-
Click "Save" (Fig. 9.(3)).
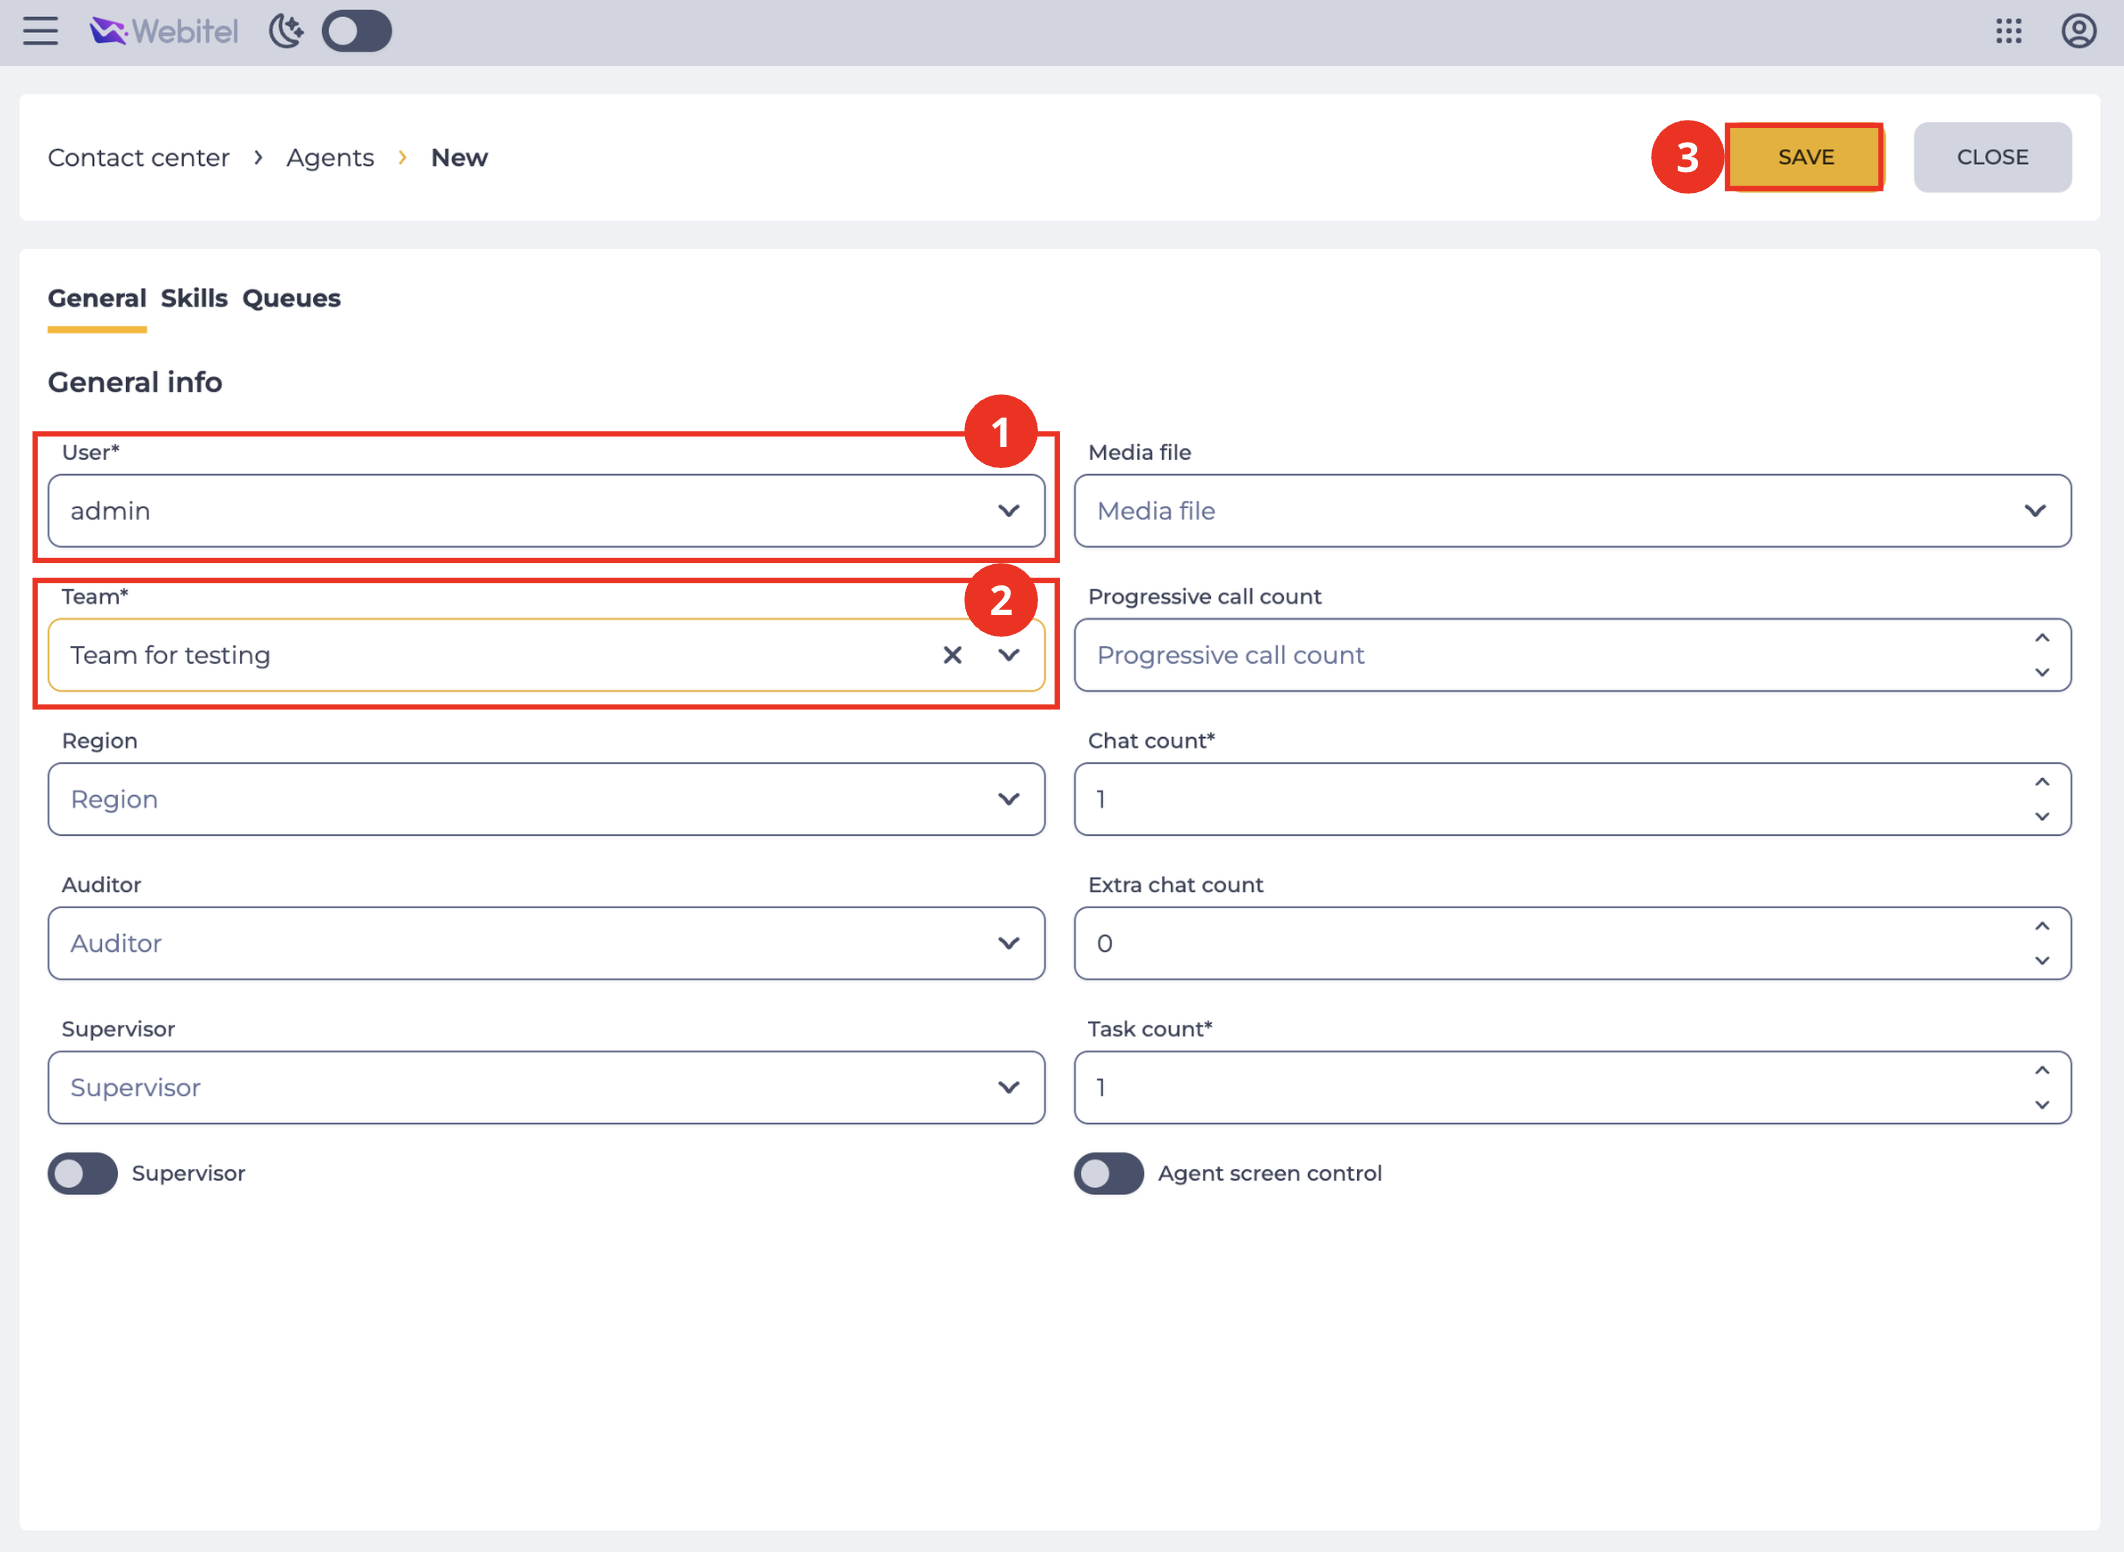
Other fields of the "General" tab are not required to create an Agent. Fill them in as needed.
For more details, see "General" ("Agents").
-
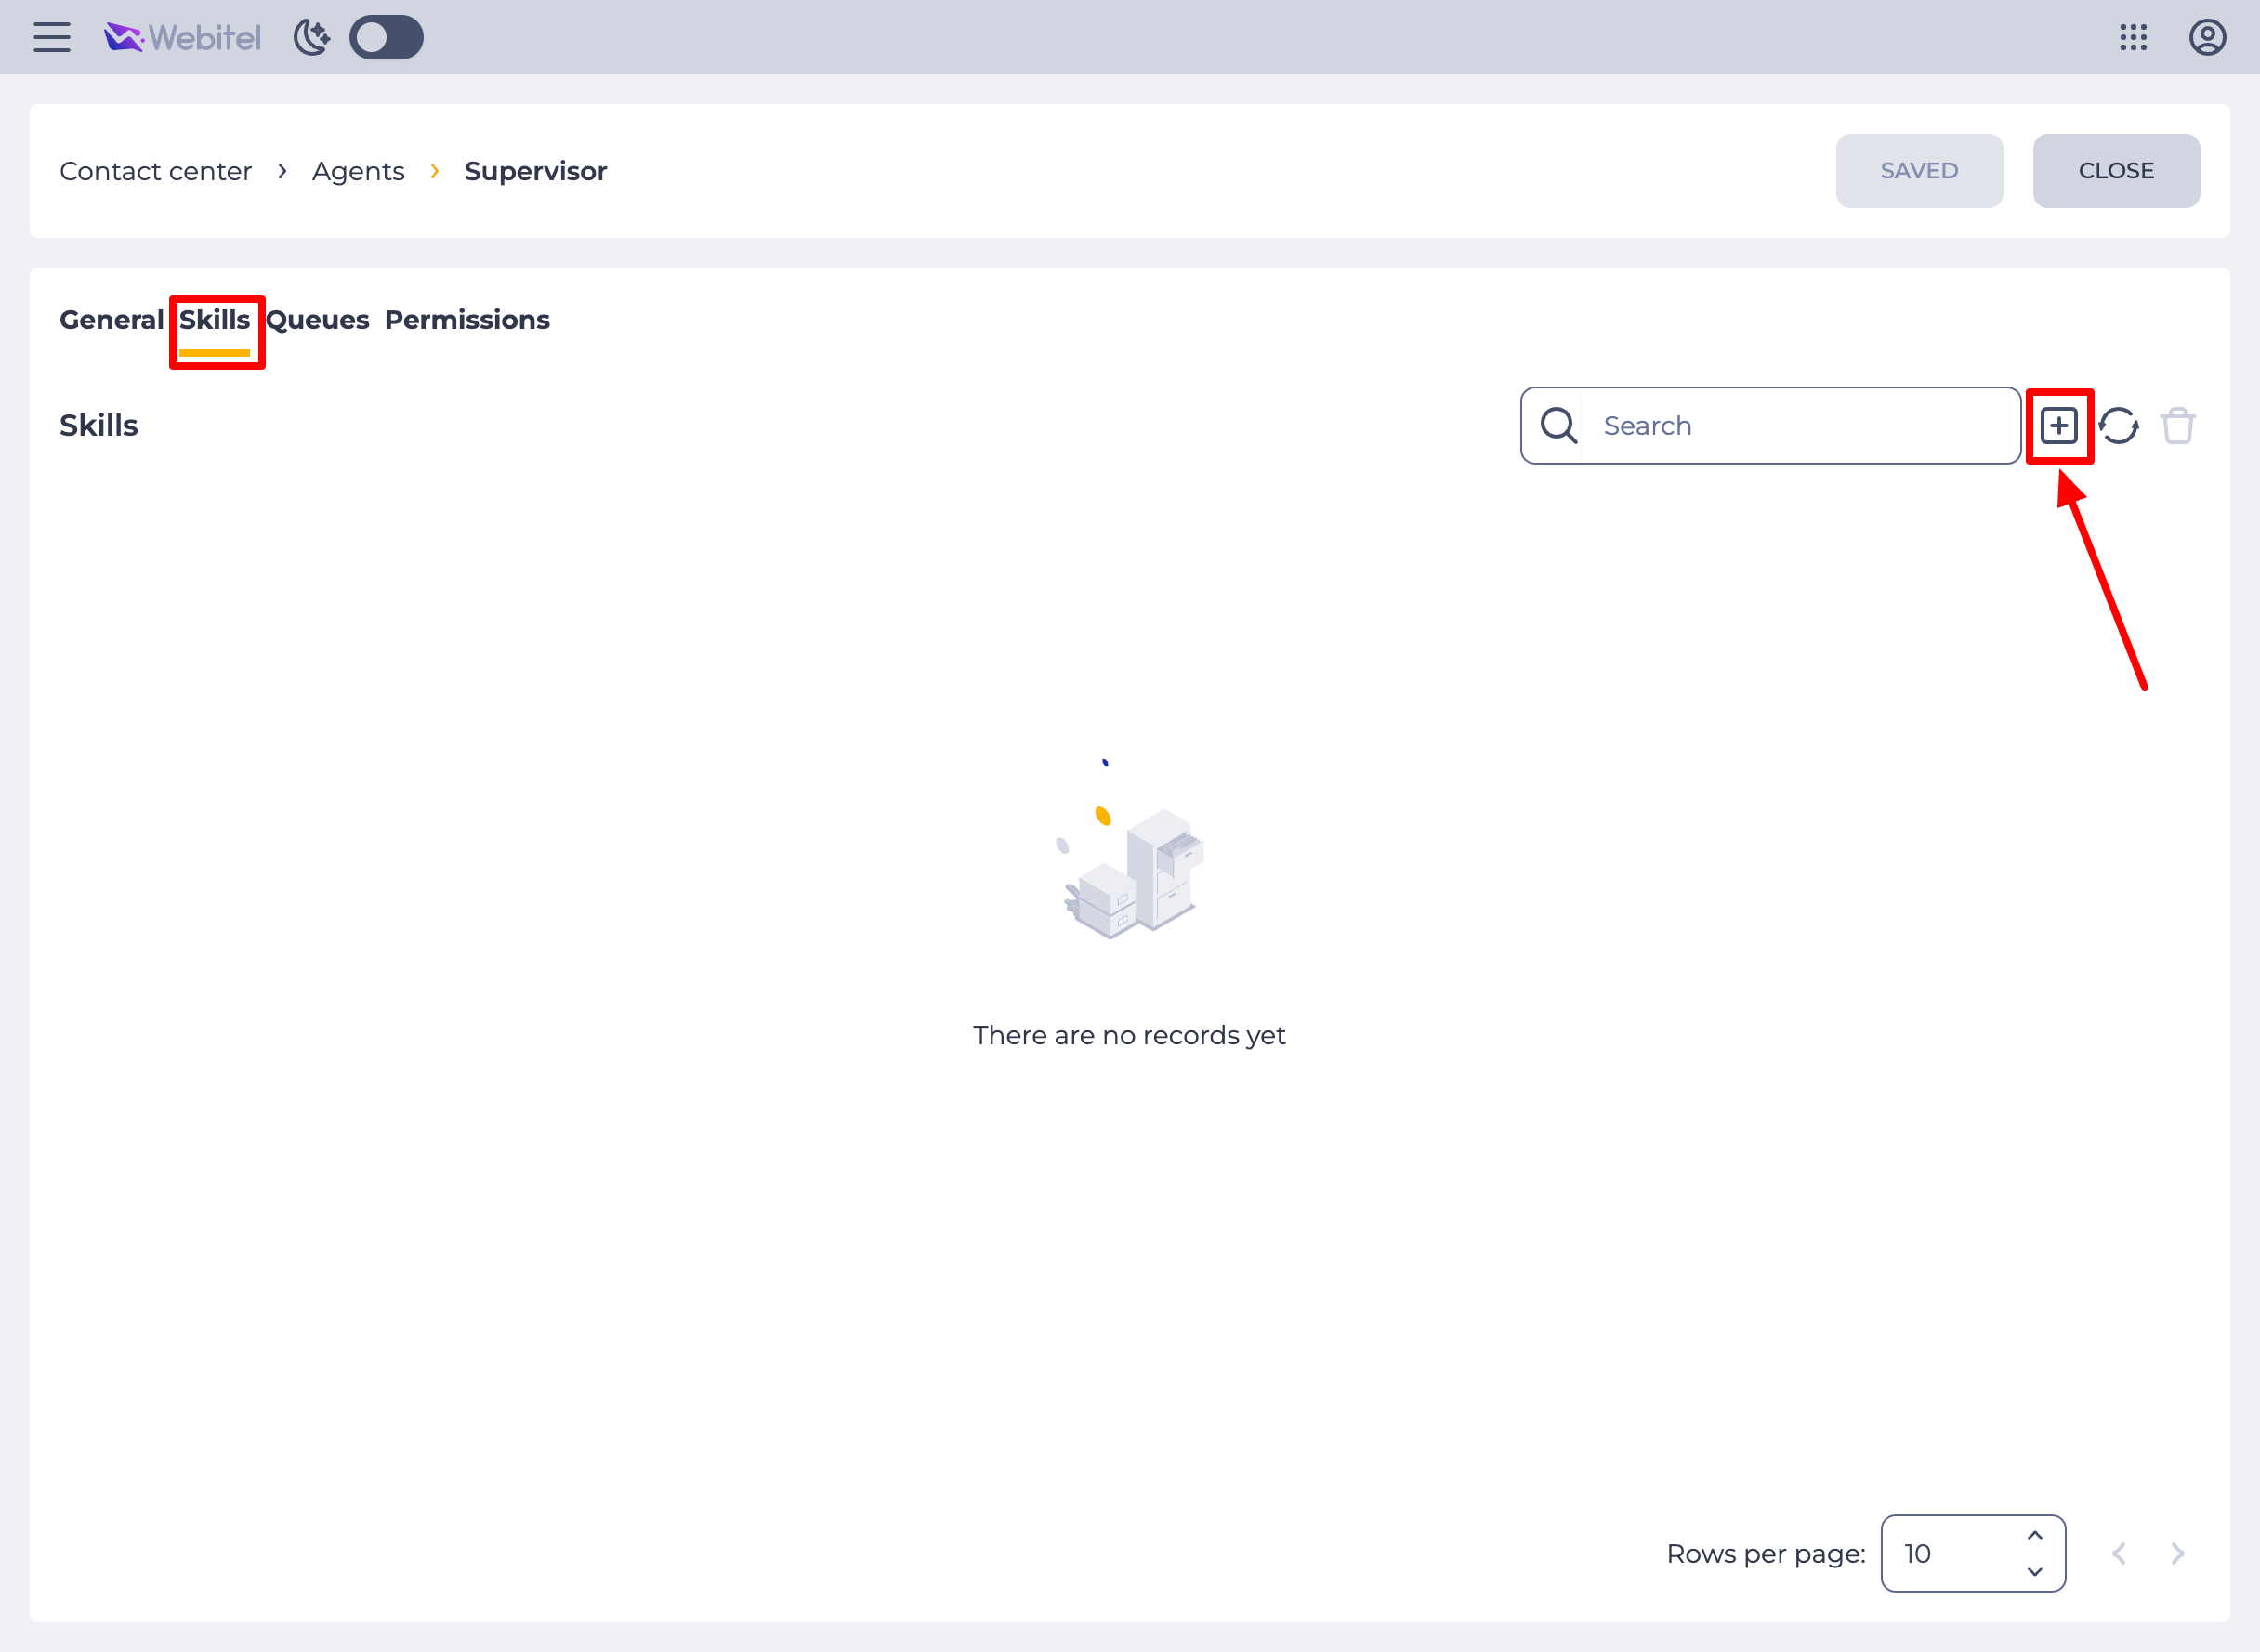
Go to the "Skills" tab and click the add tool (Fig. 10). Without a Skill, the Agent cannot handle calls and other activities.
-
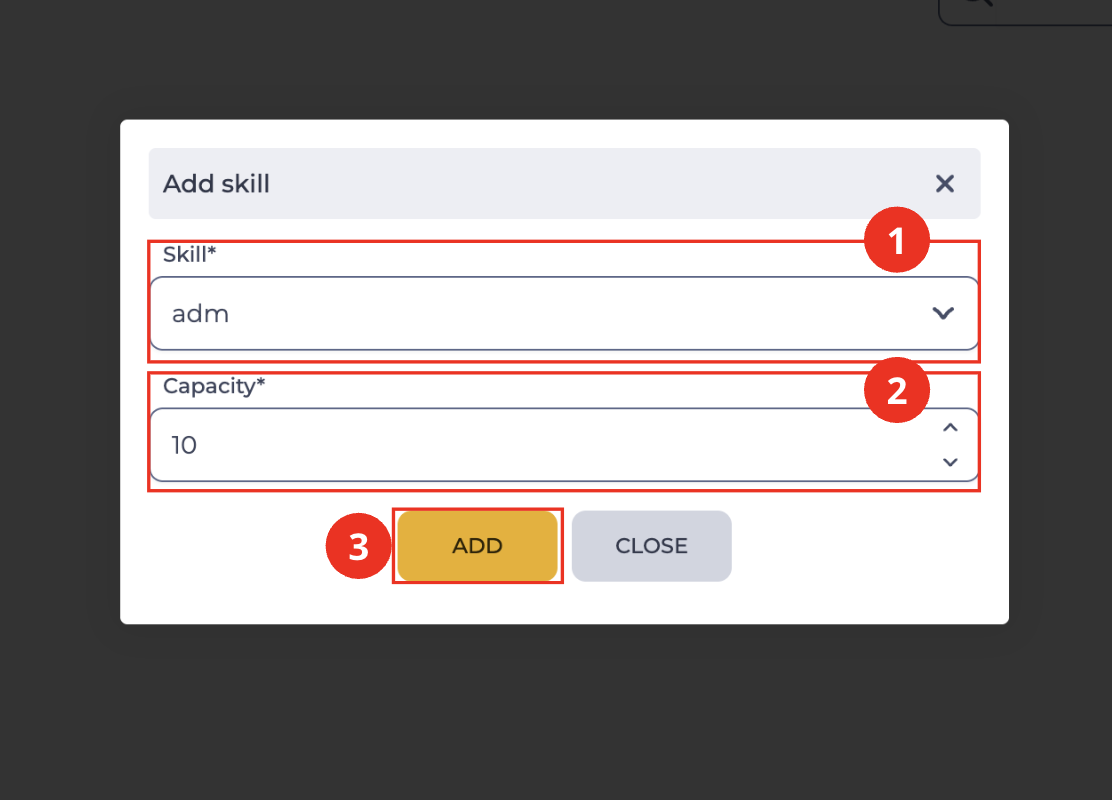
In the "Add skill" window, in the required "Skill" field (Fig. 11.(1)), select the Skill created in step 2.
-
In the "Capacity" field (Fig. 11.(2)), keep the default value (10) or enter another one.
-
Click "Add" (Fig. 11.(3)).
-
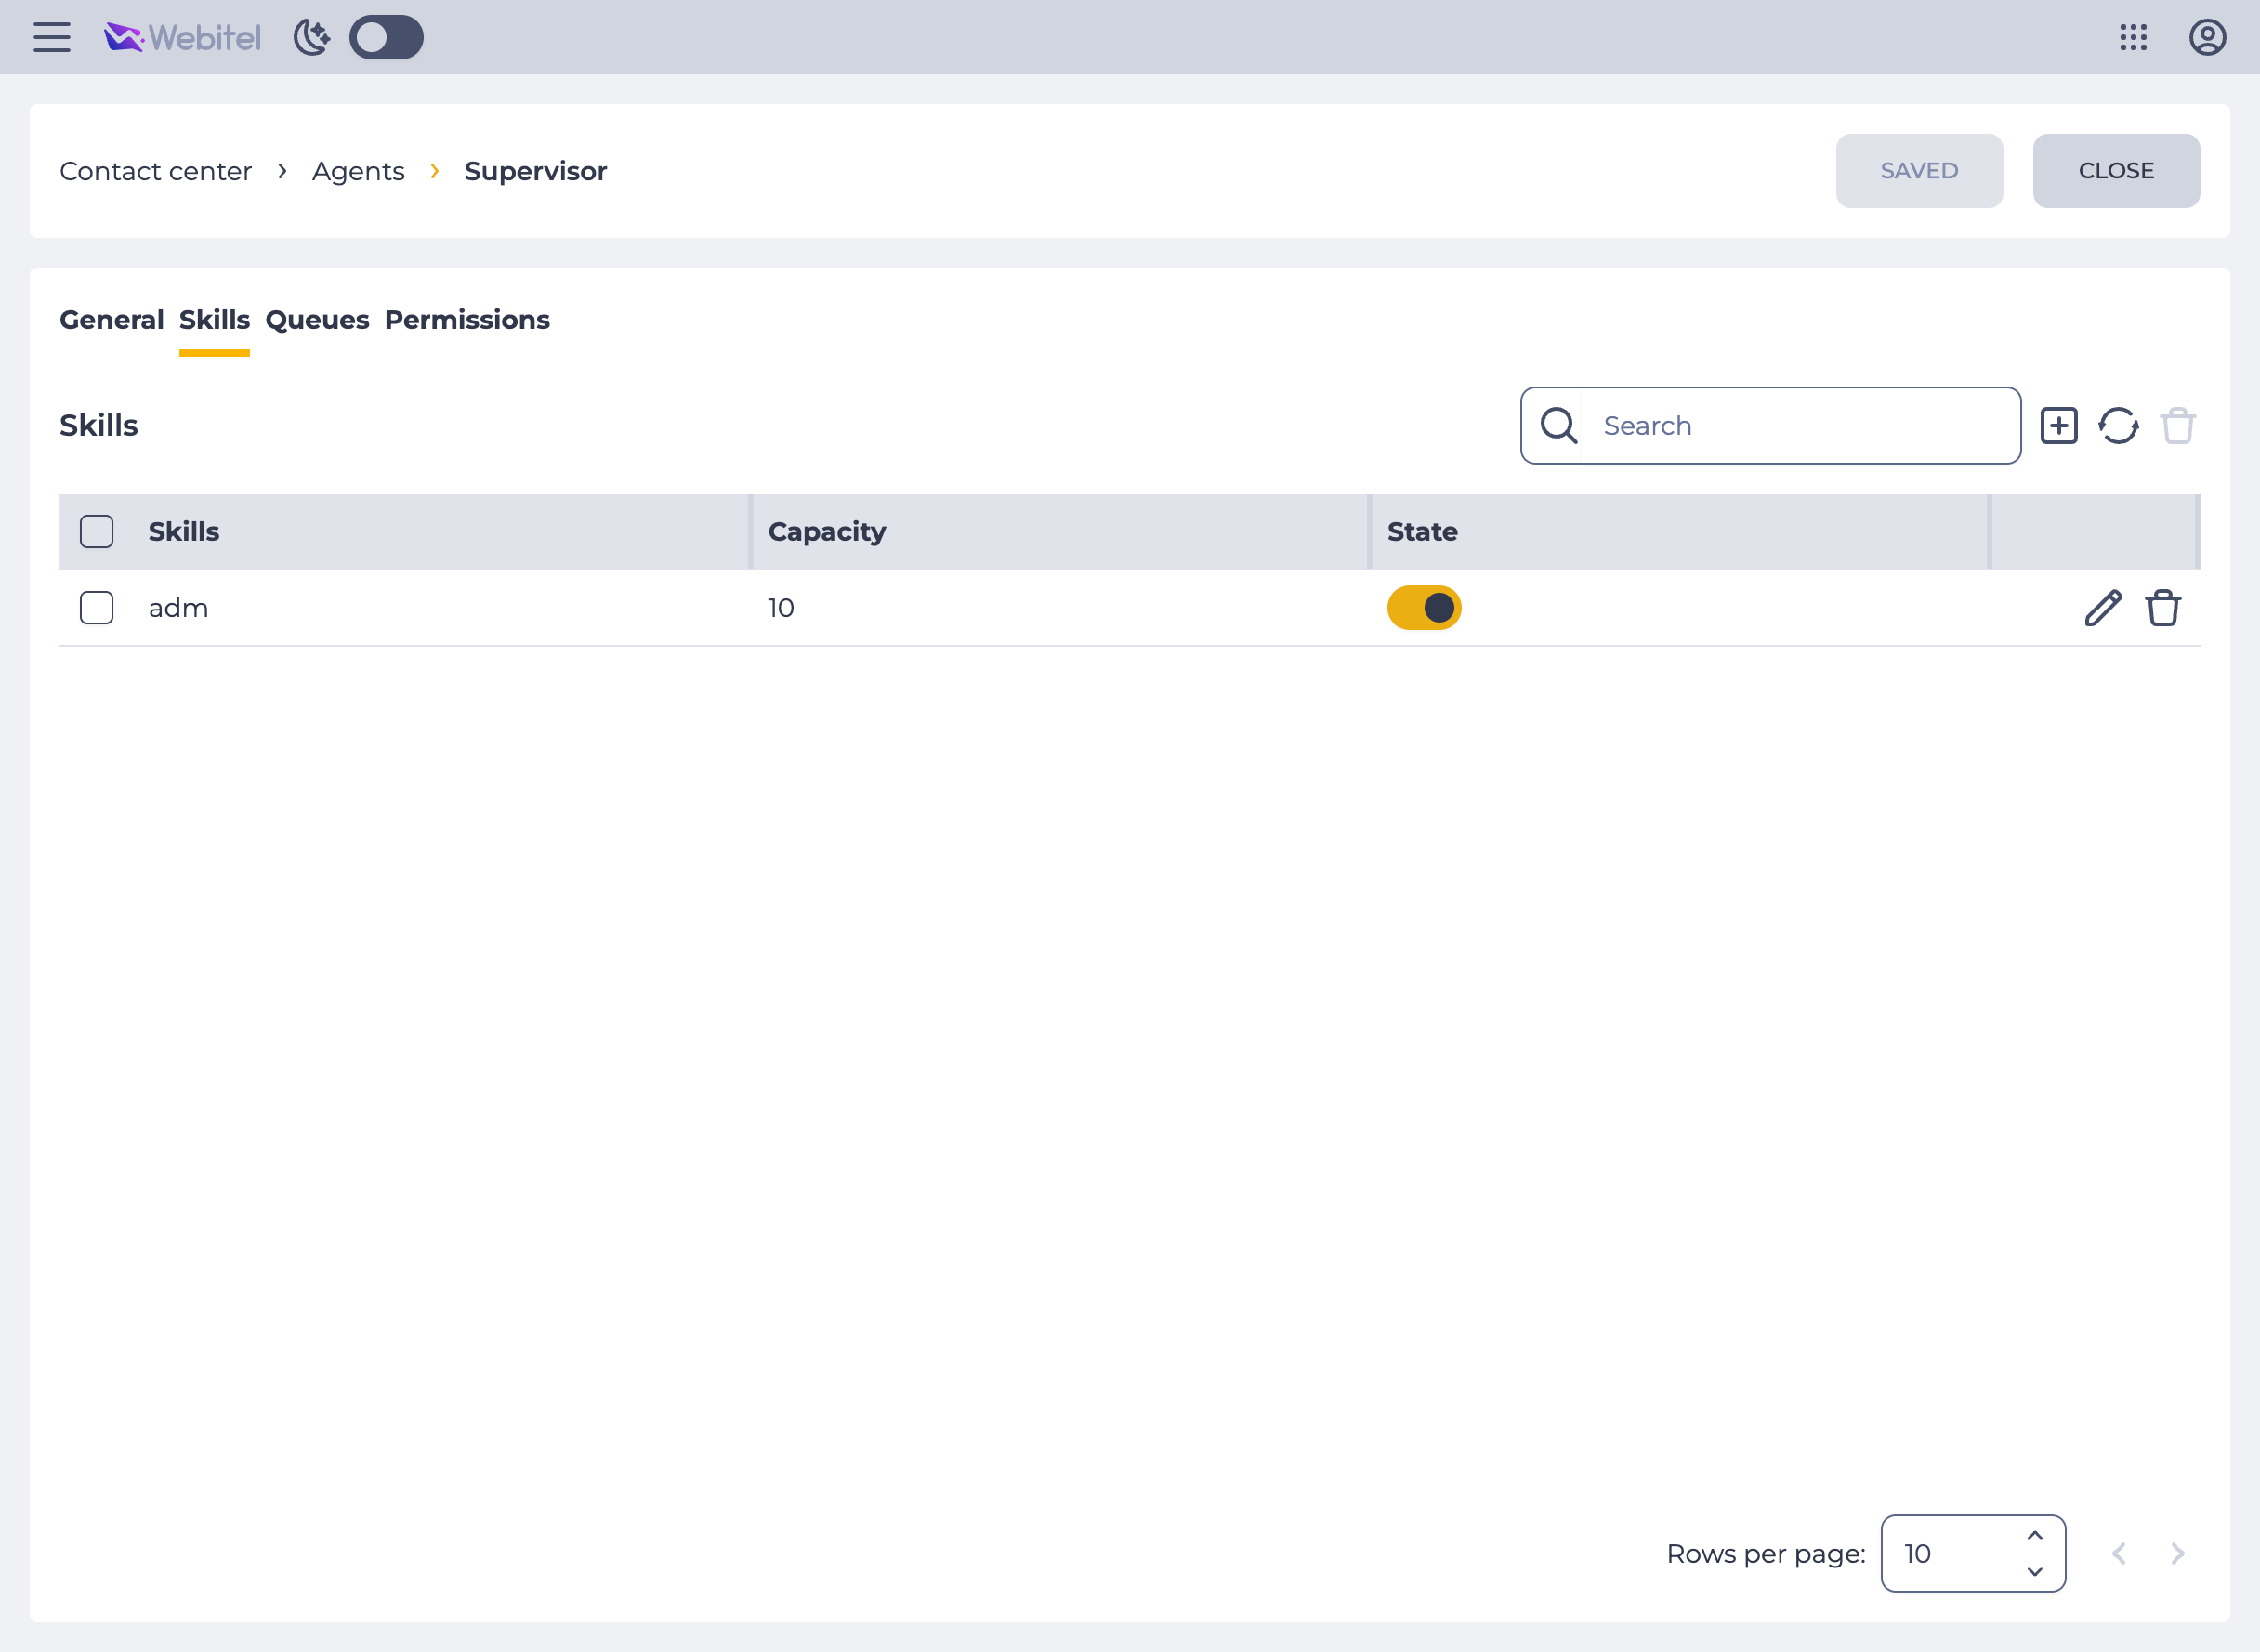
Make sure the Skill appears in the list on the "Skills" tab with the specified capacity, and the switch in the "State" column is on (Fig. 12).
For more details, see "Skills" ("Agents").
After this step, the Agent user is fully created and can start working, provided the correct licenses are assigned.
4. Additional settings
Further Agent settings (for example, queues, pauses, supervisors) are not required to create an Agent and depend on the customer's needs. For details on the sections used in this instruction, see:
-
"Users" – creating Users and description of the User card fields.
-
"Roles" – roles and access rights, default roles in the system.
-
"Licenses" – viewing and assigning licenses.
-
"Devices" – registration data for SIP phones and WebRTC.
-
"Agent Skills" – creating Skills.
-
"Teams" – creating Teams and selecting a distribution strategy.
-
"Agents" ("Contact center") – creating Agents.
-
"General" ("Agents") – main parameters of the Agent card.
-
"Skills" ("Agents") – adding Skills to an Agent.