
1. Description
It is designed to play a sound file at the beginning of a conversation.
This component is present in flow types like:
-
Voice.
The block (Fig.1(1)) is used in space to build the Flow. The settings panel for this component opens (Fig.1(2)) when you click on the block.
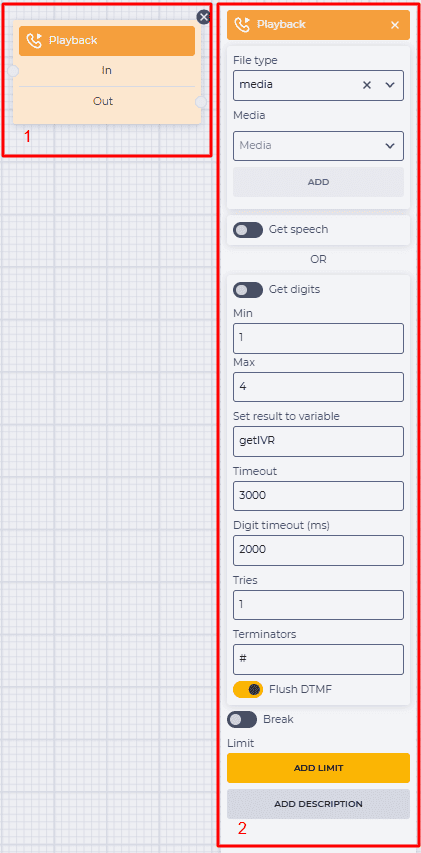
Fig.1. Playback component
1.1. Playback block
The block consists of the following elements:
-
The name of the component;
-
In branch — receiving (connecting with the previous block) branch;
-
Out branch — outgoing (connecting with the following block) branch. When hovering over the Out field, a switch appears. The switch allows this component to be connected to a component that already has a connection.
The presence of an 
Changing the switch position removes the outgoing branch of this component.
The 
1.2. Playback settings panel
It consists of the following elements:
-
File type;
-
Get speech;
-
Get digits
-
Break;
-
Limit;
-
Add description.
1.2.1. File type
It is designed to customize what will be played.
It consists of a File type field and a field that depends on the selection in the File type field, as well as the Add button that adds the selected option.
The File type field is designed to select the type of sound. The following options are available:
-
media;
-
silence;
-
tone;
-
http_audio.
1.2.1.1. Media
When the media type is selected, the second field is responsible for determining the file that will be played at the beginning of the conversation and is called Media (Fig. 2).
Clicking on the Media field opens a list of media files added to the Media files page from which the file is selected.
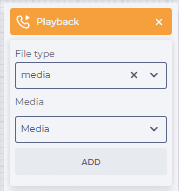
Fig. 2. Playback — Media
1.2.1.2. Silence
When selecting the silence type, the second field is responsible for the duration of silence in milliseconds and is called Silence (ms) (Fig.3).
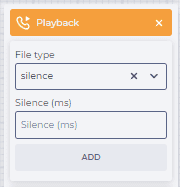
Fig. 3. Playback — Silence
1.2.1.3. Tone
In a case when the tone type is selected, the second field is responsible for the beep tone code and is called Tone (Fig. 4).
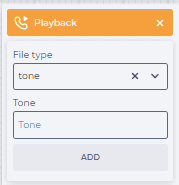
Fig. 4. Playback — Tone
1.2.1.4. Http_audio
In case when the “http_audio” type is selected, the following elements are added (Fig.5):
-
Url;
-
File type;
-
Add Header.
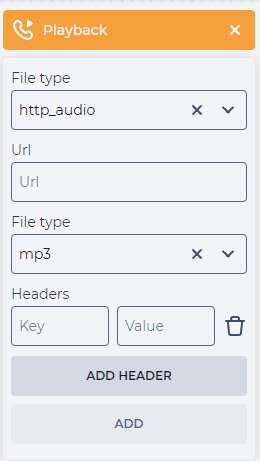
Fig. 5. Playback — http_audio
It is used to play network audio.
1.2.1.4.1. Url
Here, you enter a link to the audio file.
1.2.14.2. File type
Here, you select the file type. The following options are available:
-
wav
; -
mp3.
1.2.1.4.3. Add Header
When you click the Add Header button, the Key and Value fields are added where you enter the header value for the requests. You can add several headers. After entering data into the fields, click the Add header button.
You can add several options that will be played in order from top to bottom. It is also possible to move the added options by dragging and dropping while holding down the mouse button.
To delete one of the options, you have to click on the 
Only one of the Get speech or Get digits switches can be in an active position at a time.
1.2.2. Get speech
It is designed to receive information about what the Subscriber said while listening to the sounds configured in this component.
It consists of the Get speech switch.
1.2.2.1 Get speech
The switch is designed to enable/disable the ability to recognize what the subscriber says while listening to the sounds configured in this component.
1.2.3. Get digits
It is designed to receive information about what the subscriber presses on the phone while listening to the sounds configured in this component.
It consists of the following elements:
-
Get digits;
-
Min;
-
Max;
-
Set result to variable;
-
Timeout;
-
Digit timeout (ms);
-
Tries;
-
Terminators;
-
Flush DTMF.
1.2.3.1. Get digits
It is designed to enable/disable the ability to receive information about what the subscriber presses on the phone while listening to the sounds configured in this component.
1.2.3.2. Min
Here, you enter the minimum number of digits we expect to receive from the subscriber.
1.2.3.3. Max
Here, you enter the maximum number of digits we expect to receive from the subscriber.
1.2.3.4. Set result to variable
Here is entered the variable's name to which the values selected by the subscriber will be recorded while listening to the sounds configured in this component.
When the Get speech switch is enabled, the recognized speech of the subscriber is written to the variable as a text.
When the Get digits switch is enabled, the digit(s) pressed by the subscriber is (are) written to the variable.
1.2.3.5. Timeout
Here, you enter the waiting time for the subscriber to enter the required number of digits.
1.2.3.6. Digit timeout (ms)
Here, you enter the waiting time between digit sets — how many milliseconds to wait for the next digit set. If this field is not filled in, the limits are taken from the Timeout field.
1.2.3.7. Tries
Here, you enter the number of times the subscriber tries to enter the required number of digits.
1.2.3.8. Terminators
Required field.
If the field contains the “-” symbol, pressing the “#” button on the phone will be recorded into the variable. This is used to enable the “#” button in the voice menu.
If the field contains “#”, pressing the “#” button on the phone will exit the playback.
1.2.3.9. Flush DTMF
Responsible for canceling the digits dialed to subscribers before the recording starts playing.


1.2.4. Break
Responsible for the completion of the flow execution.
-

-

1.2.5. Add limit
It is intended to determine the maximum number of passes through this component.
The failover branch appears in the edited component when the limit is set 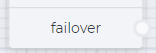
The failover branch will be used if more passes are passed through the component than entered in the Max field.
Clicking on the Add Limit button adds a Max field and a Delete limit button.
The number of possible passes is indicated in the Max field.
Clicking on the Delete limit button removes the limit and returns the Add limit button.
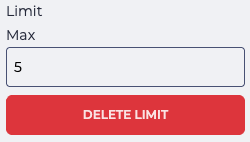
Fig. 6. Setting a limit
1.2.6. Add description
When you click the Add description button, a Description field and a Delete description button will be added.
The Description field is used to add comments to the component.
Clicking the Delete description button removes the description field and brings back the Add description button.
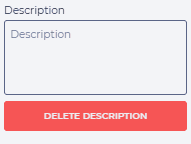
Fig. 7. Add description