
1. Description
A graphical Low-Code editor for creating Flows that can be used for any maintenance scenario.
Note
Minimum screen resolution requirements: 1280×768 or more!
Represented by space to build, as well as:
-
Top bar (Fig.1(1));
-
Left panel (Fig.1(2));
-
Space for building (Fig.1(3)).
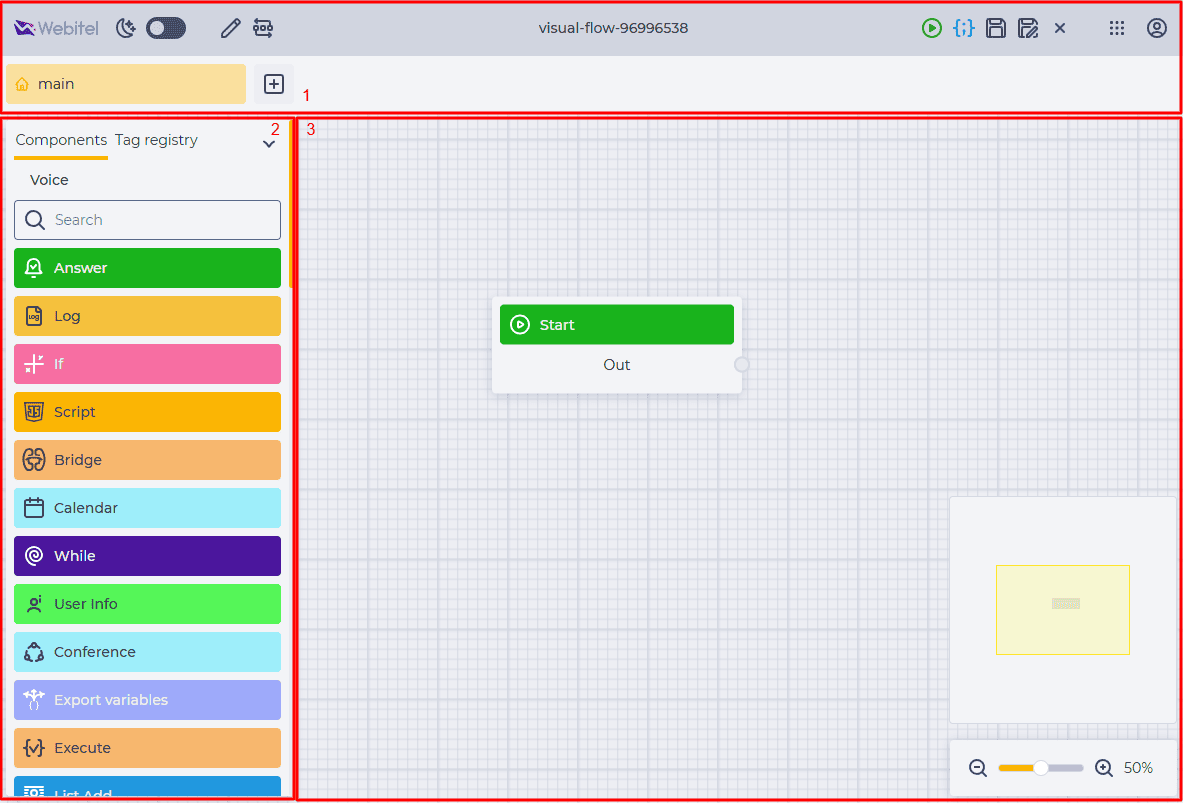
Fig. 1. Webitel Flow Diagram
1.1. Top bar
This bar displays the name of the Flow and also contains the following elements:
-
Logo (Fig. 2(1));
-
Design theme switch (Fig. 2(2));
-
Edit tool (Fig. 2(3));
-
Arrange (Fig. 2(4));
-
Flow Schema name (Fig. 2(5));
-
To start (Fig. 2(6));
-
JSONIFI (Fig. 2(7));
-
Save (Fig. 2(8));
-
Save as (Fig. 2(9));
-
Close (Fig. 2(10));
-
Application menu (Fig. 2(11));
-
User menu (Fig. 2(13));
-
Tabs (Fig. 2(13)).

Fig. 2. Top bar
1.1.1. Logo
Clicking on the logo opens the start page.
1.1.2. Design theme switch
Dark and light website design mode are available.
Use the 
1.1.3. Edit tool
It is designed to change the name and the tags of the Flow.
Click the 
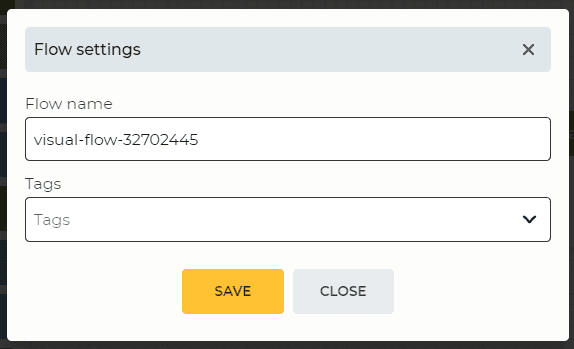
Fig. 3. Flow settings modal window
1.1.4. Arrange
Clicking the 
If one or more components are selected in the space for building, a 
1.1.5. Flow Scheme name
The scheme name is displayed here. You can change the name by clicking on the 
1.1.6. To start
Clicking the 
1.1.7. JSONIFY
The 
1.1.8. Save
It is designed to save changes in the Flow Schema.
The Save failed modal window opens (Fig. 4) when the connection with the server disappears during the work in the constructor after clicking on the 
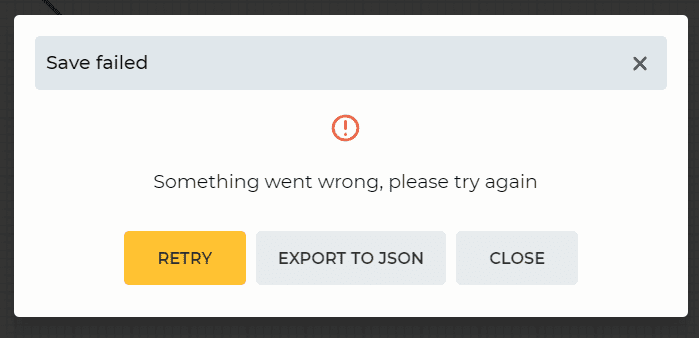
Fig. 5. Save failed modal window
Retry button - repeated attempt to save changes.
Export to JSON button - downloading a JSON file of an unsaved schema.
Close button - closing the modal window.
1.1.9. Save as
It is designed to save a copy of the current Flow Schema. When clicking on 
1.1.10. Close
When there are unsaved changes, the Save button is active, and when you click on the 
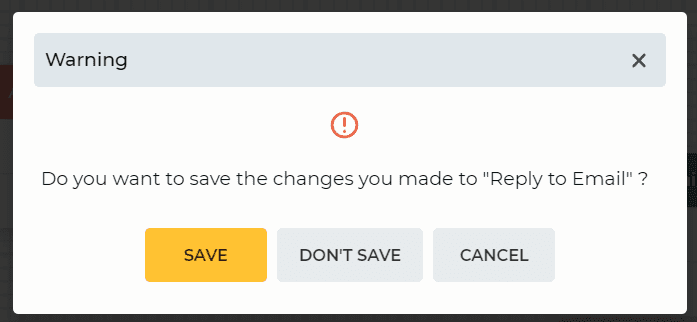
Fig. 5. Warning modal window
The Warning modal window consists of an informational notification and buttons:
-
Save - saves changes and closes the editor. The Flowpage opens;
-
Don't save - does not save changes and closes the editor. The Flow page opens;
-
Cancel - cancel closing the editor. The modal window closes. You can continue working in the editor.
1.1.11. Application menu
Clicking on the 
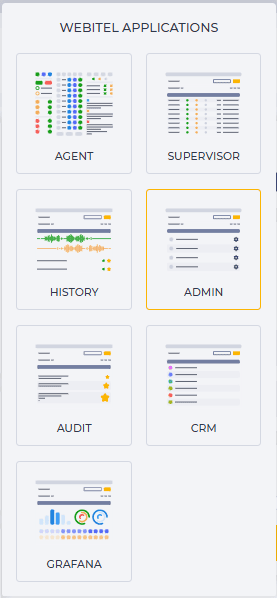
Fig. 6. Webitel applications
1.5. User menu
Clicking on the 
-
Username information;
-
Docs - takes you to the Webitel documentation page;
-
Settings - takes you to the Settings page;
-
Logout - exit the system;
-
Assembly version information.
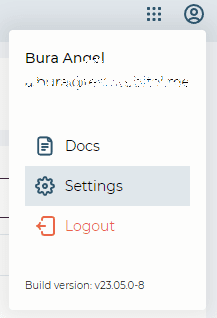
Fig. 7. User menu
1.1.13. Tabs
Tabs are used for more convenient handling of large Flow Schema.

Clicking the 


1.2. Left Panel
Consists of the following tabs:
-
Bar of components
-
Tag registry


1.2.1. Bar of components
This bar displays a list of components from which you can create Flow Schemes and a search field. The Flow Schema type is displayed at the top of the bar.
The list of displayed components depends on the type of Flow Schema selected when creating it.
There are such components:
-
Answer -
Attempt Result -
Bridge -
Broadcast message -
Calendar -
Callback Queue -
Chat AI -
Chat History -
Classifier -
Conference -
Custom code -
Execute -
Export variables -
Flush DTMF -
Form Datetime Picker -
Form File -
Form Rich Text Editor -
Form Select -
Form Select from object -
Form Select Service -
Form Table -
Form Text -
Form Textfield -
Function -
Generate Form -
Generate Link -
Get Email -
Get Queue Agents -
Hangup -
HTTP Request -
If -
iFrame -
In-band DTMF -
Join Agent -
Join Queue -
List -
List Add -
Log -
Mark IVR -
Math -
Member info -
Menu -
Notification -
Open Link -
Park -
Patch Members -
Plata by mono -
Playback -
Pre answer -
Record file -
Record session -
Recv Message -
Ringback -
Ring ready -
Schema -
Script -
Send email -
Send file -
Send message -
Send text -
Send TTS -
Set Grantee -
Set variables -
Sip redirect -
Soft Sleep -
STT -
String -
Switch -
Text-to-Speech -
Trigger -
Unset variables -
Update Cid -
User info -
While -
Form Select Case Status
There can be only one Start component, and when creating a new Flow, it is located in the space for building. It is the start of the Flow.
Each component has its settings bar.
The setting bar opens on the right side of the page when you click a component block in the space for building.
1.2.2. Tag Registry
Consists of a search field, a button for sorting, and a list of tag entries.

Available sorting options:
-
Alphabetical order;
-
Sorting by validation — components with incorrect settings in the right panel are displayed first.

Clicking on an entry opens a tab with the component in the building space. When hovering over a registry entry, a 
1.3. Space for building
This is the main workspace for building a Flow.
To select multiple components, you need to hold down the Ctrl key. Holding Ctrl allows you to move the selected component blocks.
For MacOS users, the Command key is used to select and drag component blocks.
You can clone or delete the selected block by right-clicking on a component block.
You can change the scale of the constructed flow using the mouse wheel.
In the lower right corner is a mini-map of the scheme with a zoom scale for ease of use. The scale is 50% by default and after clicking on 
2. Opportunities
2.1. Add a Component to a Flow
|
Goal |
Add a Component to a Flow |
|---|---|
|
Preconditions |
|
|
Steps
|
|
|
Result |
Data saved. The component is added to the Flow. |

3. Additional materials
3.1. Instructions
3.1.1. Flow examples
-
Add missed call to outgoing dialer -
Add a Subscriber to the Inbound Task Queue — Email -
Conference (Flow) -
Create an Activity on a missed call in Creatio -
Flow schema fragments -
Forms - Call processing -
Form — Send an email -
Incoming call with additional dialing -
Internal transfer per group -
Outgoing call -
Request a call back from the queue -
Route an incoming call to the responsible agent in Creatio -
Simple IVR menu -
Processing and Reply to Email